
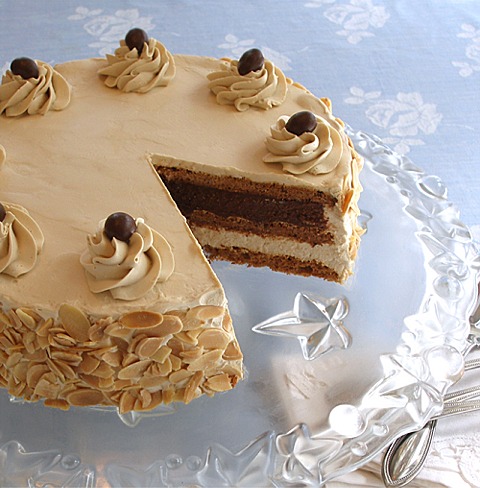
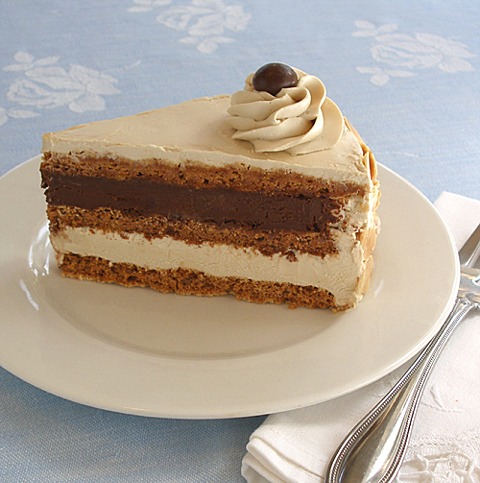
A dacquoise is a dessert of disc-shaped, nut-flavored meringues stacked and filled with sweetened whipped cream or buttercream. It's served chilled, often with fruit. The term dacquoise can also refer to the nut meringue layer itself. It is French, from feminine of dacquois, of Dax, a town of southwest France. Our dessert has three crispy layers of toasty-nutty meringue, layered with coffee flavored Italian Meringue or Mousseline Buttercream or IMBC and rich chocolate ganache, recipes included, decorated with chocolate covered espresso beans. It's absolute heaven on a plate! It is also gluten-free (gluten free)!
CAKE RECIPE HELP / GLUTEN-FREE RECIPE HELP
INSTRUCTIONS
MERINGUES
1 1/3 cups finely ground hazelnuts*; from 1 3/4 cups whole hazelnuts
1 1/4 cups finely ground almonds*; from a little over 1 1/2 cups whole almonds
2 cups powdered sugar, sifted; measure and then, sift
9 large egg whites; can be cold from the refrigerator
1/2 cup sugar
GANACHE
1 cup heavy cream
5 ounces bittersweet chocolate, chopped
3 ounces milk chocolate, chopped or 3 ounces bittersweet chocolate, chopped
ITALIAN MERINGUE BUTTERCREAM – COFFEE FLAVORED
1 pound (4 sticks or 2 cups) unsalted butter, cold, cut into pieces
2 cups sugar; divided into 1 1/2 and 1/2 cups
1/3 cup water
5 large egg whites, room temperature
1/2 + 1/8 teaspoon cream of tartar
2 tablespoons coffee extract; or 2 teaspoons instant espresso powder dissolved in 2 tablespoons hot water, let cool before using; or 1 tablespoon vanilla extract
1/4 teaspoon salt
Garnish:
2 cups sliced almonds, toasted
8 chocolate covered coffee bean
Powdered sugar
INSTRUCTIONS
STEP I: BLANCH THE NUTS. GRIND AND MEASURE.
Before you grind the hazelnuts and the almonds for use in the Dacquoise, they need to be blanched (skinned).
A. HAZELNUTS
Blanch:
1. Place 1 3/4 cups whole hazelnuts on a baking sheet, in one layer, and toast in a 300 degree F preheated oven for 8 minutes.
Make sure you stir them a couple of time so they won't burn.
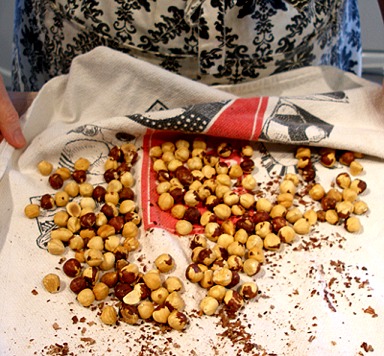
2. Immediately, pour them out on a clean, roughly textured kitchen towel.
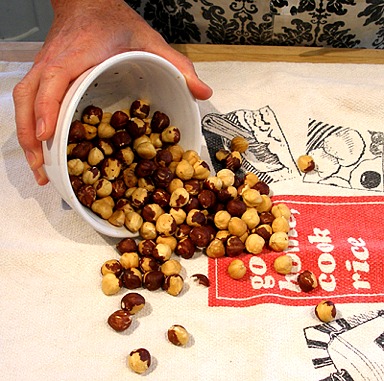
3. Then, while still hot, briskly rub the nuts together to remove the skins.
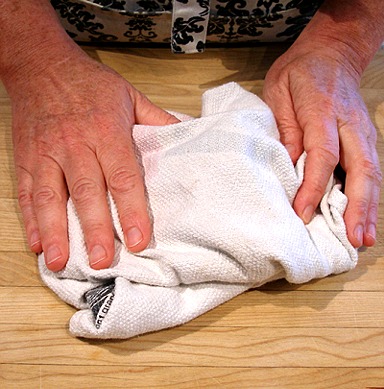
4. Separate the nuts from the skins. If some skins are recalcitrant, just leave. A little amount won't hurt.
Finely grind:
1. Place them in the bowl of a food processor, fitted with a steel blade.

2. Pulse them until the hazelnuts are finely ground.
3. Measure: 1 1/3 cups finely ground hazelnuts for the recipe.
B. ALMONDS
Blanch:
1. Bring water to a boil in a large wide pan.
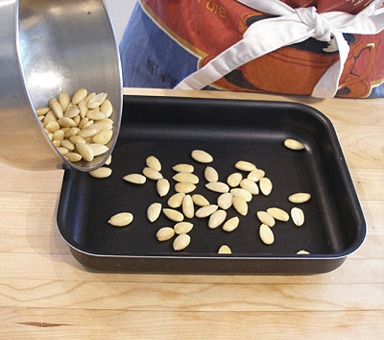
2. Put a little over 1 1/2 cups whole almonds in the boiling water and let boil for approximately 30 seconds, then drain.
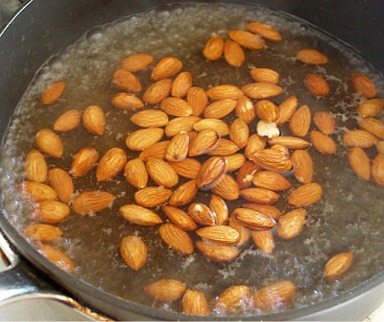
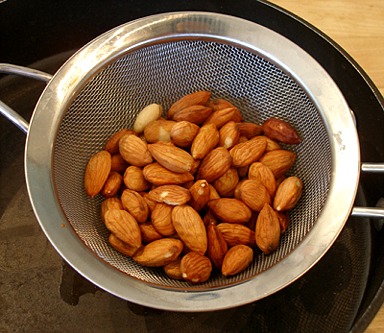
3. Run cold water over the almonds to cool them.
When they are cool, you should be able to slip the skins right off with your fingers.
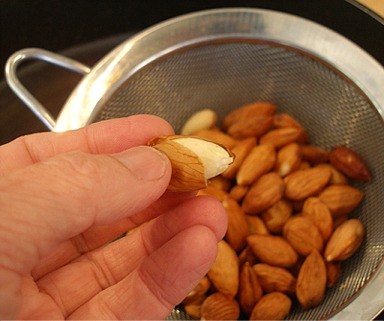
4. When all of the almonds are skinned, put them in a baking pan, in one layer, and place in a warm oven, to dry out. Do not toast the almonds, you just want to dry them.
If you have a pilot light in your oven, you can leave the pan in the oven overnight. The pilot light should be hot enough to dry the almonds overnight.
Finely grind:
1. When the whole almonds are dry, place them in the bowl of a food processor, fitted with a steel blade. Pulse them until the almonds are finely ground.
Be careful that you don't take them too far, or you will start to make almond butter.
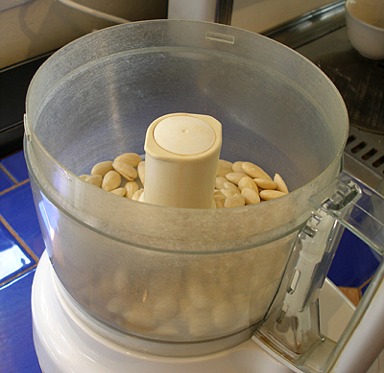
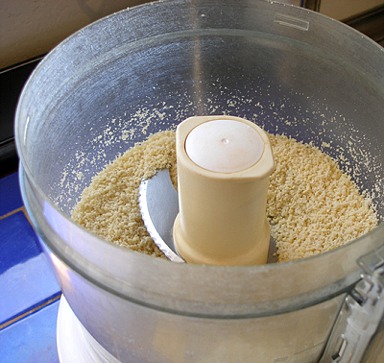
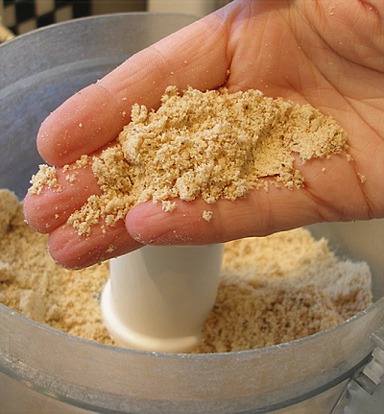
Measure: 1 1/4 cups finely ground almonds for the recipe.
C. GRIND THE FINAL NUT MIXTURE
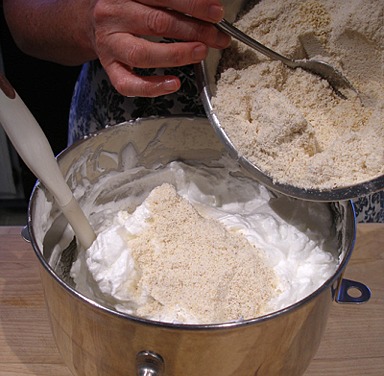
1. In the bowl of a food processor, fitted with a steel blade, place the 2 cups powdered sugar. Add the 1 1/3 cups finely ground hazelnuts and 1 1/4 cups finely ground almonds.

2. Pulse the food processor for about 30 seconds and then, STOP.
NOTE: If your food processor is not large enough, mix all of the ingredients in a medium bowl, and process in the food processor, in two portions at 30 seconds at a time.
3. Sift the mixture into a medium bowl, pushing lumps through sieve.
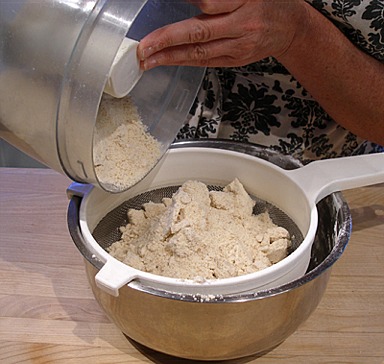
4. Then, set the FINAL NUT MIXTURE aside.
STEP II: MAKE THE HAZELNUT – ALMOND MERINGUES
Make the meringues:
1. Position an oven shelf in the middle of the oven. Preheat the oven to 250 degrees F.
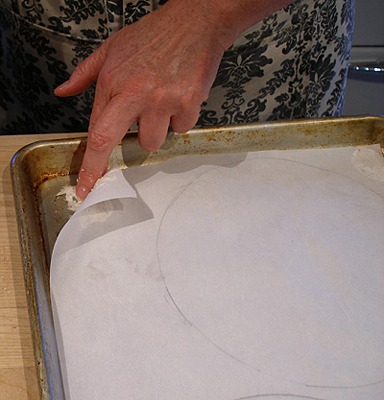
2. Line 2 baking sheets with parchment paper. With a pencil, draw three 8-inch circles on parchment paper.
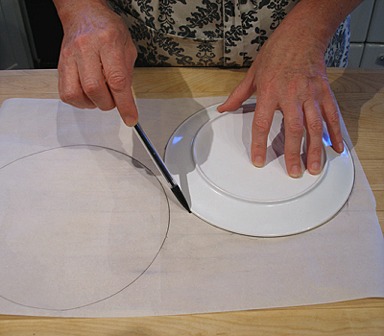
NOTE: I used an 8-inch plate as a template to draw around!
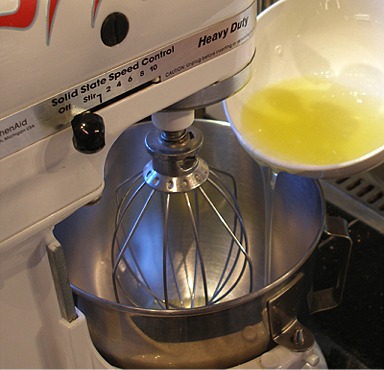
3. Put the egg whites in the clean bowl of a stand mixer, fitted with a whisk attachment.
Turn the mixer on medium-low speed for about 1 to 2 minutes until frothy.
4. Increase speed to medium and beat the whites to soft peaks, about 2 1/2 minutes.

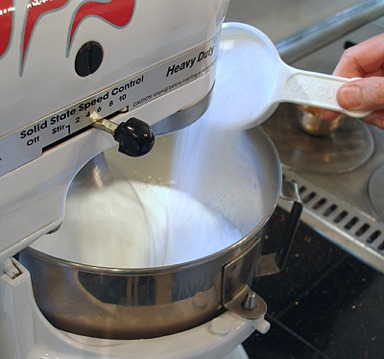
5. With the mixer still on medium, gradually add sugar at the side of the bowl.
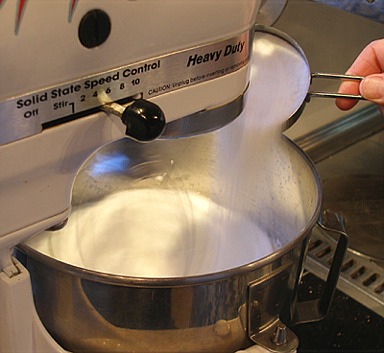
6. Then, increase the speed to medium-high and beat until whites form medium-stiff peaks, about 1 1/2 minutes.
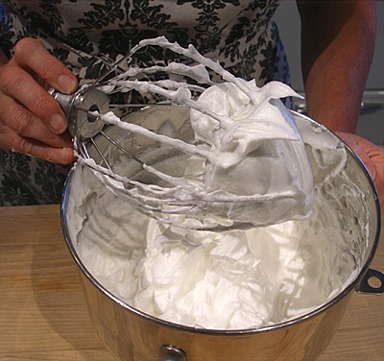
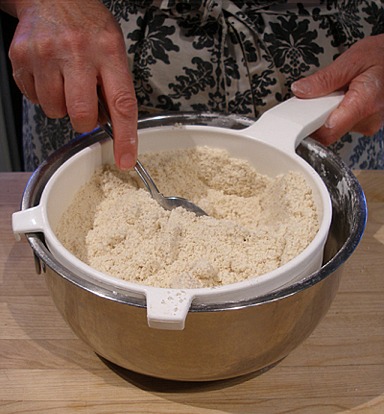
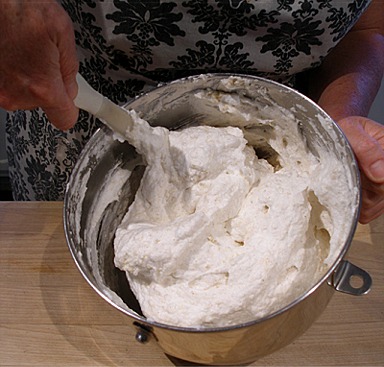
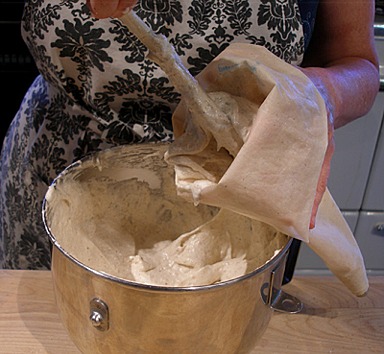
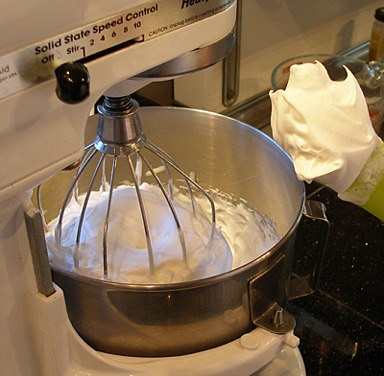
7. Gently sprinkle about 1/3 of FINAL NUT MIXTURE at a time on top of the meringue, and fold with a rubber spatula until throughly combined.
Pipe the meringues:
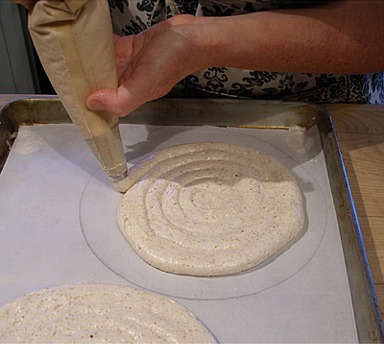
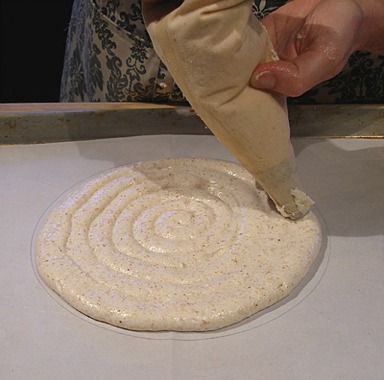
NOTE: Instead of piping, you can optionally divide the meringue between the parchment circles and gently spread it out evenly with a large offset spatula.
However, we find that piping the meringue works best to help keep the integrity of the air bubbles in place and to ensure a more even cake layer surface.
1. Dab a little of the mixture on the corners of the pan, to keep the parchment in place.
2. Place the HAZELNUT ALMOND MERINGUE in a piping bag with a large plain tip (I used an Ateco 806).
3. Pipe meringue shells on parchment lined sheets, in a spiral from the inside of the drawn circle, to the outside
4. Bake, rotating positions hourly, for 3 hours. After 2 hours, REDUCE the oven heat to 200 degrees F.

5. Allow the the BAKED MERINGUE (DACQUOISE) LAYERS to cool in their baking pans on a wire cake rack. Do not remove them while hot or warm, otherwise they will break.
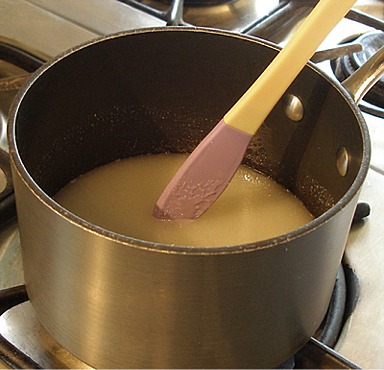
STEP III: MAKE THE GANACHE
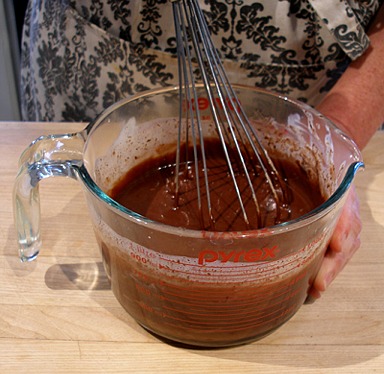
1. Heat cream in a medium saucepan and bring to a boil over medium heat.
2. Remove from heat, add milk and bittersweet chocolates.
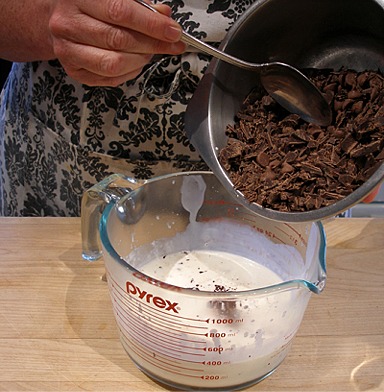
3. Let sit for 1 minute. Whisk until smooth and set aside until thick enough to spread.
STORAGE
Can store at room temperature for a day or two and then, must be refrigerated. Can be frozen for a month or more.
STEP IV: MAKE THE MERINGUE BUTTERCREAM
1. In a medium-size mixing bowl, beat the butter with a hand held mixer, until smooth and creamy. Set aside in a cool place.
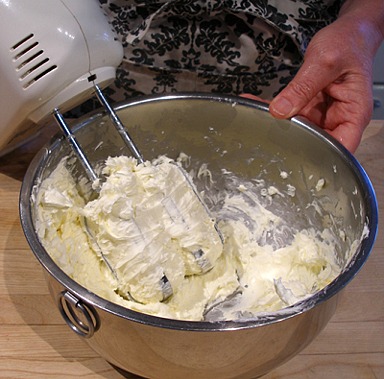
SARAH SAYS: The butter MUST remain cool.
2. Combine 1/3 cup water and 1 1/2 cups of the sugar in a small saucepan.
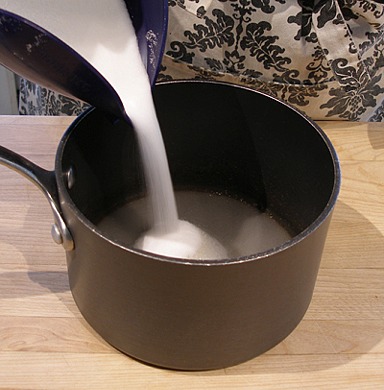
3. Under medium-high, boil sugar and water mixture, stirring constantly, until the sugar dissolves and the mixture is bubbling.
STOP stirring and reduce the heat to low. If using an electric range remove the saucepan from the heat.
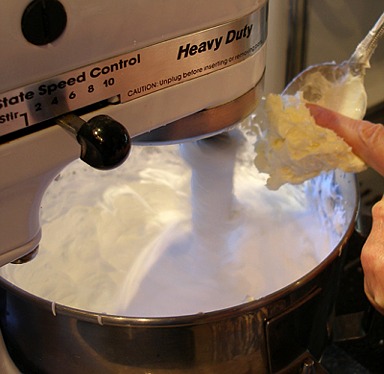
4. Meanwhile, place the egg whites in the mixing bowl of a stand mixer fitted with a WHISK attachment, while the sugar is heating on the stove.
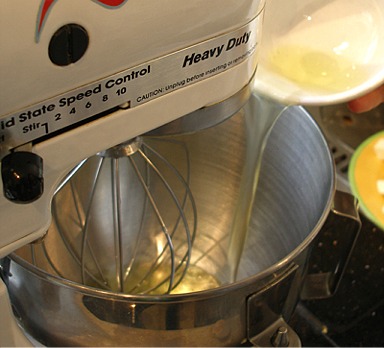
5. Beat the egg whites with a stand mixer on medium until foamy for 1 minute. Add the cream of tartar.
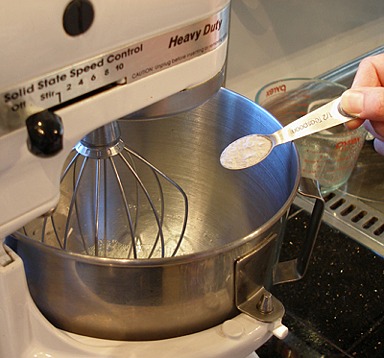
6. Beat for 3 more minutes on medium-high or until soft peaks form when the beater is raised.
7. Gradually beat in the remaining 1/2 cup sugar, taking about 2 to 3 more minutes.
SARAH SAYS: It is important to slowly build a stable egg white foam, so the resulting buttercream will not deflate. This is how it is done.
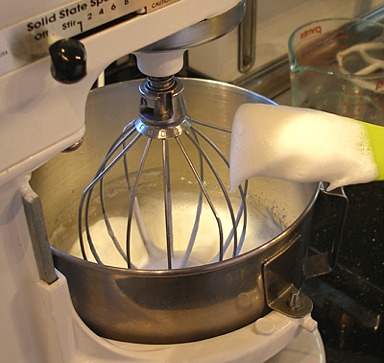
8. Increase the mixer speed to high and beat until stiff peaks form when the beater is raised slowly.
Simply turn off the mixer and return your attention to the sugar syrup on the stove.
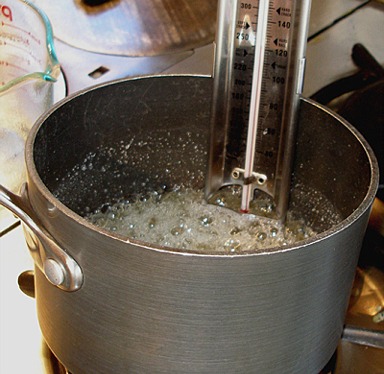
9. Increase the heat of the stove and boil the sugar syrup until you get bubbles all over the surface. (If using an electric stove, return the saucepan to the heat and proceed.)
The syrup starts to look thicker and the Candy Thermometer registers 248 degrees F to 250 degrees F (the firm ball stage).
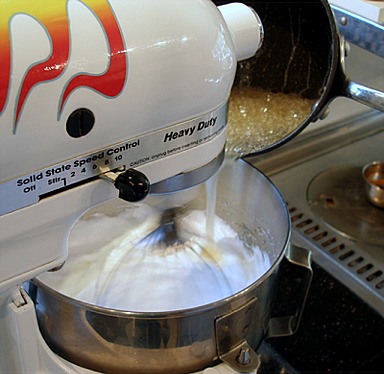
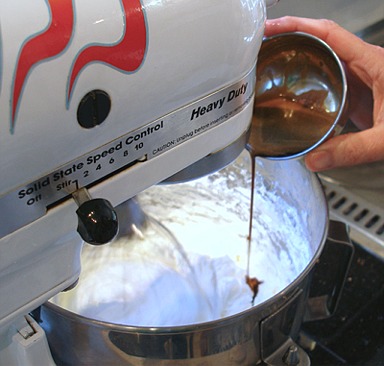
10. Carefully pour syrup into whites, whisking until cool, about 10 minutes.
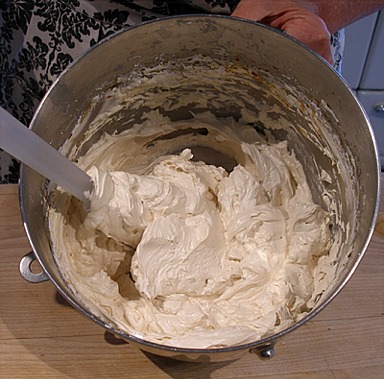
11. Beat in the softened but COOL butter at medium speed 1 tablespoon at a time until the buttercream is shiny and fluffy, about 8 to 10 minutes.
12. Dissolve the salt in the coffee extract. Keep the mixer speed on medium and drizzle in the mixture.
STEP V: ASSEMBLE THE CAKE
NOTE: Pipe the filling and frosting; this keeps the spreading to a minimum, and keeps the layers from sliding and/or cracking.
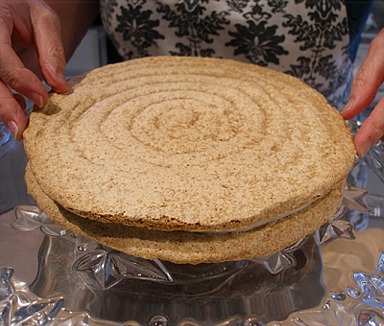
1. Place a little of the buttercream in the center of your FLAT cake plate to help anchor the meringue layer in place.
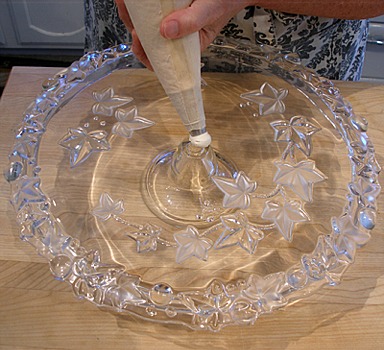
2. Gently press one baked meringue(daquoise) in place.

3. Place the buttercream in a pastry bag fitted with a large plain tip and pipe the frosting on the layer in a spiral.

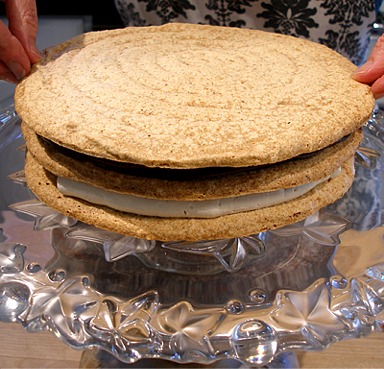
4. Place the second baked meringue(daquoise) on the first and gently press to level and adhere.
5. Place the ganache in a piping bag with a large tip and pipe it on the second layer in a spiral.
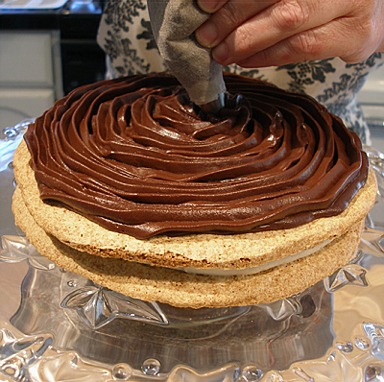
6. Press the third baked meringue(daquoise) down, gently to adhere it to the ganache.
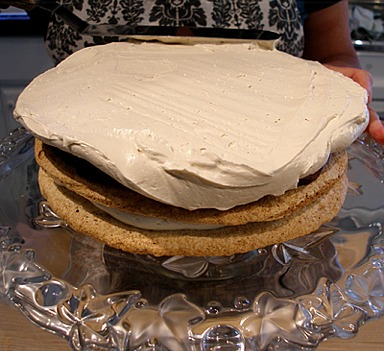
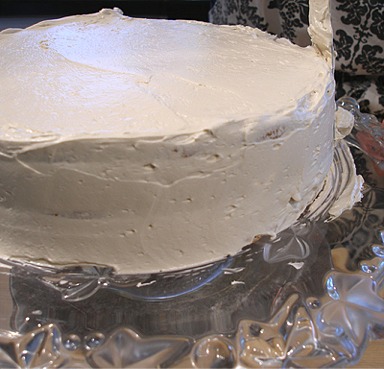
7. Pipe buttercream on the top layer, and gently spread with an offset spatula. Add more frosting to cover the sides of the cake, setting some aside for the rosettes on top of the cake.
Smooth frosting all over the sides of the cake, and smooth the sides and top of the cake.
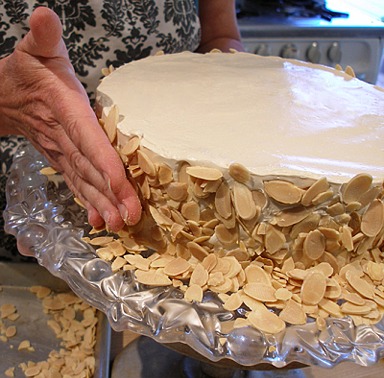
8. Press toasted almonds onto the sides of the cake, then clean the excess nuts and any frosting smears off the cake plate.
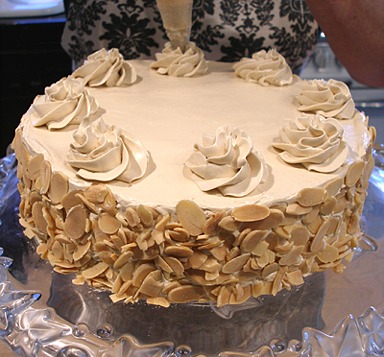
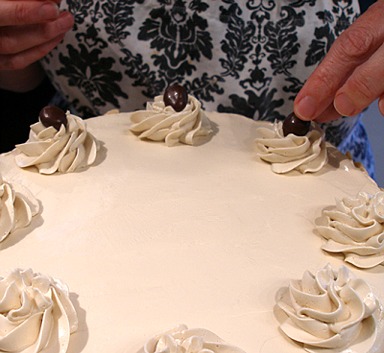
9. Pipe 8 rosettes on the top of the cake using a large open star tip(I used an Ateco 824).
Top each rosette with a chocolate covered coffee bean.
REFRIGERATE AND SERVE
1. Refrigerate the cake for at least 2 to 4 hours before serving, preferably overnight.
NOTE: I served the cake about 4 hours after it was done and the meringue layers were still very crunchy.
The cake improved after resting in the fridge overnight. The layers were still crisp, but not as hard.
2. To cut, use a large, sharp, straight-edged knife. Rinse the blade under hot water and dry it after every other cut or so.
Allow the cut dacquoise to stand at room temperature for about 20 minutes, loosely covered, before serving.
Just before serving, if desired, dust cake with powdered sugar through a very fine strainer very lightly over the top of each slice.
STORAGE
While the meringues should not be made on a humid day, they can be made well ahead and stored airtight at room temperature.
Though it can be served for several days after it is made, the meringues will no longer be as crisp.
Store any leftovers in refrigerator, tightly covered.
Do not freeze this dacquoise.