
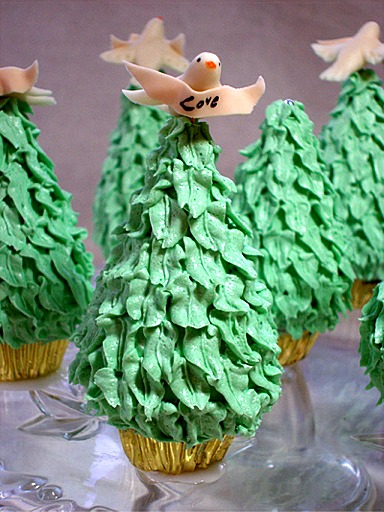
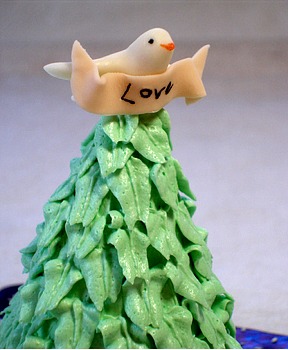
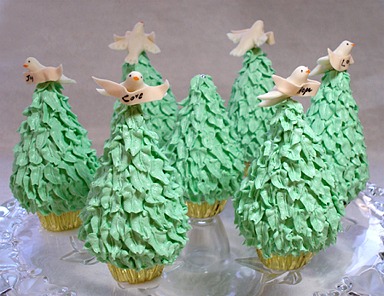
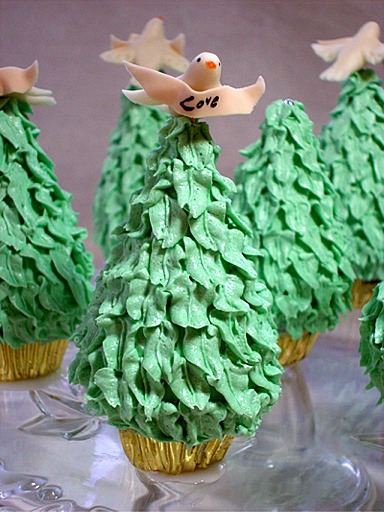
Somewhere in my travels, I read about baking cakes in cone-shaped paper cups and I just thought it was so clever. I wanted to bake an elegant dessert for a Christmas dinner party, so I came up with these little tree cakes, topped with Marshmallow Fondant doves. I call them “Wishing Trees”. For this project, we used Sarah's Ultimate Chocolate Butter Cake recipe and Tami's or Perfect Buttercream, but, you could use your favorite cake, as long as it is fairly dense, and your favorite buttercream.
CAKE RECIPE HELP
INGREDIENTS
1 cup Marshmallow Fondant or MMF or Rolled Fondant
1 recipe Ultimate Chocolate Butter Cake or UCBC; use recipe for making two layers
KELLY SAYS: I made the 2 layer cake recipe and made 10 cones, a pan of mini muffins and I had enough batter left to make a 4-inch mini cake
1 recipe Tami's or Perfect Buttercream; use recipe for 3 cups (two layer cakes)
INSTRUCTIONS
STEP I: MAKE THE DOVES AND BANNERS FROM MARSHMALLOW FONDANT (MMF)
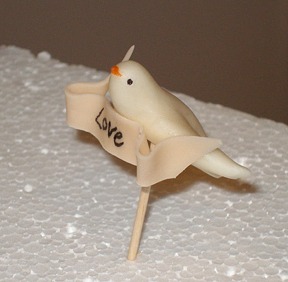
Before you bake your cakes and make your buttercream, you should sculpt the doves and banners, so they have a chance to dry a little, so the wings don't flop down, when you place them on the cakes. You can make the doves several days in advance, if you want to. Use marshmallow, or regular fondant, to form the doves and banners.
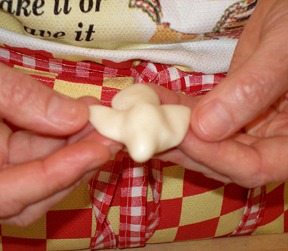
A. Make Ten Doves:
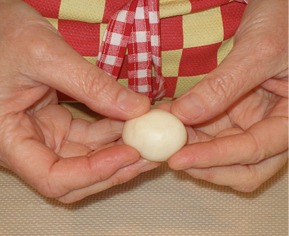
1. Knead a small handful of MMF until it is soft and pliable. Then, tear off a large marble-sized portion of MMF and form it into a rounded oval shape.
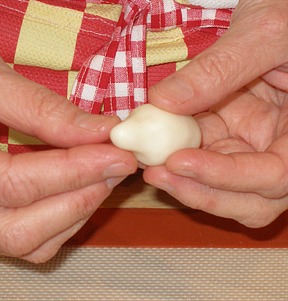
2. Begin forming the head of the bird by pinching a small section on one end of the oval, turning the piece of fondant, as you pinch.
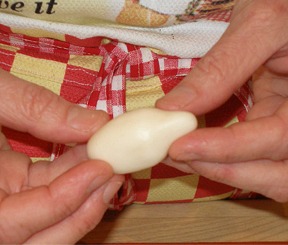
3. Take a pair of kitchen shears and cut along the sides of the oval, to form the two wings of the dove. Be careful not to cut too deeply. You need to have enough fondant to support the weight of the wings.
4. Pinch the bottom edges of the wings, to thin them out and make them more realistic looking.
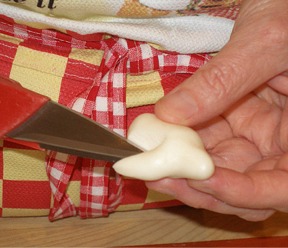
5. Use the dull side of a paring knife to help differentiate the wing from the dove's body. Do this on both the top and underside of the wings.
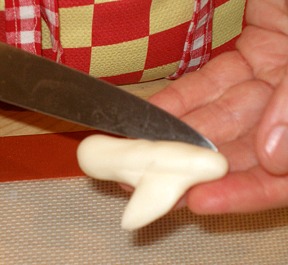

6. As you shape the dove's body, pinching as you go, you will probably have excess fondant at the back of your bird. Simply cut it off, before you begin forming the tail.
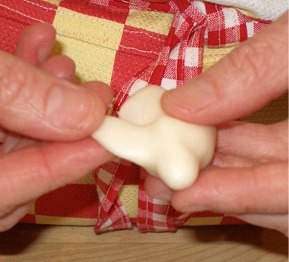
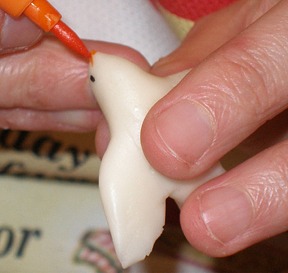
7. Form the beak of the bird by gently pinching the front of the doves head. The beaks are very small, so don't get carried away with the pinching.
Sorry for the blurry picture.

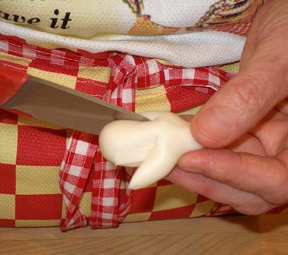
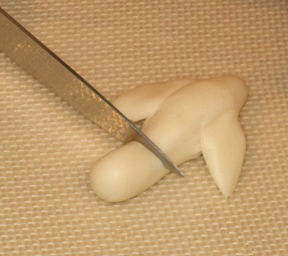
8. Gently pinch behind the wings to create a narrowing, just in front of the tail of the dove.
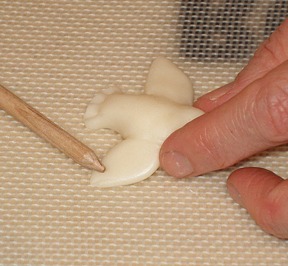
9. Flatten the tail by pinching it, horizontally, then cut the excess fondant off, with a small, sharp paring knife.
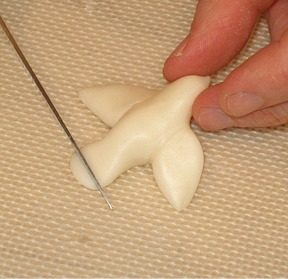
10. Use a wooden skewer, the tip of a paring knife, or fondant tool to create indentations to give a little definition to the tail.
KELLY SAYS: I pressed in three triangular shaped indentations. This mimics the tal feathers and thins out the tail, making it more delicate looking.
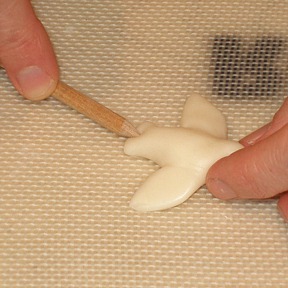
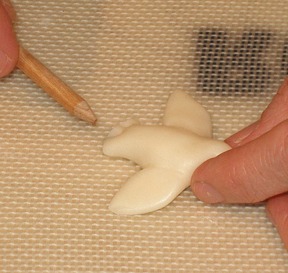
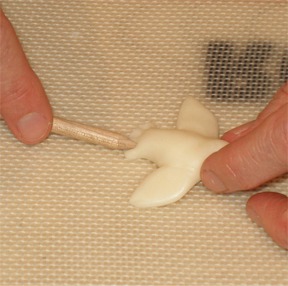
Use the same tool and technique to add definition to the wings.
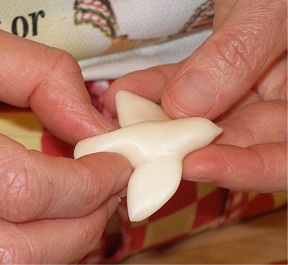
11. At this point, the bird will still be a bit soft, so put your bird on a plate, with a raised rim, to help support the wings of the bird, as it dries.
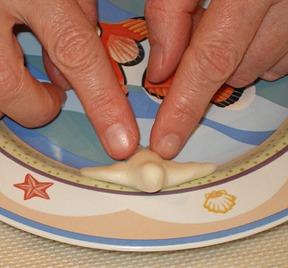
Dry your doves on the plate rim for about a 1/2 hour, to help firm-up the wings.
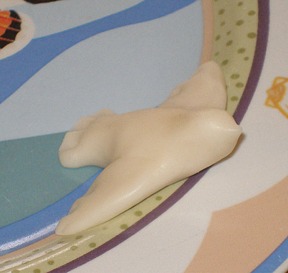
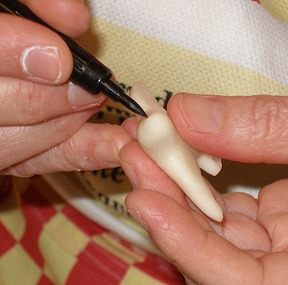
12. After a 1/2 hour, paint the face on the bird, using black and orange fine-tipped food color markers.
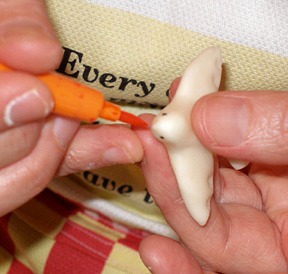
13. Set the bird back on the plate rim!
14. Repeat Step #1 – 13 to make nine more! ~
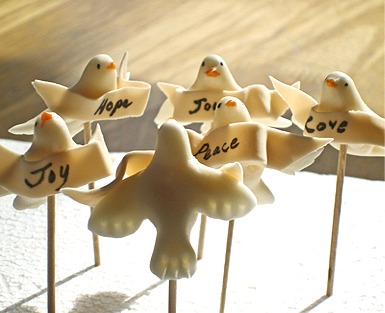
B. Make Ten Banners:
1. Tear off a small piece of MMF and tint it with a tiny bit of brown paste color. I chose this color, so the banners would have a parchment-like appearance.
Knead the color in until it is incorporated.
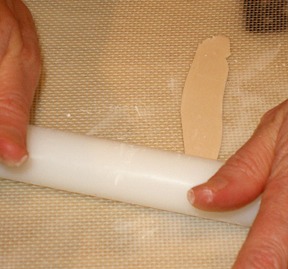
2. Remove a small portion of fondant from the parchment-colored piece and roll it out, using a small plastic fondant pin. Use some cornstarch and a silpat mat, to keep the fondant from sticking.
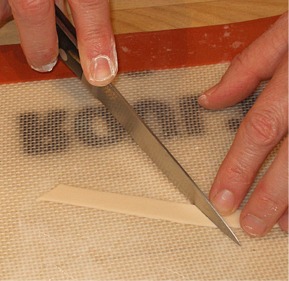
3. Cut out the banner, using a sharp paring knife, straightening out the sides, so you have a strip, about 5/16-inch wide.
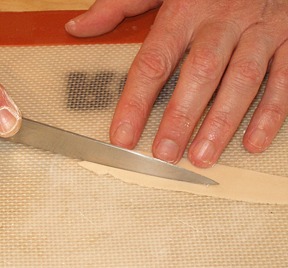
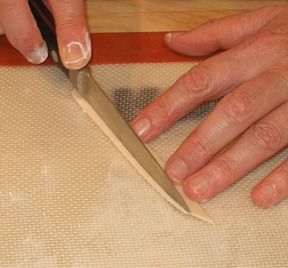
4. Cut the ends of the banner at an angle..making the piece about 3-inches long.
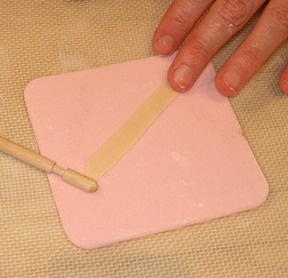
5. KELLY SAYS: I used a wooden fondant tool, on a piece of thin foam, to thin the edges of the banner, to give it a more delicate appearance.
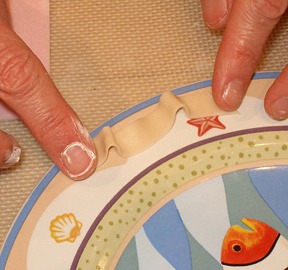
6. Take your banner and form it, on the edge of a plate, to it has soft ripples and furls.
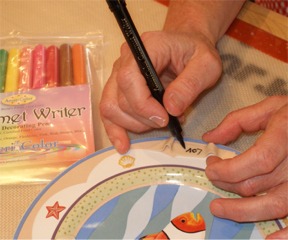
7. Let it dry for ten minutes and then use a fine-point food color marker, to write your message, in the center of the banner.
8. Let the banner dry for about an hour.
9. Repeat Step #1-8 nine more times.
C. Assemble the Birds and Banners:
NOTE: You can make these a few days in advance, if you want to.
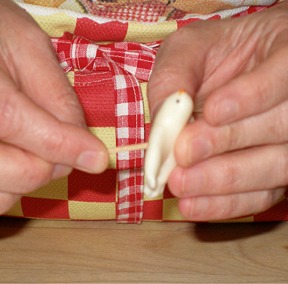
1. While you are waiting for the banners to set, find a square of Styrofoam and some toothpicks. Suspending the doves on toothpicks will help the underside dry. It also helps when you are applying the banners to the birds.
2. Gently push toothpick into the belly of each dove, being careful to not push all the way through.
3. Push other end of toothpick into the Styrofoam.
4. Take a small paintbrush and paint some water on the front of the doves chest, as well as the front edges of the wings.
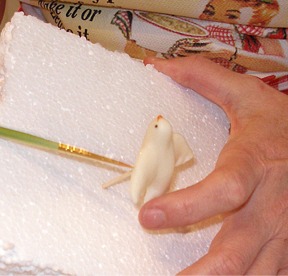
5. Gently pick up a banner and press it to the wet areas to adhere it to the dove.
Hold it for a few moments, to make sure it is secure.

6. Set the doves aside to dry.
7. Repeat Step #s 1-6 nine more times.
STEP III: BAKE THE TEN WISHING TREE CAKES
A. Make the Ten Cupcake Cone Shapes:
1. To make these cakes, you must use 4-ounce conical paper water cups. You will need 12 for this recipe.
KELLY CA SAYS: I found the “Solo” brand at www.staples.com
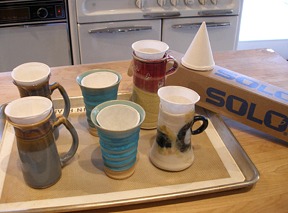
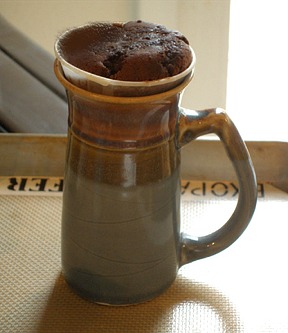
2. Look around your kitchen for any oven proof mugs or cups that will hold the paper cones in a fairly upright manner.
Here, you can see what I used, and how the cups looked in them.
Place the cups on a baking sheet. this makes it easier to get them in and out of the oven.
I used a silpat on the baking sheet, just in case any of the cakes went up and over the cups.
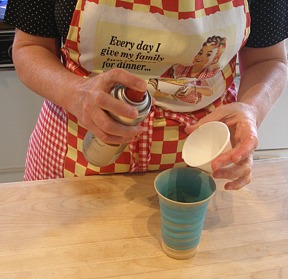
3. Make sure to spray the inside of the paper cups with a non-stick spray, so they will release easily, after baking. This is VERY important!
4. Fill each cone 3/4 full with batter and bake, according to the recipe's instructions.
I used Sarah's Ultimate Chocolate Butter Cake (2 layer recipe variaiton) and baked them at 325 degrees F for about 25 minutes, testing for doneness starting at 20 minutes. Use a toothpick to test for doneness, making sure to push it well into the cake, since it is a very deep cupcake.
5. When the cone cakes are baked, remove them from the oven and let them cool completely, before attempting to unmold them from the cup.
B. Bake Ten Mini-Muffins:
You must also bake mini cupcakes, for the base of the tree cakes.
1. It is better to bake them separately from the cones, because they will bake faster, and you don't want to have to keep opening and closing the oven to check on them.
2. Use sturdy cupcake liners on the mini cupcakes, to help the cupcakes support the weight of the cone cake addition.
KELLY SAYS: The tops of the cakes may be uneven, depending on how the cups were supported. This is OK…you can just trim them later.
C. Make the Buttercream:
While the cakes are cooling, make your buttercream:
I used Tami's buttercream, the all butter version, but you can use whatever buttercream you like.
D. Remove the Cakes from the Cones and Trim Them:
If you adequately sprayed the interior of the cone cups, your cakes should come out easily, with a little coaxing.
1. Just gently squeeze the cup all the way around, while gently pulling on the cake.

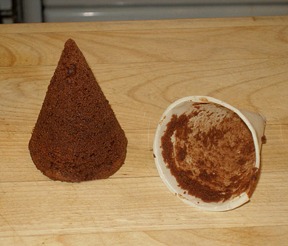
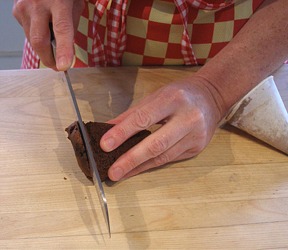
2. Hold the cake, horizontally, and trim off the uneven crown with a sharp serrated knife.
3. Repeat with the rest of the cakes.
STEP III: ASSEMBLE AND DECORATE THE TWELVE CAKES
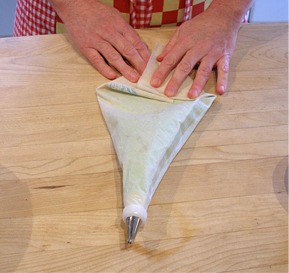
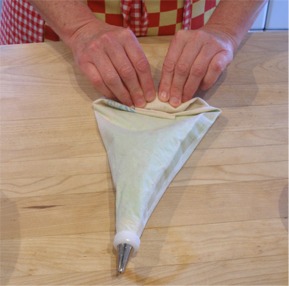
A. Prepare the Tami's or Perfect Buttercream and Pastry Bag:
1. Tint your buttercream to the shade of green you like.
2. Put a portion of your icing in a bowl, to crumb coat your cakes.
KELLY SAYS: You do not want crumbs in the icing you are going to pipe with!
Put another portion in a pastry bag, with the small leaf tip in place.
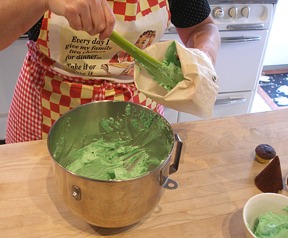
Fold your pastry bag top down and roll the end to get ready to pipe.
B. Assemble the Wishing Trees:
1. Take one mini cupcake and frost the top with an offset spatula.
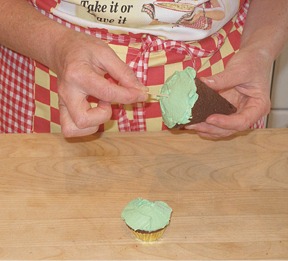
2. Take one cake cone and apply some frosting to its base.
3. Place a toothpick in the center of the bottom of the cone and center it on top of the mini cupcake. Gently press together.
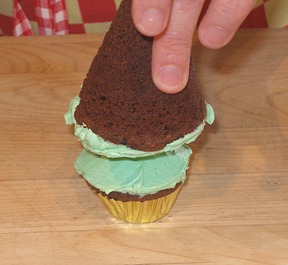
4. Repeat Step #s 1 – 3 nine more times or until all of the cupcake trees have been assembled.
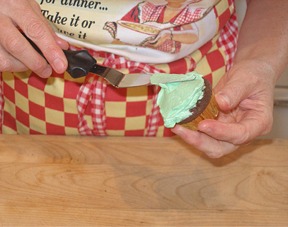
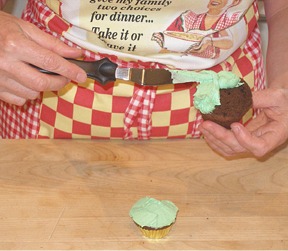
C. Frost and Decorate the Wishing Trees:
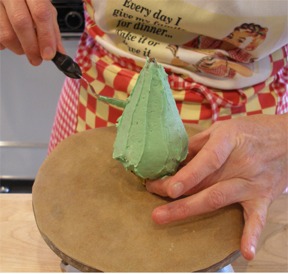
1. There will be a bit of a gap on the sides, where the cone meets the cake, just fill the gap with frosting and continue to crumb coat the entire tree.
This is easiest to do if you use a decorating turntable.
KELLY CA SAYS: The layer of frosting does not have to be perfect or smooth, you just don't want the cake to show through, after you pipe your final coat of frosting.
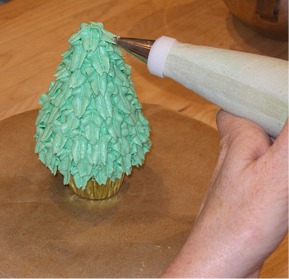
2. Start piping, with the small leaf tip, at the bottom of the tree, above the cupcake liner.
Go all the way around and then add another layer of “leaves”. It is best to start the new layer in between two of leaves in the lower layer, so the leaves do not line up in rows.
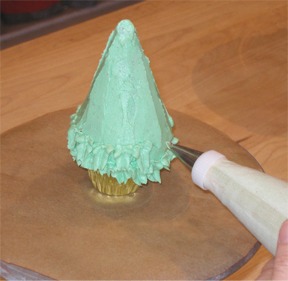
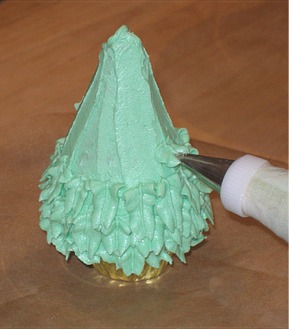
3. Continue piping until the tree is completely covered in leaves.
4. Repeat Step #s 1-3 nine more times.
D. Final Touches:
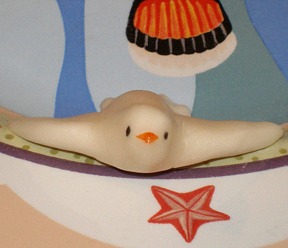
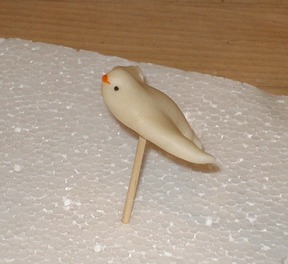
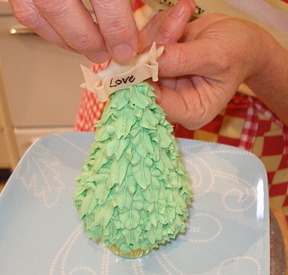
1. When your tree is covered in leaves, take a dove from the square of Styrofoam and gently remove it from the toothpick.
2. Gently press the toothpick into the top of the tree. Leaving a little over 1/4″ sticking out above the tree.

3. Take the dove and put it on the toothpick, using the hole that is already there, from the drying process. Gently press it into place.

4. Repeat Step #1-3 nine more times.
You're all done!
KELLY SAYS: This is how I plated the trees for our dessert.
It is a good idea to secure the tree to the serving plate with a little confectioners sugar/water “glue”, especially if you are going to travel with them.
If they fall over, it's a bad scene.
STORAGE
If you are making the cakes ahead of time, you can refrigerate the cakes without the doves in place. When you are ready to serve, insert the dove on the toothpick.