
I am always inspired to make sweets for Valentines Day. One of the things I decided to make this year are heart-shaped vol-au-vent, made from puff pastry dough, filled with vanilla pastry cream and topped with a strawberry heart fan. While you could use store-bought puff pastry to make these, homemade tastes much better and it is not as hard to make as you might think, it just takes a little time. A Vol-au-vent (French for “windblown” to describe its lightness) is a small hollow case of puff pastry. A round opening is cut in the top and the pastry cut out for the opening is replaced as a lid after the case is filled. For fun, I decided to name my recipe creation, Vol-au-Valentines, instead!
PASTRY RECIPE HELP
INGREDIENTS
6 to 7 baked and cooled Vol-au-vents
Egg wash:
1 large egg
2 teaspoons tap water
1/2 recipe Pastry Cream Tutorial
For Strawberry fans:
7 ripe strawberries
2 tablespoons strawberry jelly
Small sprigs of mint
For chocolate “lids”:
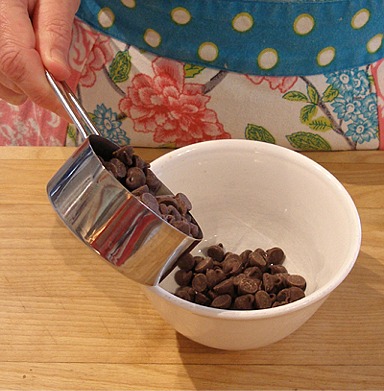
1/2 cup chopped chocolate, or chocolate chips
STEP I: MAKE THE VOL-AU-VENTS (VALENTINE'S) FROM THE PUFF PASTRY DOUGH
Make the Vol-au-Valentines
Makes 6 – 7 large completed pieces
You will need:
1/3 recipe of Puff Pastry Dough Tutorial
Egg wash:
1 large egg
2 teaspoons tap water
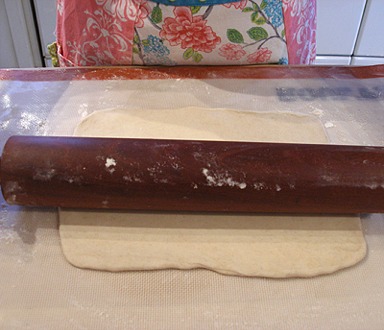
Roll the chilled puff pastry:
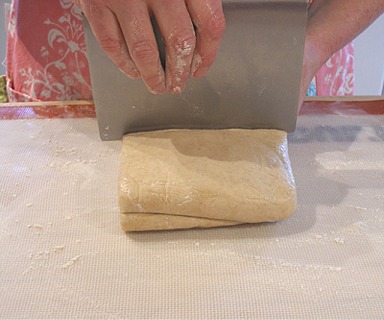
1. Remove the rested puff pastry package from the refrigerator and unwrap it.
Cut 1/3 of the dough from the package with a bench scraper or a sharp knife, straight down.
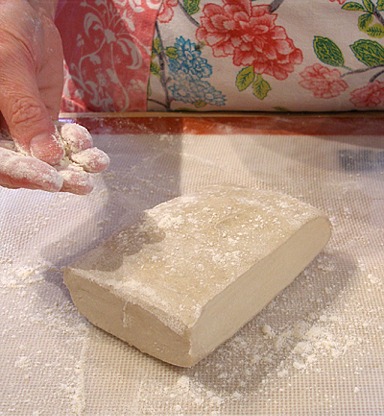
2. Roll the dough out, on a floured work surface, to about 1/4-inch thick, and then transfer the rolled dough to a baking sheet and refrigerate it for about 10 minutes.
You want the dough to be nice and cold when you are cutting the vol-au-vent.
NOTE: If you look at the cut side of the dough, you will be able to see all the butter/dough layers. All those layers are what causes the dough to expand to the flaky goodness that is puff pastry.
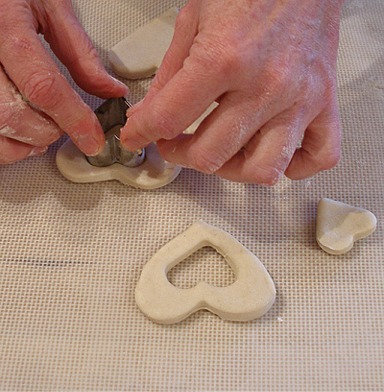
Cut out the shapes:
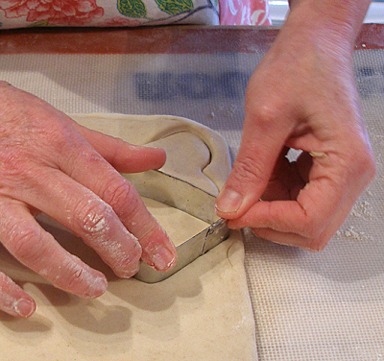
1. Remove dough from refrigerator and cut out your shapes. It is helpful to dip your cutters in flour from time to time, to prevent sticking.
2. Cut out the large hearts. You should be able to cut 14 large hearts from 1/3 of the puff pastry dough. You will need two per completed dessert.
For the Vol-au-Valentines, I used a 2 1/2-inch heart cutter and a 1 1/4-inch heart cutter for the cut-out.
KELLY SAYS: Make sure to cut your dough wisely, so you don't have a lot of scraps.
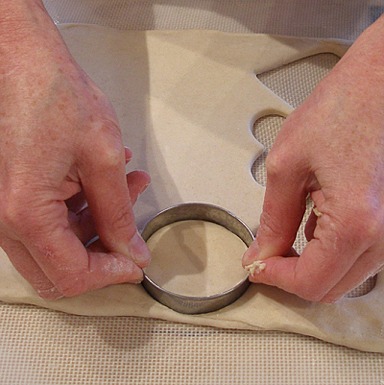
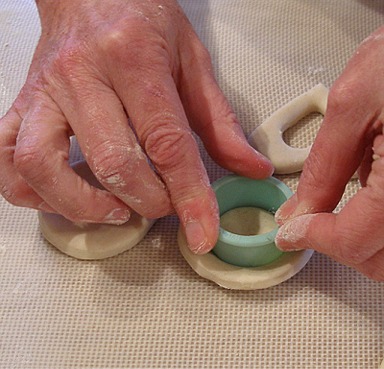
The more traditional shape for vol-au-vent is round. If you are making them, you will be able to cut 14 large circles from 1/3 of the puff pastry dough.
You will need two per completed dessert.
For the round vol-au-vent I used a 2 1/2-inch circle and a 1 1/4-inch circle for the cut-out.
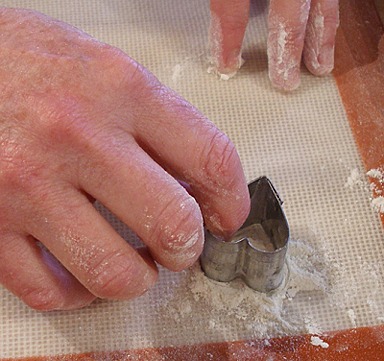
3. After you cut the large hearts, set aside 7 of them and cut out the centers with the small heart cutter.
KELLY SAYS: Do not discard the small heart shapes that you remove from the center of the larger hearts.
You can bake them and use them as little caps for your vol-au-vent, if you like, or you can just eat them, as a little snack. They are delicious!
If you are making round ones, cut out their centers from 7 of the large ones, with a smaller round cutter!
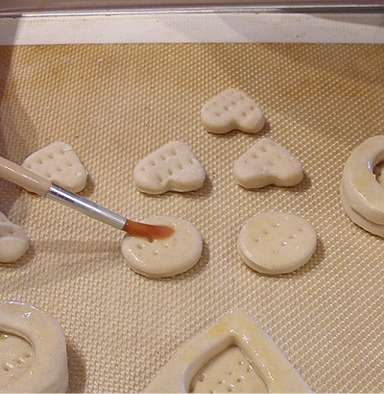
Make an egg wash, assemble shapes, and “paint” with the wash:
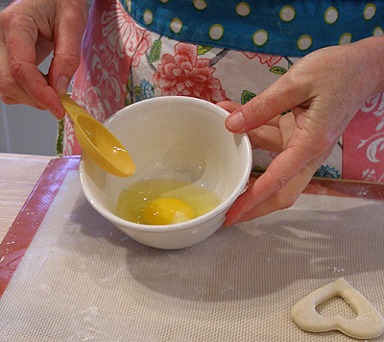
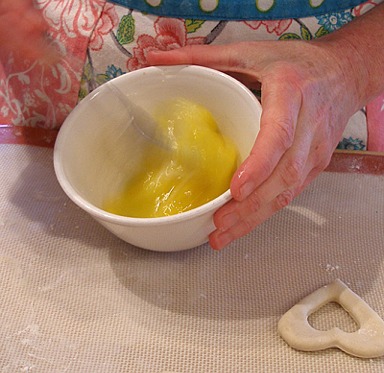
1. Make an egg wash by beating one egg with 2 teaspoons of water.
2. Place the cut-out dough on a silpat, or parchment lined baking sheet, leaving at least an inch of space between.
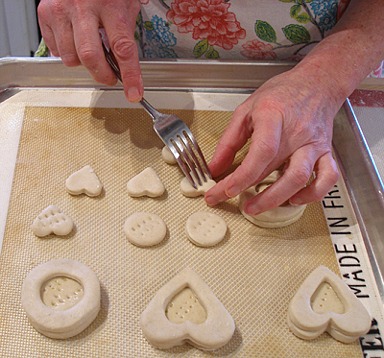
Dock the solid hearts(or rounds) with a fork, being careful to not go all the way through the dough.
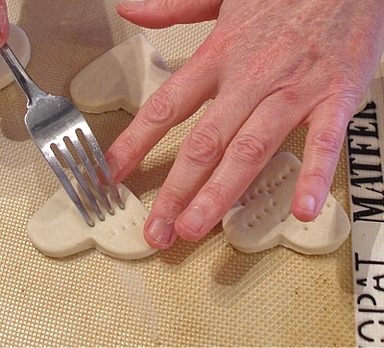
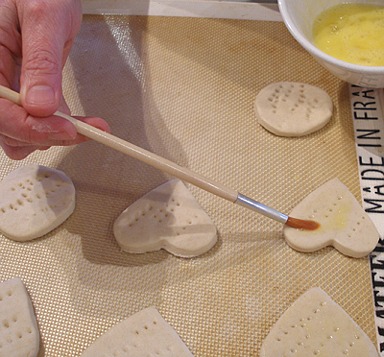
3. Paint the docked solid shapes with the egg wash, being careful, so that the egg wash does not drip down the sides, as this can inhibit their rise.
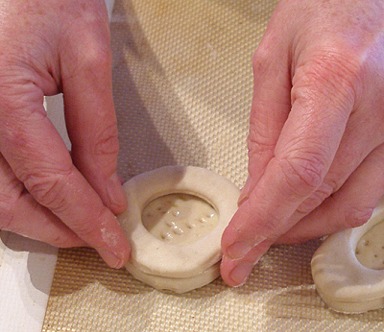
4. Place the cut hearts on top of the solid hearts and gently press into place.
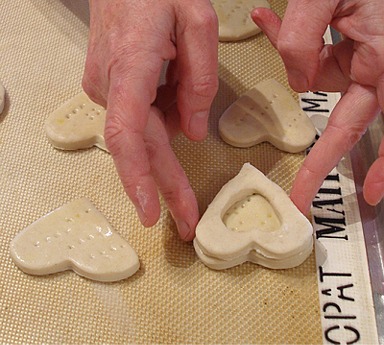
Do the same with the round shapes:
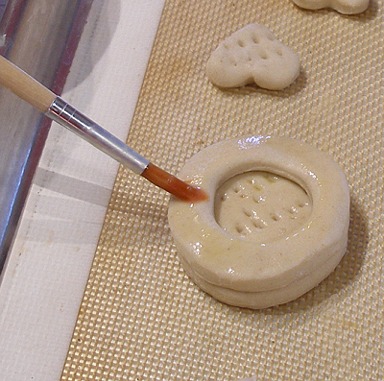
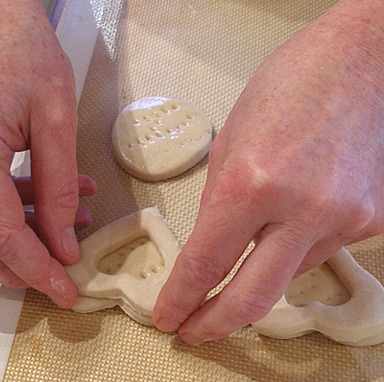
5. Dock the small cut outs.
6. Paint the egg wash on the top of the vol-au-vent, as well as the small cut outs, making sure that the egg wash does not drip down the sides.
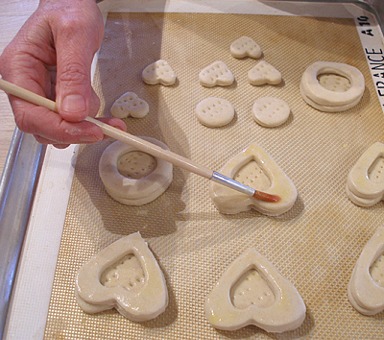
Repeat with the round cut-outs:
Chill the assembled pastry and preheat the oven to 400 degrees F. Bake for 15 minutes:
1. Place the assembled pastry on its baking sheet in the refrigerator, uncovered, and
preheat your oven to 400 degrees F. Allow for 20 – 30 minutes.
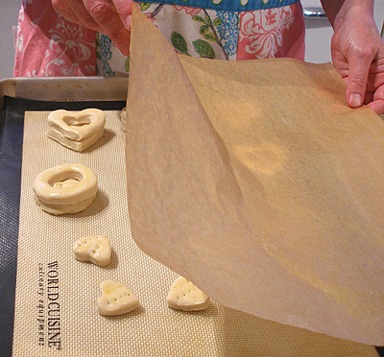
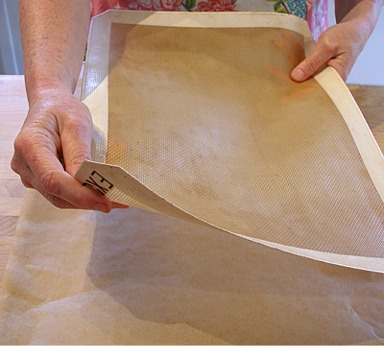
2. When your oven is preheated, remove the baking sheet from the refrigerator and place a piece of parchment over the vol-au-vent.
Place a silpat sheet over the parchment. If you do not have a silpat mat, use a double layer of parchment. This helps the vol-au-vent rise evenly.
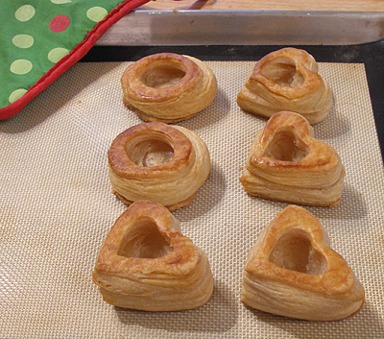
3. Place baking sheet in the oven and bake till the vol-au-vent have risen, and begin to brown, about 15 – 20 minutes.
NOTE: The small cut outs will be done sooner than the larger ones, taking about 10 minutes to bake; you may want to place them on their own baking sheet to bake.
Remove the baking sheet from the oven and remove the parchment/silpat mat from the top of the vol-au-vent.
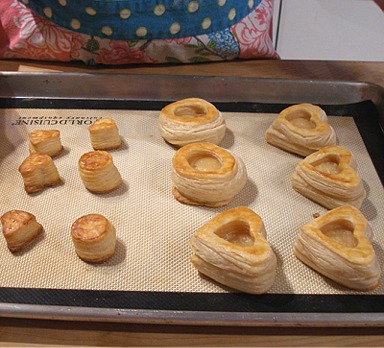
Remove the small cut outs at this time, and cool on a wire rack. Keep the larger pieces on the baking sheet to be returned to the oven.
Reduce the oven heat to 350 degrees F and continue to bake the large pieces for 15 – 20 minutes:
1. Reduce oven temperature to 350 degrees and push down the centers of the large vol-au-vent, if the centers have risen up.
NOTE:The shells are very hot. I found that using a cork, is helpful. No burnt fingers!
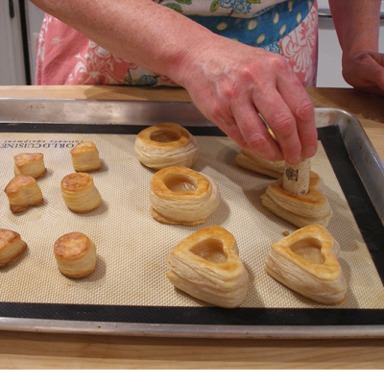
2. Put baking sheet back into the oven and bake for 15-20 minutes more, until nicely browned. If centers have risen up again, push them down with the cork, or finger, again.
Cool shells on a wire cake rack.
STEP II: ASSEMBLE THE VOL-AU-VALENTINES
Makes 6 to 7
You will need:
6 – 7 baked and cooled Vol-au-vents, above
1/2 recipe Pastry Cream Tutorial
For Strawberry fans:
7 ripe strawberries
2 tablespoons strawberry jelly
Small sprigs of mint
For chocolate valentine “lids”:
Makes enough for 12, in case some break; they are very fragile!
1/2 cup chopped chocolate, or chocolate chips
Non-stick spray
Small parchment piping bag
Special equipment:
To make the chocolate valentine “lids” you will need a Wilton 12 cavity aluminum petite heart pan
Make the strawberry fans for the top of the Vol-au-Valentines:
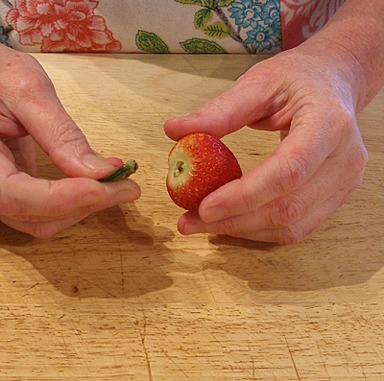
1. Choose 6 – 7 well formed strawberries to make the strawberry fans.
2. Melt the 2 tablespoons of strawberry jelly in the microwave and cool slightly.
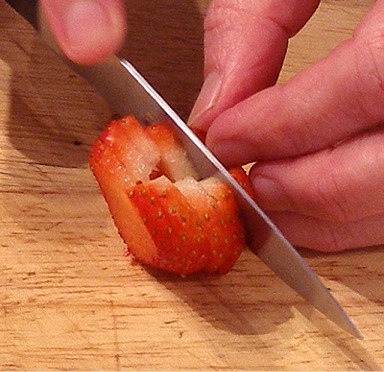
3. Pull the cap off the strawberries and make a v-shaped cut from the top of each strawberry, removing the hull.
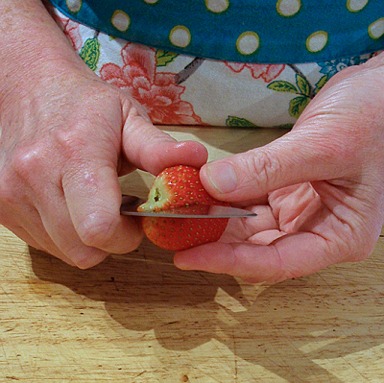
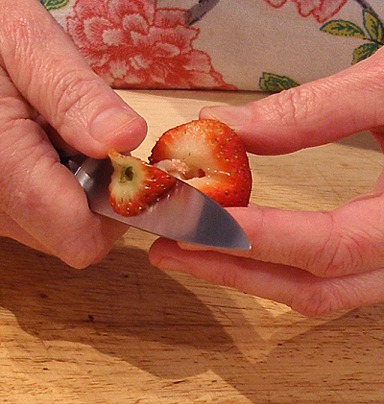
4. Stand the strawberry on the pointy end and make several thin slices, being careful not to go all the way through the berry.
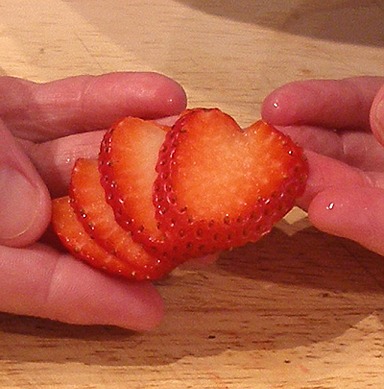
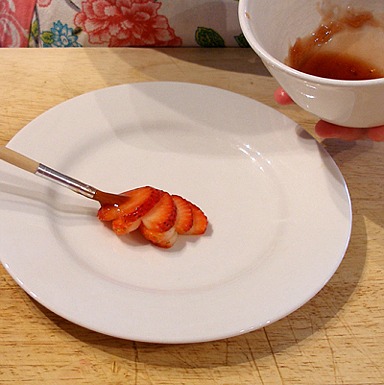
5. Fan out the strawberry and then place it on a plate and “paint” it with the melted strawberry jelly. Set the glazed strawberries aside.
Make the parchment cone to hold the melted chocolate for the chocolate valentine “lids”:
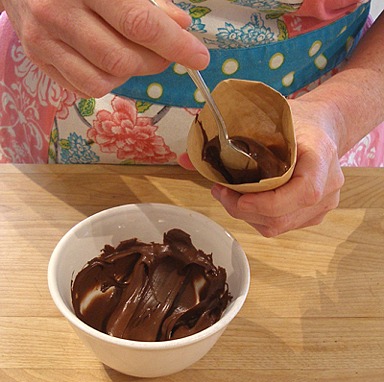
1. Melt the 1/2 cup chocolate in the microwave, or in a double boiler, till smooth.
Stir well and set aside while you make a parchment decorating cone.
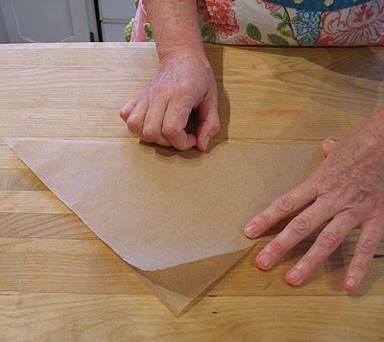
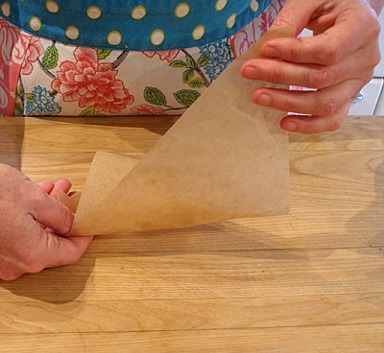
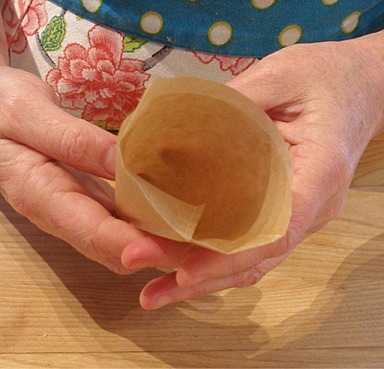
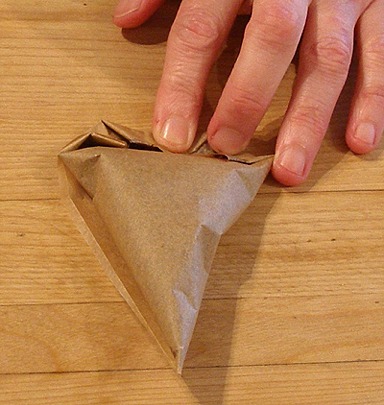
2. Take a rectangular sheet of parchment and fold it in half, diagonally, creasing with your fingernail.
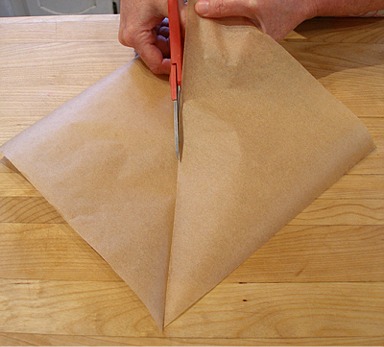
3. Open the fold and cut, at the fold with scissors or a sharp knife.
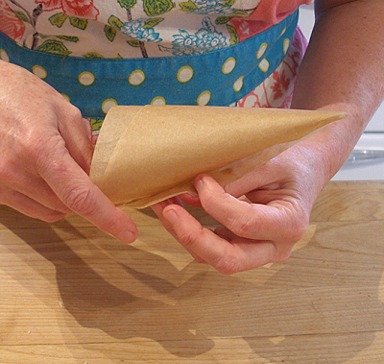
4. Hold the right angle of the triangle with your right hand and curl one corner around and hold it with your thumb, creating a cone shape.
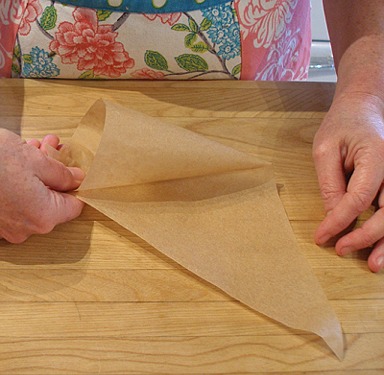
5. Wrap the other point around the cone, creating a sharp point. Fold the tail on the inside of the cone, to secure.
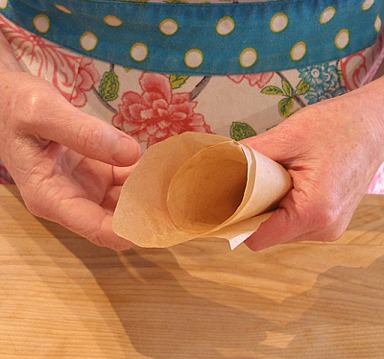
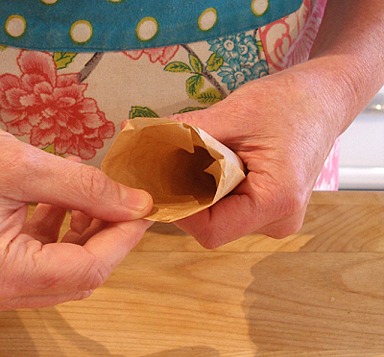
6. Spoon melted chocolate into the parchment cone and fold down the top.
Pipe the chocolate valentine “lids”:
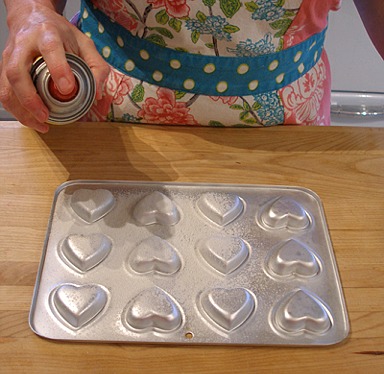
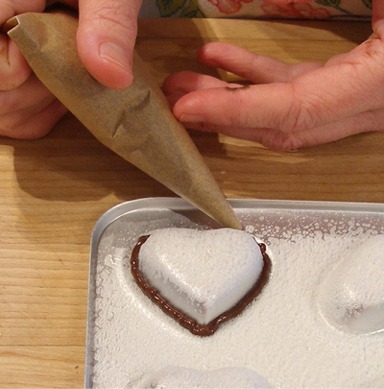
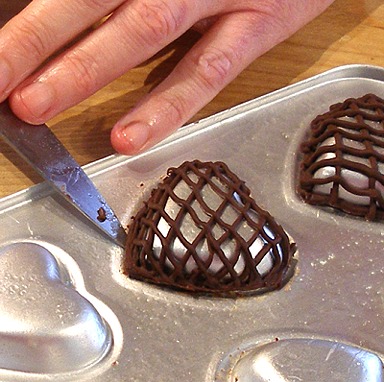
1. Place the Wilton heart pan, upside down, on your work surface and spray with non-stick spray.
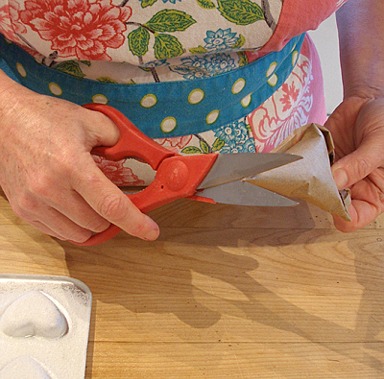
2. Cut the tip of the parchment cone with kitchen shears, making a small opening.
3. Pipe chocolate all the way around the base of the heart.
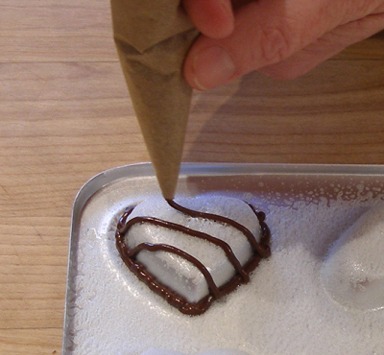
4. Pipe chocolate in diagonal lines in one direction, then pipe them in the opposite direction, creating a lattice pattern.
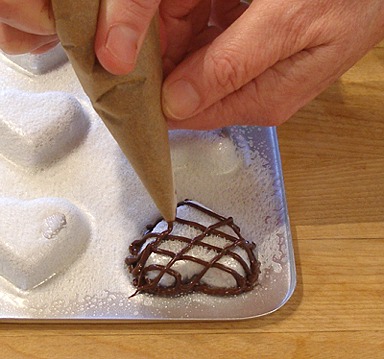
5. Clean up the edges with a toothpick.
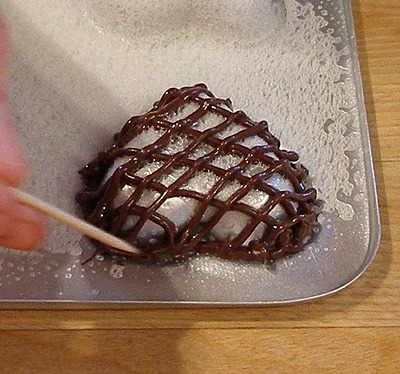
6. Continue till the whole pan is piped, then place the pan in the freezer for 10 minutes, to set the chocolate.
KELLY CA SAYS: I have you make more “chocolate valentine lids” than you need because you will lose some when you try to unmold them.
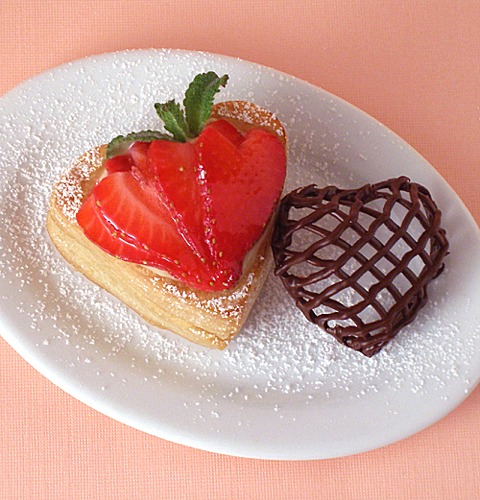
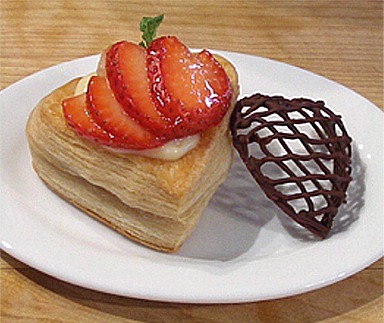
Finish assembling the Vol-au-Valentines:
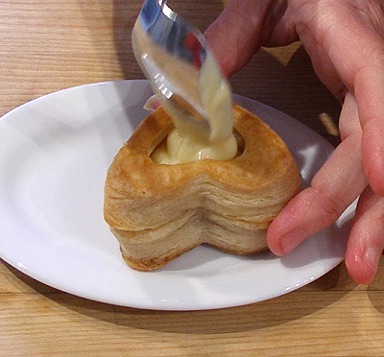
1. While chocolate sets, remove Sarah's Pastry Cream from the refrigerator and loosen it with a few turns with a whisk.
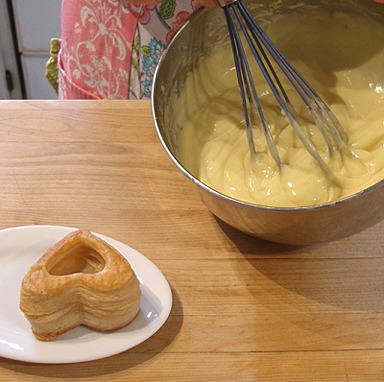
2. Place one Vol-au-Valentine shell on a serving plate and fill with Sarah's pastry cream.
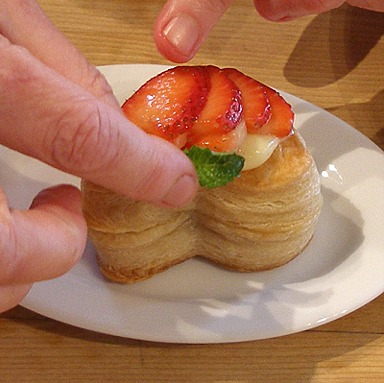
3. Take one strawberry fan and place it on top of the pastry cream.
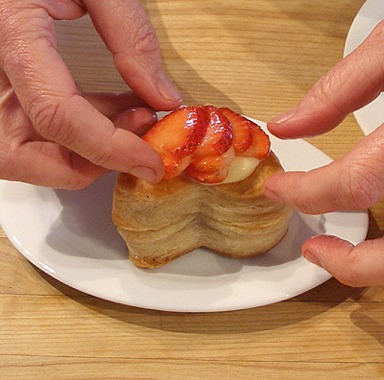
4. Take a small spring of mint and place it at the top of the strawberry fan.
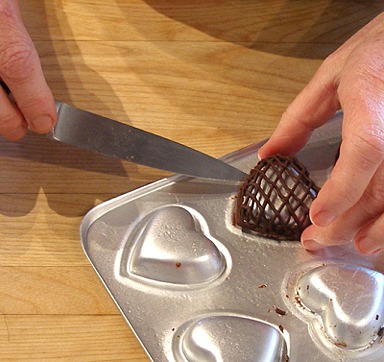
5. Remove pan with chocolate valentine “lids” from the freezer. Using a sharp paring knife, carefully go all the way around the edge of the lid, loosening it from the pan.
This is a delicate procedure. You WILL break some. They are very fragile.
6. When the lid is loosened, remove it from the pan and place it along side the filled and fruit-topped Vol-au-Valentine.
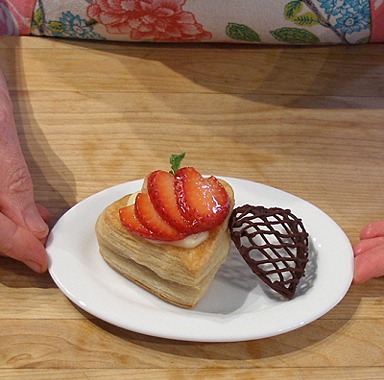
Happy Valentines Day!