
Variations: Just Like Hostess Cupcakes; Ultimate Chocolate Butter Cake or UCBC; Ultimate Butter Cake or UBC and Variations, Wishing Trees Cupcakes
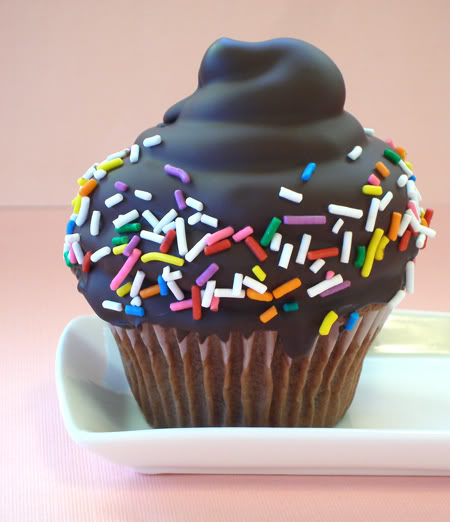
Food styling and photos by Kelly Hong © Sarah Phillips I made this infamous Hi-hat Cupcake! I used the Seven Minute Vanilla Bean Icing for the swirl and dipped them in the Chocolate Coating for Hi-Hat Cupcakes. They were TASTY!!
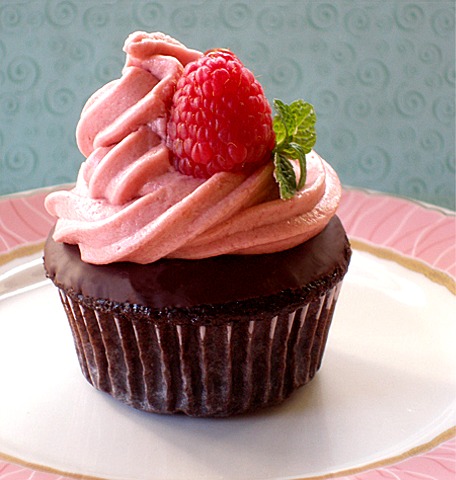
Food styling and photos by Kelly Hong © Sarah Phillips For this cupcake, I held it upside down and dipped it in a bowl of Chocolate Ganache Glaze. After the ganache hardened, I piped on some raspberry Swiss Meringue Buttercream Flavored with Jam. The frosting was delish…with a bright raspberry flavor.
You have the Ultimate Yellow Butter Cake or UBC Recipe, now you have one in chocolate. This cake has a double blast of chocolate – from cocoa powder and chocolate baking squares – making it seem as though you used an expensive European chocolate brand. The recipe can easily be made into cupcakes, and we have had a lot of fun toping them in various ways.
CAKE RECIPE HELP
Just Like Hostess Cupcakes
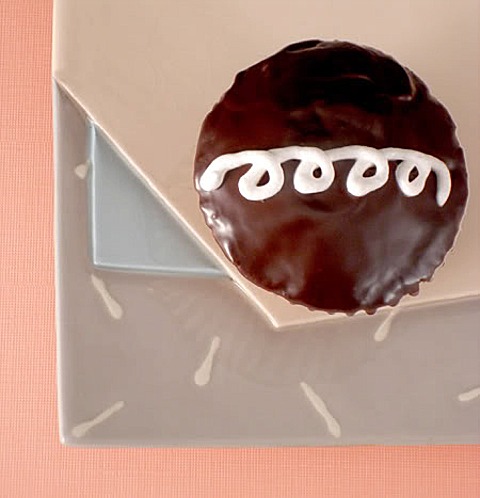
Food styling and photos by Kelly Hong © Sarah Phillips
Wishing Trees Cupcakes
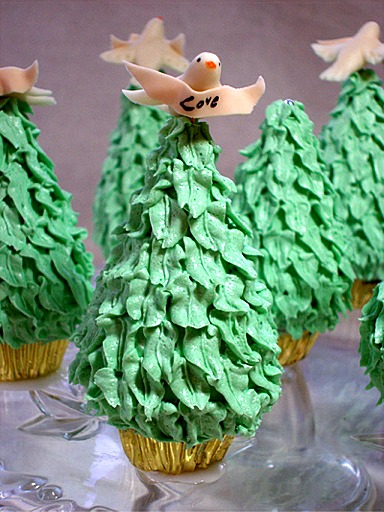
Food styling and photos by Kelly Hong © Sarah Phillips
INGREDIENTS
1 3/4 cups / 7.72 ounces / 218.79 grams unbleached all-purpose flour; spoon into dry measuring cup and level to top
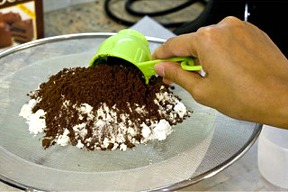
1/4 cup cocoa powder, preferably natural; spoon into dry measuring cup and level to top (I prefer to use Natural cocoa powder, but you can use Dutch-processed or alkalized)
1 teaspoon instant espresso powder (optional)
1 teaspoon baking powder
1/4 teaspoon baking soda
1/2 teaspoon salt
1 cup whole or 2% milk; use cold – does not have to be at room temperature; measure in liquid measuring cup
2 teaspoons vanilla extract
3/4 cup / 1 1/2 sticks / 169.5 grams unsalted butter; use cold – does not have to be at room temperature
1 1/4 cups plus 2 tablespoons sugar or superfine sugar
3 large eggs; use cold – does not have to be at room temperature
6 ounces (squares) bittersweet or semi-sweet chocolate, melted and cooled to tepid
NOTES:
1. Cake is mixed using a 325 watt KitchenAid Mixer. If you are using a more powerful one, adjust the mixing times downward or use the descriptions rather than mixing times with the instructions, otherwise the baked cake will fall apart and/or crumble or dome in the middle from overmixing.
2. How to melt chocolate – I melt my chocolate in the oven while it preheats. Place squares on a flat sheet of aluminum foil and place on middle shelf. When the chocolate melts, it does not drip over the sides of the foil. They take about 5 minutes at most.
Another way to melt the chocolate is to microwave it in a medium size, microwave-safe bowl on 50% power for 30 seconds at a time until chocolate is almost melted. It takes about 3 to 4 minutes.
Looks are deceiving — when done, the chocolate square collapses slightly, but has a recognizable shape and will look shiny. When you touch the top with the tip of a knife (not your fingertip because its hot), you'll see that it's melted. Take care the chocolate doesn't burn which happens quickly. Remove from oven and stir.
The chocolate must cool down to slightly warm about 72 – 74 degrees F, until needed in recipe. Do not use it HOT.
INSTRUCTIONS
1. Position the oven rack in the middle of the oven. Preheat the oven to 325 degrees F
Spray muffin tins with nonstick cooking oil spray for 21 cupcakes (or two standard 12-muffin pans) or line them with paper cups. There’s no need to grease the paper liners. (I don’t like to grease the inside of the liners in this recipe because they fall off the cupcake when baked; there is plenty of butter in the recipe.) Set aside.
2. In a medium bowl, whisk together the flour, instant espresso powder, baking powder, baking soda and salt. Sift the cocoa powder into the mixture and combine all ingredients. Set aside. Add the extracts to the milk and set aside.
SARAH SAYS: Cocoa powder does not blend well with other ingredients and lumps easily; that's why sifting is recommended because it removes the lumps. I am using a fine mesh strainer to sift the cocoa powder with. I measure the coca first, and then sift.
ODETTE SAYS: After measuring, I sift all the dry ingredients together.
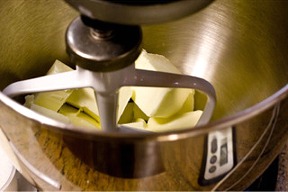
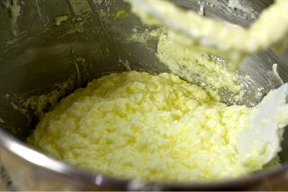
3. Beat the butter with a stand mixer, fitted with a paddle attachment, on low speed until softened. (If the butter is cold, cut it into pieces and it will warm quickly from the beaters).
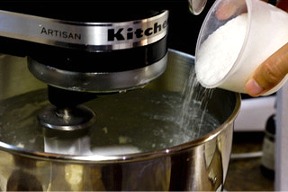
Add the sugar in a steady stream at the side of the bowl.
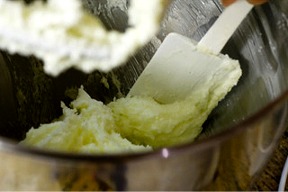
Increase speed to medium and beat for 2 minutes or until the mixture is light yellow in color and fluffy.

Stop the mixer and scrape the side and bottom of the bowl with a large rubber spatula.
4. With the mixer on low, add the eggs one at a time and beat for 20 seconds after each addition.
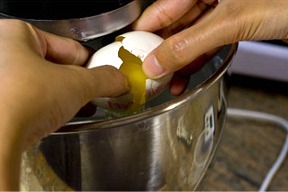
After the eggs have been added, increase the mixer speed to medium and beat the mixture for 2 minutes. Set the kitchen timer to help you keep track of the time.
If the eggs are cold, the batter will curdle slightly. It's ok. It will come together as the batter warms from the beaters.
ODETTE SAYS: Here's how the curdled batter looks like.
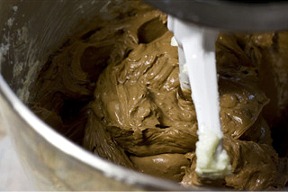
At the end of mixing, the mixture will become fluffy and aerated.

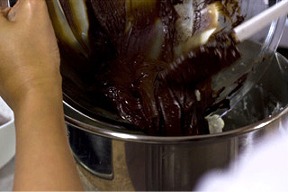
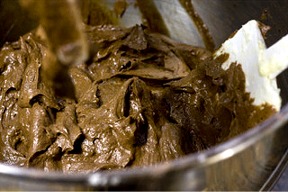
5. Add melted and cooled chocolate: Temper the chocolate by adding a teaspoonful of the butter/sugar/egg mixture at a time to the cooled chocolate and mix thoroughly after each addition.
SARAH SAYS: Tempering the chocolate properly is a very important step. If the chocolate is too warm, and added to the batter, it will seize, creating small bits of hardened chocolate in the batter. These bits will never melt and incorporate into the batter when the cake bakes; they will remain as hardened pieces of chocolate in the final cake.
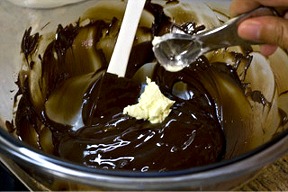
You can increase the amount of cake batter added to the chocolate after the initial first few teaspoons to tablespoons.
Add about 1/2 cup or more of butter/sugar/egg mixture to the melted chocolate before returning it to the main mixing bowl.
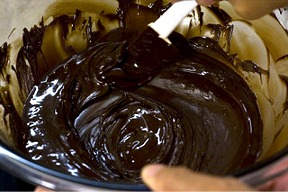
Mix all the ingredients on low speed until combined and creamy.
6. With the mixer on low, add the flour mixture in 3 equal portions…
…alternating with the milk in 2 equal portions, beginning and ending with the flour. (If the milk is cold, the batter will curdle slightly. It's ok. It will come together when you add the flour.)
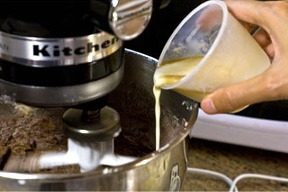
SARAH SAYS: Add the flour and liquid ingredients in increments quickly; do not wait in between additions too long as you don't want to overmix the batter.
After completing the last addition of flour, let the mixer run for 30 seconds on LOW. The batter should look mixed. STOP the mixer. Do NOT overmix.
7. Remove the bowl. With a large rubber spatula, give the batter ONE or TWO quick folds to incorporate any stray flour or milk left at the sides and bottom of the bowl. Then, STOP!
8. Divide the batter evenly among the muffin tins (each about ¼ cup of batter in each) and fill about 2/3 full. Do not smooth the tops.
Fill any unused muffin tins 1/3 full with water so they won't smoke in the oven.
9. Bake the cupcakes for 25 – 35 minutes.
To test for doneness, insert a toothpick in the middle of a few cupcakes at a time and remove. It should have a few moist crumbs attached, but not batter. Lightly touch of the tops of a few cupcakes with a cupped hand (will not spring back when touched with a fingertip) until the top feels firm and gives slightly. It should also smell done.
Chocolate cakes are hard to tell when done and it’s easy to overbake them. If you insert a toothpick in the middle and remove, it should have a few moist crumbs attached, but not batter. You can still hear a few air bubbles popping. A small amount of cracking on the top is normal.
10. Take the cupcakes immediately from the oven in their pan to a wire cake rack and let them sit for 5 minutes. Remove to a wire cake rack to cool completely.
When the cupcakes have cooled, frost and/or store.
STORAGE
The icing and filling that covers your cake determines how you store your cake. Perishable frostings and fillings containing, for example, eggs, cooked custards, whipped cream, dairy and fresh fruit and berries that are NOT baked into the batter MUST be refrigerated, where the cake will keep for a few days.
Cakes iced and filled with nonperishable recipes can be stored under a cake-keeper at room temperature for about 2 days or frozen for 2 months. “Open-freeze” them (freeze without wrappers) until the icing is firm and then wrap in plastic wrap, foil and/or then in an airtight container.
Unfrosted butter cakes should not be refrigerated because it dries the cake and can be stored at room temperature for about 2 days. Unfrosted cake layers freeze well for about 2 months. Make sure you wrap them with plastic wrap and then foil.
Because the Ultimate Chocolate Cake tends to be moist, remove the cake from its wrapping while still frozen and allow it to thaw on a wire cake rack at room temperature. If not using right away, rewrap in foil, and store at room temperature in a cool, dry place as this chocolate cake tends to be moist. Do the same if the cake is frosted, but store under a “cake keeper” or airtight container.
VARIATIONS
Just Like Hostess Cupcakes
Wishing Trees Cupcakes
More frosting options:
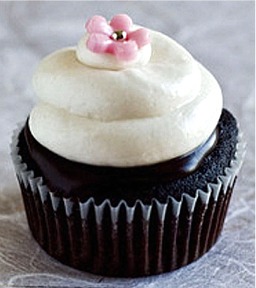
Food styling and photo by odetteganda © Sarah Phillips Odetteganda, Premium Member, Says: For this one, I frosted glazed it first with Chocolate Ganache Glaze and frosted it with Tami's or Perfect Buttercream.
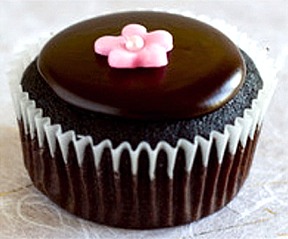
Food styling and photo by odetteganda © Sarah Phillips This one is just glazed on top with Chocolate Ganache Glaze.
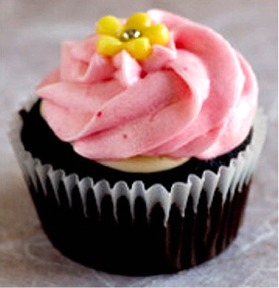
Food styling and photo by odetteganda © Sarah Phillips This one is Tami's or Perfect Buttercream but I added strawberry jam in it. I also topped this one with melted white chocolate before frosting. My mom is such a sucker for white chocolates!