
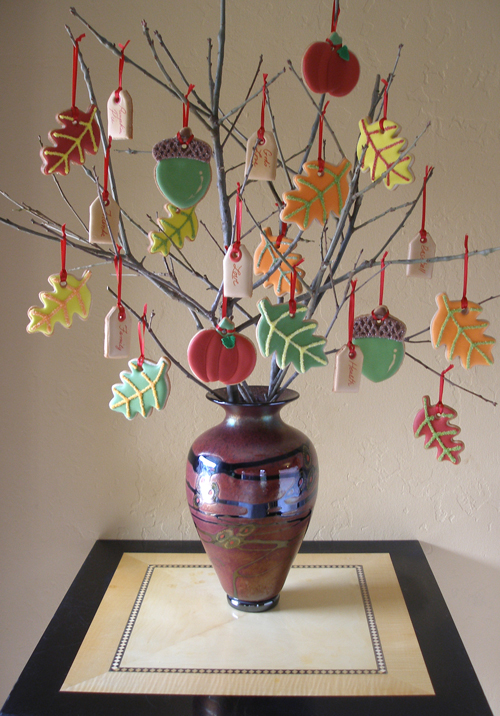
I wanted to create an unforgettable Thanksgiving centerpiece that was not only beautiful, but delicious and heartfelt, so we came up with this festive Thankful Cookie Tree. Not only is it a sight to behold, and a treat to eat, but it's a lot of fun to make, and you can customize it to your liking.
This recipe makes enough cookies for a 3-foot tall Thankful Cookie Tree containing 4 branches, plus extra cookies to give away to friends and family as gifts. You can make more or fewer cookies depending upon the size of your tree and your time constraints.
For this project, we use Sarah's Creative Cut-Out Sugar Cookie Recipe because it doesn't spread and bakes flat, creating a perfect decorating surface. Also, our royal icing recipe uses a special ingredient that makes it safe for anyone to eat! See below for more info on that as well as tips and tricks for thinning, tinting, and decorating with royal icing.
COOKIE RECIPE HELP
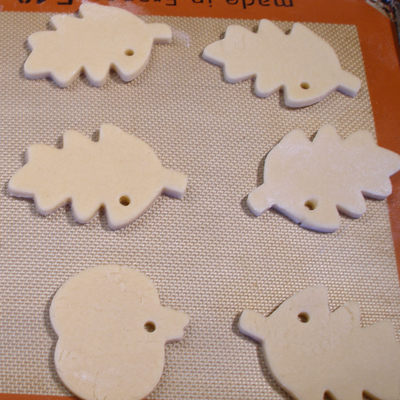
To make the “Thankful Tree”, we made a total of 74 cookies, broken down as follows: 7 acorns, 15 large leaves, 15 medium leaves, 7 pumpkins, and 30 tags
2 recipes dough from Sarah's Creative Cut Out Sugar Cookies, well chilled; after making each recipe, divide each dough portion in half. You will have 4 dough portions in all, and then wrap and refrigerate for an hour or until well-chilled. This is so the dough will be cold throughout and easier to handle.
Sanding sugar, for decoration
1 set Edible markers, such as AmeriColor Gourmet Food Writers or Black Edible Food Writers
A sturdy glass vase
If you do not have access to a tree with branches that are suitable, you may use a metal tree-shaped ornament stand
Water spray bottle
Pencil; graphite is non-toxic
toothpicks
NOTE: We recommend Kuhn Rikon and CK Products; they make great decorating bottles with couplers for piping tips: CLICK or CLICK
We LOVE to use squeeze bottles to decorate cookies; make sure they are free of grease. They do not require support, like piping bags do, and the supplied lids keep the icing tips from drying out and clogging.
If the icing has sat overnight, all we do is remove the lid and giving the icing a brief stir with a chopstick, and we're good to go.
*NOTE: If using disposable piping bags, you will need, in addition:
-5 to 7 Silicone Decorating tip covers
-5 to 7 Couplers
Piping tips:
– 4 to 6 Wilton #2 tips
– 1 Ateco #67 tip or leaf tip
– 2 Wilton #1 tips
Thin red satin ribbon, for hanging cookies – purchase a total of 536- plus 63-inches = 599 or 600-inches = 50 feet or ribbon
– 8-inch length needed for each large leaf, medium leaf, pumpkin and tag cookies or 67 cookies x 8-inches = 536-inches
– 9-inch length needed for each acorn cookie or 7 cookies x 9-inches = 63-inches
Cookie cutter suggestions:
1. Choose any Fall-themed cookie cutters but we used three from this Wilton set:
– largest acorn cutter (3.5-inches);
– large (4-inches) leaf cutter; and,
– medium (3.5-inches) leaf cutter
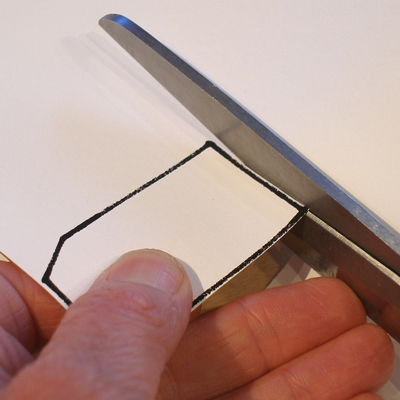
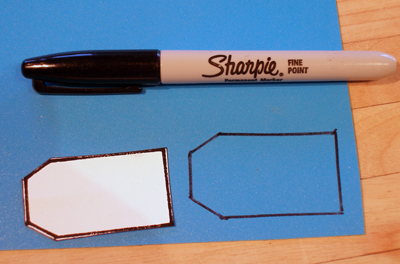
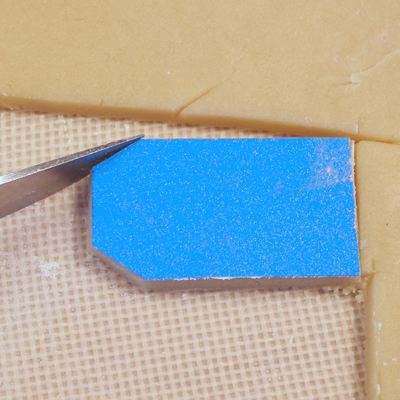
3. For the Tag Cookies, print out the cookie tag template.
Cut out the tag template and trace around the outside of the shape onto a piece of thin plastic. Plastic food container lids work GREAT for this purpose!
Since you are using a Sharpie, cut INSIDE the lines, so the marker lines are removed.

INSTRUCTIONS
STEP I: ROLL AND CUT OUT THE COOKIE DOUGH
NOTE: Roll the dough out a little thinner than usual, because you do not want the cookie ornaments to get too heavy, about 3/16-inch. After cutting, place the cookies on a parchment or silpat lined baking sheet, with at least 1-inch of space between them. Cover, and place the sheets in the refrigerator to chill for 30 minutes to an hour before baking.
1. Working with one portion of dough at a time (1/2 of a single recipe), roll out the chilled dough on a lightly floured surface.
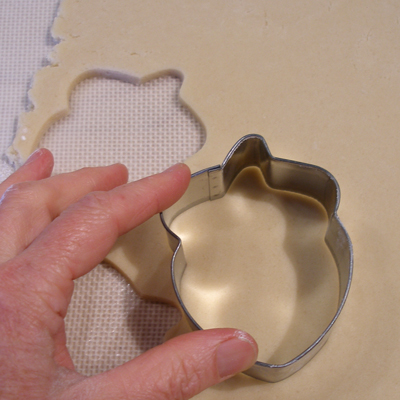
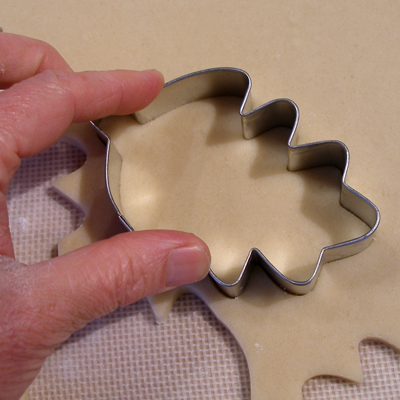
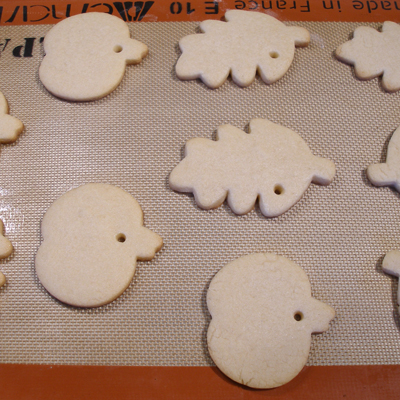
2. For the leaves (both sizes), you have to be a little tricky. If you cut them out and bake them all as is, all facing right, they will all point in the same direction on the tree.
Make sure that you flip 1/2 of the leaf cookies over, before you place them on the baking sheet. This will ensure that some of them will be facing right, and some will be facing left.
3. Place the cookies on a parchment or silpat lined baking sheet, with at least 1-inch of space between them. Place the sheets in the refrigerator to chill.
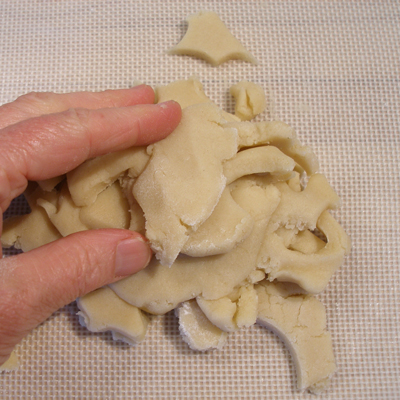
4. After you are finished cutting out the first portion of dough, stack up the scraps and press them down into a disk.
Wrap this dough in plastic and put it in the refrigerator.
Do the same thing with the scraps from each of the 4 portions of dough.
You will use these scraps to make the tag cookies.
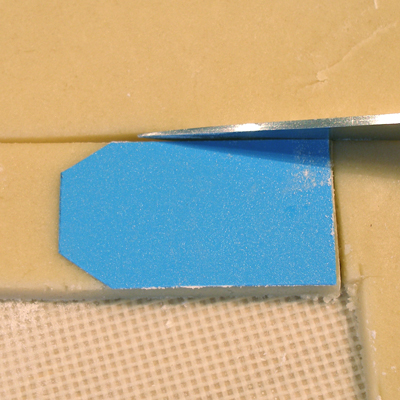
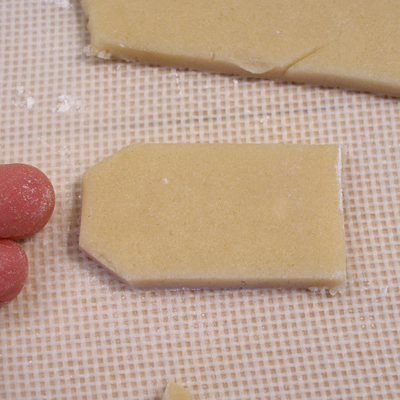
5. Roll out the dough scraps, to make the tag cookies.
Roll the dough out to a thickness of 3/16-inch.
Cut around the plastic template with a sharp knife or rotary cutter.
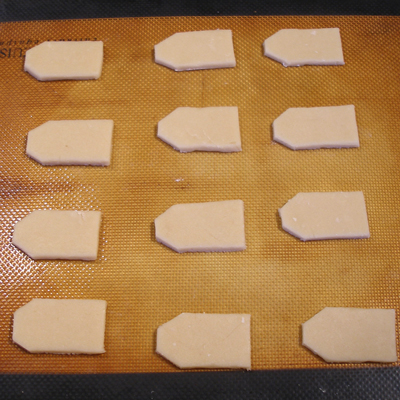
Place the cookies on a parchment or silpat lined baking sheet and place the sheet in the refrigerator to chill.
STEP II: BAKE AND COOL THE COOKIES.
Cut-out the cookie dough and chill:
1. Position an oven shelf to the middle of the oven. Preheat oven to 350 degrees F.
2. Remove one sheet of cookies from the refrigerator.
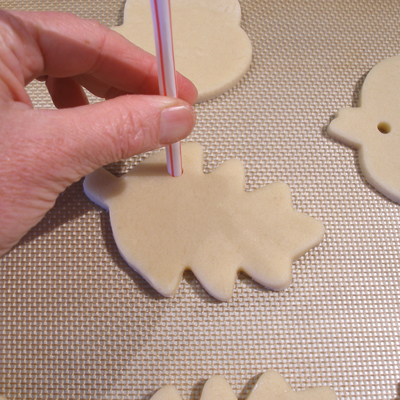
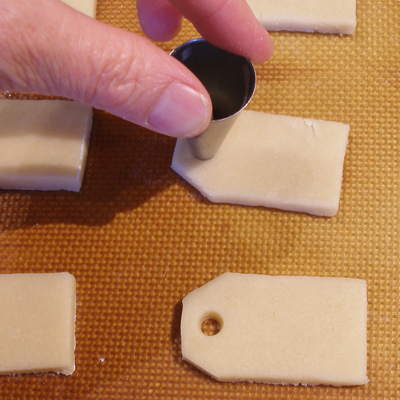
3. Cut out the hanging holes in the chilled cookies.
You can use a drinking straw or a large open tip pastry tip to make the holes.
Just press straight down, and lift up. The little circle of dough will stay in the straw or pastry tip.
4. Bake the cookies for 10-12 minutes, or until the edges of the cookies just start to turn light brown.
5. Allow to cool on cookie sheet a few minutes and remove to a wire cake rack to cool.
SARAH SAYS: If baked on parchment paper, cookies can be cooled right on its surface; simply slide the paper with the cookies on top to a wire cake rack to cool. Remove cookies when cooled.
6. When the tag cookies are chilled, cut out the hanging holes with a straw or piping tip.
7. Bake tag cookies for 9-10 minutes, or until the edges are just beginning to turn light brown.
8. Allow to cool on cookie sheet a few minutes and remove to a wire cake rack to cool.
SARAH SAYS: If baked on parchment paper, cookies can be cooled right on its surface; simply slide the paper with the cookies on top to a wire cake rack to cool. Remove cookies when cooled.
STEP III: MAKE THE ROYAL ICING RECIPE
ROYAL ICING RECIPE
Makes 5 cups
This will give you more than enough to make this project.
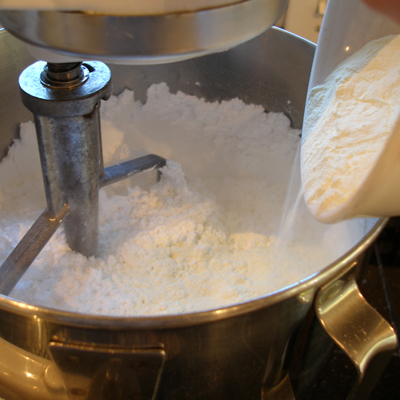
SARAH SAYS: We used to sift our powdered sugar (after measuring) when we made royal icing, and it was such a messy prospect! We have discovered that if you just mix the powdered sugar with the meringue powder for about 15 seconds, you will have no yucky lumps and you do not have to sift!
INGREDIENTS
2 pounds (about 8 to 8 1/4 cups) unsifted powdered sugar
1/2 cup plus 2 tablespoons meringue powder
1 cup water
1 teaspoon vanilla extract
INSTRUCTIONS
1. In the bowl of a stand mixer, fitted with the paddle attachment, place the powdered sugar. Then add the meringue powder.
Mix together, on the lowest setting, for about 15 seconds.
If you like, you may place a clean kitchen towel over the mixer to keep any floating powdered sugar at bay.
2. Add the water and beat, on LOW speed for about a minute. Stop the mixer and scrape down the sides of the bowl, then beat for an additional 6 minutes.

3. Add the vanilla and beat briefly, to combine.

4. The icing should be very thick, and hold peaks.
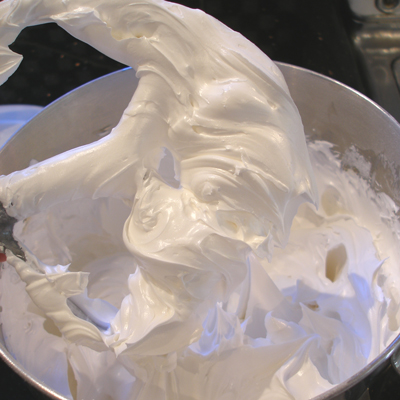
5. It is now time to color the icing, but keep the bowl of icing tightly covered with plastic wrap, while you gather the food color and icing tools, so it doesn't start to harden on the edges of the bowl.
STORAGE
When working with royal icing, it must be covered at all times with plastic wrap, otherwise it will crust or dry out (get a thin crust of hardened sugar) on top and ruin the batch.
For storage, make sure you keep it well wrapped, airtight at room temperature, if made with meringue powder. If made with raw egg whites, store in the refrigerator, well wrapped.
Cover icing with plastic wrap. Secure with a rubber band and then cover with an airtight covering. Stir thoroughly before using. But, sometimes when it's humid, Royal Icing does not store well at all.
If piping with royal icing, when not using, always keep the tip covered.
If the Royal Icing is too stiff after storing, stir gently or rebeat with an electric mixer at low speed. I've noticed that mixing thin icing for several minutes after storing tends to thicken it up, so add more water, if necessary, a drop at a time, to thin it.
STEP IV: THIN AND TINT THE ROYAL ICING
SARAH SAYS: Some cookie decorators make an “outline” thickness and a “fill” thickness when they ice cookies. We like to ice our cookies with ONE consistency of icing, that is somewhere between the two.
It is easier, and it has the added bonus of making a very smooth cookie, with no discernible outline around the cookie's edge.
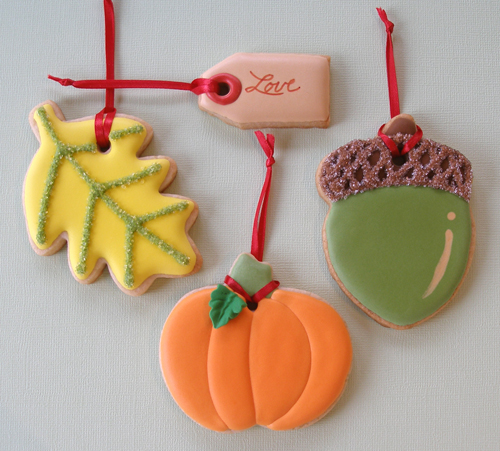
Cookie Color Suggestions:
When icing cookies there is A LOT of waiting involved. You pipe one color, and you have to wait until is sets up a bit, so the subsequent color will not flow into the first color.
It is helpful to create a palette of colors that you can use on several different types of cookies in your set.
Here we are using AmeriColors: brown, yellow, red, orange, green, and dark green.
We made the following 5 to 7 colors: Cream, Deep Orange/Red, Green, Dark Green, Brown, with two additional colors, not shown here: Pale Yellow and Light Orange, but those are optional.
1. For the CREAM COLOR background for the tag cookies:

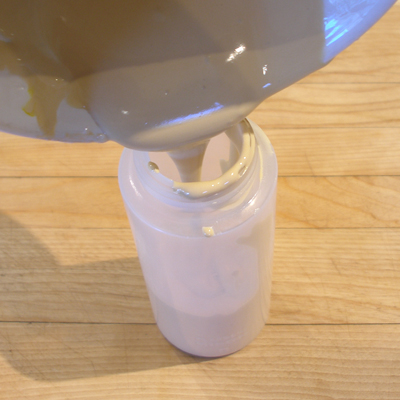
First, thin the icing. Use our new technique with a water spray bottle:
1. Remove about 1 cup of thick royal icing from the bowl and thin it with water. Immediately cover the unused portion of the royal icing and set aside.
2. Using a spray bottle, slowly add water to the thick royal icing, stirring it in gently. Do not stir the icing aggressively, because it is possible to over-work the icing, which tends to make it flaky when dry.
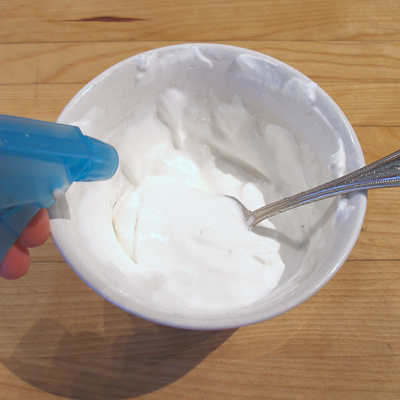
3. The consistency is right when the icing flows smoothly off the spoon, in an unbroken stream.
Then add the suggested color(s), below.

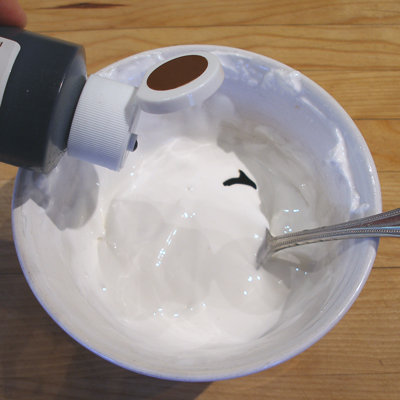
Then tint the icing:
1. To the 1 cup thinned royal icing, add one drop of brown and one drop of yellow gel paste food color, and gently stir it in to create cream color.
2. Pour the icing into a decorating bottle, or a piping bag, fitted with a Wilton #2 piping tip. Cover the piping tip with the tip cover and set aside.
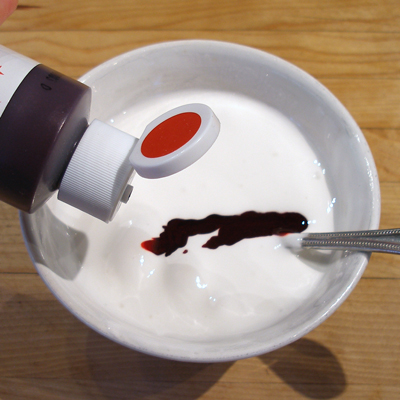
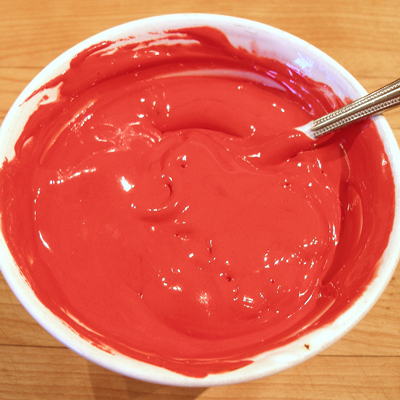
2. For the DEEP ORANGE/RED COLOR on the tag cookies and the pumpkin cookies:

1. Remove about 1 cup of thick royal icing from the bowl and thin it with water. The consistency is right when the icing flows smoothly off the spoon, in an unbroken stream.
Immediately cover the unused portion of the royal icing and set aside.
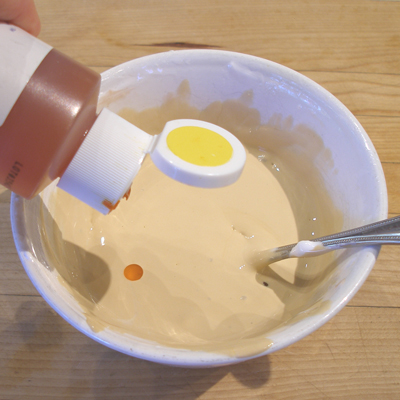
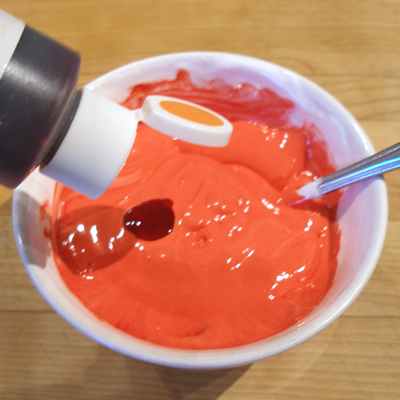
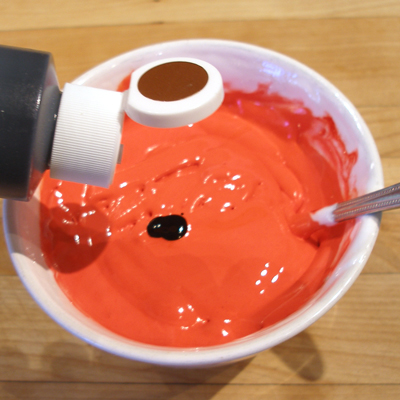
2. To this 1 cup thinned royal icing, add a big squirt of red, about 5 drops of orange and a drop of brown.
You can adjust the color at the end, but we are looking for a deep orange red color.
3. Pour the icing into a squeeze bottle or piping bag fitted with a #2 tip. Cover the piping tip with the tip cover and set aside.
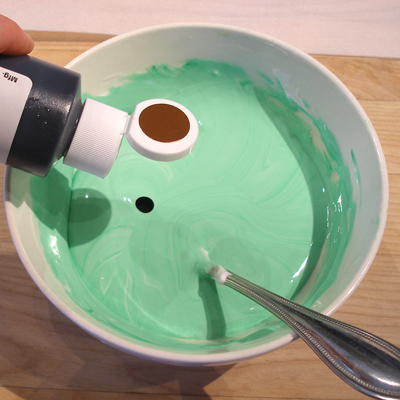
3. For the GREEN COLOR for the pumpkin stems and the acorn cookies:
1. Remove about 1 cup of thick royal icing from the bowl and thin it with water. The consistency is right when the icing flows smoothly off the spoon, in an unbroken stream.
Immediately cover the unused portion of the royal icing and set aside.
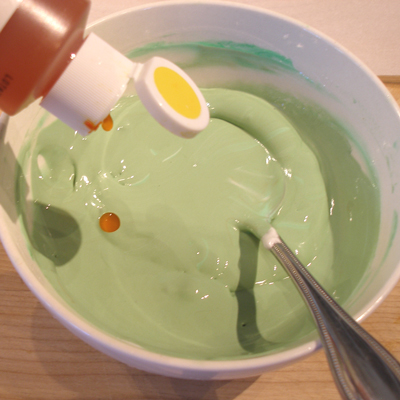
2. Add about 4 drops of green, one drop of brown and one drop of yellow.
You are looking for a light olive green color. You may need to add more to adjust the color.
3. Pour the green icing into a squeeze bottle or a piping bag fitted with a #2 tip. Cover the piping tip with the tip cover and set aside.
4. DARK GREEN COLOR for the thick leaves on the pumpkins:
1. These are made from THICK royal icing: Remove about a 1/4 cup of the thick royal icing from the bowl, and add a few drops of water to slightly thin it. You do not want it to flow, you just want to loosen it up a little.
Immediately cover the unused portion of the royal icing and set aside.
2. Tint the icing dark green.
3. Then put it in a plastic squeeze bottle or piping bag fitted with a small leaf tip. I used a Ateco #67. Cover the piping tip with the tip cover and set aside.
5. For the BROWN COLOR for the top of the acorns:
1. This time, remove about 1/2 cup of thick royal icing from the bowl and thin it with water. The consistency is right when the icing flows smoothly off the spoon, in an unbroken stream.
Immediately cover the unused portion of the royal icing and set aside.
2. Tint it brown, by using about 6-8 drops of brown food coloring.
3. Pour the brown icing into a squeeze bottle or a piping bag fitted with a #2 tip. Cover the piping tip with the tip cover and set aside.
Optional 6. and 7. For the optional PALE YELLOW AND LIGHT ORANGE COLORS for the leaves:
1. To make the pale yellow and light orange, first thin 1 cup each of royal icing. Place in separate bowls.
2. In one bowl, use a few drops of yellow until a pale yellow is obtained. In the other bowl, use a few drops of orange until a light orange is obtained
3. Pour the icing each into its own decorating bottle, or a piping bag, fitted with a Wilton #2 piping tip. Cover the piping tips with the tip covers and set aside.
STEP V: ICE THE COOKIES
Have all of your baked and cooled cookies ready, plus your icing colors! Make sure all of the icing colors in plastic squeeze bottles or in piping bags have their tips covered.
We will be adding in sanding sugar details after the main colors have been piped in this section. If you have a gas oven, with a pilot light, you can place the cookies on a baking sheet and set the sheet inside the oven. Mind you the oven should be OFF, but the warmth from the pilot light will help hasten the drying of the royal icing.
Before adding the sanding sugar details, the cookies need to be completely dry. It is best to let them dry overnight, and then add the details the next morning, Step VI.
– FOR THE TAG COOKIES:
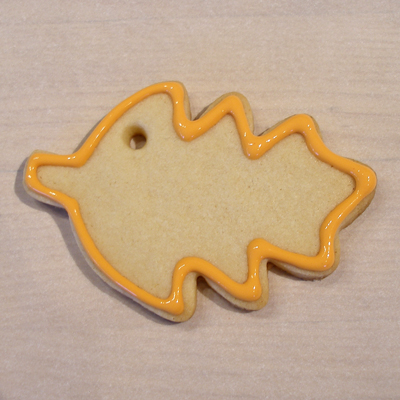
1. To ice the tag cookies, pipe the orange-red circles around the holes on each of the cookies.
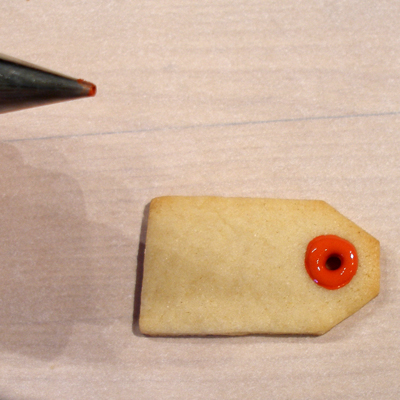
2. Set them aside so the orange-red icing can set up for about 10 to 20 minutes. They do not have to be completely dry, but the surface should be crusted.
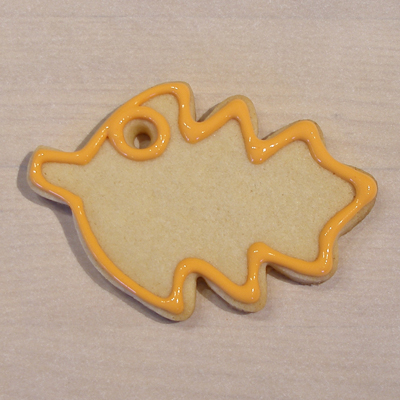
3. With the cream color icing, pipe around the orange-red color, then around the edge of the cookie.
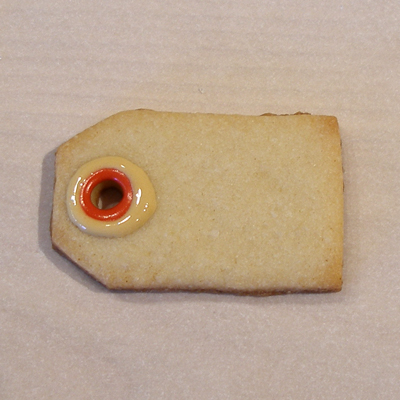
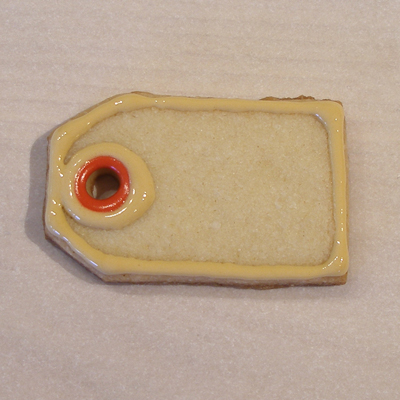
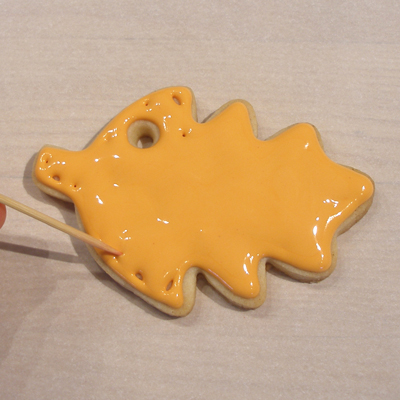
4. Fill in the center of the cookie, then use the toothpick to smooth the surface.
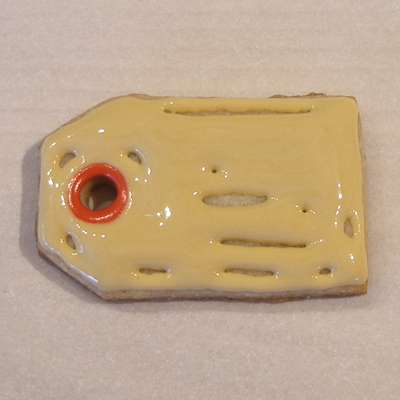
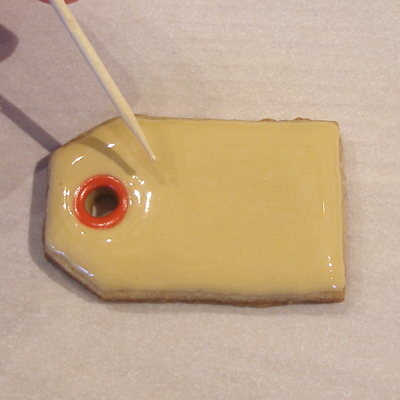
5. Repeat on all the tag cookies. Set aside so the icing can dry overnight.
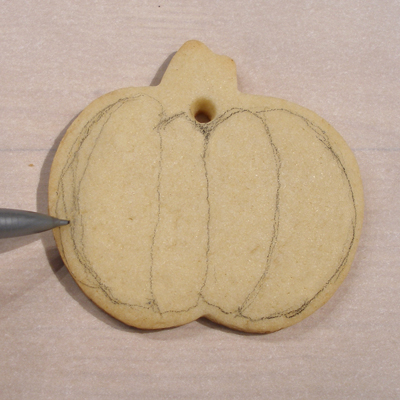
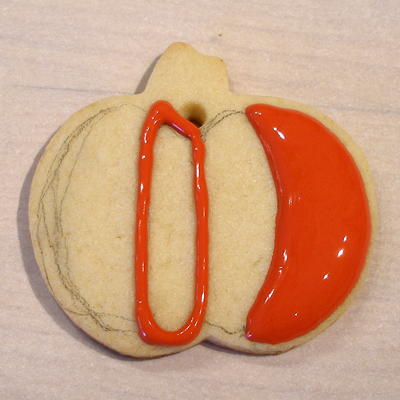
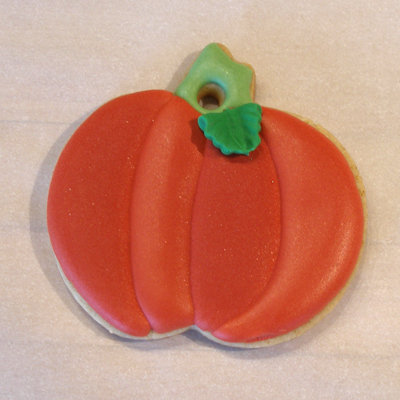
– FOR THE PUMPKIN COOKIES:
1. Use the deep orange-red icing that you used on the tags to ice the pumpkins.
2. Pencil graphite is non-toxic, so you can use it to plan out the icing on your cookie.
Usually, you will only have to do this once, and can do it free-hand on the subsequent cookies, using the first cookie as a “model”.
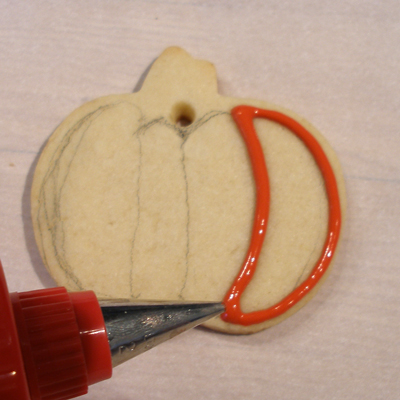
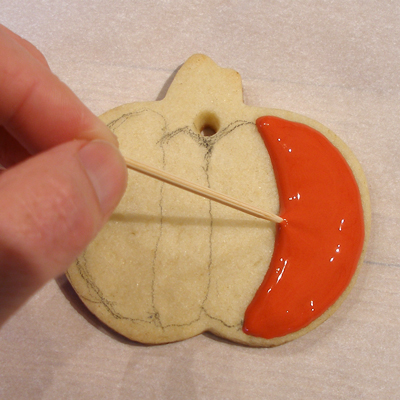
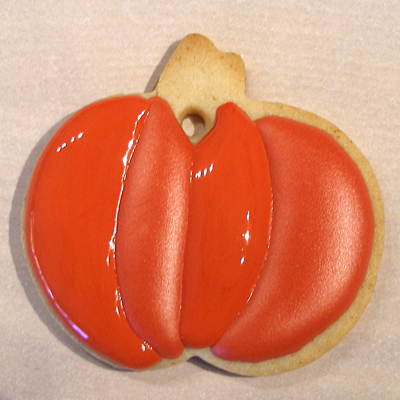
3. Pipe an outline around the far right section of the pumpkin, then fill it in with icing.
Use a toothpick to fill in all the spaces.
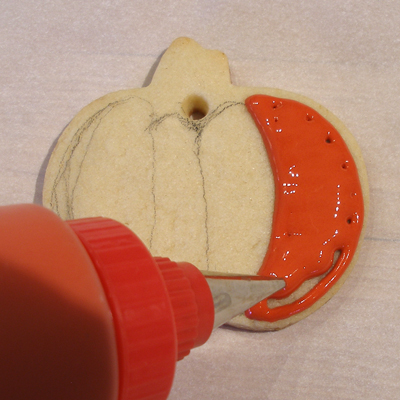
4. Repeat these steps with the section that is second from the left.
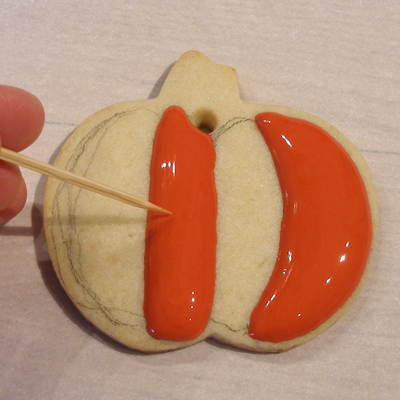
5. Do this on all the pumpkin cookies, then set them aside for at least 20 minutes so the icing can set-up. They do not have to be completely dry, but the surface should be crusted.
Icing the pumpkins like this gives the finished cookie a nice dimensional look when dry.
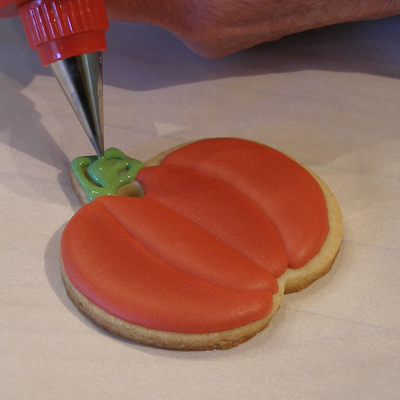
6. Pipe the other two sections of the pumpkin with deep orange/red.
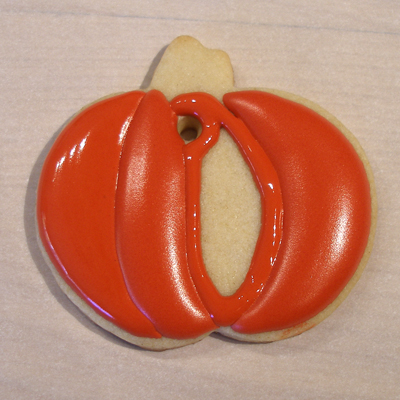
7. Set the cookies aside for 20 minutes so the icing can set up. They do not have to be completely dry, but the surface should be crusted.
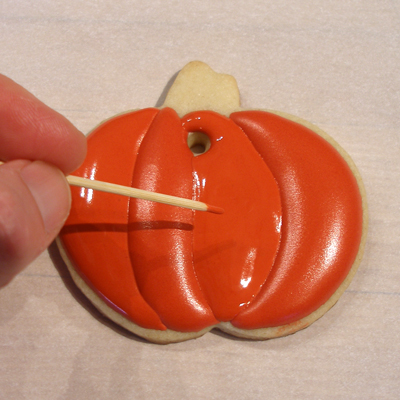
NOTE: If you pipe the green stems now, the colors may blend into each other.
8. When the orange/red frosting is dry, pipe the stems of the pumpkin cookies.
Outline first, then fill in, being sure to avoid the hanging hole.
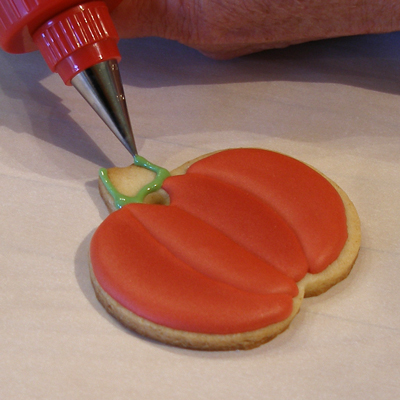

9. Repeat on all the pumpkin cookies. Set aside so the icing can dry overnight.
Make the dark green leaves for the pumpkins:
Make 7 to 12 dark green leaves. You will need 7, but make more than you need, because some will break and you can save the extra unbroken leaves to use on other projects. When dry, they last for many months, stored at room temperature in an airtight container!
1. With the tick Dark Green Icing, pipe the leaves on a piece of parchment paper, using a slight up and down “wiggle”, to make a ridged leaf.
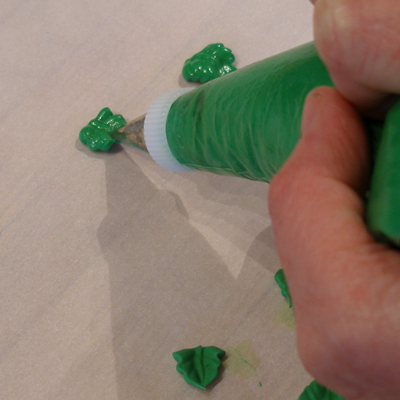
2. When you are nearing the end of the leaf, ease off on the pressure, and pull the bag away, leaving a pointed tip.
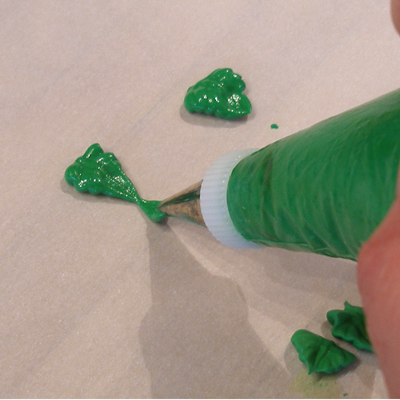
3. Let these leaves dry overnight at room temperature. Carefully remove with an icing spatula or pancake turner.
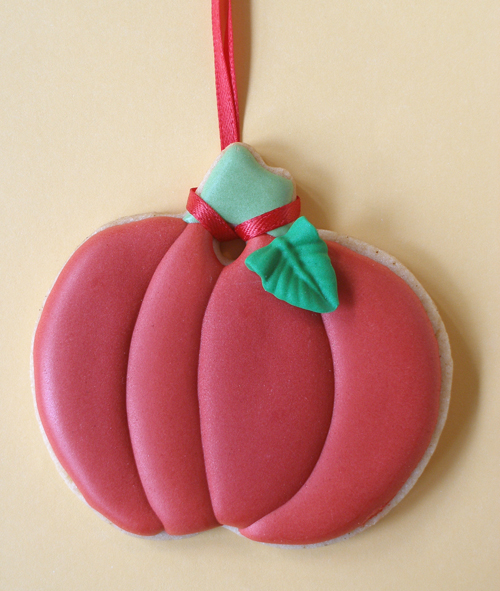
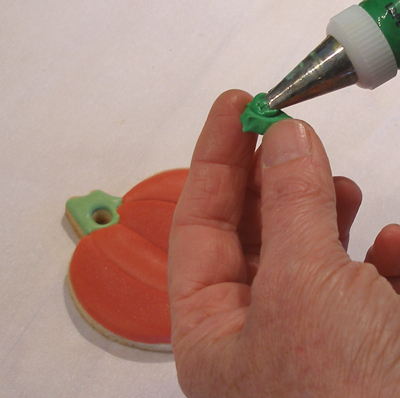
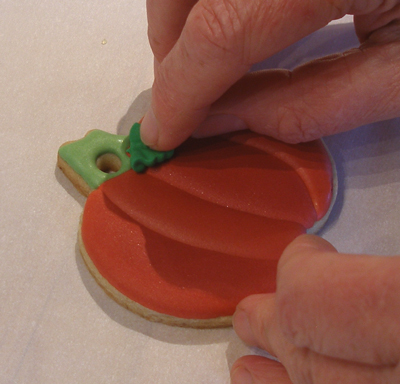
Finish the Pumpkin Cookies:
The next morning, your cookies should be totally dry.
1. Add the leaf by piping a small dot of green on the back of a dried leaf and gently pressing the leaf in place.
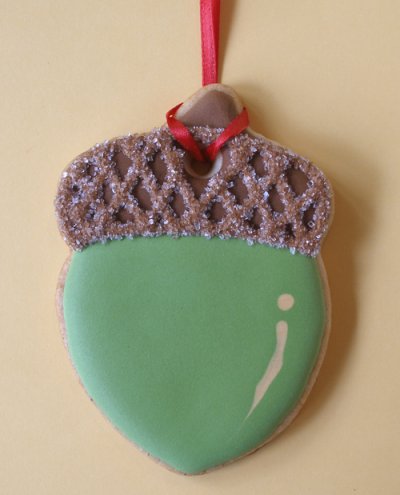
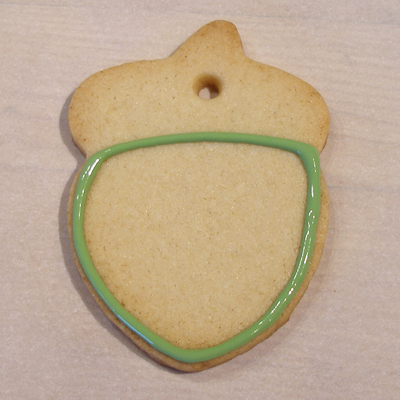
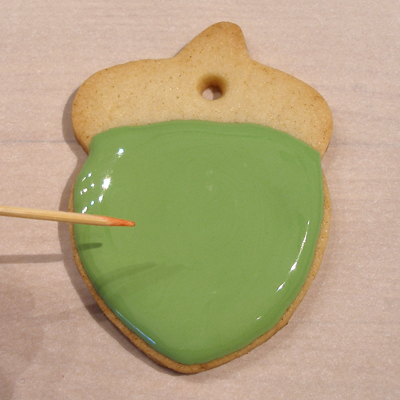
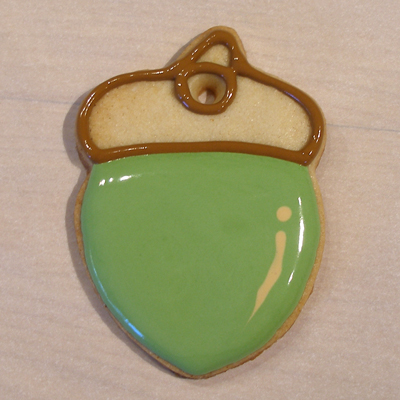
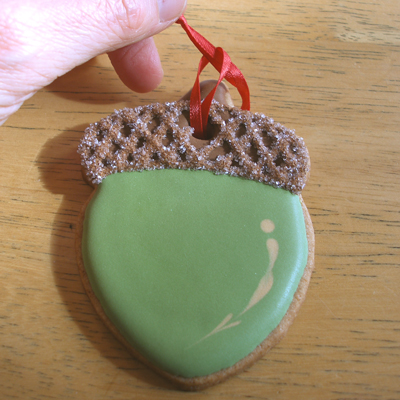
– FOR THE ACORN COOKIES:
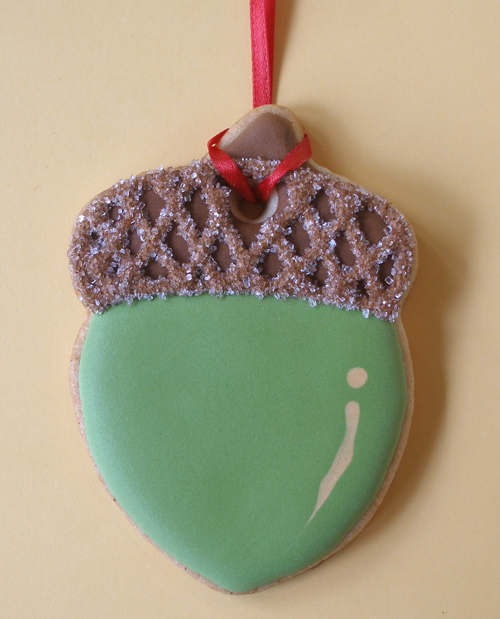
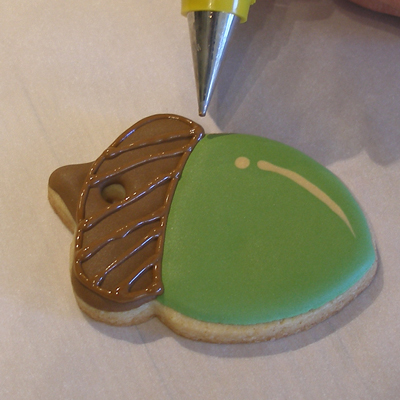
1. Outline the bottom of the acorn in green icing and fill it in. You may gently tap the cookie to level the icing.
2. Add a dot and a small line of the cream icing to one side of the acorn, to make a highlight. Use a toothpick to help pull down the line, following the curve of the cookie.
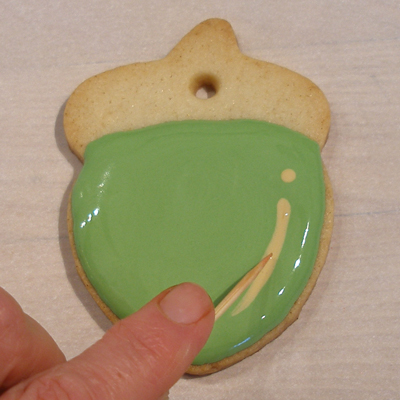
3. Repeat the above steps with all of the acorn cookies, then set them aside for 20 minutes to set. They do not have to be completely dry, but the surface should be crusted.
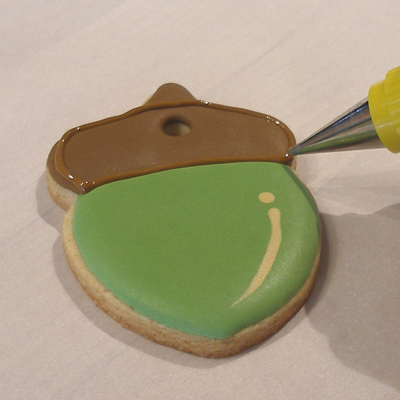
4. With the brown icing, pipe around the hanging hole and outline the top of the cookie, then fill it in.
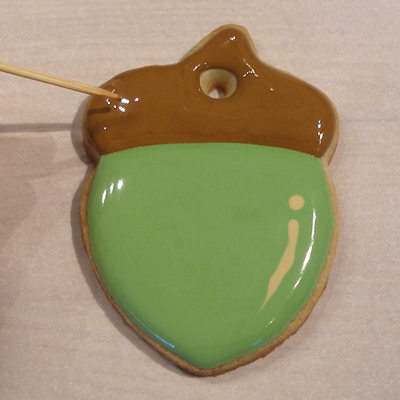
5. Set cookies aside to dry overnight.
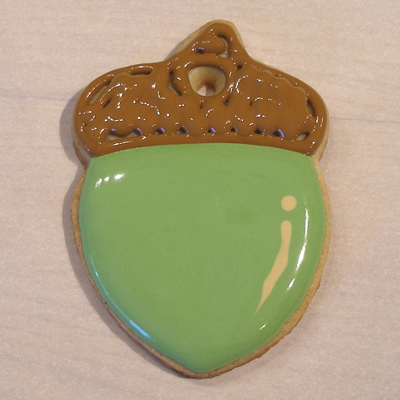
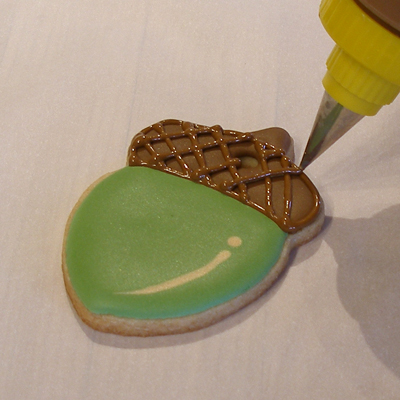
Finish the Acorn Cookies:
1. Take the #2 piping tip off the brown icing bottle and replace it with a #1 tip. Gently stir icing with a chop stick.
Pipe around the outside of the acorn cap then pipe diagonal lines in both directions, creating a cross-hatch pattern.
2. Liberally sprinkle the sanding sugar over the wet icing, then tip the cookie to remove the excess.
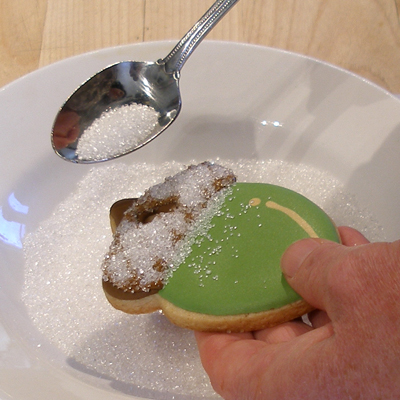

3. Set cookies aside to dry.
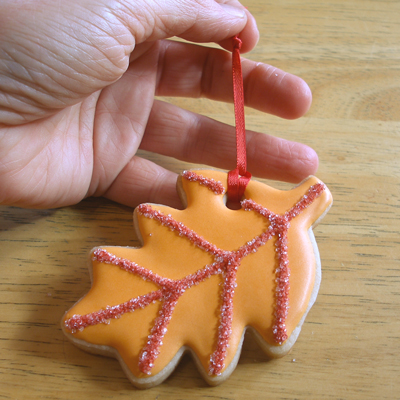
– FOR THE MEDIUM AND LARGE LEAF COOKIES:
We used the same green and orange-red colors, that we used to ice the acorns and pumpkins, to ice some of the leaves.
We also made a two additional icing colors – pale yellow and a light orange – for our tree!
1. Pipe around the hanging hole and the outline of the cookie, then fill in, just as you did for the other cookies.
You may gently tap the cookies to level the icing.
2. Repeat with the rest of the leaf cookies. Set the cookies aside overnight to dry completely.
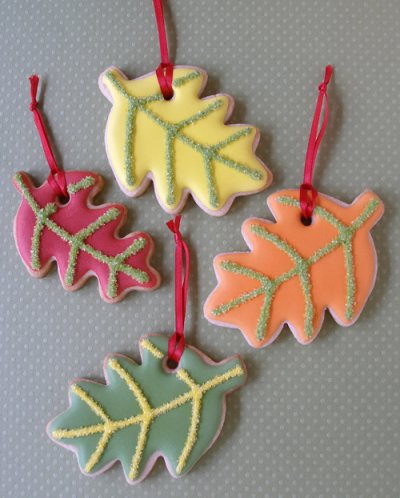
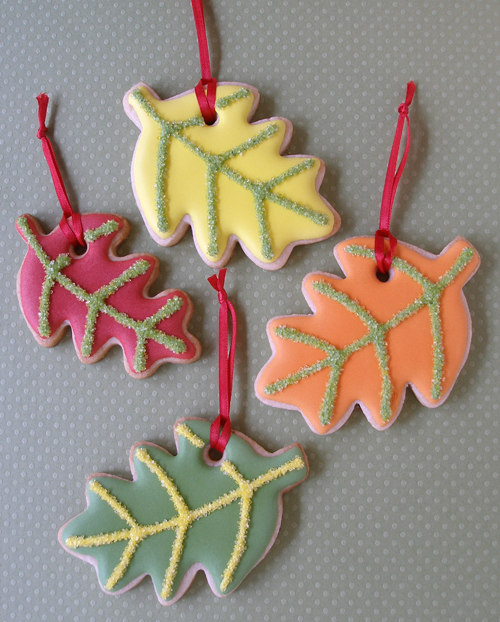
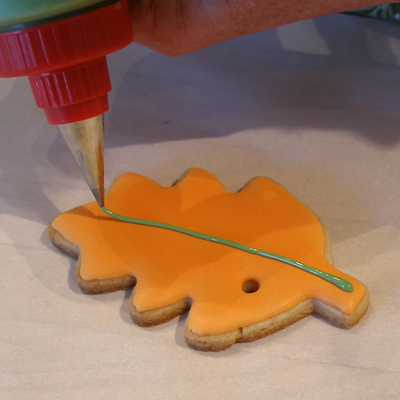
Finish the Leaf Cookies:
1. Choose a contrasting color, then take the #2 piping tip off the icing bottle and replace it with a #1 tip. Gently stir icing with a chop stick.
2. Pipe the center vein on the leaf, then pipe the side veins.
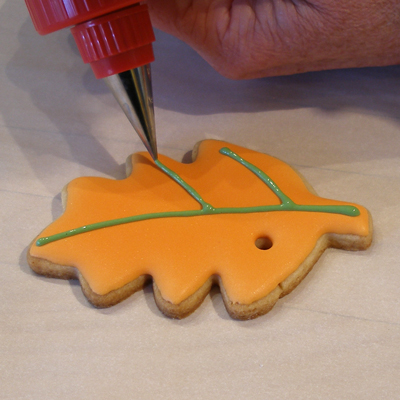
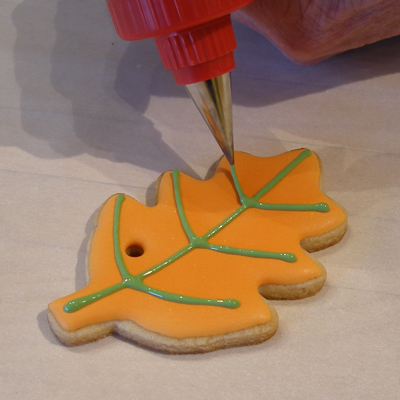
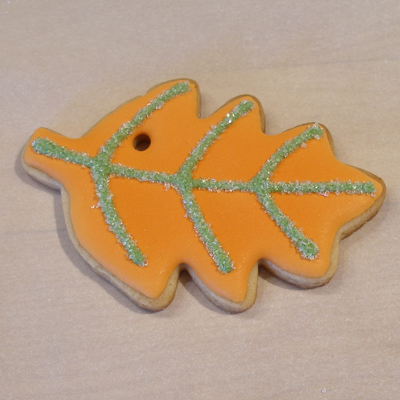
3. Liberally sprinkle the sanding sugar over the wet icing, then tip the cookie to remove the excess.

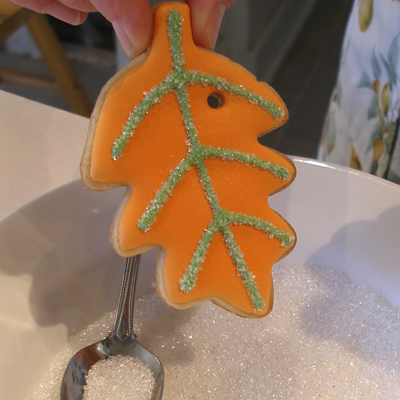
4. Set cookies aside to dry.
STEP VI: ASSEMBLE THE COOKIE TREE. ADD THE HANGING RED SATIN RIBBONS. ARRANGE THE COOKIES ON THE TREE
1. Simply put the sticks in the vase. Make sure the vase is sturdy and will not tip over.
2. After the detail icing on the cookies is COMPLETELY dry, you can remove any excess sanding sugar with a soft brush.
Do not attempt to add the hanging ribbons until the cookies are completely dry, or you will be sorry.
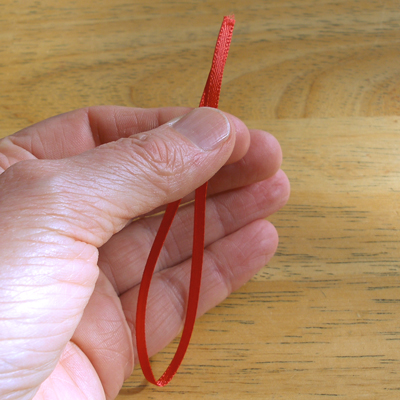
3. To hang the tag and leaf cookies, cut 8-inch lengths of thin satin ribbon. The pumpkin and acorn cookies require 9-inch lengths, because of the stems.
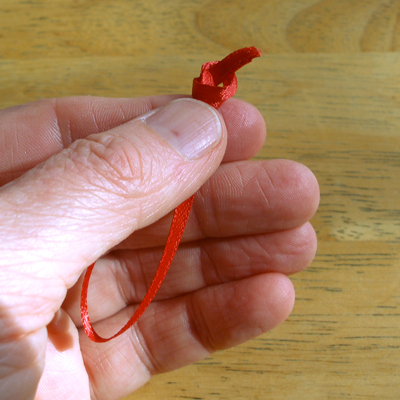
4. Fold the ribbon in half and make a knot in the open end.
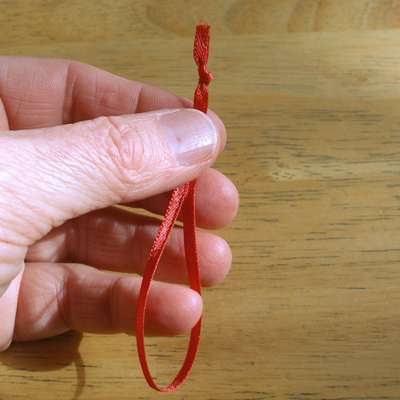
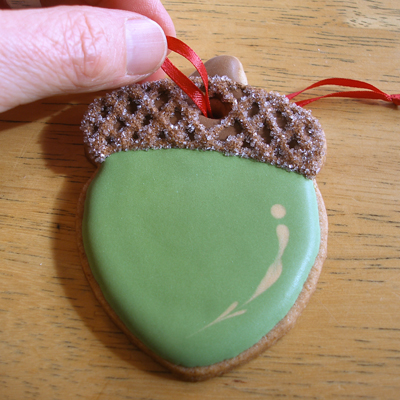
5. Push the looped end through the hole in the cookie, then pass the knotted end through the loop.

SERVE
1. Hang your cookies on the branches. Place the Thankful Cookie Tree in a prominent place for your Thanksgiving celebration.
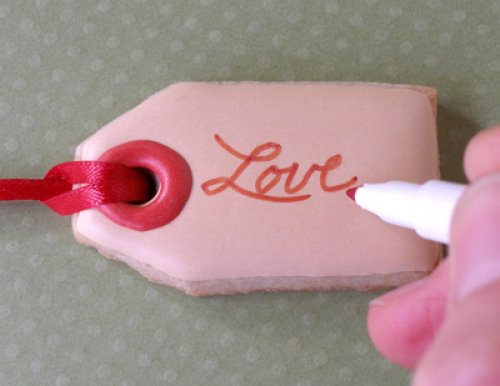
2. Arrange the finished tag cookies on a decorative plate, then, as your Thanksgiving guests arrive, have them share the things they are thankful for, writing them on the tag cookies with a red or any colored edible ink marker.
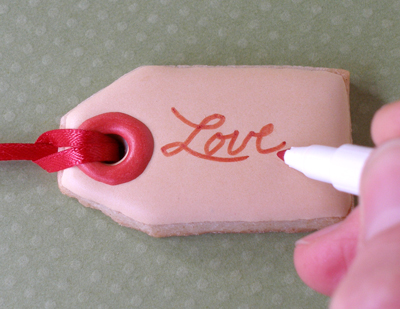
3. Have them add their tags to the decorated centerpiece.
4. After the meal, invite your guests to choose the cookies they wish to have for dessert. If you are hosting a small dinner party, there will be enough cookies to send them home with cookie goodie bags too!
STORAGE
The hanging cookies will keep for a few days at room temperature without having to cover them. Wrapped cookies will stay at room temperature for abut a week.
While it is not ideal to freeze iced sugar cookies, it is OK to do so, if you store them for short periods of time, then unwrap them, put them, in a single layer, on baking sheets, and let them come to room temperature that way.
Happy Thanksgiving to all of our Baking Friends!