
Variations: Chocolate Strawberries and Cream Roulade or Jelly Roll Cake; Gluten-Free Strawberries and Cream Roulade or Jelly Roll Cake; Strawberry Daiquiri Roulade or Jelly Roll Cake; Mojito Roulade or Jelly Roll Cake
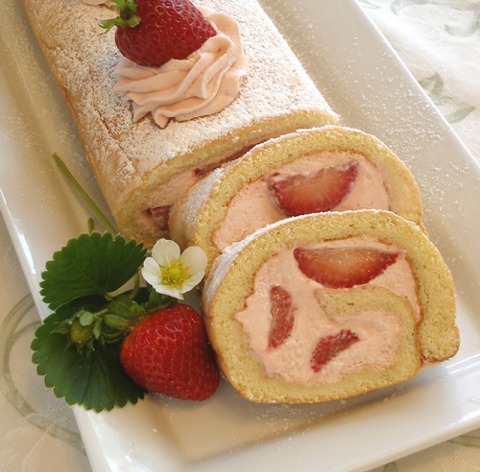
This recipe tastes just like a light and fluffy strawberry shortcake! The beauty of this recipe is that you can fill it with raspberries, blueberries, or blackberries, instead, and change the flavor of the whipped cream to match. For a variation, use our Chocolate Cake Roll or Biscuit Roulade for the cake.
CAKE RECIPE HELP
INGREDIENTS
The cake can be baked and/or filled on the day of or one day before serving. It needs to chill, as soon as it is filled, for 2 – 4 hours or overnight in the fridge. I won't push it any further than that.
To make this cake, you will need the following:
1 recipe Vanilla Scented Biscuit Roulade Cake by Sarah Phillips (recipe follows) or baked 1 or 2 days before, stored at room temperature, or frozen and thawed
Make the day before, perferably the day of:
1 recipe Strawberries & Cream Filling by Sarah Phillips and Kelly CA (recipe follows) or 1 day before; re-fluff with large balloon whisk; do not rebeat
1 pound fresh strawberries
STEP I: MAKE THE VANILLA SCENTED BISCUIT ROULADE (JELLY ROLL) CAKE
VANILLA SCENTED BISCUIT ROULADE CAKE / Recipe alone
INGREDIENTS
1/3 cup sifted bleached cake flour; do not use self-rising (SARAH SAYS: to measure flour for this recipe, sift cake flour into measuring cup and level to top*)
3 tablespoons cornstarch
1/4 teaspoon salt
2 large eggs
2 large eggs, separated
1 large egg yolk
1/2 cup plus 1 tablespoon sugar or superfine sugar
1 tablespoon pure vanilla extract
1/4 teaspoon cream of tartar
*NOTES:
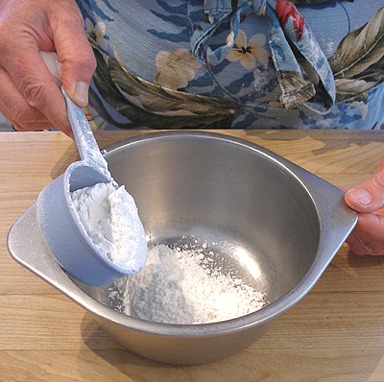
How to measure 1/3 cup sifted bleached cake flour:
1. Place a piece of waxed paper on the counter with the measuring cup on top.
2. Sift the flour into the 1/3 cup measuring cup.
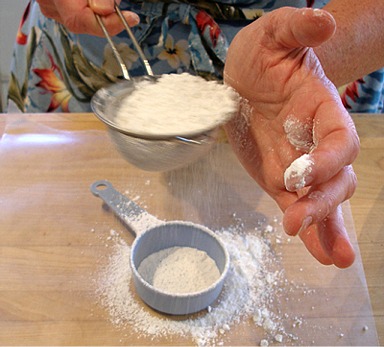
3. Level off the flour evenly to the rim of the measuring cup with a knife.
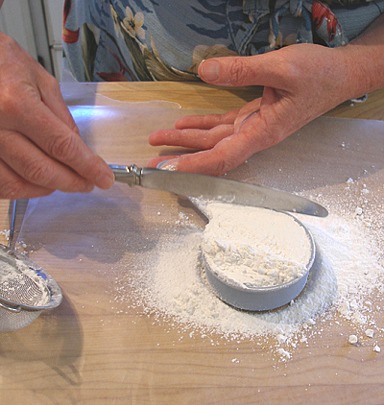
4. Place excess flour back into the cake flour container.
SUGGESTED EQUIPMENT:
Two 17 x 12-inch jelly-roll pans
One large, clean smooth kitchen towel. Do not use terry cloth or anything else with texture.
INSTRUCTIONS
1. Prepare the baking pan and preheat the oven:
A. Position the oven rack in the lower third of the oven. Preheat the oven to 450 degrees F.
The oven must be VERY hot.
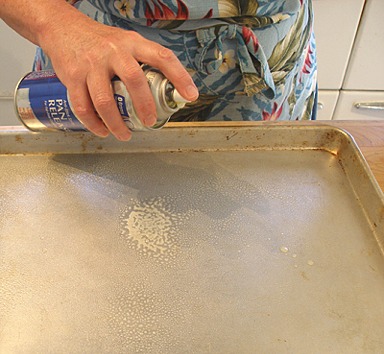
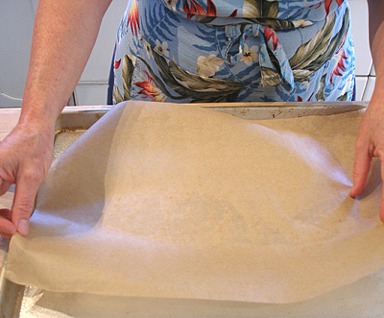
B. Prepare, one 17 x 12-inch jelly-roll pan: grease and line with parchment paper or a nonstick liner.
2. Mix the flour, cornstarch and salt:
A. In a small bowl, place the cake flour.
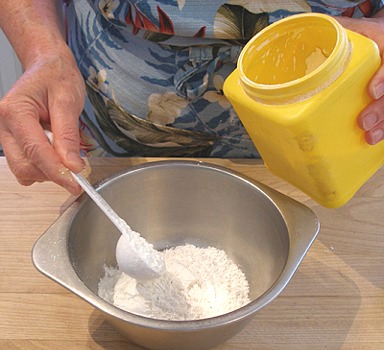
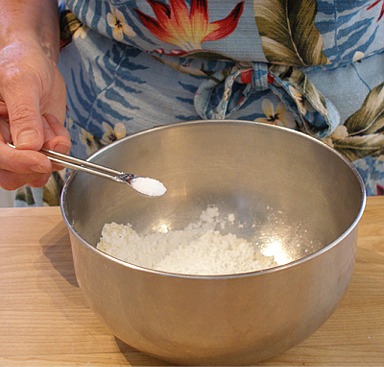
B. Add the cornstarch and salt to the flour and stir to combine. Set aside.
3. Beat the eggs and yolks together with sugar for a total of 5 minutes or until the mixture becomes thick, fluffy, and triples in volume:
SARAH SAYS: This is a VERY important step.
A. Fit the stand mixer with a paddle attachment. Do NOT use a whisk attachment.
Place 2 large eggs and 3 yolks (2 yolks from 2 large eggs, separated, plus 1 large yolk) in a mixing bowl of a stand mixer.
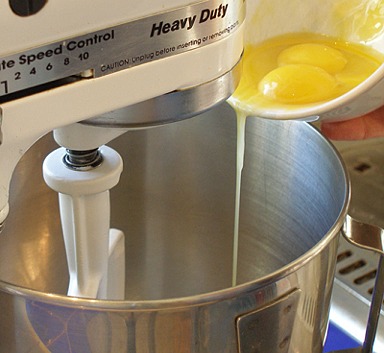
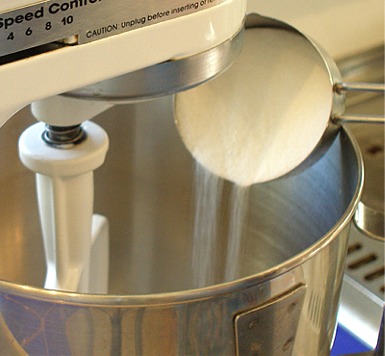
B. Add the 1/2 cup sugar.
SARAH SAYS: Do not let the sugar sit on top of unbeaten egg yolks for any length of time.
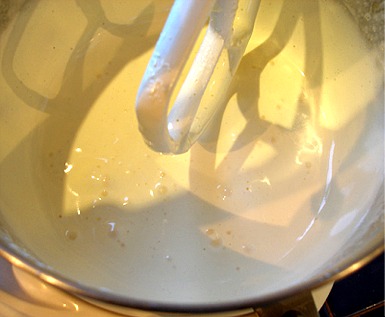
C. Beat the egg mixture on high speed for a total of 5 minutes or until it becomes thick, fluffy, and triples in volume:
SARAH SAYS: If your egg mixture does NOT achieve this, make a sweet omelet with it, and start again with new!
Here's how:
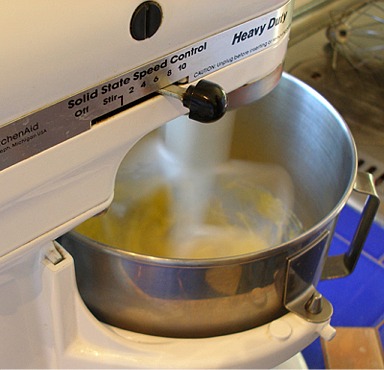
a. Start the mixer on low for a few seconds and then adjust it to high speed. Beat for one minute.
The mixture will start to look bubbly.
b. Stop the mixer. Scrape the side and bottom of the bowl without squashing the egg foam.
Be gentle.
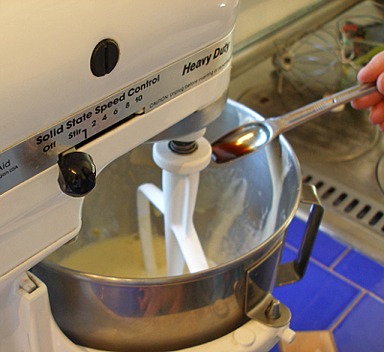
c. Add the vanilla to the beaten egg mixture.
d. Resume beating on high for 3 or 4 additional minutes, or until thick, fluffy, and triples in volume.
You will have beaten the egg mixture for a total of 5 minutes.
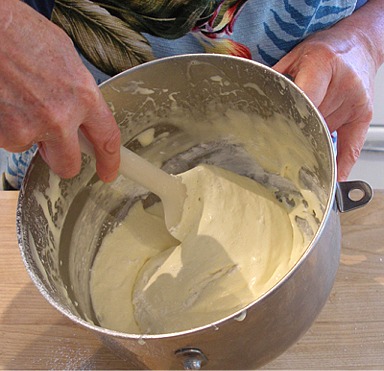
4. Immediately fold the flour into the fluffy egg mixture:
SARAH SAYS: You don't want to smash any of the beaten air bubbles in the egg mixture, so be gentle, but make sure you fold all of the flour into it.
This is a tricky part; you do not want to see any streaks of flour showing, so you have to be gentle but bold at the same time!
And, don't let the egg mixture sit while you talk on the phone or run out in the yard to save your kid who just fell off the swing set; you need to work with it right away.
(Ok! You had better save your kid….Pop it in the fridge if you do….Refluff with a large balloon whisk; do not use the mixer.)
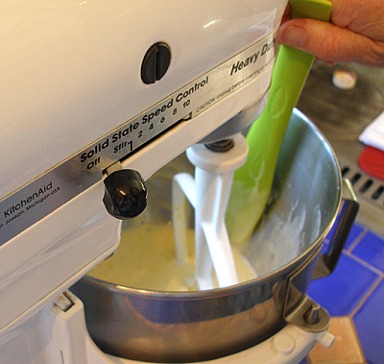
A. Sift 1/2 the measured flour over the egg mixture.
SARAH SAYS: Make sure it is ONLY HALF of the flour!
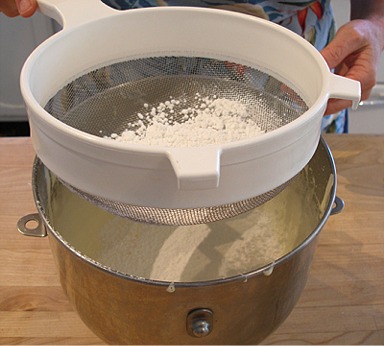
B. Fold it in gently but rapidly with a large rubber spatula until the flour has disappeared.
Make sure you scrape the side and bottom of the bowl as you do.
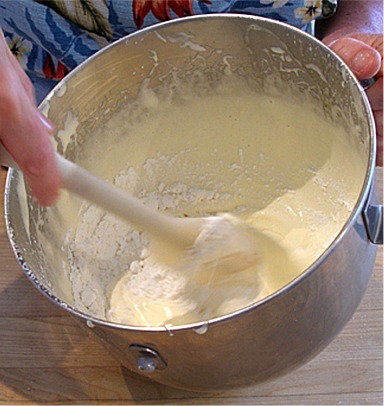
C. Sift the remaining half of the flour over the egg mixture and fold it in until the flour has disappeared.
D. Set aside just long enough to beat the egg whites.
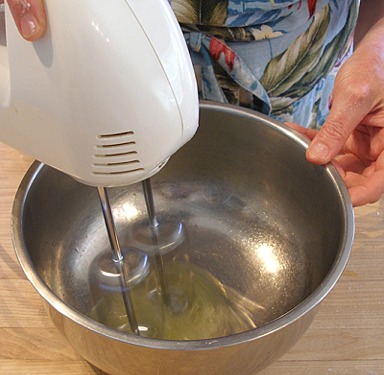
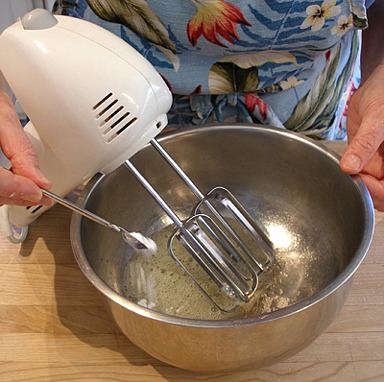
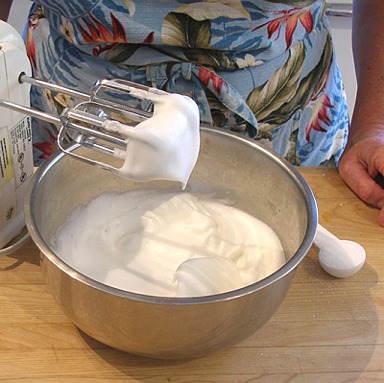
5. Immediately beat the egg whites until stiff peaks form:
SARAH SAYS: I recommend using a hand-held electric mixer or a wire whisk for this step since you will be beating 2 egg whites and you want the beaters to fully reach the whites.
A. In a medium size deep bowl, with straight sides, beat the egg whites (2 large egg whites from 2 large eggs, separated) on low until foamy.
B. Add the cream of tartar.
Increase the mixer speed to high and beat until soft peaks form when the beater is raised.
C. Add the remaining 1 tablespoon sugar.
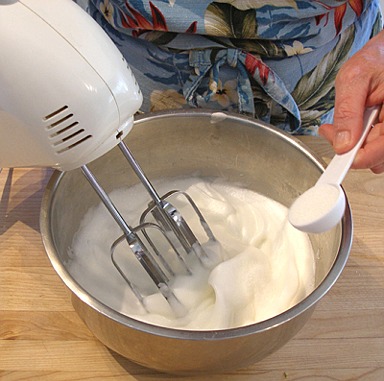
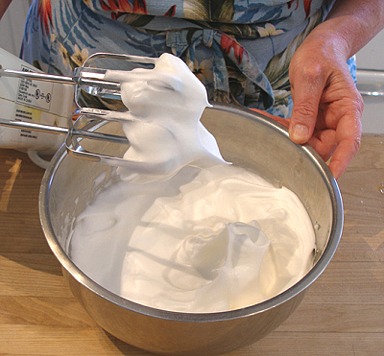
D. Continue to beat on high until stiff peaks form when the beater is raised.
6. Right after beating, fold the egg whites in the egg/flour mixture, until all the whites have been incorporated:
A. Using a large rubber spatula, add 1/3 of whites to the egg/flour mixture and fold it in.
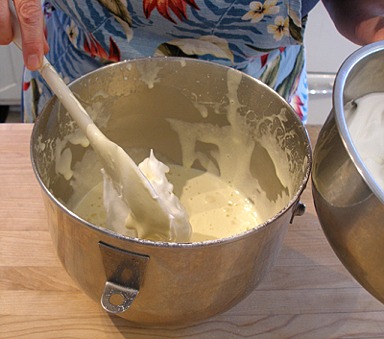
B. Add in the remaining egg whites and fold in, until all are incorporated.
SARAH SAYS: No smashing the air bubbles!

C. Not done, yet! You do not want to see any egg white streaks.
7. Fill the prepared pan with batter and bake the cake for 7 minutes or until golden brown:
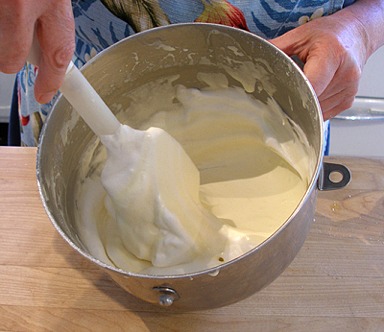
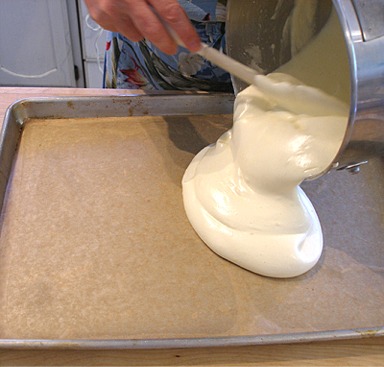
A. Carefully scoop the batter into the prepared sheet pan.
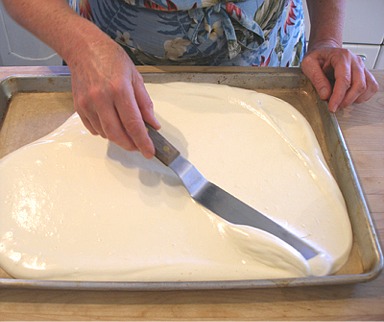
B. Use an angled metal spatula to spread the batter in the pan and level it.
Do NOT press down and smash any air bubbles in the batter.
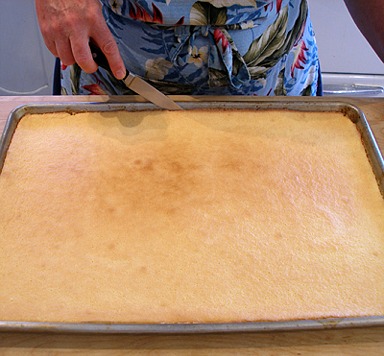
C. Immediately bake the cake for 7 minutes, or until golden brown.
A wooden cake tester, inserted in a few places, should come out clean.
The cake should be springy to the touch. You should hear a few air bubbles popping.
D. When the cake is done baking, immediately loosen the edges with a small metal spatula or sharp knife.
Make sure you go all around the cake. DO NOT SKIP THIS STEP!
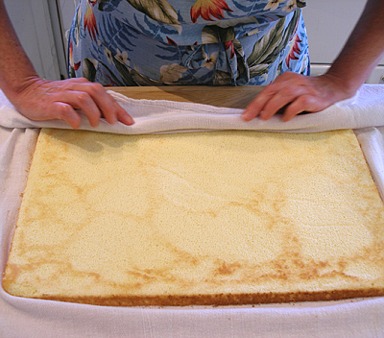
8. Roll the unfilled cake with a smooth kitchen towel, as soon as it comes from the oven while still hot. Then, let cool on a wire cake rack:
A. Unmold the cake:
a. Place a smooth kitchen towel on top of the hot, loosened cake.

b. Place another sheet pan on top of the towel, flat side down.
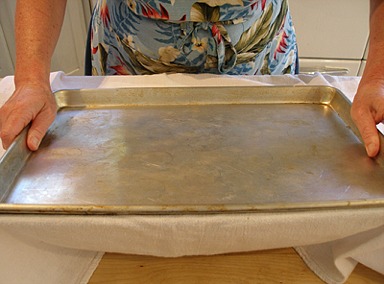
c. Flip both pans over at the same time, and the cake will onmold onto the smooth kitchen towel.
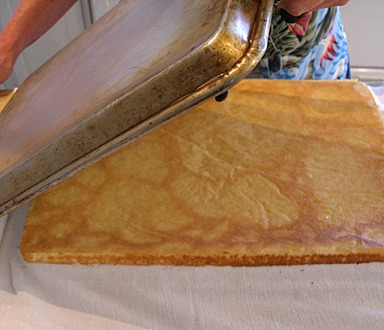
d. Remove the top cake pan and set aside.
While holding one end of the towel, slide the bottom sheet pan out from under both the towel and cake, keeping the cake on the towel.
e. Starting at one corner, carefully peel off the parchment paper from the bottom of the cake, which is now facing up.
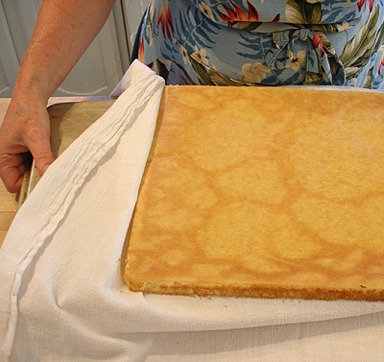
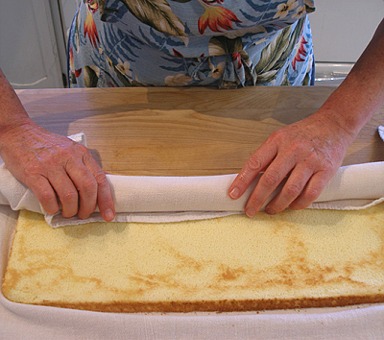
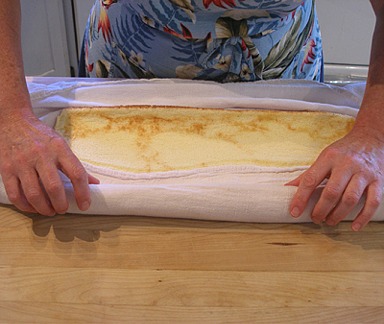
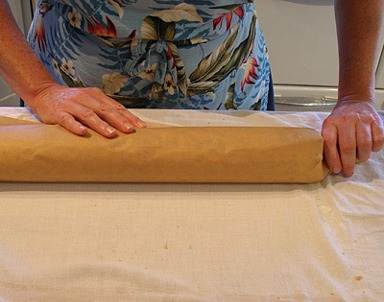
B. Roll the cake up tightly, towel and all:
SARAH SAYS: Start rolling at the long end.
Question: What is the long end? I am so confused?
Answer: Here's how I think of it. When you look at a rug on the floor, the narrow ends are usually the ones with the fringe on it. The long ends are the sides of the rug.
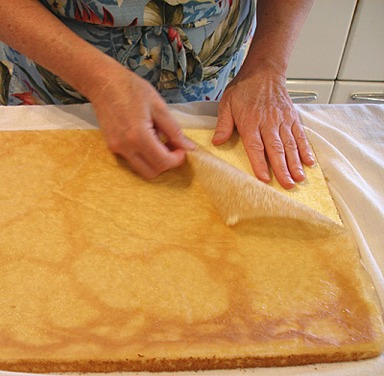
a. With the cake still on the kitchen towel, fold the edge of the towel onto the top of the cake. Gently begin rolling the cake under.
b. Once you get the initial edge of the cake rolled, continue rolling to the other edge of the towel.
Make sure you keep even pressure and roll the cake tightly, but do not force it or press on the cake in any one place.
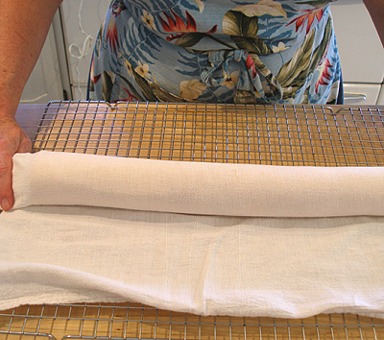
c. Cool the rolled cake, as is, on a wire cake rack.
STORAGE
Do NOT refrigerate the unfilled cake.
It can be stored at room temperature, rolled as is, and wrapped in plastic wrap for day or two.
Freeze as is, wrapped in plastic, for a month or more. Thaw at room temperature
STEP II: MAKE THE STRAWBERRIES AND CREAM FILLING
STRAWBERRIES AND CREAM FILLING / Recipe alone
Makes 4 cups, enough to fill the cake and some left over for garnish
INGREDIENTS
2 tablespoons cold water
1 teaspoon unflavored gelatin
2 cups (1 pint) chilled whipping cream
1 teaspoon vanilla extract
2 tablespoons sugar
1/2 cup strawberry jelly, heated and strained; or a flavor of your choosing
1-2 drops red gel food coloring (optional)
1 pound fresh strawberries
INSTRUCTIONS
1. Place stand mixer bowl and whisk in the refrigerator to chill.
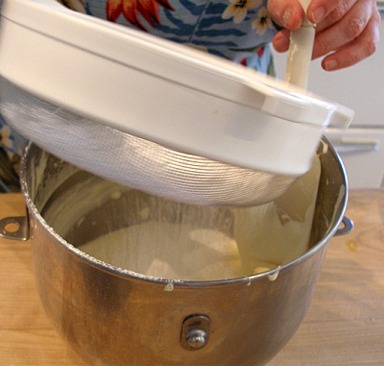
2. Prepare the strawberry jelly:
A. Place strawberry jelly in a bowl and microwave for about 30 seconds, or until it is melted.
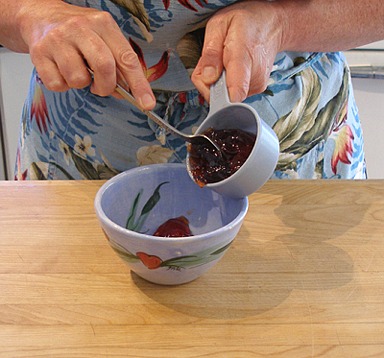
B. Strain melted jelly, using a fine mesh sieve, and set aside to cool to room temperature.

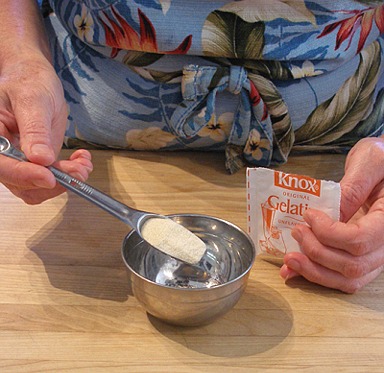
3. Prepare the gelatin:
A. Place the dry gelatin in a small bowl. Pour cold water over it. Let soak for 5 minutes.

B. Dissolve by placing it in a container over a small pot of simmering water. Set aside to let cool.
NOTE: Alternatively, you may dissolve the gelatin by heating it very briefly in the microwave, under low power. Do not let it overheat.
4. Prepare the whipped cream:
A. Using an electric mixer, fitted with a whisk attachment, beat cream on high speed in its pre-chilled mixer bowl.
Place the empty bowl in the freezer to quickly chill.

B. Just before it becomes soft and billowy, slowly add the sugar and vanilla to the whipped cream at the side of the bowl.
Continue to whip on high as you do.


C. Whip the cream until barely stiff. Stop the mixer.
D. Add melted and cooled gelatin to the cream mixture.
KELLY SAYS: I find there is less tendency for the cooled gelatin to for blobs in the finished whipped cream using my method:
a. First, take about 2 tablespoons of the cream from the mixer bowl.
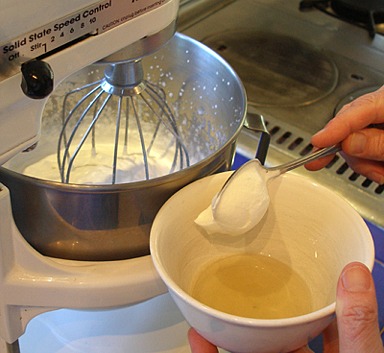
b. Stir it into the cooled gelatin.
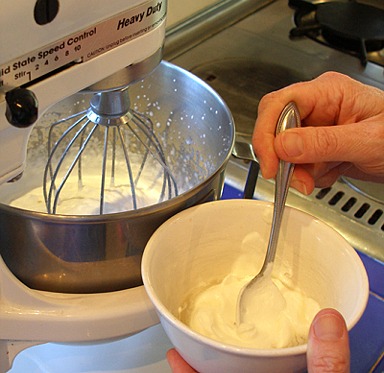
c. Return the cream/ gelatin mixture back into the main mixing bowl with the rest of the semi-whipped cream.
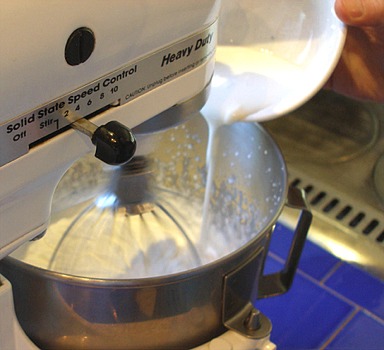
E. Continue to whip the cream on high until soft peaks form.
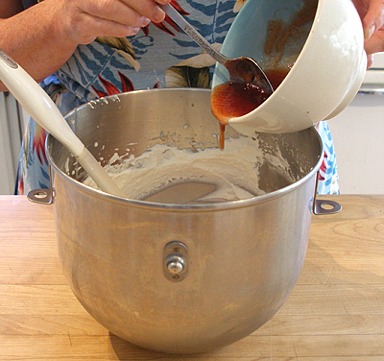
5. Fold in the cooled strawberry jelly, add the food coloring and refrigerate:
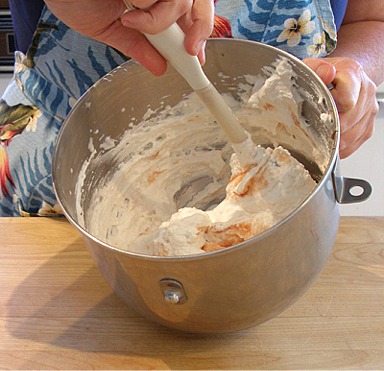
A. Fold in the cooled strawberry jelly.
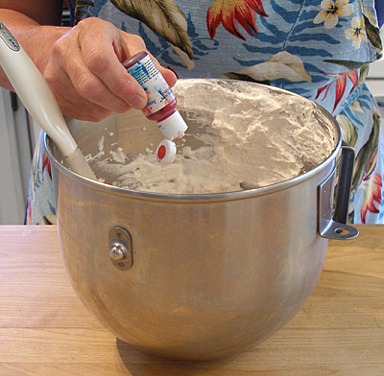
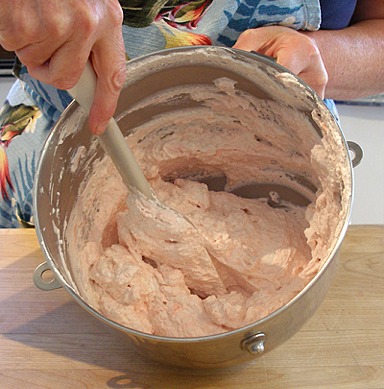
B. To make the cream a nice pink color, add 1-2 drops red gel food coloring and fold till color is uniform.
C. Cover and place the bowl in refrigerator while you prepare the cake to be filled.
STORAGE
After the strawberry jelly has been folded in, keep refrigerated. Re-fluff with a large balloon wire whisk; do not rebeat.
Can be made the night before filling the cake. Best made the day of, though because filled cake has to chill for 2 to 4 hours, preferably overnight.
STEP III: ASSEMBLE THE ROULADE (JELLY ROLL) CAKE
1. Prepare the strawberries:
A. Wash strawberries and set aside 5 or 6 of the most perfect strawberries for garnishing the finished cake.
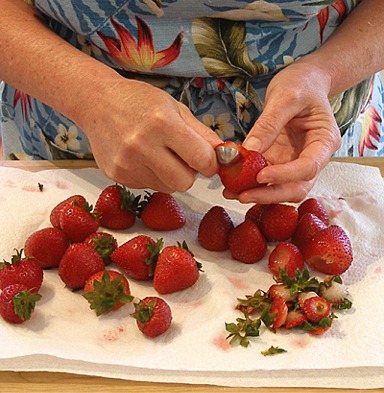
B. Remove hulls and slice the rest of the strawberries in half, lengthwise. Set cut strawberries on a paper towel, to absorb excess moisture.
NOTE: I find that a metal 1/4 teaspoon measure is a perfect tool to remove the strawberry hulls.

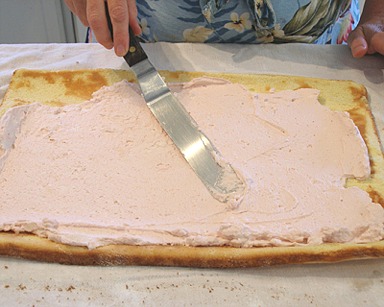
2. Spread the cake with the Strawberries & Cream Filling and Fill with Strawberries.
A. Unroll biscuit roulade.
B. Using a large offset metal icing spatula, evenly spread about 3/4 of the STRAWBERRIES & CREAM FILLING, from STEP II, above, to the edges of the cake.
Set about 1/4 of filling aside for a garnish on top.
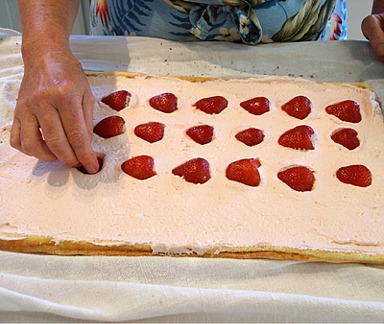
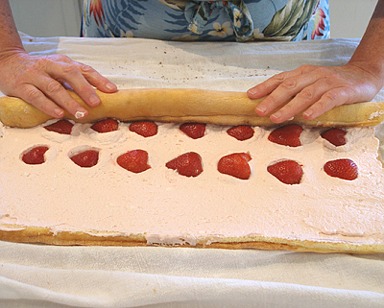
C. Place strawberries on the cream in 3 rows, starting about 1-inch from the nearest edge. Fill 2/3 of the cake and leave the farthest 1/3 of the cake free of berries. Leave at least a 1/2-inch border at either end free of berries.
Gently press the strawberry halves into the cream, so you have a nice even surface. This will help you roll the cake evenly.
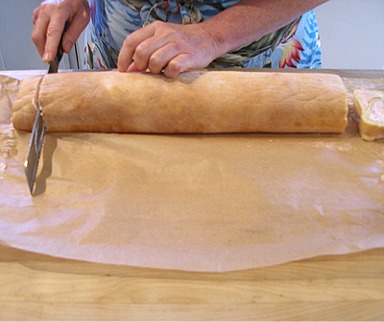
3. Roll the filled cake and refrigerate for 2 to 4 hours, preferably overnight:
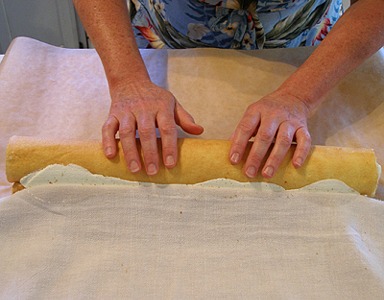
A. Starting with the cake's long edge nearest you, carefully reroll the cake. Roll the cake evenly, using gentle pressure.
Notice the cake is being rolled tightly. But, not so much that the cake cracks and the filling squishes out the sides.
B. Roll the cake all the way to the end and place seam side down.
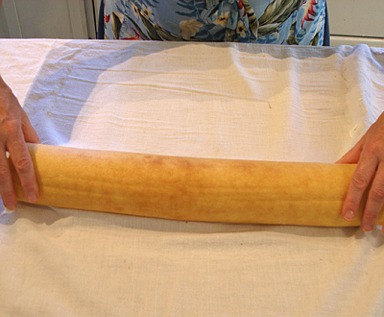
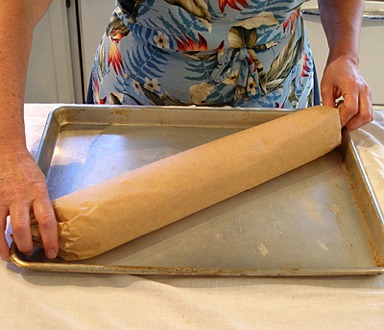
C. Gently roll the cake onto a sheet of parchment paper, then roll it up in the parchment, tucking ends in, so they won't unravel.
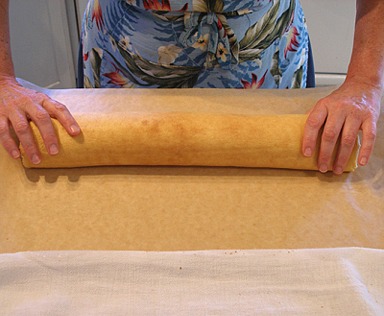
D. Place parchment wrapped roll on a sheet pan and place it in the refrigerator to set.
E. Chill the cake at least 2 – 4 hours, preferably overnight.
STORAGE
Store cake in the refrigerator no more than overnight before serving.
Cake is filled with whipped cream, which is perishable, and must be kept refrigerated. Can stay on the cool side of room temperature no more than 2 hours.
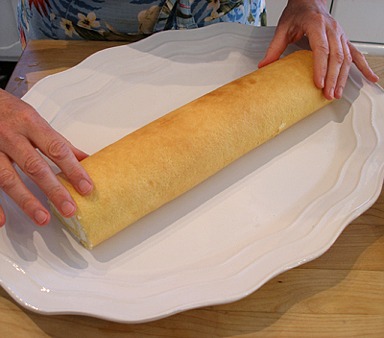
STEP VI: SERVE
1. Remove the cake from the refrigerator and unwrap from its parchment paper.
2. Using a sharp thin serrated knife, trim the ends of the cake so they look nice and neat.
Try not to eat the ends of the cake that you have just cut off.
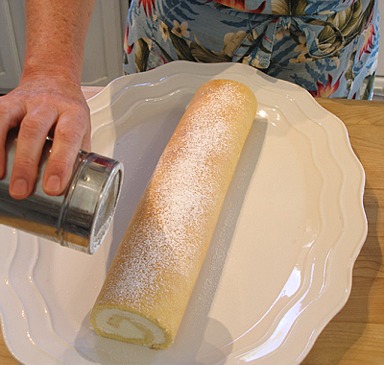
3. Place the trimmed roulade on a serving tray and sprinkle with powdered sugar.
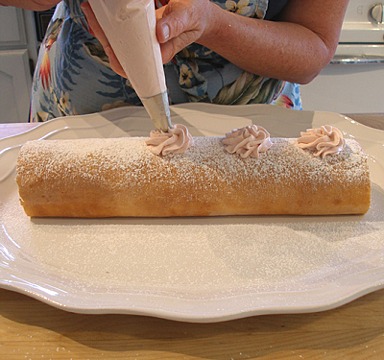
4. Remove reserved strawberry cream and give it a few turns with a whisk, till fluffy.
Place cream in a piping bag, fitted with a Wilton 1M tip and pipe rosettes evenly down the length of the roll.
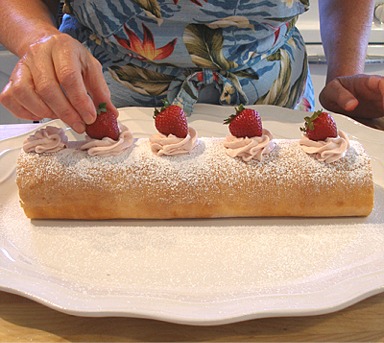
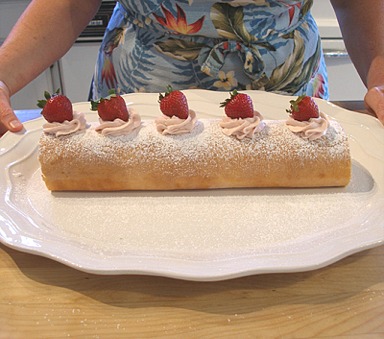
5. Place the reserved strawberries on the rosettes to garnish.
VARIATION
Chocolate Strawberries and Cream Roulade or Jelly Roll Cake
Use the Chocolate Cake Roll or Biscuit Roulade for the cake.
Gluten-Free Strawberries and Cream Roulade or Jelly Roll Cake
Strawberry Daiquiri Roulade or Jelly Roll Cake.
1. Brush cake with Mojito Soaking Syrup
2. Add 1 tablespoon dark rum, instead of 1 teaspoon vanilla extract, to the whipped cream