
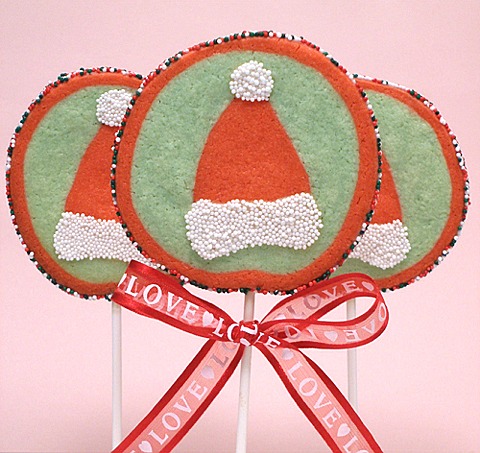

Add a cellophane bag and a pretty bow and they'd be a great addition to anyone's Christmas stocking. They'd also be a great treat for a child's class Christmas party at school.
Ever wonder how those slice and bake cookies are made with the pictures inside? Well, they have very fancy dough extruders, that do all the work for them.
Here we show you how to make them by hand, with wholesome ingredients and lots of love. They are a lot of fun to make, and they taste delicious too.
COOKIE RECIPE HELP
INGREDIENTS
STEPS I, ETC:
2 1/2 recipes, Vanilla Shortbread Cookie Dough; chill and refrigerate for at least two hours before using.
Tint as follows:
Recipe #1-Make 1 recipe Vanilla Shortbread Cookie Dough – Red Cookie Dough #1 (for hat body and wrapping the finished roll): tint red with 1/4 teaspoon red gel food coloring, as per tinting instructions with recipe.
Recipe #2 –Make 1/2 recipe Vanilla Shortbread Cookie Dough – Vanilla Cookie Dough #2 (for hat cuff and pom pom): do not tint. You will need half an egg yolk in the recipe – 1 large egg yolk = 1 TBSP + 1 tsp or 4 teaspoons. So, for 1/2 large egg yolk = measure 2 teaspoons
Recipe #3 –Make 1 recipe Vanilla Shortbread Cookie Dough – Light Green Cookie Dough #3 (for background): tint light blue or green with 2-3 drops blue or green gel food coloring, as per tinting instructions with recipe.
3 large egg whites, lightly beaten, reserved from the above cookie recipes
STEP V:
22-25 paper lollipop sticks
1 recipe Confectioners' Sugar Gaze (for “gluing” the nonpareils in place), below
1/4 cup white nonpareils
1/4 cup multi-colored nonpareils
STEP I: FORM THE RED SANTA HAT SHAPE
It is important to keep the dough well-chilled at all times!
Form the shapes needed from: Red Cookie Dough Recipe #1 and Vanilla Cookie Dough Recipe #2
You will also need the lightly beaten egg whites, when assembling.
Make the Red cookie dough recipe #1 triangle:
1. Remove the red cookie dough recipe #1 from the refrigerator and divide the dough in half.
Rewrap and replace the rest of the dough back into the refrigerator. We will call the stored piece, stored red dough recipe #1. You will need it later, in Step IV.
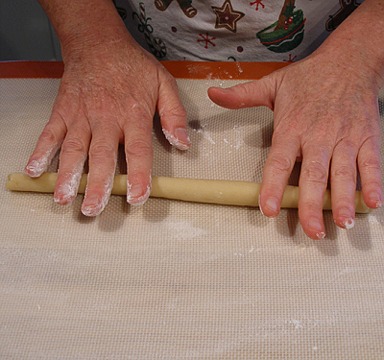
2. On a lightly floured surface, or a silpat counter mat, roll the other red cookie dough recipe #1 half into a 9-inch long cylinder.
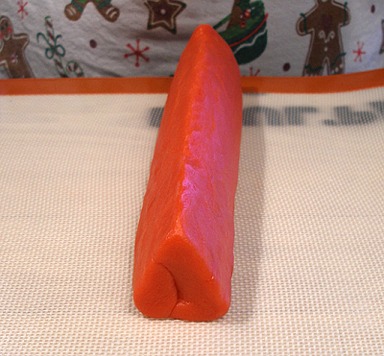
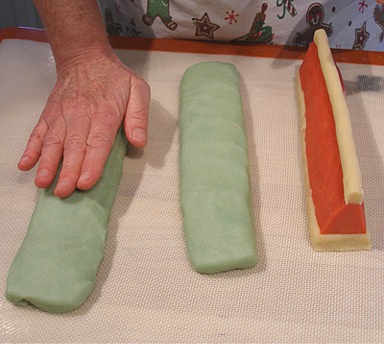
3. Gently throw the red cookie dough recipe #1 cylinder down onto work surface to help flatten the bottom of the roll. This will become the bottom of the red cookie dough recipe #1 triangle or Santa's hat.
4. Use a bench scraper and a spatula to help flatten the sides of the red cookie dough recipe #1 triangle.
Make the sides of the triangle are longer than the width of the bottom of the triangle, so it stands in a peak.
Accentuate the point at the top of the hat by pinching it with your fingertips.


This is what the red cookie dough recipe #1 triangle should look like in cross section.
Make the Vanilla cookie dough recipe #2 rectangle:
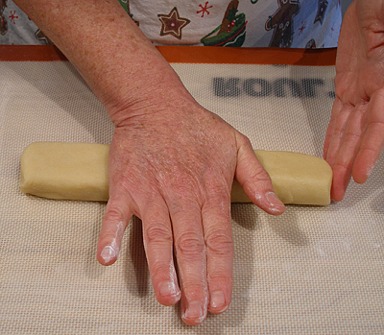
1. Remove the vanilla cookie dough recipe #2 from the refrigerator.
2. Press dough into a long rectangle, then use rolling pin to roll it into an approximate 10 x 1.25-inch rectangle, called the vanilla cookie dough recipe #2 rectangle.
You may have a little extra length beyond 10-inches.
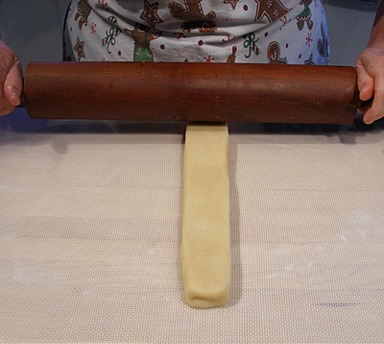
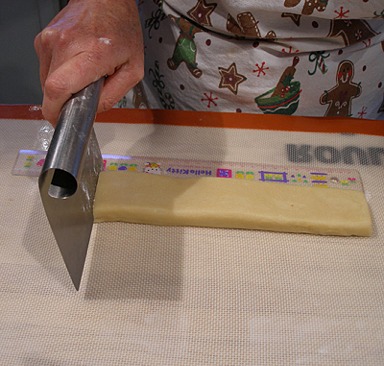
3. Trim the vanilla cookie dough recipe #2 rectangle to 9-inches long on both ends.
Reserve the trimmed pieces, called the vanilla cookie dough recipe #2 scraps for the Vanilla cookie dough recipe #2 rope, next.
Make the Vanilla cookie dough recipe #2 rope:
This will be used make the hat pom pom or the white circle you see on top of the hat.
1. Gather the vanilla cookie dough recipe #2 scraps and press them together.
2. Roll them into a 9-inch Vanilla cookie dough recipe #2 rope.
3. Trim both ends of the rope. Set aside.
NOTE: Refrigerate the formed dough pieces if the room is warm until well chilled.
Assemble the formed dough pieces into a Santa Hat Shape:
1. In a small bowl, have the lightly beaten egg whites ready.
Place the Red cookie dough recipe #1 triangle, Vanilla cookie dough recipe #2 rectangle and the Vanilla cookie dough recipe #2 rope on your covered work bench.
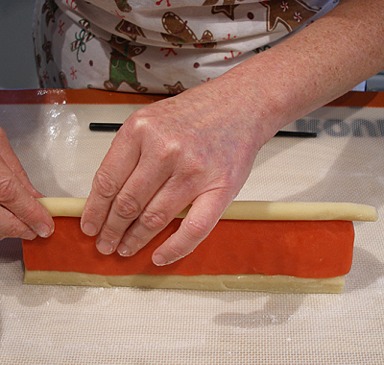
2. Paint the top of the vanilla cookie dough recipe #2 rectangle, lightly with egg white.
3. Then, place the smaller, bottom flat side of the red cookie dough recipe #1 triangle on top of it. Press it firmly into place, being careful not to distort the shape.
If you do distort the shape of the triangle, use your bench scraper to tidy it up again.

4. Use a chopstick or a dowel to press a small depression into the top of the red cookie dough recipe #1 triangle. Then, paint the depression with egg white.
Then, paint the depression with egg white.
5. Place the vanilla cookie dough recipe #2 rope in the depression and press gently to adhere.
Trim the ends even with red triangle.
6. Place the Santa Hat Shape on its flat white bottom, on a parchment paper-lined baking sheet and place it in the freezer for at least 30 minutes, to firm up.
The hat needs to be hard so its shape will not distort when you surround it in Step III, with the light green cookie dough recipe #3.
STORAGE
The Santa Hat Shape can be stored overnight in the refrigerator or frozen, well wrapped for a month or more.
Thaw in the refrigerator.
Note: Take care not to continue to refrigerate, freeze and thaw the dough for any length of time throughout the entire process.
STEP II: FORM THE BACKGROUND, WITH THE LIGHT GREEN DOUGH #3, AROUND THE SANTA HAT SHAPE TO FORM THE
GREEN SANTA HAT LOG
Form the shapes needed from: the Santa Hat Shape, Step I and the light green cookie dough recipe #3.
You will also need the lightly beaten egg whites.
It is important to keep the dough well-chilled at all times!
1. Remove light green cookie dough recipe #3 from the refrigerator and, place it on a lightly floured surface, or a silpat counter mat.
Hit it on the side a few times with a rolling pin to soften and roll it into an 11-inch long cylinder. The cylinder will be thick in circumference.
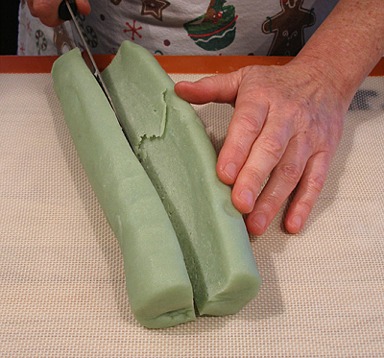
2. Cut the light green cookie dough recipe #3 cylinder in half, lengthwise.
Then flatten the sections into two light green dough recipe #3 rectangles, with your hands, until they are about 2 1/2-inches wide each.
3. Remove the Santa Hat Shape from the freezer and place it on its flat white base on a work surface.
Do NOT let it thaw; it must be really cold.
You will notice that the light green dough recipe #3 rectangles will be longer than the Santa Hat Shape, but we will trim the excess and use it to cover the bottom of the Santa Hat Shape.
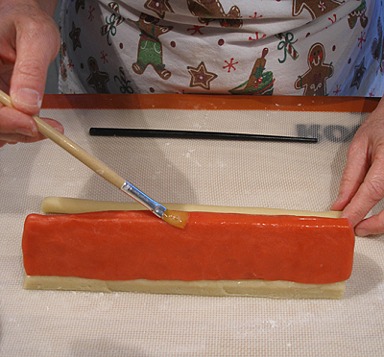
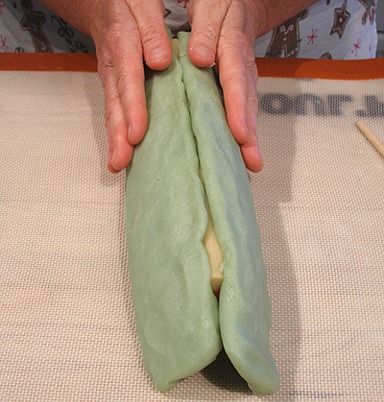
4. Paint the sides and top of the Santa Hat Shape with egg whites.
Then, really compress the two light green dough recipe #3 rectangles onto the sides of the cold Santa Hat Shape.
Carefully form the two light green dough recipe #3 rectangles up and over the top of the Santa Hat Shape, pressing the top seam to seal.
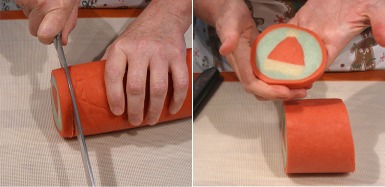
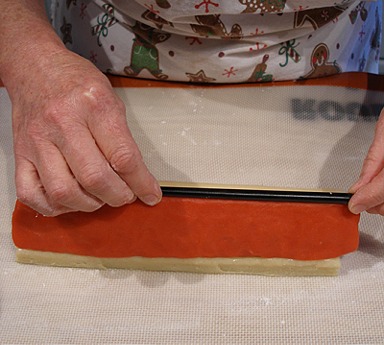
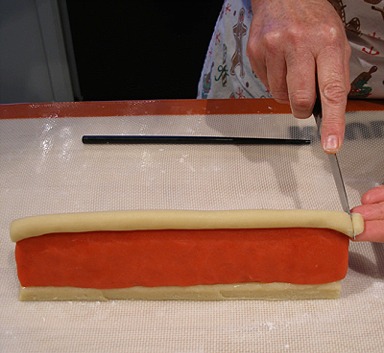
5. With a very sharp knife, trim the excess dough from the both ends of the light green dough recipe #3 rectangles pressed onto the Santa Hat Shape,
leaving light green dough recipe #3 rectangle scraps.
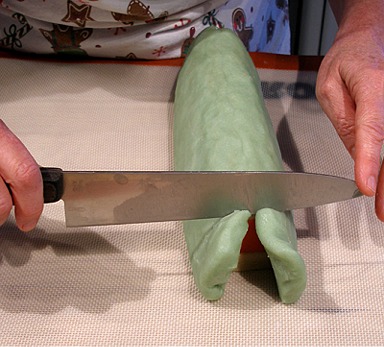
Press the light green dough recipe #3 rectangle scraps together and form it into a 9-inch long light green dough recipe #3 small rectangle.
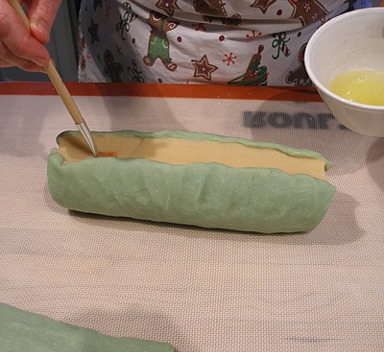
7. Turn the Santa Hat Shape with the trimmed light green dough recipe #3 rectangles pressed onto it, over so its white base bottom is up.
Paint the bottom of the Santa Hat Shape with egg whites.
Press the light green dough recipe #3 small rectangle into place, pressing the seams on either side to seal.
This will form the Green Santa Hat Log.
Got all that!? LOL!
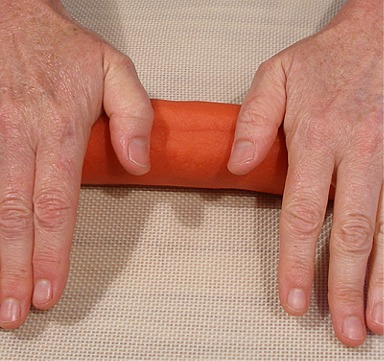
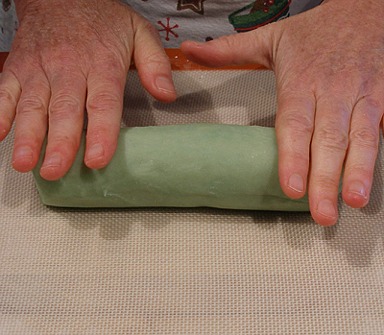
8. On your work surface, gently roll the the Green Santa Hat Log into a neat and even round cylinder shape.

Wrap it in plastic wrap and place it in the refrigerator to chill, for at least 30 minutes.
STORAGE
The Green Santa Hat Log can be stored overnight in the refrigerator or frozen, well wrapped for a month or more.
Thaw in the refrigerator.
Note: Take care not to continue to refrigerate, freeze and thaw the dough for any length of time throughout the entire process.
STEP III: ENCASE THE GREEN SANTA HAT LOG IN ROLLED OUT STORED RED DOUGH RECIPE #1 FROM STEP I
Form the shapes needed from: the Green Santa Hat Log from Step III and the stored red dough #1 from Step I.
You will also need the lightly beaten egg whites.
It is important to keep the dough well-chilled at all times!
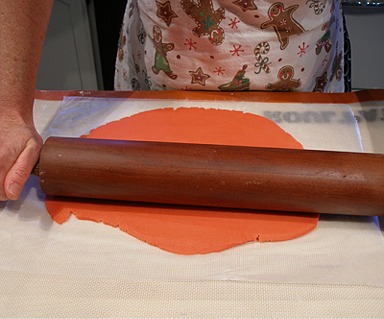
1. Remove the stored red dough recipe #1 from Step I, from the refrigerator.
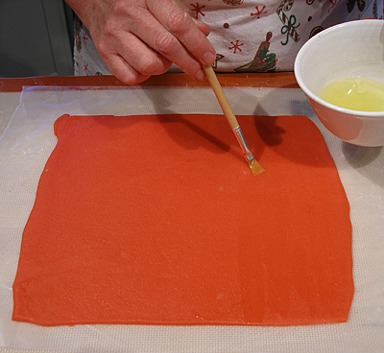
2. On a on piece of waxed paper, roll it out to an approximate 10-inch red dough recipe #1 square. The dough will be thin.
Waxed paper is more pliable than parchment paper and easier to use for this project.
Brush the dough all over with egg white.
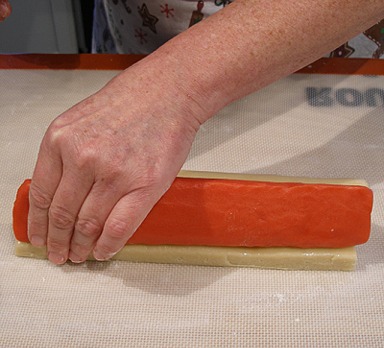
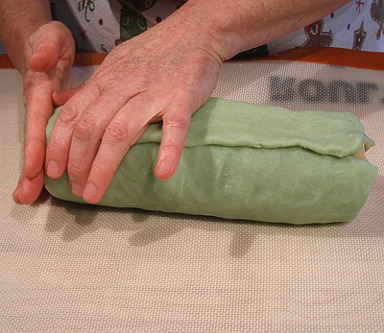
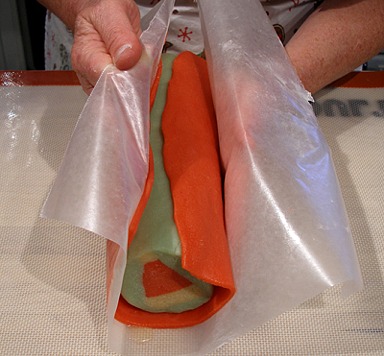
3. Remove the chilled Green Santa Hat Log from the refrigerator and place it on one end of the 10-inch red dough recipe #1 square.
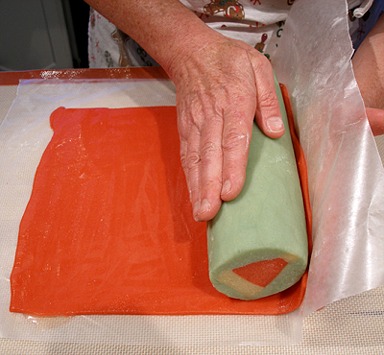
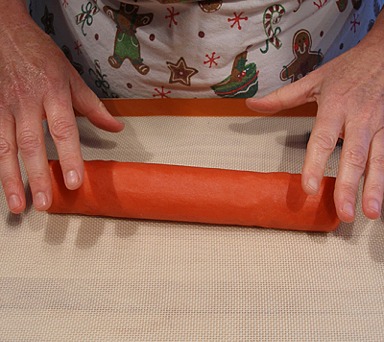
Use the waxed paper to help you roll the Green Santa Hat Log and encase it in the 10-inch red dough recipe #1 square.
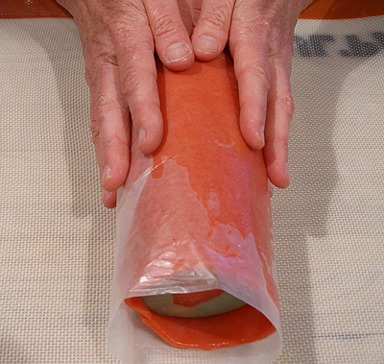
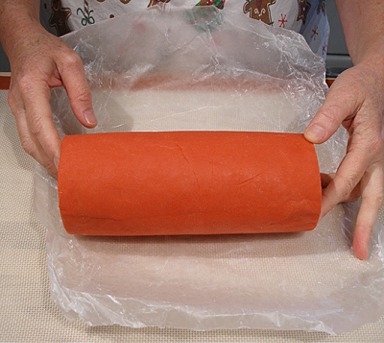
Press the seam to seal, then gently turn the roll over and roll the seam to flatten it. This makes the Santa Hat Cookie Dough Roll.
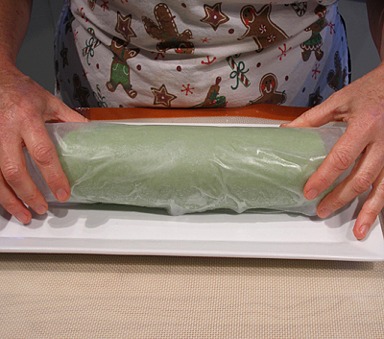
4. Wrap the roll with additonal layers of plastic wrap, and place the Santa Hat Cookie Dough Roll into the refrigerator to chill for at least 2 hours, or overnight.
NOTE:The roll needs to be very cold when you slice it, so the cookies will not distort.
STORAGE
The Santa Hat Cookie Dough Roll can be stored overnight in the refrigerator or frozen, well wrapped for a month or more.
Thaw in the refrigerator.
Note: Take care not to continue to refrigerate, freeze and thaw the dough for any length of time throughout the entire process.
STEP IV: SLICE AND BAKE THE SANTA HAT COOKIE DOUGH ROLL FROM STEP IV. OPTIONALLY DECORATE THE COOKIES.
You will need: the Santa Hat Cookie Dough Roll from Step III. 22-25 paper lollipop sticks.
You will also need the lightly beaten egg whites.
It is important to keep the dough well-chilled at all times!
Slice and bake the Santa Hat Cookie Pops:
1. Position an oven shelf in the middle of the oven. Preheat the oven to 325 degrees F.
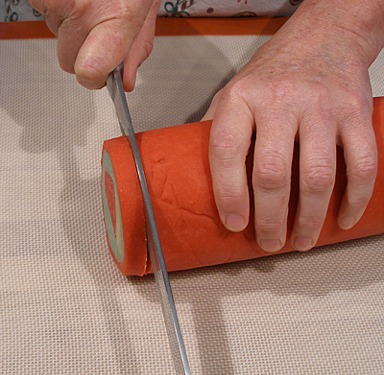
2. Remove the chilled Santa Hat Cookie Dough Roll from the refrigerator and unwrap.
With a very sharp knife, trim each end so they are straight.
3. Slice log into 1/4-inch thick slices with a sharp thin knife. Cut 4 slices at a time, then insert the sticks.
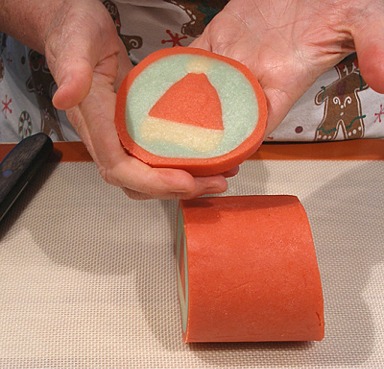
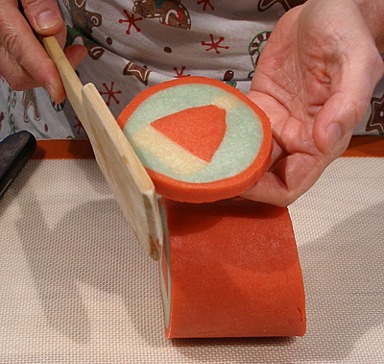
4. If irregularities in the cookie rounds form while slicing them, you may use a flat wooden spatula to reshape them.
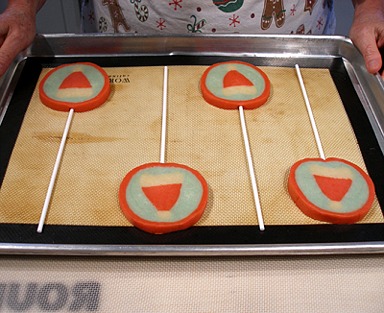
5. Place 4 slices on a parchment or silpat lined baking sheets as pictured below, then insert lollipop sticks into the cookies.
To insert the sticks, place your hand on top of the cookie, and insert the stick into the center of the dough, about 1/2 way up the length of the cookie.
Bake cookies in batches, keeping the remaining dough in the refrigerator while the sliced cookies bake.

6. Bake cookie pops for 12-15 minutes, or until edges of the cookies JUST start to color. The tops of the cookies should still be pale.
Let cookie pops cool on the baking sheet for 5 minutes, then transfer to a rack to cool completely.
Optionally, Decorate the baked Santa Hat Cookie Pops:
1 recipe Confectioner's Sugar Glaze (for “gluing” the nonpareils in place)
1/4 cup white nonpareils
1/4 cup multi-colored nonpareils
1 recipe confectioners sugar glaze(for “gluing” the nonpareils in place)
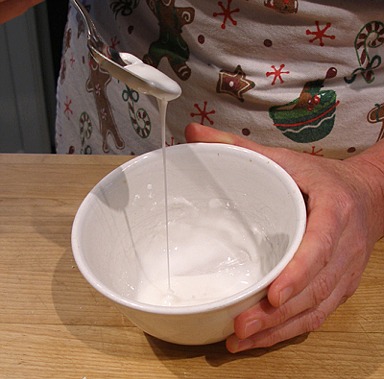
1. Make the confectioners sugar glaze
CONFECTIONER'S SUGAR GLAZE
INGREDIENTS
1/4 cup confectioners sugar, sifted; measure and then, soft
1 1/2 teaspoons warm water
INSTRUCTIONS
Place sifted confectioners sugar in a small bowl, add the warm water and really stir until thoroughly combined and very smooth.
Keep the glaze covered with plastic wrap at all times and as much as possible during use. Stir right before using.
2. Place a rimmed baking sheet, lined with a nonstick silpat mat, near your worksurface. It will be used to catch the white nonpareils.
NOTE: If you have a silpat mat, use it to line the baking sheet. This helps cut down on the amount of little sugar balls that go bouncing all over your kitchen.
I found out about this tip a little too late.
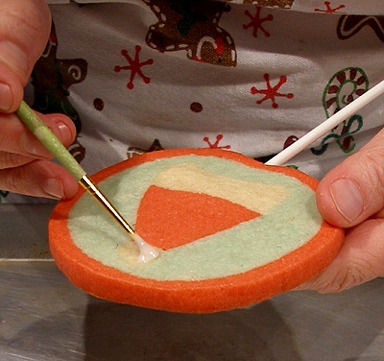
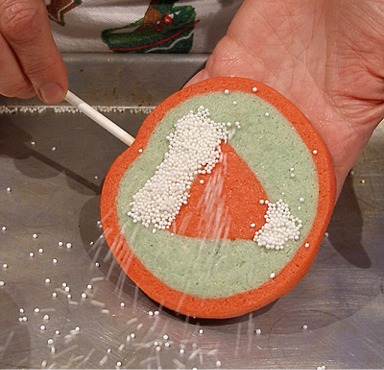
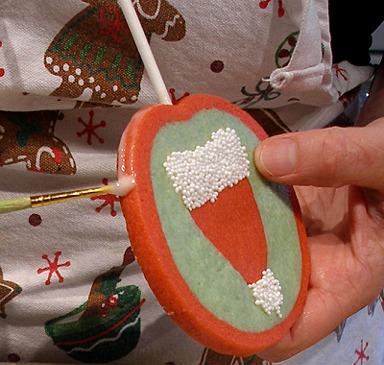
3. Using a small paintbrush, paint some of the confectioner's sugar glaze onto one baked Santa Hat Cookie Pop – in the pom pom and cuff of the hat.
4. Over the rimmed baking sheet and, using a spoon, sprinkle white nonpareils over the wet glaze.
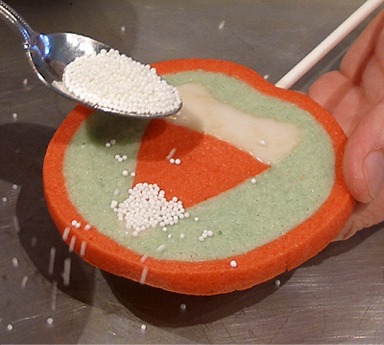
5. Gently press the white nonpareils to adhere, then tip the Santa Hat Cookie Pop over so that the excess fall onto the baking sheet.
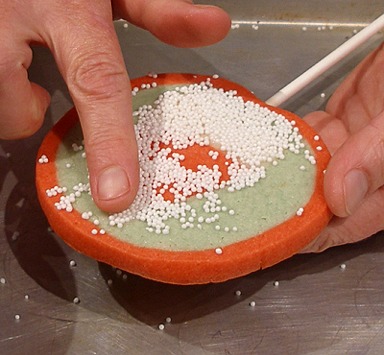
Periodically, dump the excess nonpareils from baking sheet and reuse them.
6. Place the cookie pop on a wire cake rack and let glaze and nonpareils set for about 10 minutes.
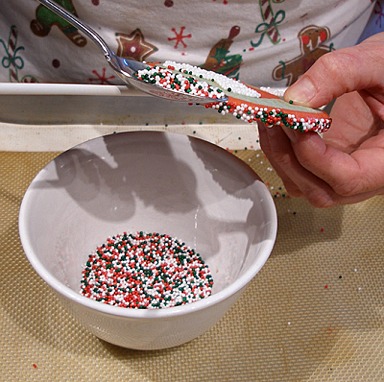
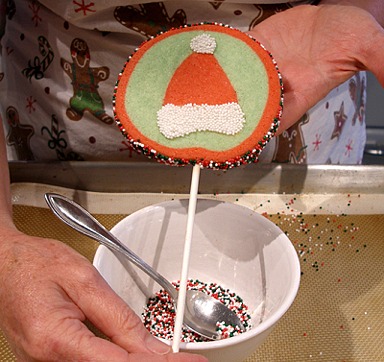
7. Then, paint 1/2 way around the edge of the Santa Hat Cookie Pop with the confectioners' sugar glaze.
Then, sprinkle edge with the multicolored nonpareils.
Repeat with the other side of the cookie so the whole edge is covered.
8. Place cookie on a wire rack until glaze and the multicolored nonpareils have set.
Repeat with the other cookies.
STORAGE
Cookies keep well for about a week, in an airtight container.