

Cake used with the Easter Bunny Cake Pops Tutorial
Cake used with the Spring Tulip Cake Pops
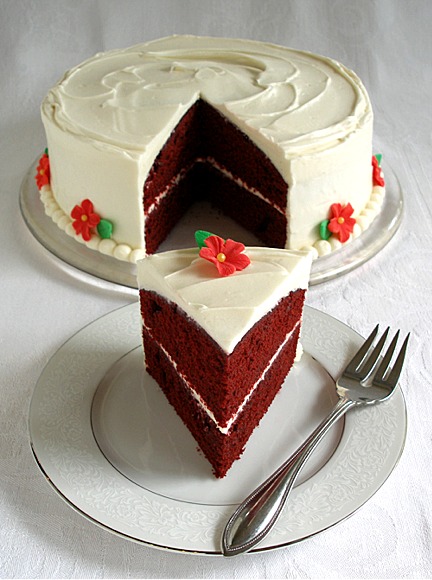
Most Red Velvet Cakes are dry. I have a thing about eating dry cakes – no good! So, I make sure I work harder to create cake recipes that are moist. It is because I became so tired of eating butter cakes that are dry and flavorless. So, I took a lot of time to develop this recipe so it was tender and had a good mouthfeel. This cake does not turn bright red, either – I wanted to add in some real chocolate flavor, too – it has a nice mahogany color that won't turn your mouth red.
Red Velvet Cake is a favorite throughout the South. No one is quite sure why you add red food coloring to chocolate cake, but coloring does make its naturally light brown color more appealing. The use of red dye to make “Red Velvet” cake was probably started after the introduction of the darker cocoa in order to reproduce the earlier color. It is also notable that while foods were rationed during World War II, some bakers used boiled beets to enhance the color of their cakes. Boiled grated beets or beet baby food is still found in some red velvet cake recipes. Red velvet cakes seemed to find a home in the south and reached peak popularity in the 1950s – just before a controversy arose about health effects of common food colorings.
CAKE RECIPE HELP
Layers, Premium Member, Says: “And for those of you who have not had the pleasure of trying this recipe–do so! You'll never go back, it's really that good!”
Efrain Delgado, Premium Member, Says: “Excellent red velvet recipe! I try it and its a wonderful, moist and flavor full cake. Thanks a lot SARAH!”
STEP I: MAKE THE RED VELVET LAYER CAKE
RED VELVET LAYER CAKE
INGREDIENTS
2 cups all purpose unbleached flour; spoon into dry measuring cup and level to rim
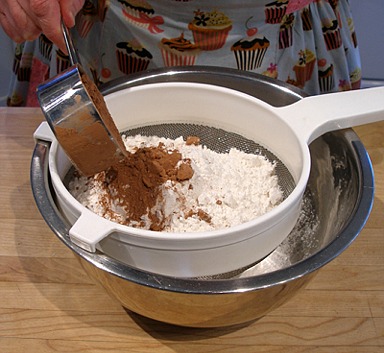
1/2 cup natural cocoa powder; measure and sift
2 teaspoons baking powder
1/2 teaspoon baking soda
1 teaspoon salt
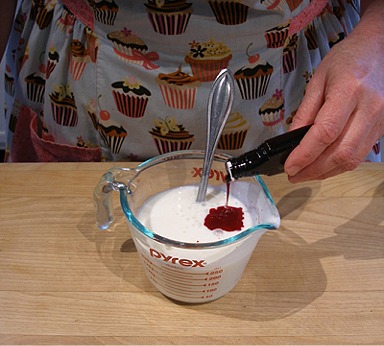
1 cup buttermilk, well shaken; can be cold from the refrigerator
1 tablespoon vanilla extract
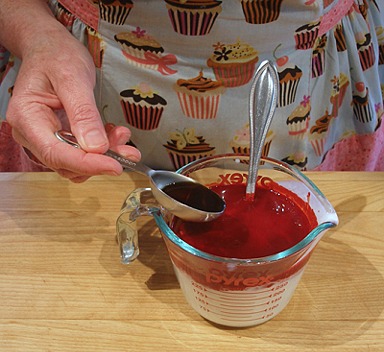
4 tablespoons (2 ounces) liquid red food coloring*; use liquid food coloring from the grocery store
1 cup (2 sticks) unsalted butter; can be cold from the refrigerator
1 1/2 cups sugar
4 large eggs; can be cold from the refrigerator
*SARAH SAYS: If you substitute the liquid red food coloring with gel, powder or paste food coloring, make sure you also add in 3 to 4 tablespoons water to the recipe.
INSTRUCTIONS
1. Position the oven rack in the center of the oven and preheat to 350 degrees F. If using a dark, nonstick or glass pan, reduce oven heat by 25 degrees F.
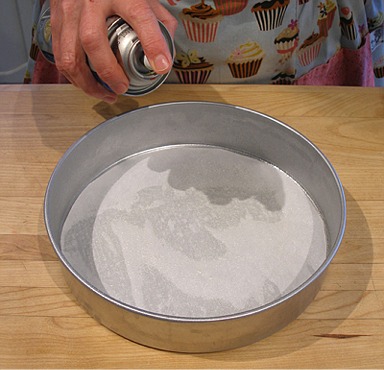
2. Generously grease two, 9- x 2-inch pans with shortening or spray with Baker’s Joy or vegetable oil spray.
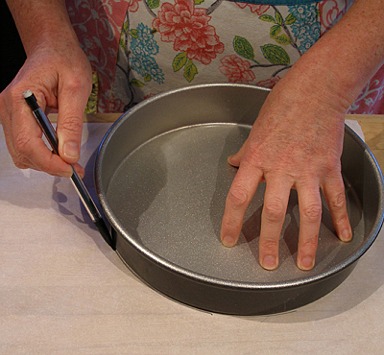
SARAH SAYS: Instead, you can line each greased baking pan with a greased piece of parchment paper. Here's how:
Place one pan on top of a piece of parchment paper and trace around it with a pencil. The lead is nontoxic.
Cut out the round of parchment paper following the pencil marks as a guide.
Spray the baking pan with nonstick cooking oil.
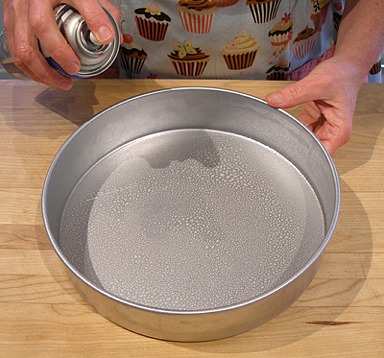
Place the parchment round in the bottom of the pan.
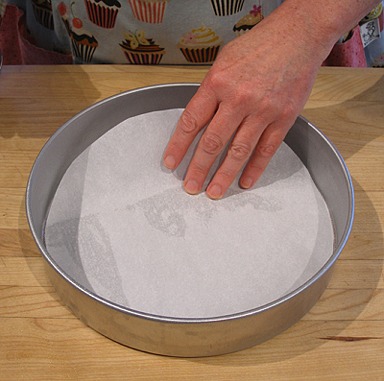
Spray the top of the parchment round with nonstick cooking oil.
Repeat the process with the other pan. Set both pans aside.
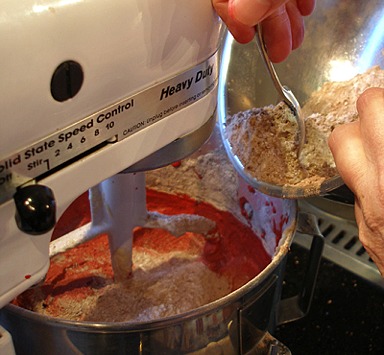
3. In a medium size bowl, after measuring, sift together the flour, cocoa powder, baking powder, baking soda and salt. Stir together with a spoon. Set aside.
SARAH SAYS: Cocoa powder does not blend well with other ingredients and lumps easily; that's why sifting is recommended because it removes the lumps. I use a fine mesh strainer.
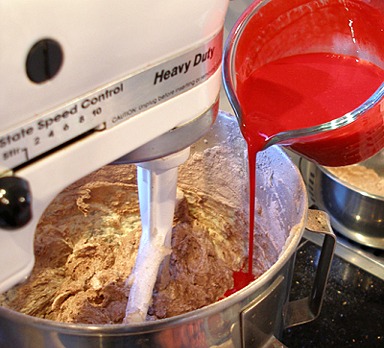
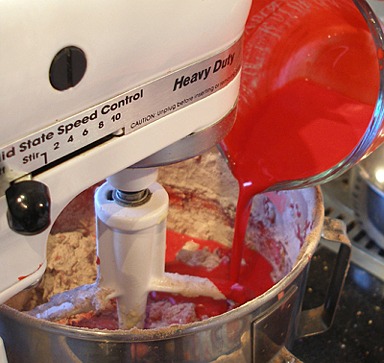
4. Mix the buttermilk together with the food coloring and vanilla extract. Set aside.
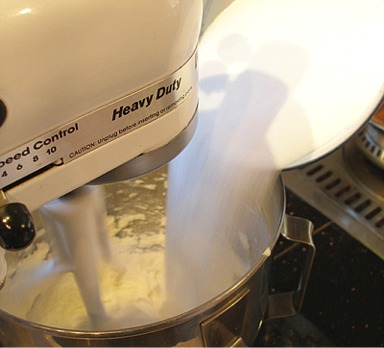
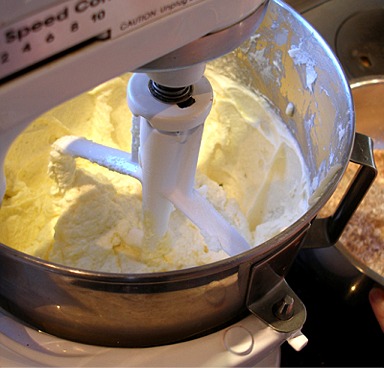
5. In the bowl of a stand mixer fitted with a paddle attachment, beat the butter on low speed until soft. (If the butter is cold, it will warm quickly from the beaters – taking about 60 seconds).

6. Add the sugar in a steady stream at the side of the bowl. Increase speed to medium and beat for 2 minutes until light yellow and fluffy.
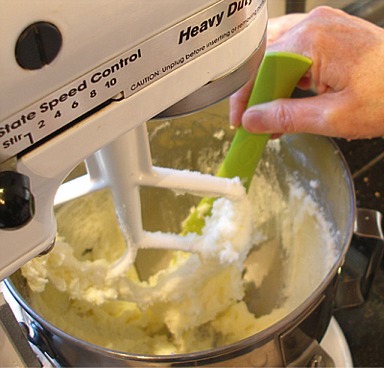
Stop the mixer and scrape the side and bottom of the bowl with a large rubber spatula.
7. With the mixer on low, add the eggs one at a time and beat for 20 seconds after each addition.
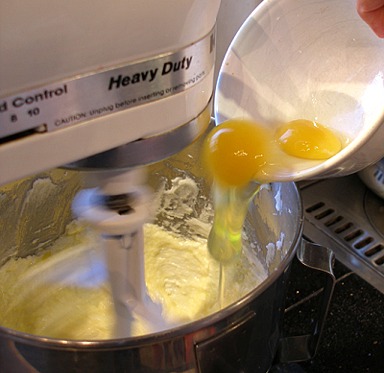
8. After the eggs have been added, increase the mixer speed to medium and beat the mixture for 2 minutes. (If the eggs are cold, the batter will curdle slightly. It's ok. It will come together as the batter warms from the beaters.) Set the kitchen timer to help you keep track of the time. The mixture will become fluffy and aerated.
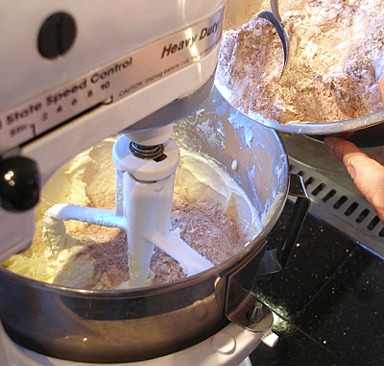
9. With the mixer on low, add the flour mixture in 3 equal portions, alternating with the milk in 2 equal portions, beginning and ending with the flour. (If the milk is cold, the batter will curdle slightly. It's ok. It will come together when you add the flour.)
SARAH SAYS: Add the flour and liquid ingredients in increments quickly; do not wait in between additions too long as you don't want to overmix the batter.
Add the first 1/3 of the flour mixture:
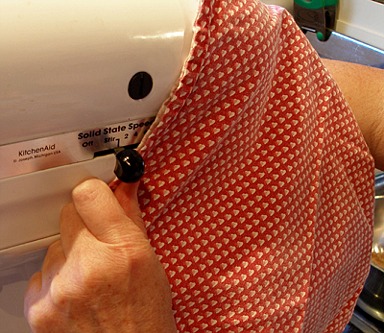
NOTE: I found it helpful to use a dish towel around the mixer to keep the flour flying to a minimum.
Add first 1/2 of the buttermilk mixture:
Add second 1/3 of the flour mixture:
Add remaining 1/2 of the buttermilk mixture:
Add last 1/3 of the flour mixture:
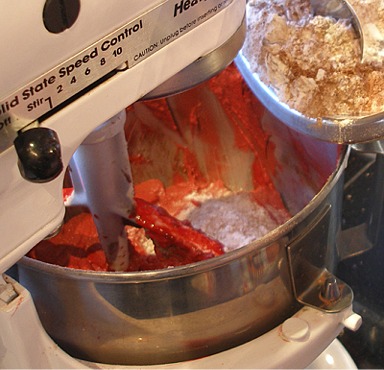
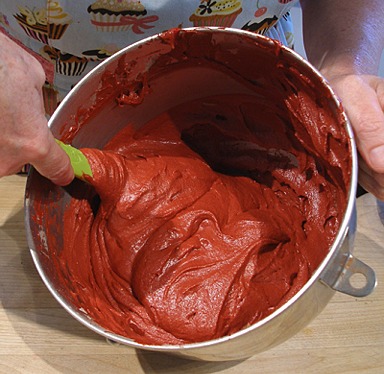
10. After completing the last addition of flour, stop the mixer, and scrape the side and bottom of the bowl with a large rubber spatula.
Then, let the mixer run for 30 seconds on LOW. The batter will be thick and fluffy. STOP the mixer. Do NOT overmix.
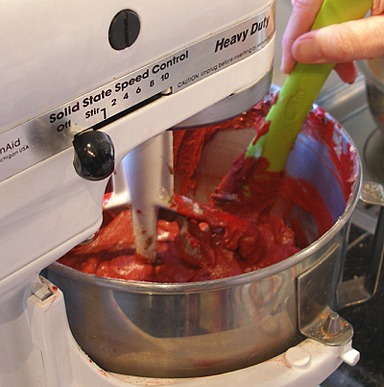
11. Remove the mixing bowl from the mixer. With a large rubber spatula, give the batter ONE or TWO quick folds to incorporate any stray flour or milk left at the sides and bottom of the bowl.
Then, STOP!
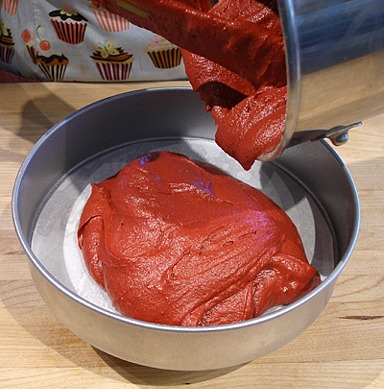
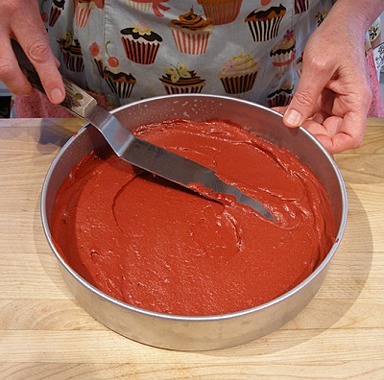
12. Divide the batter equally into the prepared pans and lightly smooth their tops. The pans should be about 1/2-full.
13. Bake the cake layers for 20 to 30 minutes or until the top feels firm and gives slightly when touched.
If you insert a toothpick in the middle and remove it, it should have a few moist crumbs attached, but not batter.
NOTE: The cake can be baked in a 9 x 13 x 2-inch, greased cake pan, taking 30 – 35 minutes to bake. Cupcakes take 20 – 30 minutes to bake.
Take the pans from the oven to a wire cake rack and let sit for 10 minutes before unmolding.
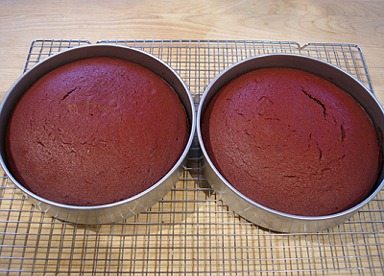
SARAH SAYS: The cake will develop cracks on its top during baking. It will be assembled later and you will no longer see them. The cake layers should bake
flat and need little or no trimming.
14. To unmold, loosen the sides with a small metal spatula or sharp knife, taking care not to scratch the cake pan. Invert onto cake rack and place upright to cool completely.
15. Meanwhile, prepare the icing:
STORAGE
Unfrosted butter cake layers should not be refrigerated because it dries the cake and can be stored at room temperature for about 2 days, well wrapped. Unfrosted cake layers can be frozen for more than one month, well wrapped. Thaw at room temperature.
STEP II: MAKE THE TRADITIONAL CREAM CHEESE FROSTING
TRADITIONAL CREAM CHEESE FROSTING / Recipe alone
Yields about 4 1/4 cups of icing; enough to fill and frost two, 9 x 2-inch layers
SARAH SAYS: Never overbeat cream cheese frosting after it has been made otherwise it will become too soft and slimy. If it does, do not add in more powdered sugar, but instead add in chunks of cold cream cheese and the frosting will correct itself. Cream cheese frosting is perishable, so keep refrigerated or anything frosted with it.
INGREDIENTS
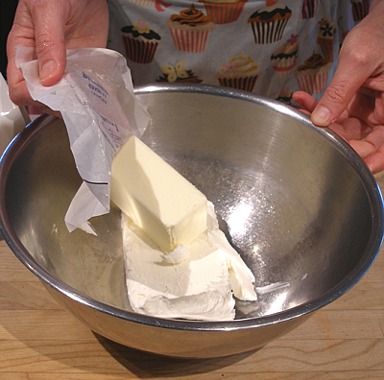
12 ounces (1 1/2 8-ounce packages) cream cheese, softened; I prefer Philadelphia Brand
3/4 cup (1 1/2 sticks) unsalted butter, softened
2 teaspoons vanilla
1/2 teaspoon salt
6 cups powered sugar, sifted; sift after measuring
INSTRUCTIONS
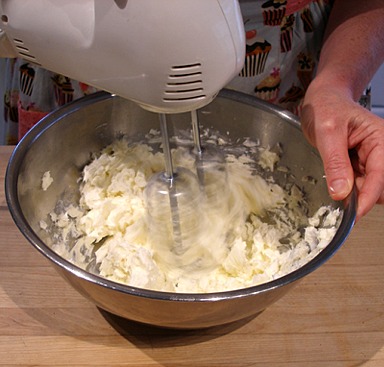
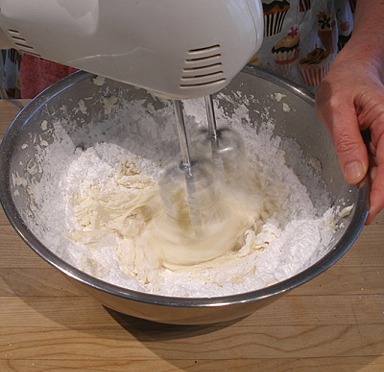
1. In a medium bowl with a hand held mixer on medium, beat the cream cheese and butter to soften.
2. Add the vanilla extract and salt.
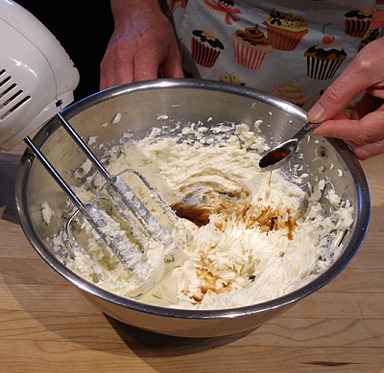

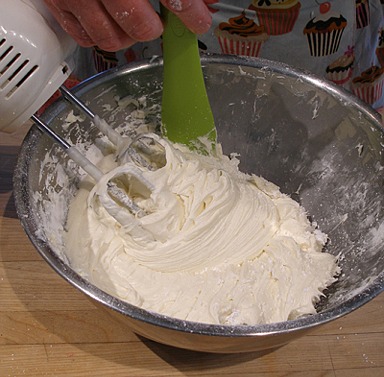
3. With the mixer running on low, slowly add the powdered sugar and beat until light and fluffy.
Correct with milk or powdered sugar if it is too stiff or soft.
STORAGE
Store the cream cheese frosting in the refrigerator where it will keep for a few days. Cream cheese frosting does not freeze well. Store the frosted cake in the refrigerator in a domed cake keeper, under an inverted bowl, or cover with an aluminum foil tent to prevent moisture from accumulating under the wrapping. Cake keeps for about 3 days. Cream cheese icing does not freeze well.
STEP III: ASSEMBLE THE CAKE
1. Prepare the cake plate: Place the cake plate on a turntable, if you have one. A turntable makes it much easier to get a smooth even finish on your cakes.
NOTE: I always use strips of waxed paper on the cake plate to keep it clean while I ice the cake.
2. Fit a piping bag with a large round tip, and fill with 1 cup Traditional Cream Cheese Frosting. (Refill when needed).
3. Place one layer of the Red Velvet Cake bottom side up, on the prepared cake plate.
4. Pipe a dam of Traditional Cream Cheese Frosting around the edge of the layer.
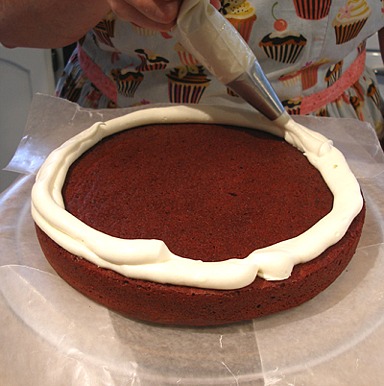
5. Put about 1/2 cup of the Traditional Cream Cheese Frosting in the center of the layer and spread to a little over the edge of the cake with a large offset spatula.


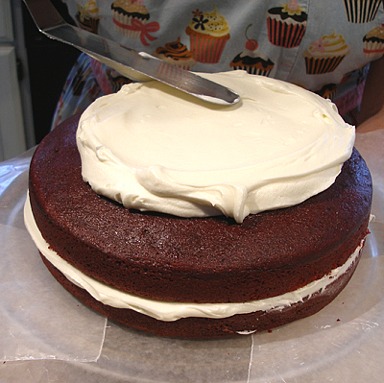
6. Place the top layer on top of the filling, pressing down gently, to level and set.

7. Place a large amount of Traditional Cream Cheese Frosting on top of the cake.
Using a large off-set Icing spatula, spread it evenly over the top and down the sides of the cake.
8. Remove the remove waxed paper strips from the cake plate. Clean up any frosting that may be on the edge of the plate as well.
DECORATE
1. Pipe dots of of Traditional Cream Cheese Frosting around the bottom of the cake with a plain tip.
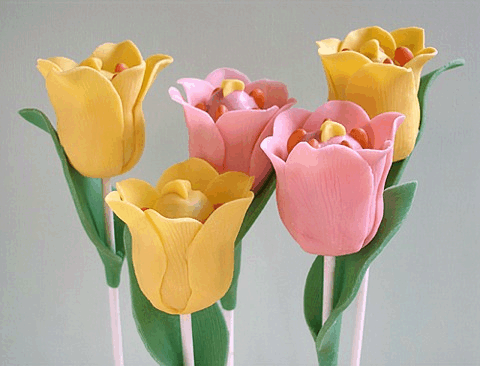
2. Optionally, decorate the cake with Fondant Flower Toppers with Leaves.
3. Refrigerate the cake for about an hour or two before serving. Let warm to room temperature before serving.
SERVE
Cut cake into slices with a long sharp knife.
STORAGE
The icing and filling that covers your cake determines how you store your cake. Because the Traditional Cream Cheese Frosting needs refrigeration, the cake MUST be refrigerated, where the cake will keep for a few days. The frosting does not freeze well.
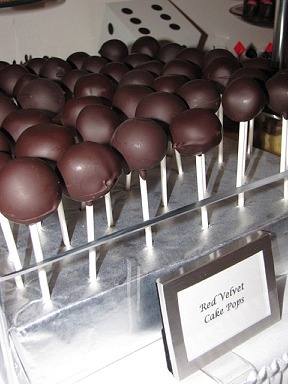
kjz, Premium Member, Says: “I made (Cake Pops) using Sarah's Red Velvet recipe. Tempered Lindt Dark Chocolate (1/2 85% and 1/2 50%). People can't stop asking for more.”
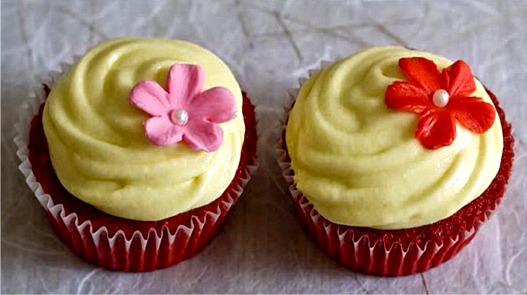
Cupcakes and photo by odetteganda, Premium Member © Sarah Phillips
ODETTEGANDA, Premium Member, SAYS: “(They) turned out to be very moist and chocolaty! The texture also was very fine and smooth which kind of melts in the mouth…Of course I am not surprised, Sarah's recipes are the best. I was supposed to frost it with Cream Cheese Frosting, but then again, I did not have butter anymore so I settled for the Neoclassic French Buttercream that I have frozen. It was a lovely combination though. And as always, I made Manny and a few officemates' morning happy.”