

These cookies are a labor of love. My mom LOVES shortbread, and it not such a fan of iced cookies so I made her these cookies yesterday. Find out which special cookie recipe we used. You need to keep the dough very cold while you work with it, so be prepared to keep popping the dough in and out of the refrigerator while you form them. We have included a special bonus section on making Tie-Dye Cookies.
COOKIE RECIPE HELP
INGREDIENTS
1 recipe Vanilla Shortbread Cookies with How to Tint Tutorial
Equipment:
3-inch high Alphabet Shape Cookie Cutters
1 2- or 3-inch high Heart Shape Cookie Cutter
Gel-paste colors, Americolor: 1 drop yellow, two drops pink, 2 drops blue
Wilton #12 round piping tip
Chop stick or ruler
Nonstick Silpat mat or chilled cookie sheet
INSTRUCTIONS
STEP I: TINT THE SHORTBREAD DOUGH AND PREPARE THE PANS
Tint the shortbread dough:
1. Cut the dough into thirds.
2. Knead in drops of gel-paste colors to make one section yellow, the other pink, and the third blue.
3. Cover each dough section separately with plastic wrap and refrigerate for at least 30 minutes, or until well-chilled.
Prepare the pans:
Line two cookie sheets with silpat mats or with parchment paper. Set aside.
STEP II: MAKE THE POLKA DOT COOKIES
Start making one or two letters of one set at a time. Take only what you need from the refrigerator leaving the rest.
1. On a nonstick silpat mat, very lightly dusted with flour, or on a chilled cookie sheet, roll out a small amount of shortbread cookie dough to 3/16-inch thick…just a little…of the two colors you want to use together.
KELLY CA SAYS: It is easier to use just enough dough for one or two letters because the dough has to be very cold when you work with it. I rolled out both blue and yellow tinted shortbread cookie dough.
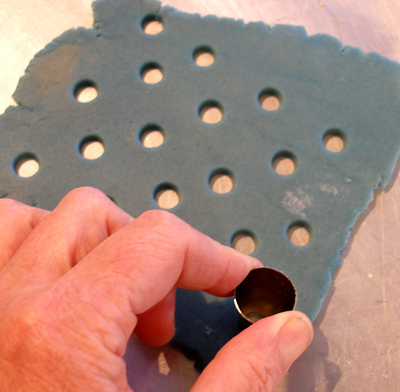
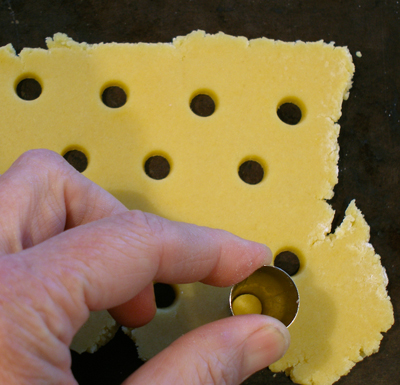
2. Starting with the blue cookie dough, punch out holes, as shown in the photo, with the small end of a Wilton #12 tip, making sure to keeping them as round as possible. Save the punched out holes.
3. Repeat with the yellow color.
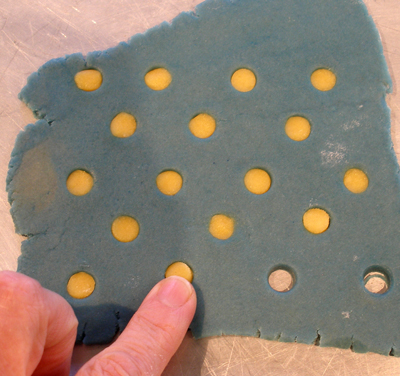
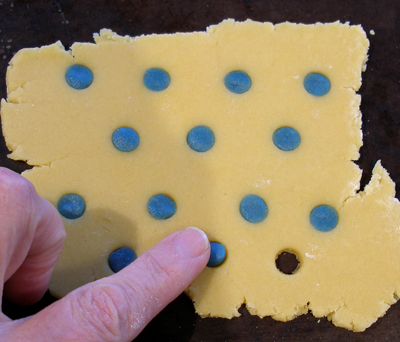
4. Then place both the blue and yellow doughs with the holes in them, and their punched out holes back in the refrigerator for a few minutes until chilled.
5. When chilled, use the punched out holes of one color, to fill the holes in the other color, and vice versa.
Afterwards, chill the dough, again, to make sure it is very cold.
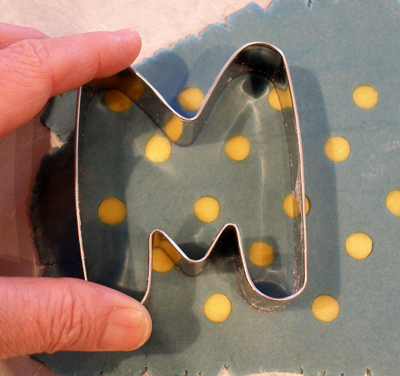
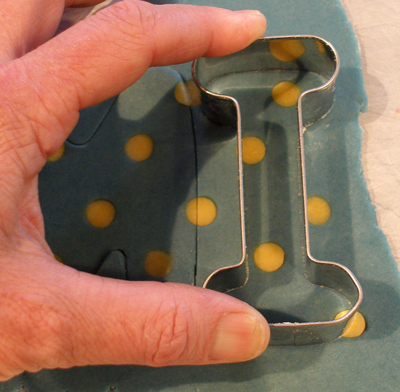
6. Then cut out the letters and/or shapes.
KELLY CA SAYS: For example, in one set, I cut out the letters “M” and “I” from the blue dough, and the letter “O” from the yellow dough.
7. Peel the excess dough from around the cut-out letters. Save the cookie dough scraps and make Tie-Dye Cookies, Step IV.
Carefully transfer the cut-out cookie shapes to a prepared cookie sheet, making sure they are spaced about 1 1/4 inches apart. Brush off any excess flour with a clean pastry brush.
8. Place them in the refrigerator, while you make the other letters/shapes.
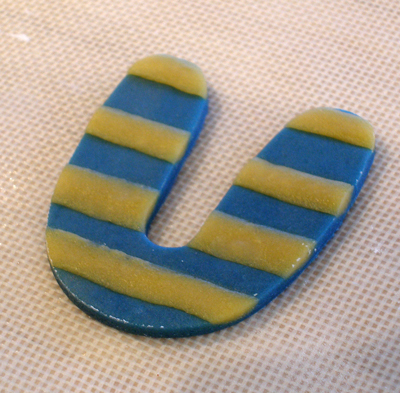
STEP III: MAKE THE STRIPED COOKIES
Start making one or two letters of one set at a time. Take only what you need from the refrigerator leaving the rest.
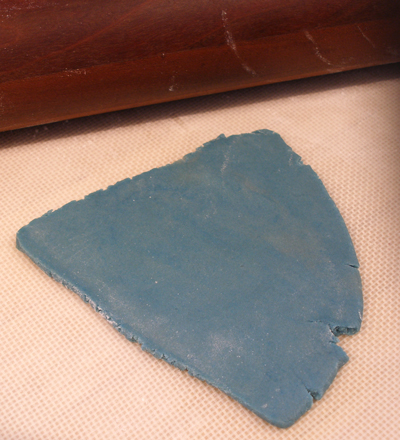
1. On a nonstick silpat mat, very lightly dusted with flour, or on a chilled cookie sheet, roll out a small amount of the base color, such as blue, of the shortbread cookie dough to 1/4-inch thick.
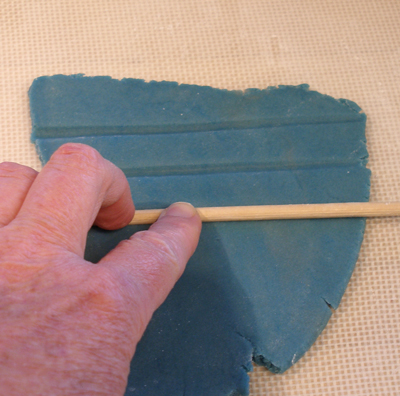
2. Then take a chop stick or use the edge of a ruler and gently press parallel channels into the rolled out dough.
3. Roll out a contrasting color, such as yellow, a bit thinner(about 1/8-inch) and cut thin strips of this dough.
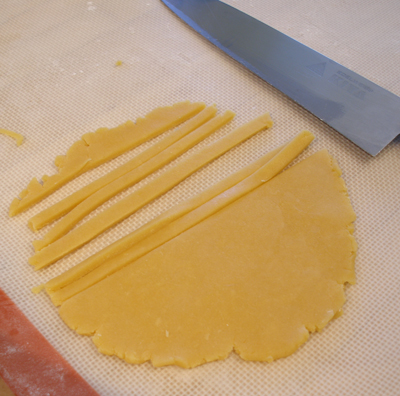
4. Lay the cookie dough yellow strips in the channels made by the chopstick in the blue cookie dough. Brush off any excess flour with a clean pastry brush.
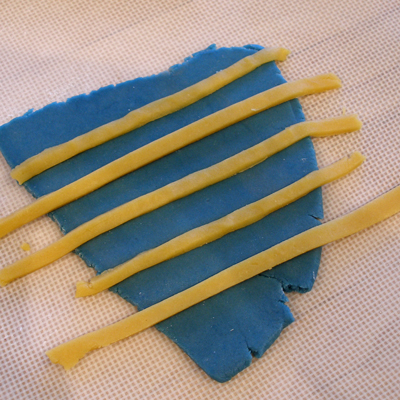
5. Gently roll over the dough, to adhere the stripes to the base dough.
6. Place dough in the refrigerator until cold, before cutting out the shapes/letters. Carefully peel off the excess dough from around the cut-ut shape.
Save the scraps and make Tie-Dye Cookies, Step IV.
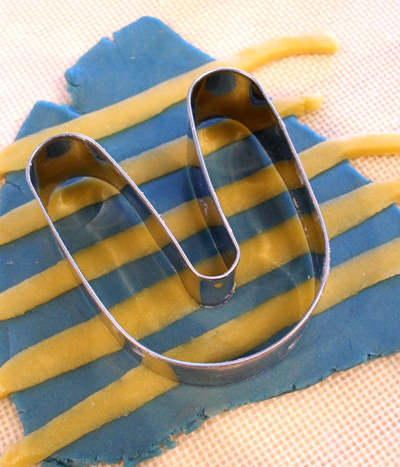
7. Remove cut shape to the prepared cookie sheet, making sure they are spaced about 1 1/4 inches apart.
Chill while you prepare the other letters and/or cookie shapes.
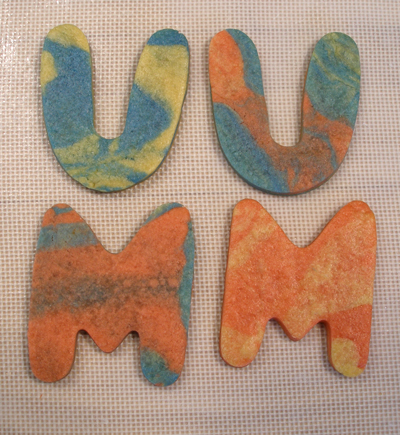
STEP IV: SAVE THE SCRAPS AND MAKE TIE-DYE COOKIES
The cookies from the rerolled scraps have more of a tie-dyed look, but they are still pretty, as you can see in the photos below.
1. Save the scraps and stack them together in and gently press them into a rectangle, wrap them in plastic wrap and refrigerate until cold.
2. Then roll them out and cut more cookies.

STEP V: BAKE THE COOKIES
1. Position and oven shelf to the middle of the oven and heat the oven to 325 degrees F.
2. Bake the cookies, one cookie sheet at a time, in the middle third of the oven for 9 to 13 minutes, or until just lightly browned on the edges.
3. Using a metal spatula, immediately transfer the cookies to wire racks. Let stand until completely cooled.
STORAGE
Store baked cookies in an airtight container for up to 2 weeks or freeze for up to 2 months.