
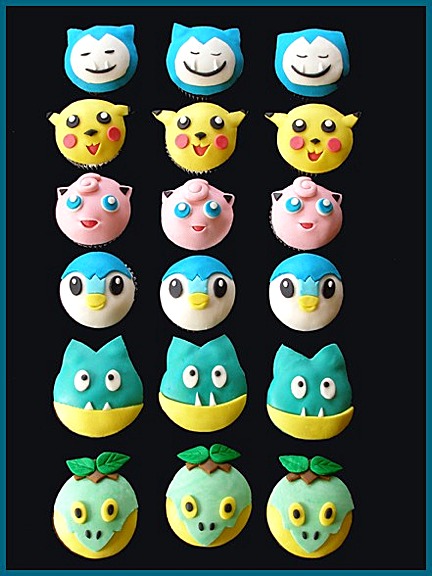
I knew I wanted to make my son some sort of Pokemon (Pokeman) cake for his birthday party. I finally decided that I wanted to make chocolate cupcakes with Marshmallow Fondant Pokemon character faces on top.
CAKE RECIPE HELP
INSTRUCTIONS – How to Make Piplup and Jigglypuff

PRE-PREPARATION
Before one starts a project like this, it is important to be VERY organized.
Most cartoon characters have faces that can be distilled down to simple geometric forms. I looked at the faces of some of my son's favorite Pokemon characters and made some thin cardboard patterns that I could use to cut the fondant:
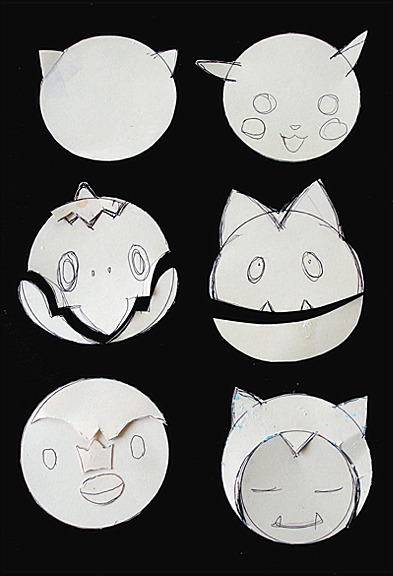
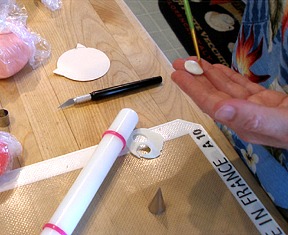
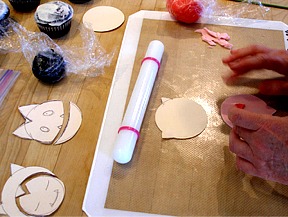
I gathered whatever cutting supplies I could find in my stash, an Exacto knife, round cookie cutters, leaf-shaped cookie cutters, oval and round fondant cutters and even large piping tips, for smaller circles.
Cutters leave a much cleaner line than knives, so use them when you can.
RECIPES
Bake and prepare:
1 recipe White or Chocolate Cake Cupcakes, Chocolate Cupcake version
1 recipe Tami's or Perfect Buttercream (makes 3 cups) as both a filling for the cupcakes and for crumb coating the cupcakes.
1 recipe Marshmallow Fondant or MMF I had all my fondant colors made ahead of time.
KELLY SAYS: I had to make a lot of colors to make these Pokemon cupcakes, so, I had to knead in gel color after the MMF was completely mixed. I believe I made 12 colors in all.
Had I been making a cake, and needed a large amount of MMF in the same color, I would have added the gel color directly into the melted marshmallows, at Step #5 of the MMF Recipe See tutorial on how I kneaded in the colors at the MMF Fondant Recipe.
STEP 1: PREPARE ALL OF THE CUPCAKES
Fill and ice all cupcakes before you before you create the MMF topper designs.
1. Fill all the cupcakes by putting Tami's Buttercream in a piping bag with a plain #10 piping tip.
Insert the tip, about 1/2 the length of the tip, into the center of the cupcake. Gently squeeze the bag till you see the top of the cupcake puff up a little. DO NOT try to overfill the cupcake or the top will pop right off!
KELLY CA SAYS: believe me, I know from experience! lol!
2. Prepare cupcakes for fondant by applying a thin coat of buttercream with a small offset icing spatula.
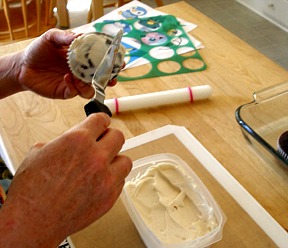
KELLY SAYS: The circle drafting template you see in the photo was a big help in making my cardboard patterns.
3. Cover the cupcakes with plastic wrap so the icing will not dry out. Preferably place in an airtight container and set aside.
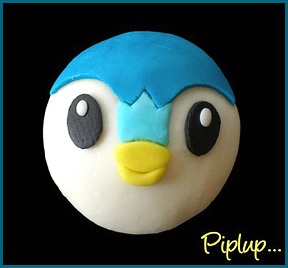
STEP 2: BUILD PIPLUP'S FACE – ROLL THE MMF AND CUT OUT THE SHAPES. PUT TOGETHER.
Build Piplup's face before adhering it to the filled and iced cupcakes.
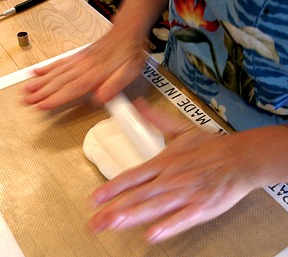
1. Pinch off just enough white MMF to work with. Keep the rest tightly covered in an airtight container so it will not dry out.
Use a small Wilton fondant roller, fitted with the rolling bands, to get a nice even thickness. I like to roll all my fondant on a Silpat nonstick mat about 1/8-inch thick.
KELLY SAYS: The Silpat mat worked SO well. I didn't have to use any cornstarch or powdered sugar to keep the MMF from sticking to my work surface! You must be EXCEEDINGLY tidy when you change colors when rolling out your MMF on the Silpat mat! Nothing is worse than rolling out your pretty white fondant and noticing that there are all sorts of other colors mixed in. Wipe all crumbs off your Silpat before you switch colors.
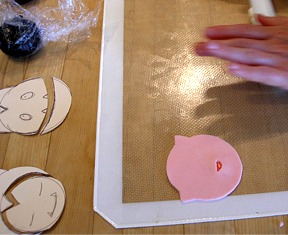
2. Since Piplup's head is round, use a round biscuit cutter to cut out the white base layer.

KELLY SAYS: Use a cutter, whenever possible, for nice clean cuts.
3. After you cut the base layer cut, then cut the rest of the shapes for Piplup's face. Since the fondant cuts better with cutters, use the circle cutter for the blue and then cut two of the forehead shapes out of the circle. Cut around the cardboard template with a very sharp Exacto knife, being careful not to tear the fondant. Cut slowly, for a cleaner edge.
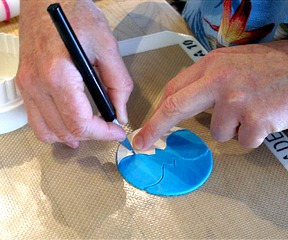
KELLY SAYS: Quickly remove scraps of MMF and rewrap them so they don't dry out. Why waste a good thing?
4. Adhere the cut out piece of MMF to the already cut-out white base. Moisten the back of the piece you wish to layer with a light coating of water. Use a small clean paintbrush, for better control.
KELLY SAYS: You can see that I have positioned the moistened forehead pieces and I am cutting out the other shapes.
STORAGE: KEEP ALL OF THE MMF SHAPES UNDER PLASTIC WRAP AND IN AN AIRTIGHT CONTAINER SO THEY DO NOT DRY OUT.
STEP 3: APPLY THE PIPLUP'S FACE TO THE BUTTERCREAM COVERED CUPCAKE
After building most of Piplup's face on the Silpat mat, I then applied it to the buttercream coated cupcake.
1. Remove one cupcake at a time from the plastic wrap and cover the remaining ones so the buttercream will not dry out. Press the the face gently on the cupcake, to help it conform to the surface shape.
KELLY SAYS: If the buttercream has dried or set, apply another thin coating; do not use water to moisten it.
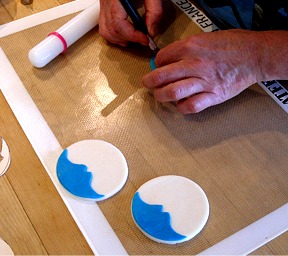
2. After Piplip's face is in place, add the eyes and beak. I used an oval fondant cutter for the eyes and beak, attaching them to the base layer with a thin coating of water.
KELLY SAYSI knew that these pieces had to be added after the face was applied to the cupcake because the curvature of the cupcake top would change the way the face looked.
FINISHED CUPCAKE
ANOTHER EXAMPLE: JIGGLYPUFF
Some of the Pokemon characters have open mouths, such as Jigglypuff. I decided to give them a more “life-like” look by adding the red fondant to the BACK of the face.
1. Cut out the mouth and then flip the face over. Then, roll out a small piece of red and apply it with water to the back of the cut out.
KELLY SAYS: When the face was flipped back over, viola, a nice cute mouth!
2. Use the large end of a piping tip for the Pokemon with round eyes.
KELLY SAYS: I used a smaller circle cutter for the iris and the small end of a #10 tip for the white highlight of the eye.
I made the little forehead curl by pulling of a piece of fondant and rolling it in the center, leaving a round knob on each side. I then formed it into a spiral, moistened it and pressed it into place.
FINISHED CUPCAKE
KELLY SAYS: You can see that Jigglypuff has little pointy ears that hang off the edge of the cupcake. I reinforced the area under the ears by adding a small ball of fondant between the top of the cupcake and the underside of the ear. This added a little support and helped keep the ears from drooping.
SUMMARY
KELLY SAYS: I hope this little tutorial helped you visualize the steps I used to make these cupcakes.
It took me a VERY long time to make the MMF toppers but it was a fun process and my son thought they were so cool and so did the children who attended his birthday party.
If your cherub is not interested in Pokemon, this technique can be used to depict all sorts of cartoon characters. Just have fun!!