
Recipe by Sarah Phillips; Food Styling and Photos by Kelly Hong © 5-18-2016 Sarah Phillips CraftyBaking.com
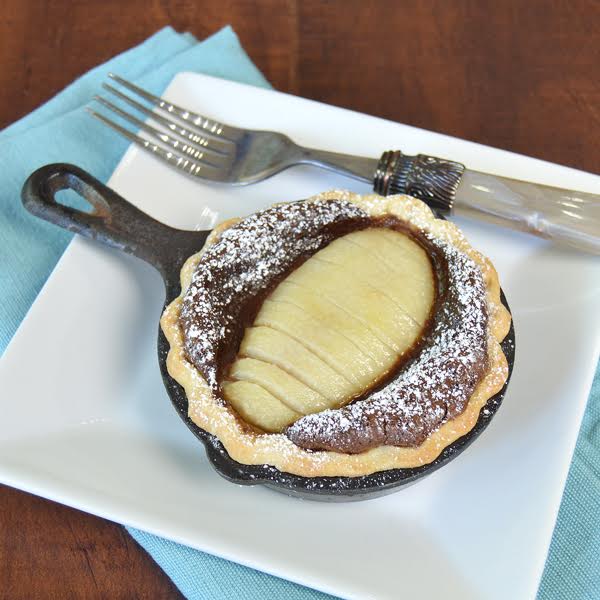
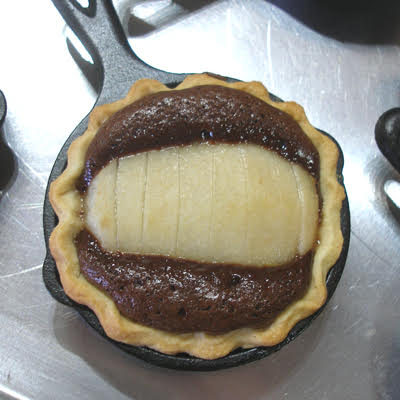
The combination of pears and chocolate in a tart shell is divine! The chocolate filling is reminiscent of a chocolate lava cake, rich and creamy at the center, with a nice brownie-like chew on the edges.
The pears exude a sweet syrup as they bake. The combo is simply indescribably good. Well, let’s just say that you simply HAVE TO make this recipe. It’s THAT delicious!
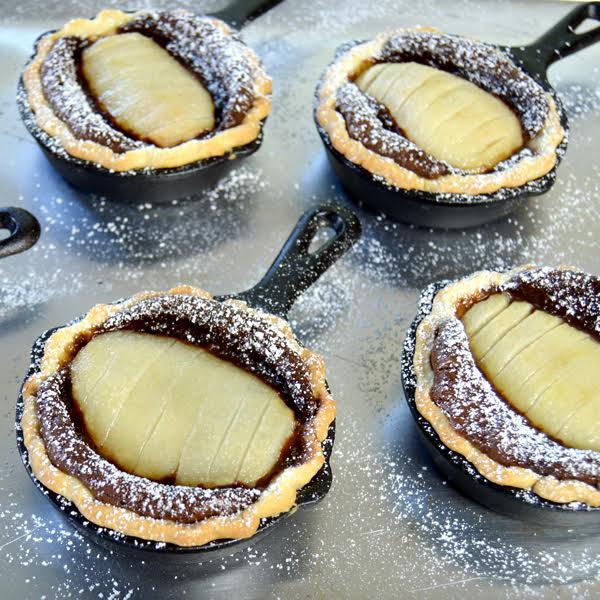
We made ours as tarts in mini cast-iron skillets for fun.
We rescued our blemished pears from our local grocery store; luckily they were marked down in price because they were bruised, but still firm and were perfect for this recipe. Sometimes fruit becomes bruised in the supermarket from too much handling, and it can become food waste or, in few cases, it is sold at a lower price. Ask your grocer for any bruised fruit that is slated to go to the trash bin, and they may be able to sell it to you at a reduced price, instead of it eventually becoming landfill and contributing to pollution. Join our Ugly Produce is Beautiful℠ Educational Campaign, helping to bring awareness to our Nation’s enormous food waste problem.
PIE RECIPE HELP
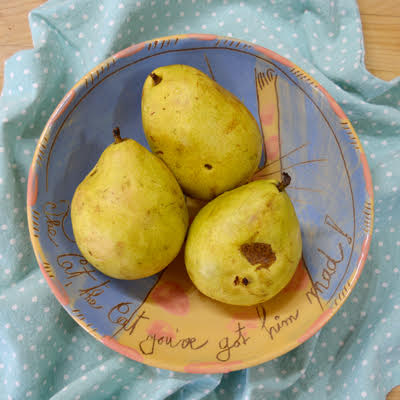
This recipe is a great way to use those “ugly” or imperfect bruised but still firm pears!
SECRETS
If you have extra pie dough left over, wrap and freeze it for another time. Or roll it out, sprinkle with a mixture of cinnamon and sugar, cut out shapes and bake at 375 degrees F or until done. Makes a delicious snack.
INGREDIENTS
For the tart crusts:
1 recipe Sarah’s Perfect Pie Dough (double crust), well-chilled; Make a single crust when using an 11- x 12-inch tart pan
For the pears:
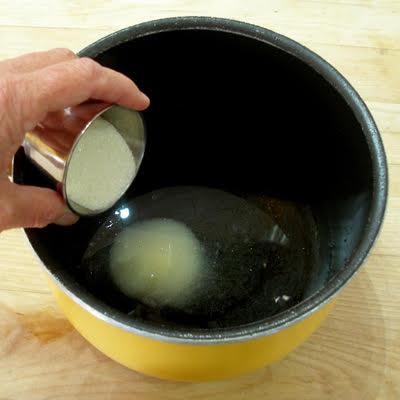
1 cup water
2 tablespoons sugar
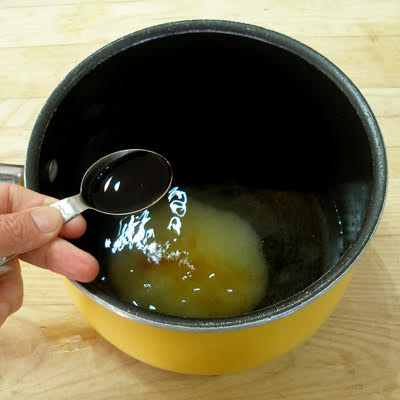
3 tablespoons dark rum or 1 tablespoon vanilla extract
2 pears, ripe but still firm, about 1 pound total; use Anjou, Bosc, or Winter Nellis because they hold their shape when poached
For the chocolate filling:
3 tablespoons unbleached all-purpose flour; spoon into measuring cup and level to rim
1/4 teaspoon baking powder
1/4 teaspoon salt
4 1/2 ounces good-quality semisweet or bittersweet chocolate
7 tablespoons unsalted butter, diced
1/2 cup sugar
1 large egg
1 large egg white
For the garnish:
Whipped cream or powdered sugar, optional
Equipment:
Eight 3 1/2-inch miniature cast-iron skillets
One 5-inch round biscuit/cookie cutter
Pie weights, rice or dry beans
Melon baller, optional
INSTRUCTIONS
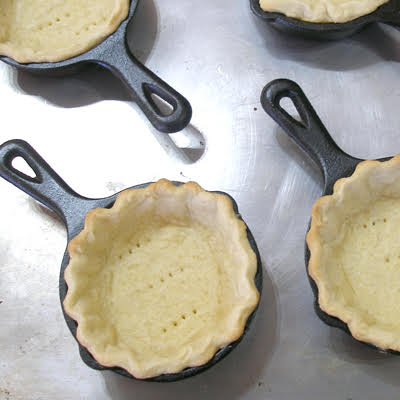
STEP I: FORM THE PIE CRUST DOUGH IN THE MINI CAST-IRON SKILLETS AND PARTIALLY PREBAKE
Form the pie crust dough:
We have ample tips on How to Roll, Flute, and Blind Bake Pie Crusts.
Sarah’s Perfect Pie Crust Dough needs to be WELL chilled, so it does not stick when rolled.
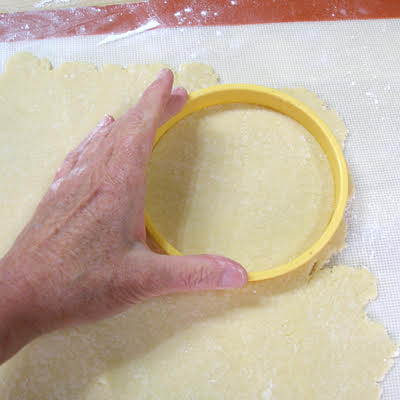
1. Cut the chilled dough in half, and leave the rest in the refrigerator.
2. Roll out dough to about 3/8-inch thickness, on a floured work surface. The dough should be fairly thin.
3. Cut out eight rounds of dough total with a 5-inch round biscuit/cookie cutter.
Set the dough rounds on a parchment paper lined baking sheet.
Refrigerate until ready to use.
Set scraps aside, gently press them together, wrap and place the scraps in the freezer to rechill.
4. Remove the second half of dough from the refrigerator, and repeat the above steps.
5. Remove the scraps from the freezer, reroll and cut. Place on the backside of a rimmed baking sheet and refrigerate until ready to use.
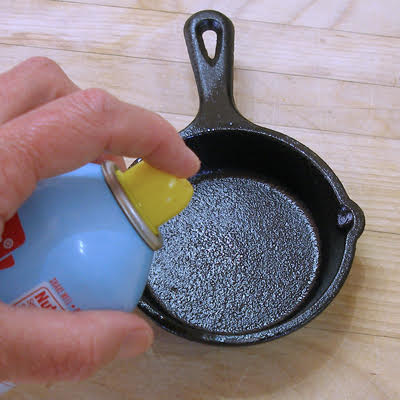
6. Lightly spray the mini cast-iron skillets with non-stick spray.
7. Gently remove the dough from the baking sheet, and fit it into the mini skillets, being careful that you do not stretch the dough.
Stretching the dough will cause shrinking when baked.
NOTE: If you are using a tart or tartlet molds, you do not need to crimp the edges. Simply roll a rolling pin over the mold to remove any excess dough.
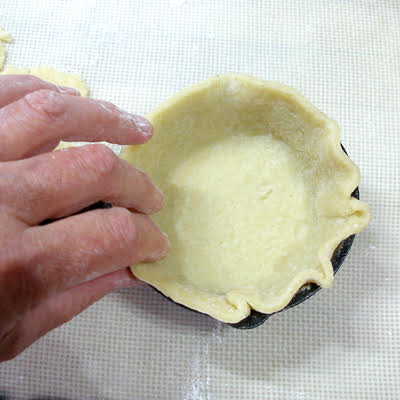
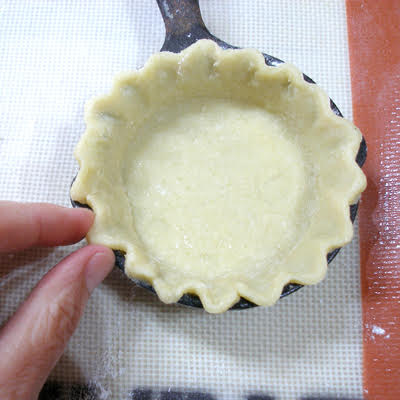
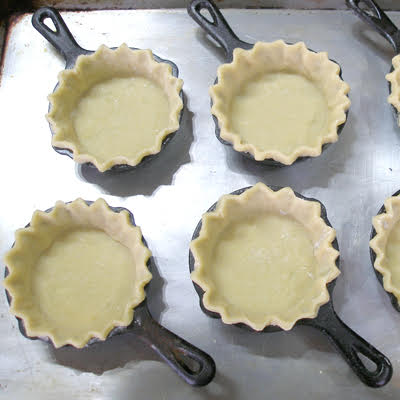
8. Flute the edges of the dough, then place the skillet on a rimmed baking sheet and place into the refrigerator to chill.
Chill the filled molds for 20 minutes before baking.
Partially prebake the pie crust dough:
1. While the formed pie crust dough chills, position an oven shelf to the middle of the oven.
Heat the oven to 375 degrees F.
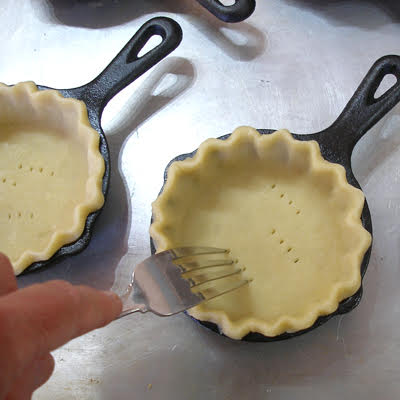
2. When chilled, remove the baking sheet from the refrigerator and press a fork into the bottoms of the tart shells a few times.
This is also a good time to refine the crimping on the edges of the skillet tarts.
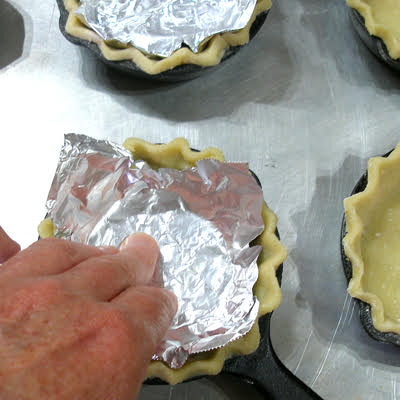
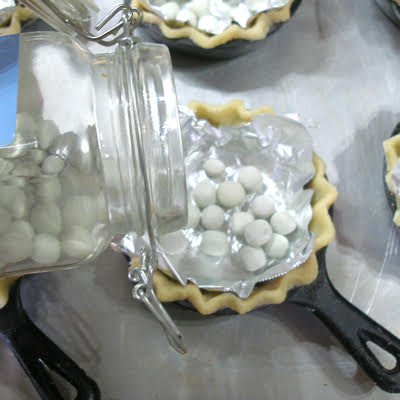
6. Cut squares of foil and carefully fit them into the molds. Try not to disfigure the edges as you press.
Fill each mold with pie weights, rice or dry beans.
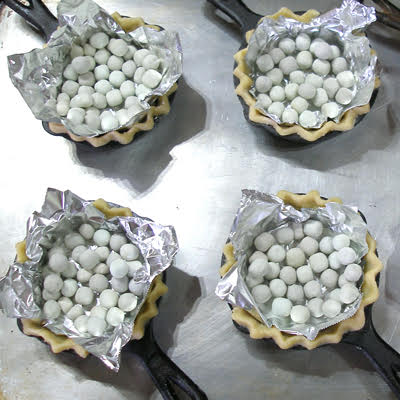
7. Bake for 15 minutes. At this point, the crusts will be partially baked.
They will be baked again, when filled, so do not be concerned that they are not completely browned.
NOTE: For an 11- or 12-inch tart pan, bake the dough for 20 minutes.
8. Remove from oven, then carefully pull the foil out, removing the pie weights. Set aside to cool.
9. Optionally, turn off the oven or reduce the oven’s heat to 350 degrees F.
You will need to heat it again in Step III.
STEP II: PREPARE AND POACH THE PEARS
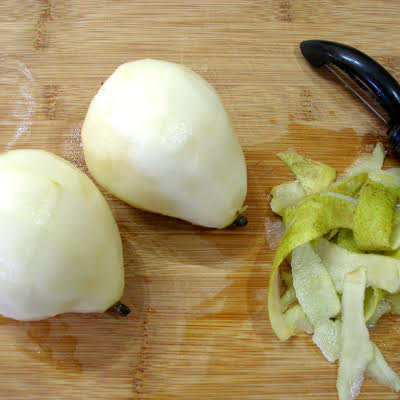
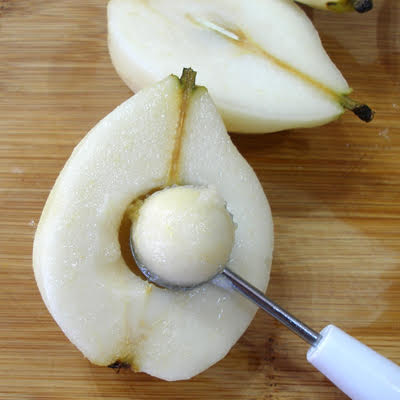
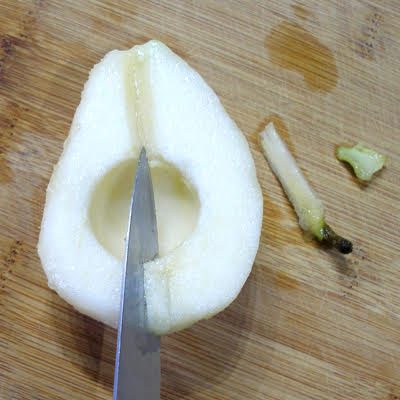
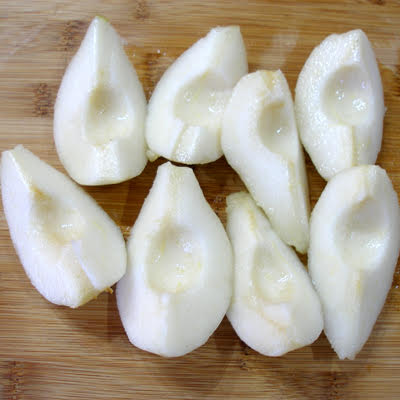
1. Peel and core the two pears. We use a tool called a melon baller to core the pears!
Cut each of them lengthwise into quarters.
NOTE: If you are making an 11- or 12-inch tart, cut the pears into sixths, to get twelve pieces total.
2. Combine the water, sugar and rum in a medium saucepan. Bring to a simmer over medium heat.
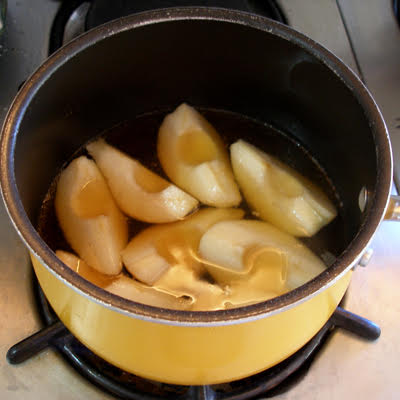
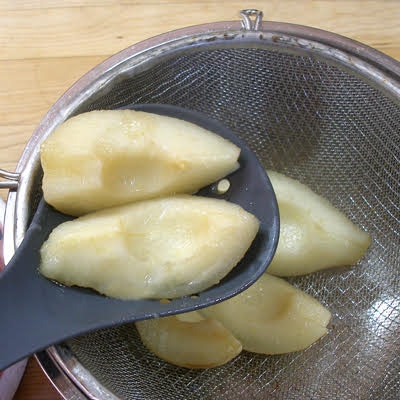
3. Add the pears to the saucepan and simmer for 4 minutes, until tender and slightly translucent. Lift the pears from the syrup cautiously with a slotted spoon, and set aside in a colander to drain.
NOTE: It is important to avoid over-poaching the pears, or they will be difficult to handle.
STEP III: MAKE THE CHOCOLATE FILLING
1. Check the oven’s heat that it is set to 350 degrees F from Step I, or heat it to 350 degrees F. Make sure the oven shelf is placed in the middle of the oven.
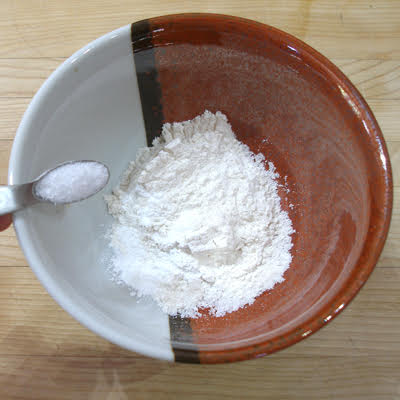
2. Combine the flour, baking powder, and salt in a small bowl and set aside.
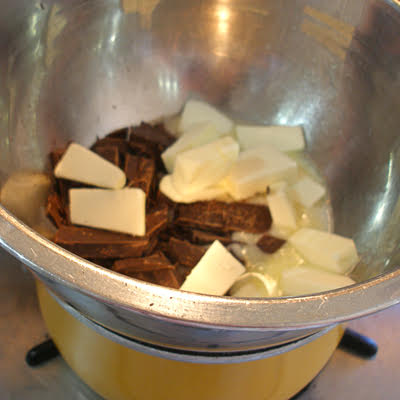
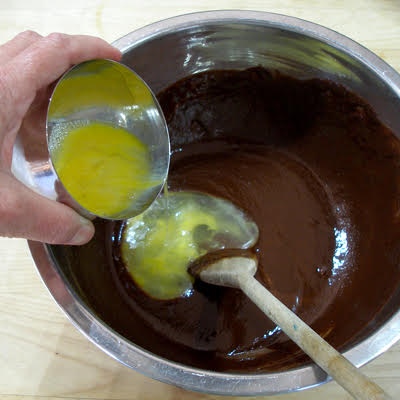
3. Melt the chocolate and butter in a double boiler, or in a heatproof bowl set over a pan of simmering water, stirring frequently.
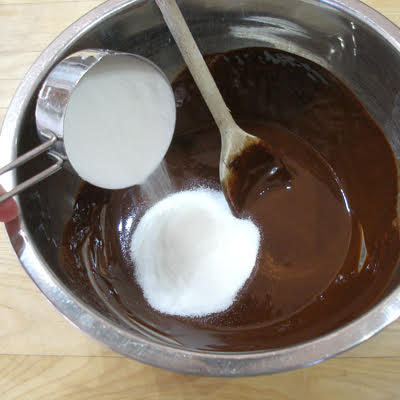
4. Transfer the melted chocolate to a medium bowl, add the sugar, and stir.
Add the egg and egg white, stirring well between each addition.
Add the flour mixture and stir again until just combined.
STEP IV: ASSEMBLE AND BAKE
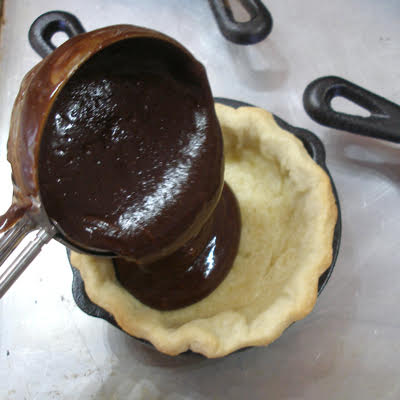
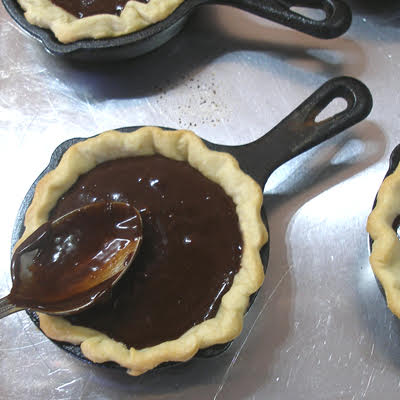
1. Pour the chocolate filling into the prebaked tart shells and even out the surface with a spatula.
NOTE: If making tartlets, it is a good idea to use an ice cream scoop to fill the shells.
Fill them until they are a little over 1/4-inch from the top of the shell. Do not overfill, because you still have to place the pear piece on top.
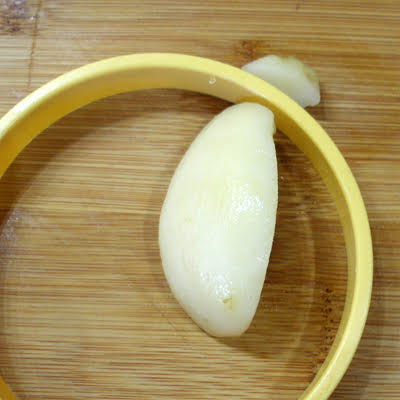
2. If your pear quarters are too large to fit in the tartlets, simply cut off the pointed end, using the same cookie cutter you used to cut out the tart shell crust.
NOTE: If you are making an 11- or 12-inch tart, arrange the poached pear pieces over the filling in a sun-ray pattern, the small ends pointing toward the center of the tart.
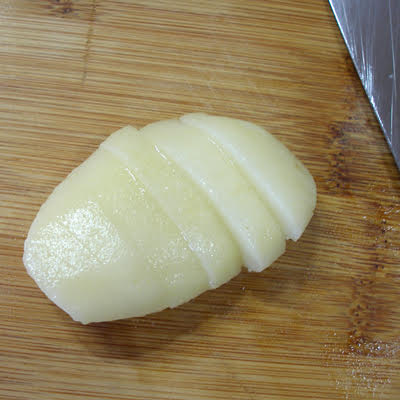
3. Carefully cut each of the pear quarters, horizontally, into strips, being careful not to cut all the way through.
This step is optional, but makes a prettier final product.
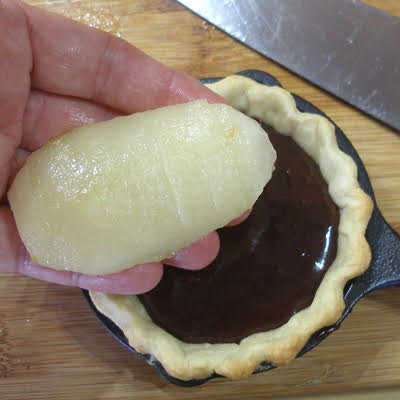
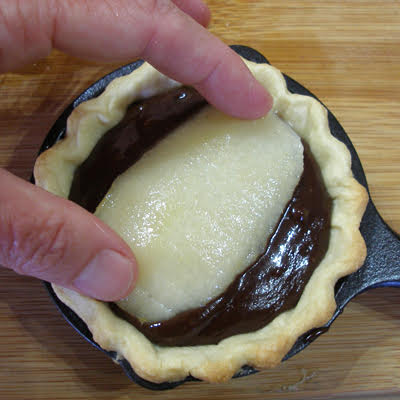
4. Use the knife to transfer the pear to your hand, and center it on the top of the tart, pressing down, gently.
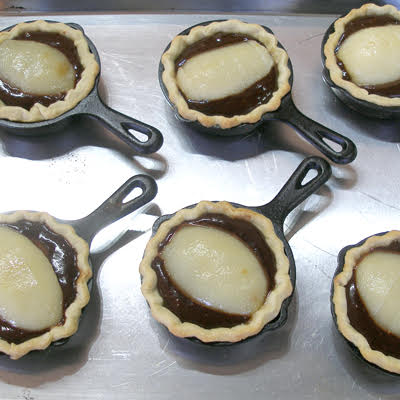
5. Bake for 15 minutes, until the filling is just set and slightly puffed on the edges, and the crust is golden.
NOTE: if you are baking an 11- or 12-inch tart, bake for 20 minutes.
6. Transfer to a rack and let cool completely before serving.
SERVE
1. Serve in their mini cast-iron skillet pans with a dollop of whipped cream or sprinkled with powdered sugar.
STORAGE
Store pie in the refrigerator for a few days.