Variaitions: Dark Chocolate Marshmallow Fondant; White Chocolate Marshmallow Fondant
Plus, How to Tint Tutorial and Extra Tips
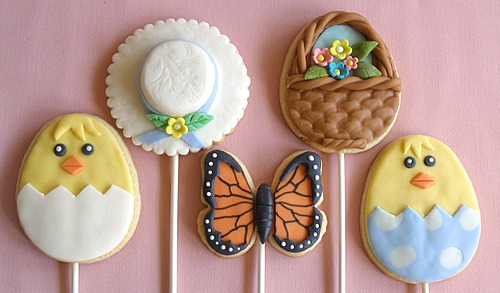
Sugar Cookie Pop Tutorial / Easter Cookie Lollies Recipe
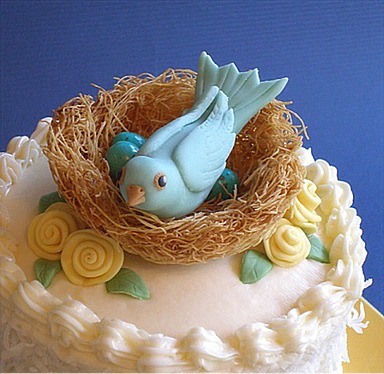
Mother's Day Coconut Cake Tutorial

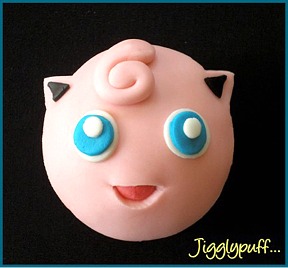
Pokemon MMF Decorated Cupcakes
This is one of the more detailed tutorials on the internet; I took extra special care to give a lot of detailed explanations, tips, and techniques. No wonder it is one of our most popular recipes.
Rolled Marshmallow Fondant is a stretchy material made from melted marshmallows, corn syrup, water and powdered sugar. It can also be tinted and flavored. It is used to cover cakes with and to decorate cookies and cupcakes, too. It is becoming more and more popular because it tastes great and is less expensive and easier to make than a regular fondant recipe.
How much fondant do I need to cover my cake with?
FROSTING, ICING ETC RECIPE HELP
NewYorkSarah, Premium Member Says: “Last week I made the Marshmallow recipe and I LOVED THE RESULTS!!! The fondant was so pliable and didn't rip when I placed it on my cakes … I also added 1 tablespoon of Crisco to this recipe and found it to aid in the pliability of the fondant.”
Fatchef Says: “I made the MMF (very easy to make and work with). It also tastes really good compared to the Wilton recipe for fondant or other store bought ones. I coved 2 different cakes on 2 different days and occasion. Since my fillings needed to be refrigerated, I placed all the cakes covered with MMF in the refrigerator. When I took them out for more deco and on the display tables for a couple of hours before cutting into them, there were fine. No problems with condensation or anything else. Actually the MMF hardened just fine and was easy to cut into. I hope this helps. “
INGREDIENTS
16 oz white mini- (or large) marshmallows; 100 mini-marshmallows = 10 large; for best results, use a good quality brand and fresh marshmallows. Mini ones melt the easiest.
2 tablespoons water; or more, if needed – If using large marshmallows, you may need to add 1 teaspoon more water.
1 to 2 teaspoons corn syrup (optional); helps MMF roll more easily and not crack as readily
1 teaspoon lemon juice or citric acid, optional; SARAH SAYS: The addition of lemon juice helps cut the sweetness of the recipe.
2 pounds (approximately 8 cups) powdered or confectioners' sugar, sifted (measure and then, sift); or more, as needed
1/2 cup Crisco shortening; or more, as needed to grease your kitchen implements and hands with
SARAH SAYS: melted marshmallows get sticky and Crisco helps grease surfaces so you can work with it more easily.
Flavorings: 2 teaspoons vanilla or 1 teaspoon almond extract or 1/4 to 1/2 teaspoon any flavored candy oils; candy oils are strong, so be careful how much you add
EXTRAS
Extra cornstarch: You can mold MMF. Dust molds lightly with cornstarch before using.
You can add 50/50 mixture of gum tex or tylose to the recipe so it dries harder.
INSTRUCTIONS
STEP I: MELT THE MARSHMALLOWS AND MIX THE INGREDIENTS
Sift the powdered sugar into a large bowl and measure out the extracts, corn syrup and lemon juice so everything is ready to go when your marshmallows are completely melted.
1. Grease a large microwave proof bowl with shortening. Set aside.
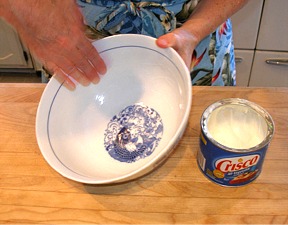
KELLY SAYS: This recipe is so easy! One tip—grease your hands and the bowl you mix the stuff in with Crisco or you will be picking marshmallow and sugar from between your fingers! I can't use gloves to knead—they never stay on my hands!
2. In a large microwave proof bowl, pack in marshmallows and add the water.
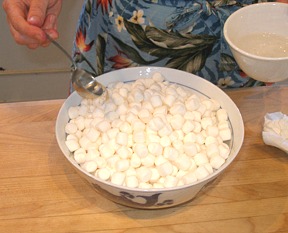
3. Microwave on high for 20 to 30 seconds at a time, just long enough for the marshmallows to soften and puff up.
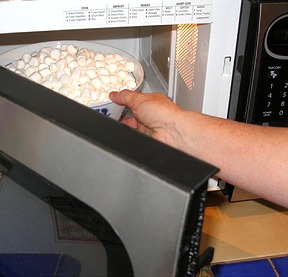
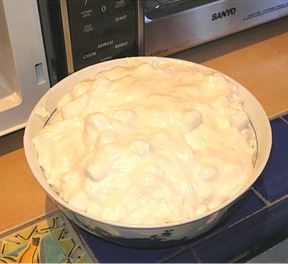
4. Stir melted marshmallows with a greased (use Crisco) heat-proof rubber spatula or greased wooden spoon, until it is well combined. If marshmallows are not completely melted, microwave for 30 seconds more, and stir after every microwave session before deciding to heat more. Keep doing this until all the marshmallows are melted.
SARAH SAYS: BE CAREFUL! The marshmallow mixture is very hot when comes right out of the microwave and will stay hot for awhile!
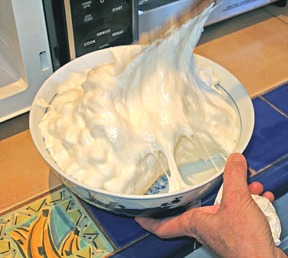
SARAH SAYS: You can melt the marshmallows and water over a double boiler. I have placed the ingredients in a stand mixer bowl and placed this over simmering water. Be careful because the mixing bowl gets really hot. Then, after the marshmallow mixture has melted, let it cool slightly, and then clip the bowl onto the stand mixer. (No muss, no fuss!)
Or, if you melted the marshmallows with water in another pot or bowl, you can mix them with a stand mixer. Make sure you grease the mixing bowl and bread dough (hook) attachment with Crisco shortening. Then, scrape them into the mixing bowl with a greased (shortening) heat-proof spatula. Be careful – the mixture is extremely hot.
5. Add the corn syrup, lemon juice, and flavoring, and stir with a greased (shortening) heat proof rubber spatula or large mixing spoon.
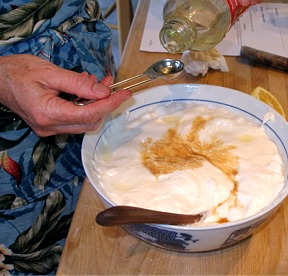
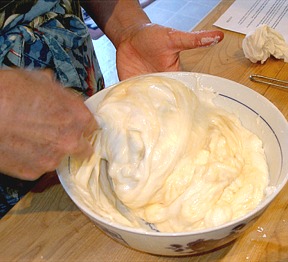
The next step is to knead the mixture, either by hand or with a stand mixer.
STEP II: KNEAD THE MARSHMALLOW MIXTURE
Marshmallow Fondant can be kneaded with a powerful stand mixer with the dough hook attachment or entirely by hand .
Knead with a stand mixer: NOTE: It includes finishing with a good hand kneading.
1. Grease the mixing bowl and the hook attachment with shortening before clipping on to the stand mixer.
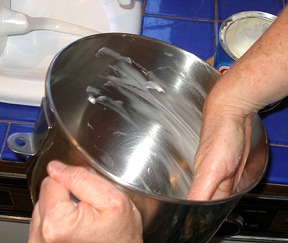
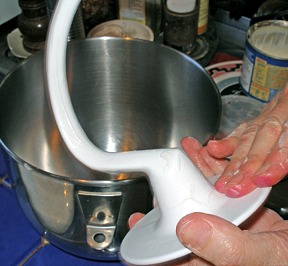
2. Add 6 cups sifted powdered to the bowl, reserving about 2 cups aside, to knead in later, if needed. Make a well in the center of the sugar.
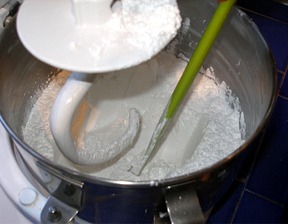
3. Scrape the warm marshmallow mixture into the mixing bowl.
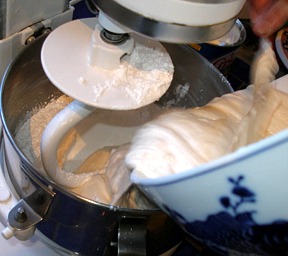
4. Turn the mixer on low speed.
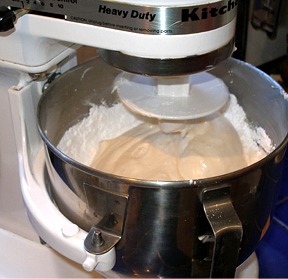
At first, it will look like all the sugar will not get mixed in but, be patient, it will.
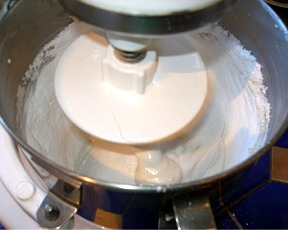
5. Continue to mix on low for about 3 minutes, or until all the sugar is combined and mixture starts to firm up.
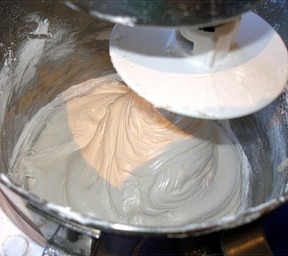
6. Finish the Marshmallow Fondant with hand kneading of 5 to 7 minutes or more:
A. While fondant is in mixer, prepare your kneading surface by greasing your countertop with a thin layer of shortening. You must also shortening grease your hands. It helps prevent the fondant from sticking and will give it a smooth finish.
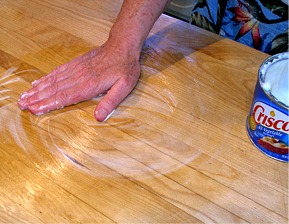
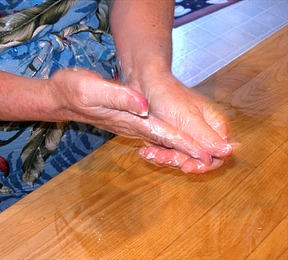
B. Pull the fondant out of the mixer bowl and put it on your greased work surface.
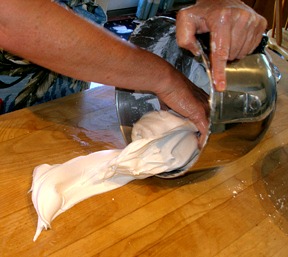
C. If mixture is still soft and sticky, sift about about 1/2 cup of the 2 cups reserved powdered sugar over the marshmallow mixture and knead it in.
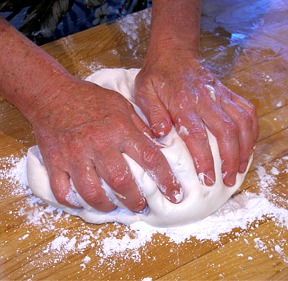
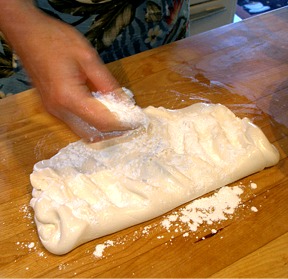
7. Continue sifting powdered sugar over the mixture, about 1/2 cup at a time and kneading after each addition, until the mixture becomes wonderfully pliable and firm, smooth and elastic. Re-grease your hands as necessary. This takes roughly about 5 – 7 minutes by hand.
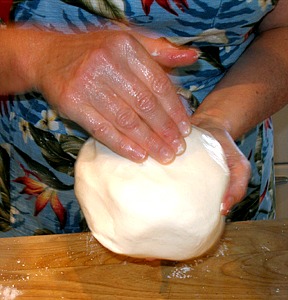
8. When fondant is of the right texture, form it into a ball and cover the ball with a LIGHT coating of shortening and wrap the ball with plastic wrap. Place it in an airtight container or resealable plastic bag, and let it sit preferably, overnight before using.
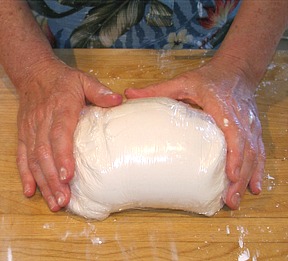
To Mix Marshmallow Fondant Entirely by Hand:
1. Prepare your kneading surface by greasing your countertop with a thin layer of shortening. You must also shortening grease your hands. It helps prevent the fondant from sticking and gives it a smooth finish.


2. With a greased heat-proof rubber spatula or greased wooden spoon, scrape the bowl of marshmallow/sugar mixture on the countertop. Sift the powdered sugar over the melted marshmallows, about two cups at a time. Fold until all is incorporated and it is no longer sticky. Stop adding most of the sugar is incorporated.

2. Knead mixture with shortening greased hands. If the mixture is still too hot, use a greased heat-proof rubber spatula or greased wooden spoon, to essentially fold the ingredients together on the countertop.
3. Continue to sift the powdered sugar, one or two cups at a time, and knead after each addition.

4. Re-grease your hands as necessary. Keep kneading, adding sifted powdered sugar over the mixture and knead. The mixture will eventually become quite stiff. Add enough powdered sugar until the mixture becomes pliable and firm, smooth and elastic. This takes roughly about 8 – 15 minutes by hand. Form into a ball. Preferably, let rest overnight in an airtight container before using.


STEP III: ROLL THE MARSHMALLOW MIXTURE
Roll about 1/8-inch thick, no more than 1/4-inch — I like to roll mine thin, almost paper thin and use a roller with bands for an even thickness. The MMF will almost meld into the buttercream. The thicker you roll your fondant out the less likely it will melt into the buttercream icing thus giving you the “hard exterior.” Use a thin coating of Crisco to roll your MMF on. A little amount of Crisco goes a long way. Roll the fondant a coupe of times and flip over and roll again. (Some use a light dusting of powdered sugar to roll their MMF on, but it has a drying effect and causes eventual cracking, so be careful how much you use. Cornstarch dries more than powdered sugar.)
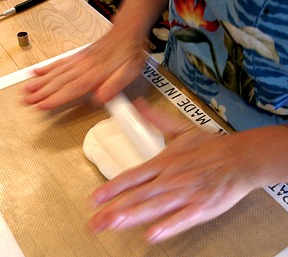
KELLY CA SAYS: I roll my MMF on a Silpat mat, It works SO well. I didn't have to use any cornstarch or powdered sugar to keep the MMF from sticking to my work surface!
NOTE: You must be EXCEEDINGLY tidy when you change colors when rolling out your MMF on the Silpat mat! Nothing is worse than rolling out your pretty white fondant and noticing that there are all sorts of other colors mixed in. Wipe all crumbs off your Silpat before you switch colors.
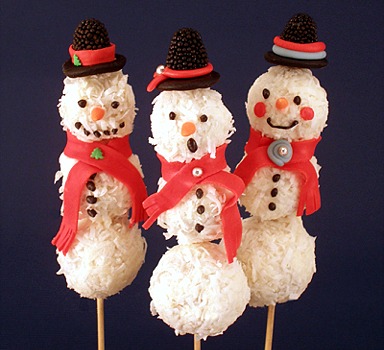
Snow Cake Men with MMF Accessories
STEP IV: TO COVER A CAKE WITH MMF
Coat cake with a THIN coating of buttercream, jam or jelly (about 1/4 to 1/3-inch thick) because MMF needs a sticky surface to adhere to. Make sure your icing is smooth.
SARAH SAYS: You can let the buttercream crust over before applying the MMF, so you can adjust it, if necessary. To adhere to the cake, pipe piping gel at the bottom of the cake around the board, to which the MMF will adhere to.
I do not recommend using whipped cream or an icing that needs refrigeration as Marshmallow Fondant does condense when removed – just make sure you remove it to an air conditioned room or dry it in front of a fan to dry, if you do.
When trimming MMF, it will shrink. Trim it right below the cake board so when it shrinks, it will be the perfect length.
MMF shrinks slightly as it dries.
Covering a large cake: Roll the rolled MMF onto a large rolling pin – dust rolling pin with cornstarch or powdered sugar or rub pin with Crisco. Or, roll fondant on clear vinyl. Grease or dust this mat and roll your MMF out on it and then apply to cake.
STORAGE
Coat fondant ball with a good layer of Crisco shortening, wrap tightly in a plastic wrap and then place in a re-sealable bag and then place in an airtight container. Squeeze out as much air as possible. Store at room temperature in a cool, dark place where it will keep for two months or more. To soften, microwave at 50% for five to ten seconds on high, at a time. Knead before resuming.
If you refrigerate a marshmallow fondant covered cake, it will condense because it contains sugar — sugar attracts moisture from the refrigerator. You need to treat it the same as a fondant covered cake when you remove it from the refrigerator.
Some have said do NOT freeze marshmallow fondant. But, I have frozen it. Wrap it in plastic wrap and then place in an airtight bag. Thaw in its wrappers at room temperature. It takes about 24 hours to come to room temperature. It's hit or miss when frozen as part of a decorated cake….Sometimes it will weep….
Marshmallow fondant will hold up in about 75 degree F weather, but no warmer. Does not keep well in humid weather because it is made of sugar. If hot and humid, keep cake in an air-conditioned room.
TINTING MMF
Americolor gel colors work well. Make the color darker than you want as it will lighten as you add the powdered sugar. Let the fondant sit overnight, wrapped airtight, as the color will darken.
There are two ways to add in color:
1. ADD COLOR DIRECTLY TO MELTED MARSHMALLOWS: When making a making a MMF cake covering, for example, and you need a large amount of MMF in the same color, add the gel color directly into the melted marshmallows, at Step #5 of the MMF Recipe, above.
2. KNEAD IN COLOR: Another way is to knead in color after the fondant has been made. This is especially the way to go if you are tinting small amounts of MMF. The larger the piece, the more kneading it takes. Make sure you wear gloves because the color will get all over your hands! Wilton's clear decorating gloves are great to use.
KELLY SAYS: I tinted MMF in 12 colors when I made my son's Pokemon Cupcakes for his birthday party! This is exactly how I tinted each one color – by kneading it in by hand!
TO DO:
1. Cut off a piece of white MMF and knead it on a Silpat mat, until it is nice and smooth.
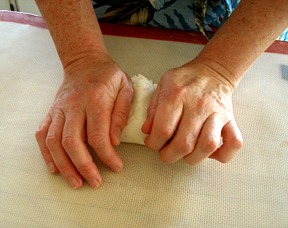
KELLY SAYS: I like to use a Silpat nonstick mat for my kneading surface. I didn't have to use any cornstarch or powdered sugar to keep the MMF from sticking to my work surface! You must be EXCEEDINGLY tidy when you change colors when rolling out your MMF on the Silpat mat! Nothing is worse than kneading your pretty white fondant or one color and noticing that there are all sorts of other colors mixed in. Wipe all crumbs off your Silpat before you switch colors.
2. Place a clean toothpick into your gel paste food color. Swipe color on your piece of MMF.
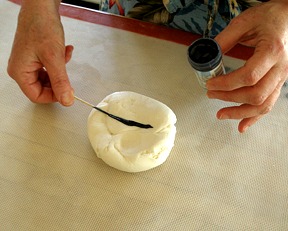
KELLY SAYS: For making the Pokemon Cupcakes, I used Wilton brand. Everytime you stick a toothpick in the gel color, use a clean one.
3. Fold your MMF over the stripe of color, encasing it inside. This will minimize the mess on your hands and work surface.
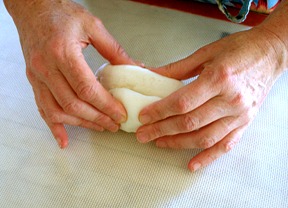
4. Continue to knead your MMF until the color is uniform throughout. This may take some time.
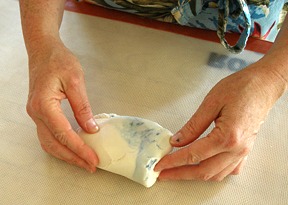
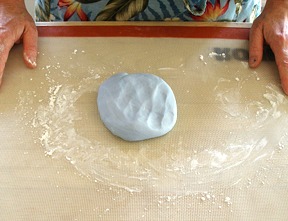
KELLY SAYS: I wanted a light green color.
There are cases when you may want the color to appear marbled, if you desire this effect, stop kneading when desired look is reached. When I was making the Turtwig cupcake, I liked the way the green looked with a little marbling.
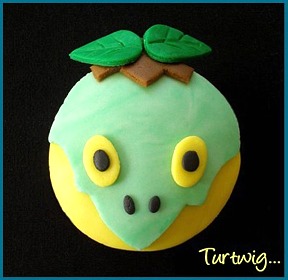
NOTE: When you add the color, especially if you are making a dark color, and you need to use quite a bit of food coloring, your ball of MMF may get a little tacky. If this happens, take out a little cornstarch and dust your surface and your ball of MMF. This will minimize the stickiness. Continue to knead, adding more color with a clean toothpick, until you reach your desired shade.
If you add too much color, and your ball of MMF becomes too dark, you can always knead in some white MMF to lighten the color.
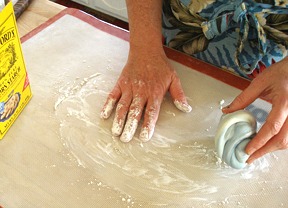
5. When you are done, form the MMF into a ball and coat it with a thin layer of Crisco.
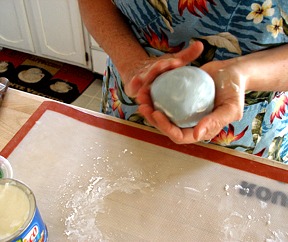
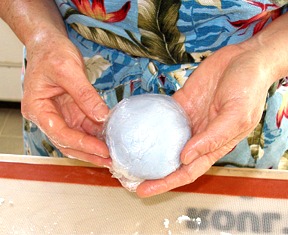
6. Then, wrap the ball in plastic wrap. You can then put all your balls of color in a resealable plastic bag, squeezing out as much air as possible. This will keep your MMF nice and soft, until you are ready to use it.
DECORATING
You can decorate right away, as the Marshmallow Fondant does not need to dry beforehand, however it shrinks a little as it dries. You can airbrush on rolled Marshmallow Fondant, as well as “paint” with luster dusts and paste foods colors mixed with lemon extract, which I prefer for a shiny result, or use vodka.
Use a small amount of water, brushed on with a clean paint brush, or piping gel to attach MMF pieces to one another.
VARIATIONS:
Dark Chocolate Marshmallow Fondant
Add to recipe ingredients, above:
1 ounce melted semi-sweet or bittersweet chocolate
1 tablespoon cocoa powder, Dutch-process or natural (Natural will give a more pronounced flavor)
1. Follow instructions for Step #1, above, for melting the marshmallows. Stir melted chocolate to the melted marshmallows. In a small mixing bowl, sift cocoa powder (if using), in a small mesh strainer, over one cup powdered sugar and combine.
2. Sift cocoa powder/powdered sugar over the melted marshmallows and knead until incorporated. Continue with Step #2, above.
3. See Step #3, above.
White Chocolate Marshmallow Fondant
Use 1 or 2 ounces good quality white chocolate. You may need more powdered sugar in the recipe.
1. Follow instructions for Step #1, above, for melting the marshmallows. Stir melted chocolate to the melted marshmallows.
FROZEN BUTTERCREAM TRANSFER
Can be accomplished on MMF
ATTACHING MMF PIECES TO ONE ANOTHER
Attach two pieces together with a light brushing of water from a clean paint brush.
COOKIES
Attach MMF shapes to warm-to-the-touch cookies and it will melt slightly and adhere to them. Decorate on top with royal or buttercream icing.
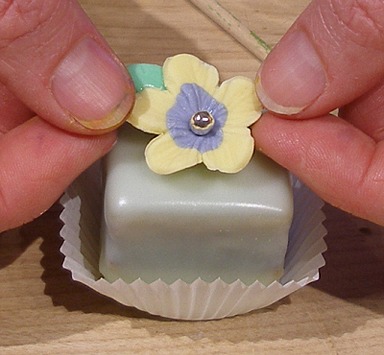
Fondant Flower Toppers
Valentine's Day Love Stacks
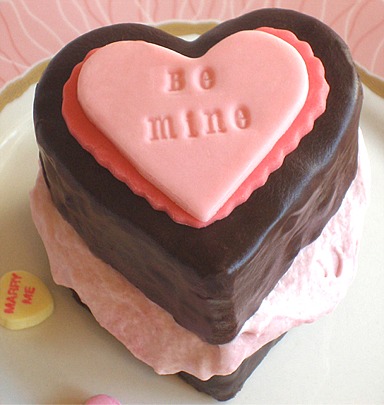
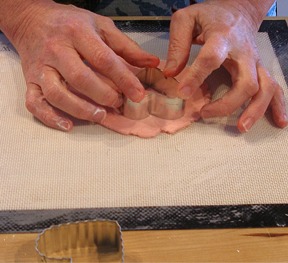
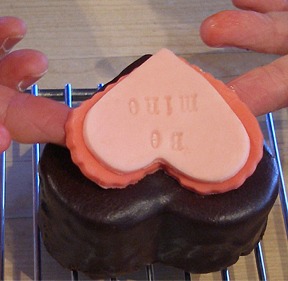
1. To make, I used two cutters that were slightly smaller than the cutter I used to cut the cakes, because I wanted the brown edge to show around the MMF topper.
I used two different pinks, one slightly darker than the other:
I cut out 5 each of the lighter pink hearts.
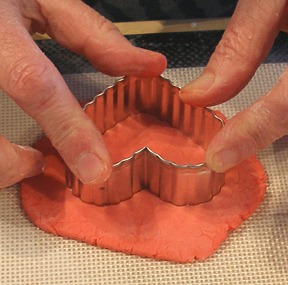
I cut out 5 in the darker pink with a heart cutter that had a scalloped edge, to add a little more visual interest.
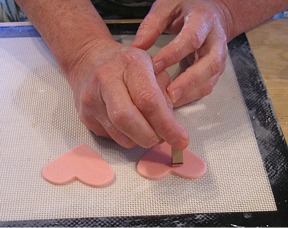
2. I stamped a message on the top lighter pink heart!
Use rubber stamp letters to create whatever sentiment you want to express.
You MUST use rubber stamps that you ONLY use for baking. It is NOT OK to use rubber stamps that you have previously used for crafts, when you are baking.
Press the stamp into the MMF. If you find that your stamps are sticking, you can dip the stamp in a little cornstarch and then brush the excess away.
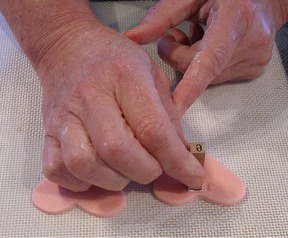
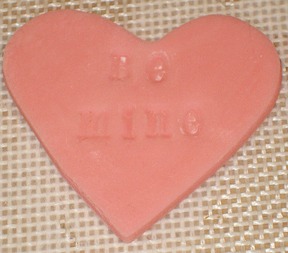
3. Attach the pink impressed heart to the darker pink scalloped-edged heart by wiping or brushing a little water on the back of the impressed heart, and gently press the two pieces together.
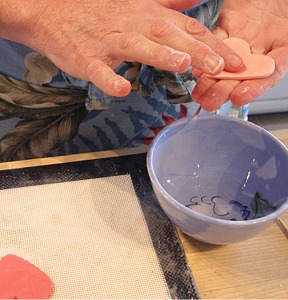
4. Set the five completed toppers aside to dry.
5. When you are ready to make your stacks, take one of your fondant heart toppers and wipe a little corn syrup on the back of it.
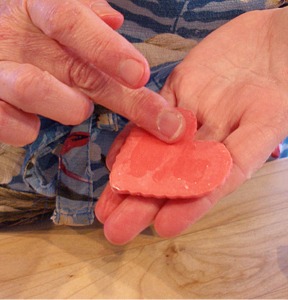
6. Take the ganache-covered heart cake and place it on the top of one of the two cakes that will be made into the stack.
You want to do this BEFORE you stack the hearts together, so you are not exerting too much pressure, which might make your mousse squish out to much.
MORE…
Cake and photo by Ann © Sarah Phillips
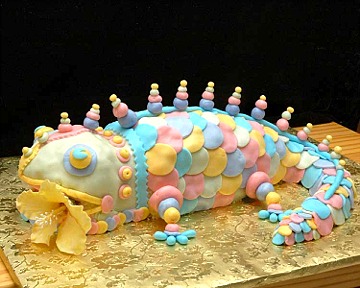
Rainbow Geko Cake by Ann: “The cake was a rousing success and, Sarah, your recipe Sarah's Scratch Cake From a Mix is just absolutely delicious. This is the second cake I've made using it but the first I have been able to sample and it is just the most moist and firm cake I've even eaten. Nobody believed it was a box cake.”
Cake and photo by Ann © Sarah Phillips
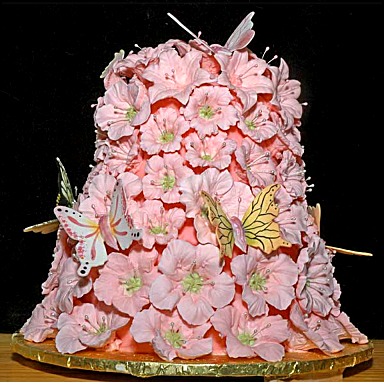
Sweet 16 Cake by Ann: “This is Sarah's Scratch Cake from a Mix using spice cake on the 8″ bottom layers and yellow cake on the 6″ top layers. I tapered the 8″ layer up to meet the 6″ top layer and tapered that one to 4″. I also used Sarah's MMF. Both are excellent recipes! The petunias and lilies are royal icing. The butterflies are gum paste with royal icing bodies.”


