
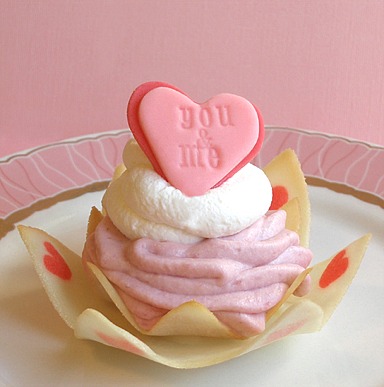
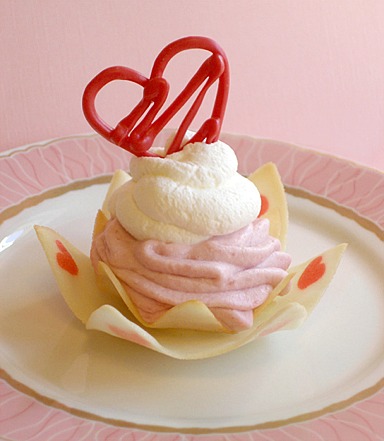
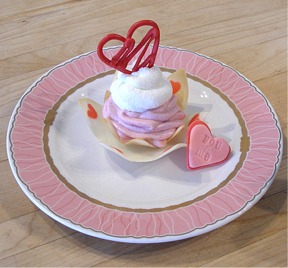
Loving Cups are nested tuile cookie cups filled with White Chocolate Raspberry Mousse, topped with luscious whipped cream! I topped my creations with a Marshmallow Fondant or MMF Topper or a delicious red chocolate heart!, made by hand. We have included a template for the cups, and step-by-step instructions on how to make the toppers. We also use this recipe to make Valentine's Day Love Notes Cookies. Traditionally, tuiles (pronounced “tool-ee”) are thin, crisp almond cookies that are gently molded over a rolling pin or into an arched form while they are still warm. Once set, their shape ressembles the curved French roofing tiles for which they're named. Here, I created a Valentine's variation on the classic French tuile cookie by shaping them with a stencil and while still warm, placing them in a bowl to retain a gently curved shape, to be later filled.
COOKIE RECIPE HELP
INSTRUCTIONS
INGREDIENTS
This special Valentines Day dessert multiple recipes:
Filling:
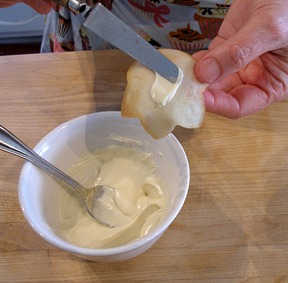
White Chocolate Raspberry Mousse – must be made ahead of time placed in the refrigerator, to chill
Whipped Cream – You can make this ahead of time, or right before you are ready to assemble your desserts
Tuile Cups:
Tuile Paste, to make the cups; recipe, below
red gel paste food color
Tuile Cup Assembly:
3 ounces white chocolate chips or chocolate
Loving Cup Toppers:
1/2 cup red candy melts
Marshmallow Fondant or MMF
STEP I: MAKE THE TUILE CUP PASTE AND COOKIES
TUILE PASTE adapted by Sarah Phillips and Kelly Hong from a recipe by Bo Friberg from “The Professional Pastry Chef” © Sarah PhillipsCraftyBaking.com
This recipe makes a lot of tuile paste, but, it will keep in the refrigerator for several weeks. You can use this paste to make other kinds of tuiles, like little rolled and filled tuiles. It is a very versatile recipe.
INGREDIENTS
8 ounces (2 sticks) unsalted butter, softened
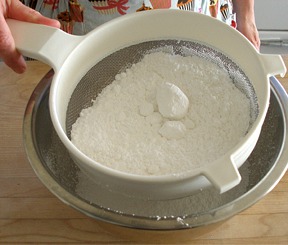
8 ounces powdered sugar, sifted; measure and then, sift
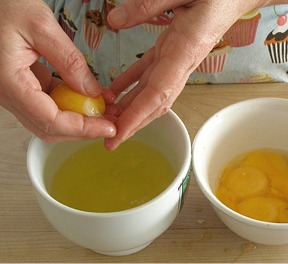
1 cup (about 7 large) egg whites, at room temperature
1 teaspoon vanilla extract
8 ounces bleached cake flour, sifted; measure and then, sift
red gel paste food color
2 ounces of white chocolate, melted, for “glue”
NOTES:
Weigh and sift your sugar and flour before you start mixing the batter.

Separate your eggs and measure out one cup of egg whites, and set them aside.
INSTRUCTIONS
STEP I: MAKE THE COOKIE TEMPLATES AND COOKIES
A. Make the templates: The real trick to making the cookies correctly, is to make good templates.
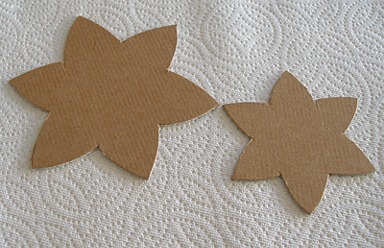
I knew I wanted to have a stacked cup, with a smaller cup nested inside a larger cup, so I cut the shapes out of cardboard, using an x-acto knife.
After that, I transferred the shapes to a piece if thin plastic, about 1/16 thick. You can use a large coffee can lid, or the side of a large plastic food container. Just look around, you may have to be inventive.
You can also use thin cardboard, but these will get dirty and have to be tossed after use. This would be a shame, after going through all the work to make them.
I added a little handle on one side of the template, to facilitate movement.
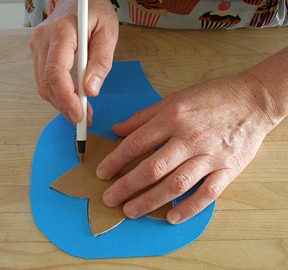
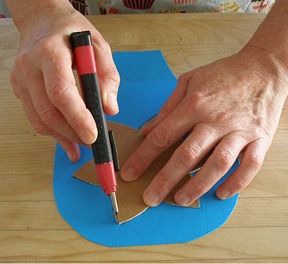
Cut around the drawing with an x-acto knife.
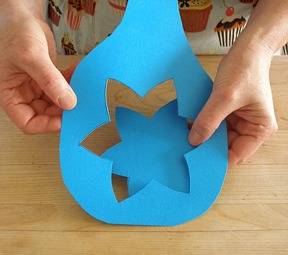
Here are the two templates, ready to go.

B. Make the cookie batter:
1. Position and oven shelf to the middle and preheat your oven to 375 degrees F.
2. Fit your stand mixer with a paddle attachment. Place the butter in your mixer bowl and add the confectioners sugar.
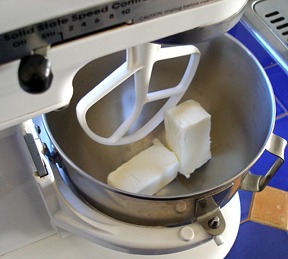
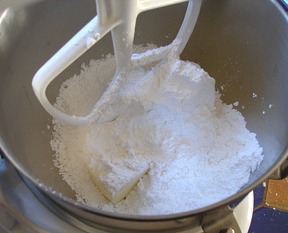
3. With the mixer on medium speed, cream the butter and confectioners sugar together, until the mixture is light and fluffy. Stop the mixer and scrape the sides and bottom of the bowl with a large rubber spatula.
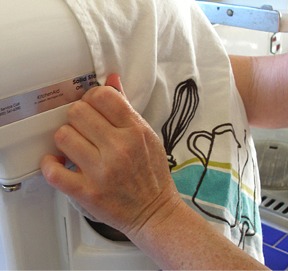
NOTE: While doing so, I find it helpful to cover your mixer with a clean kitchen towel, so the confectioners sugar does not end up all over your counter, and in your lungs.
4. With the mixer on low speed, incorporate the egg whites, a little at a time at the side of the bowl, until they are all added.
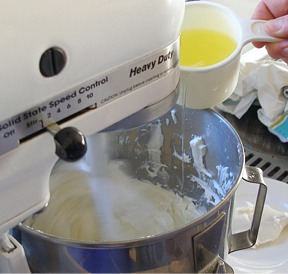
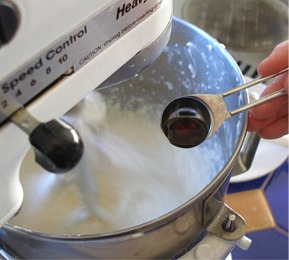
Add the vanilla and mix to combine. Stop the mixer and scrape the sides and bottom of the bowl with a large rubber spatula.
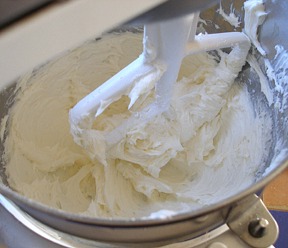
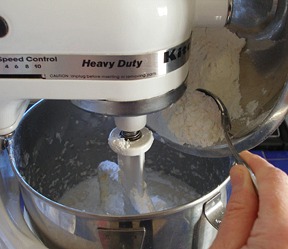
5. With the mixer on low, add the cake flour slowly at the side of the bowl and mix only until it is incorporated. DO NOT OVERMIX.
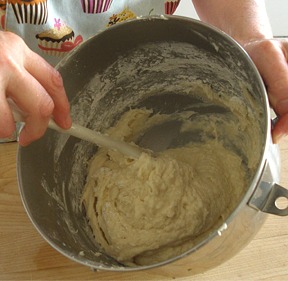
6. Remove bowl from mixer and give mixture a few turns with a spatula, to incorporate any flour that has stuck to the sides of the bowl.
7. Remove a little of the tuile batter and add a little red food color. You will use this batter to pipe the hearts on the edges of the large tuile cups.
Put the red batter into a piping bag with a small plain tip (I used a #4 Wilton tip).
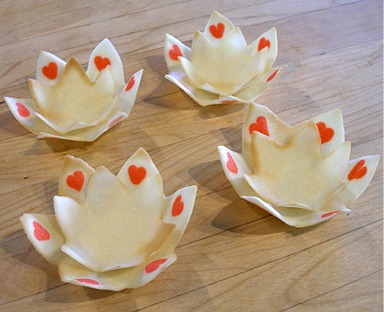
C. Form six large and 6 small tuiles:
Here I create a Valentine's variation on the classic French tuile cookie by shaping them with a stencil, and while still warm, placing them in a bowl to retain a gently curved shape, to be later filled.
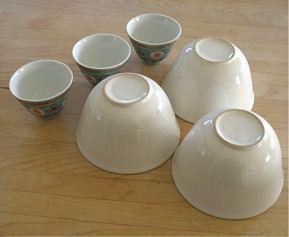
1. Look in your cupboards to find some cups or small bowls to form your tuiles in, once they are baked.
You want to do this NOW, because you have to work fast, when you take them out of the oven.
I used the interiors of the bowls below, to form mine.
2. Line your baking sheet with a silpat mat. You can grease and flour your baking sheets to make these but I HIGHLY recommend using a silpat mat, in fact, I wouldn't attempt these if I didn't have silpat mats.
3. Take your large tuile template and place it on the baking sheet.
Using a small offset spatula, gather about a tablespoon of the batter and spread it on the template.
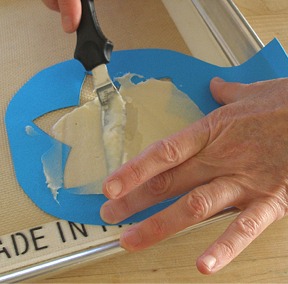
Try your best to spread the batter as evenly as possible, making sure to get it right out to the tips of the template.
Hold the template down with your hand, so the batter doesn't seep beneath it.
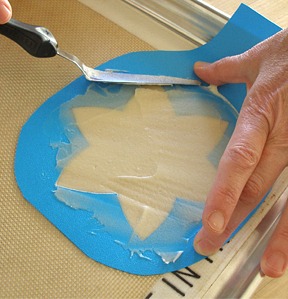
Carefully remove the template by holding the front end down with your finger and lifting it off, using the handle.
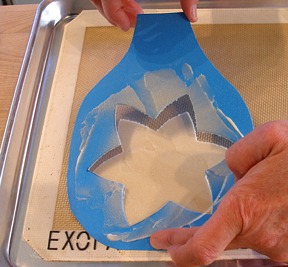
4. Continue, in the same way, repeating Step #3, until your baking sheet is full, being careful not to disturb the finished tuiles, when forming a new one.
I made six tuiles per sheet, to give myself plenty of room in between. They will spread slightly.
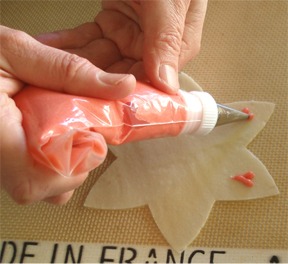
5. When you have formed your six large tuiles, take the piping bag and pipe the hearts onto the petals of the flower shapes.
The hearts will flatten and flow, as the cookies bake.
D. Bake the tuiles:
1. Place the filled baking sheet in the preheated oven and bake for 5 to 8 minutes or only until there is a bit of color on the edges of the cookies. Check after 5 minutes. You may have some patches of brown on the interior of the tuiles, if the batter is not 100% even. Keep an eye on them, to make sure they do not brown too much, or they will be too brittle to shape, after they are baked.
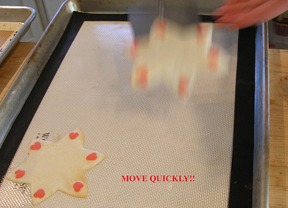
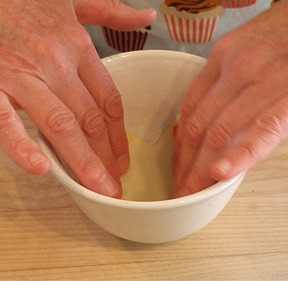
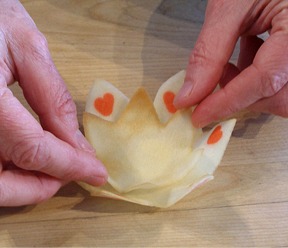
2. When the edges are slightly brown, remove the sheet from the oven and quickly remove the tuiles from the sheet with a spatula and gently place them in the waiting large (in this case, white) bowls.
See how fast I am moving? LOL!
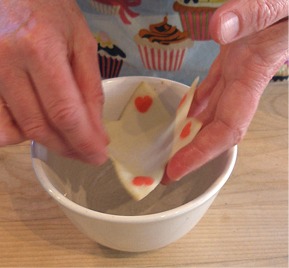
Try to get them centered in the cups, so they will be nicely rounded when set.
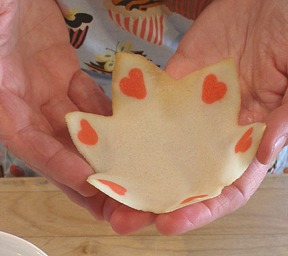
This is what they look like when they have set up…this happens very quickly.
Look at those cute hearts! I'm still patting myself on the back for coming up with this idea.
KELLY SAYS: If the cookies get too brittle to form, before you are finished forming them, you can pop the tray back in the oven, ever so briefly, and they will soften up again.
3. When the six large cups are formed, make six small ones with the small template in the same manner, skipping the heart piping step; following Step #s C 1 – 4. and then, Step #s D 1 -2.
DO NOT use a hot baking sheet when you form the tuiles. The sheet and silpat mat must be cool, or the tuiles will not form properly and you will end up swearing and throwing your template and batter out the window.
Keep in mind that the small cups cook a little more quickly than the large ones do; Place the filled baking sheet in the preheated oven and bake for 4 to 6 minutes.
Also, because they are smaller, they set up faster, so, work faster!
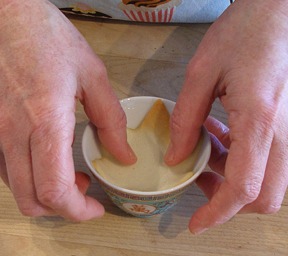
When the edges are slightly brown, remove the sheet from the oven and quickly remove the tuiles from the sheet with a spatula and gently place them in the waiting small (in this case, patterned) bowls.


STORAGE
Store formed tuiles in an airtight container in a cool, dry place.
STEP II: ASSEMBLE THE TUILES AND MAKE THE TOPPERS
When you have both six large and six small cups formed, it is time to assemble your Loving Cups! Do not want to fill these with mousse until just before you plan on serving them. If you fill them too early, the tuile cups will absorb the moisture from the mousse and they will become woefully soggy.
You must make your decorations for the tops ahead of time, so you can place them, right after you fill the cups.
A. Assemble the tuile cups:
1. Melt 3 ounces white chocolate chips in the microwave and “glue the two cups together. Make sure to place them so the petals are off-set. They look prettier that way.
Set aside.
B. Make the toppers:
I chose to make two toppers for the cups…a red squiggle heart, using red candy melts, and an embossed “love note”, made from MMF. Make six, total.
RED SQUIGGLE HEART TOPPER
Makes three
INSTRUCTIONS
1. Cover a baking sheet with parchment and set aside.
2. Melt about a 1/2 cup of red candy melts, according to package directions. I melted them in the microwave.
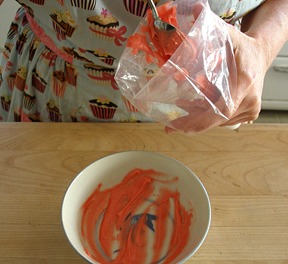
3. Place melted candy melts in a zip-top sandwich bag and push it to one corner of the bag.
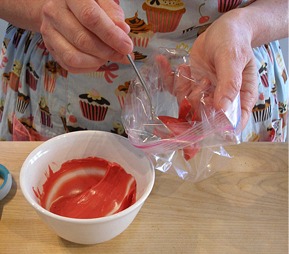
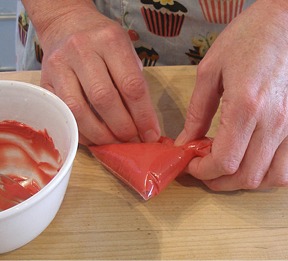
4. Snip a small hole, in the corner of the bag, with a pair of clean scissors.
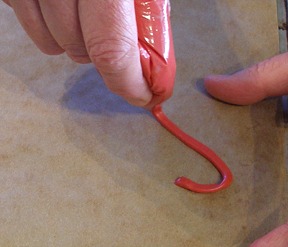
Pipe six squiggle hearts on the parchment-lined sheet by first making the outline of the heart, and then making free-form squiggles from one side of the heart to the other.

KELLY CA SAYS: Make several extra hearts, to allow for breakage, and place sheet in the refrigerator to harden the candy melts. Do not store there.
5. Set the toppers aside at room temperature, until you are ready to use them.
MARSHMALLOW FONDANT OR MMF HEART “LOVE NOTE” TOPPERS
Makes three
MORE TIPS about making MMF Toppers
1. Take two small handfuls of white MMF and dye them two shades of pink, one darker than the other.
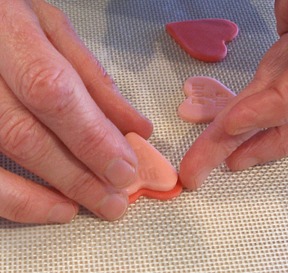
2. Using two heart cookie cutters, one slightly larger than the other, cut out two hearts for each topper.
3. Use rubber stamp letters to express the sentiment you wish to convey. DO NOT use stamps that have been previously used for crafts.
You must only use stamps that are kept exclusively for baking.
If the stamps stick to your fondant, rub the stamp in a little cornstarch, wiping off the excess.
4. Use a little water, on the back of the smaller heart, to “glue” the two pieces together.
5. Set the toppers aside, until you are ready to use them.
STEP II: ASSEMBLE THE LOVING CUPS, FILL WITH MOUSSE, GARNISH WITH WHIPPED CREAM AND TOP WITH THE TOPPERS. SERVE!
OK, so, you have consumed your romantic dinner, now it's time to go to the kitchen and assemble your desserts.
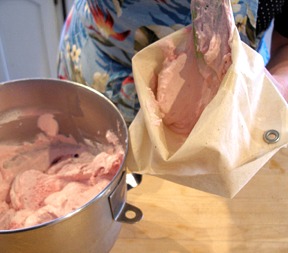
1. Remove the chilled White Chocolate Raspberry Mousse from the refrigerator and place it in a piping bag, fitted with a large open star tip.
2. Fill another pastry bag, fitted with a large plain tip, with whipped cream.
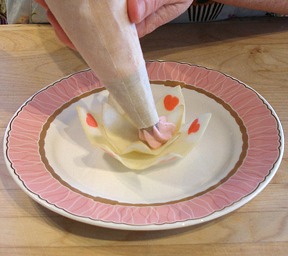
3. Pipe a small dot of mousse in the middle of the plate. Place the tuile cup on a serving plate on the small dot of mousse to adhere.
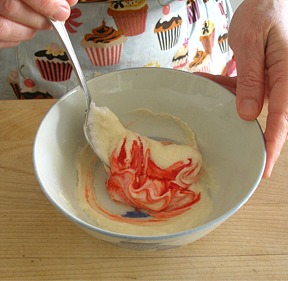
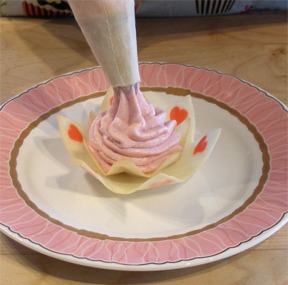
Then, fill the inner tuile cup with mousse, swirling it around, decoratively.
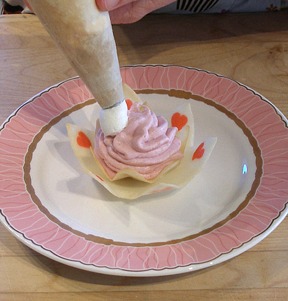
4. Take the piping bag with the whipped cream and swirl whipped cream on top of the mousse.
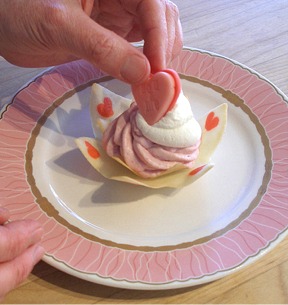
5. Add toppers of your choice, and serve. This creamy and delicious dessert will win your sweeties heart for sure!
STORAGE
The assembled Loving Cups must be kept refrigerated. They should be served right away after assembling or within a couple of hours; they get soggy upon standing.
A very pretty Valentine for your honey!