
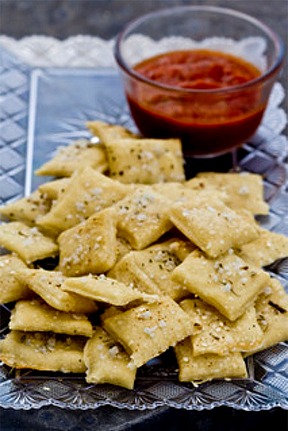
Crackers and photo by odetteganda © Sarah Phillips
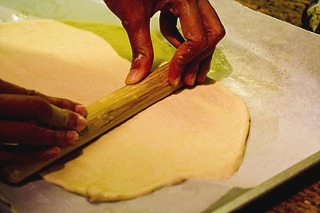
Crackers can be a real treat to make at home. This way, you can select you own toppings and bake them in different shapes, if desired. The key to a crisp lavash is to roll out the dough paper-thin. The sheet can be cut into crackers in advance or snapped into shards after baking. The shards make a nice presentation when arranged in baskets.
BREAD RECIPE HELP
INGREDIENTS
1 1/2 cups (6.75 oz) bread flour or unbleached all purpose flour; spoon into dry measuring cup and level to rim
1 tablespoon (.75 oz) agave syrup or sugar
1/2 tsp (.055 oz) instant yeast
1/2 tsp (.13 oz) salt
1 tablespoon (.5 oz) canola or vegetable oil
1/3 to 1/2 cup + 2 tablespoons (3 to 4 oz) water, at room temperature
Toppings: Poppy seeds, sesame seeds, paprika, cumin seeds, caraway seeds, or kosher salt
INSTRUCTIONS
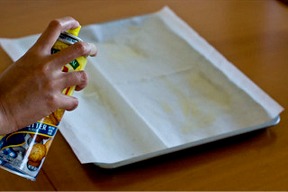
1. Line a sheet pan with a baking parchment and mist the parchment paper with spray oil. Set pan aside.
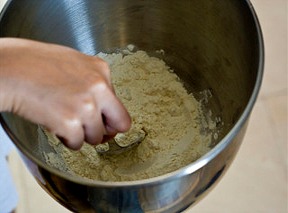
2. Add the flour, sugar, yeast and salt in a bowl of an electric stand mixer. If kneading by hand, combine the dry ingredients in a medium bowl.
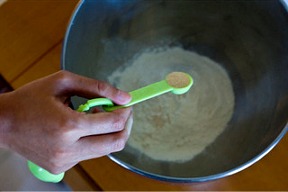
Combine the ingredients with a large mixing spoon.
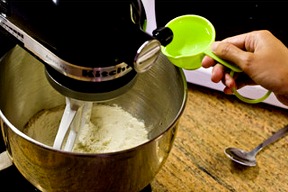
3. Fit the stand mixer with the paddle attachment. Mix the dry ingredients on low and then, slowly drizzle the oil on at the side of the bowl.
Once the oil is fully absorbed, slowly pour the water on at the side of the bowl. You may not need the full amount of water, but be prepared to use it all if needed. Continue mixing on low until the water is fully absorbed.
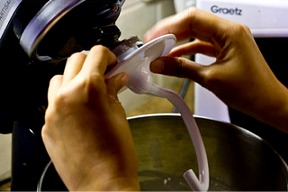
4. Switch the paddle mixer attachment to the dough hook.
Mix on medium speed for 5 minutes or until a smooth and sticky dough is created. The dough sticking on the side of the bowl should eventually adhere to the dough in the middle.
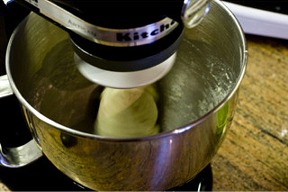
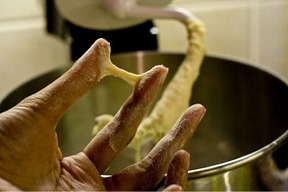
Once the dough is smooth and sticky, pinch a small piece of dough and try what is called the “windowpane test”. To do this, gently stretch and rotate the piece of dough with your floured index and forefinger until the dough forms a thin, translucent membrane. If the dough easily tears, continue kneading the dough for a few more minutes, testing every minute after until the translucent membrane is achieved.
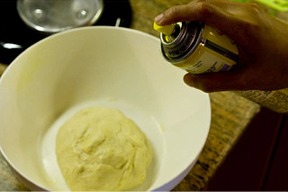
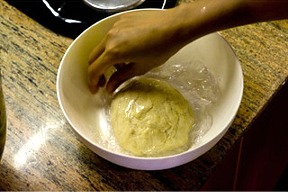
5. Form a ball on the dough and transfer it to a floured medium bowl. Very lightly spray the dough with spray oil and let the dough rise at room temperature for 1 1/2 hours or until the dough doubles in size.
NOTE: The dough can be refrigerated at this point if it will not be used immediately. To do so, cover the dough airtight with a plastic wrap and place in the refrigerator. If ready to use, take the dough out at room temperature 1 1/2 to 2 hours before baking to let it rise.
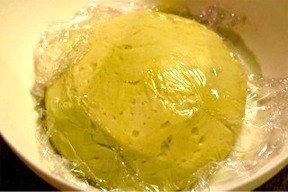
While letting the dough rise, loosely cover it with plastic wrap.
The dough should double in size after around 1 1/2 hours.
6. Once the dough doubles in size, gently roll the dough to the desired thinness with a floured rolling pin. You may have to stop from time to time to relax the gluten.
Preheat your oven at this point to 350 degrees F with the oven rack in the middle shelf.
ODETTE SAYS: I roll my dough directly in the oiled sheet pan that I prepared and set aside. This way, I don't have to transfer the dough anymore. I like mine still a little thicker. You can also make very thin crackers with the pasta maker attachment.
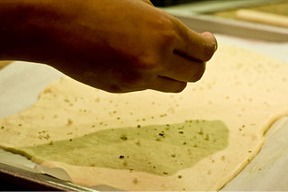
7. Once the dough is rolled, lightly mist the dough with water so that the toppings will stick to the dough. Then sprinkle with desired toppings. I put Garlic Powder, Kosher Salt and Oregano on my crackers. Let it rest for 3 minutes to allow the toppings to stick to the dough.
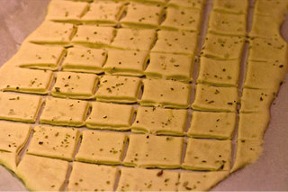
8. The dough can now be baked at this point. The pizza roller can be used to cut the dough into diamond or rectangular shapes. If not cutting the dough, it can be snapped into shards after baking that can be presented on a basket.
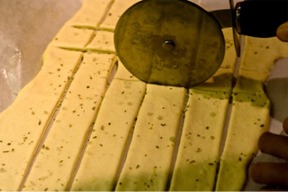
ODETTE SAYS: I like to cut mine into bite size squares.
9. Bake for 15-20 minutes, or until the dough begins to brown evenly on top. Remove from oven and let cool in the pan for 10 minutes. Serve with your favorite dip.
STORAGE
Store crackers in an airtight container placed in a cool, dry place. They will keep for about 1 week.
Crackers and photo by odetteganda © Sarah Phillips
This recipe is adapted from Peter Reinhart.