
stock photo
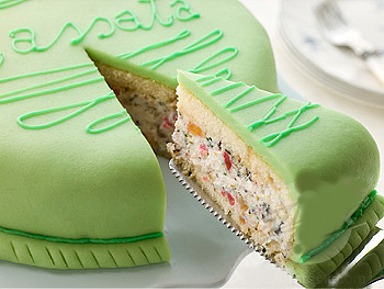
Cassata alla Siciliana is the iconic cake of Sicily, originating in Palermo and the surrounding area. It began as an Easter tradition, but like so many other sweet Italian specialties, Cassata’s popularity today spans the seasons. Local Sicilian bakeries proudly display their renditions of this classic cake in the front window or in a special place of honor on the counter. Display is a key word here; for if ever a dessert could be described as Baroque, Cassata would be it.
The Cassata is traditionally covered pale green Marzipan, likely made from Sicily’s own almond crop, and decorated with jewel-toned candied fruits, curlicues, swirls and dots of royal icing. But if you are not inclined to use marzipan, I have included a Maraschino Icing Glaze and Garnish Recipe to finish the cake with. Though, nowadays, frostings for “Cassata Alla Siciliana” vary; I have even frosted mine with my wonderful Seven Minute Vanilla Bean Icing.
CAKE RECIPE HELP
STEP I: MAKE THE ITALIAN SPONGE CAKE AND RUM SYRUP
ITALIAN SPONGE CAKE adapted from Gina DePalma, Pastry Chef
Makes two, 9 x 2-inch layers
INGREDIENTS
2 cups sifted bleached cake flour; sift onto a sheet of waxed paper and then spoon into measuring cup and level to rim
2 teaspoons baking powder
3/4 teaspoon salt
8 large eggs, separated
1 teaspoon cream of tartar
1 1/2 cups superfine or granulated sugar; divided
2 teaspoons pure vanilla extract
1/4 teaspoon almond extract
1/2 cup (1 stick, 4 ounces, 8 tablespoons) unsalted butter, melted and cooled to body temperature
INSTRUCTIONS
Sponge Cake:
1. Position a rack in the center of the oven and preheat the oven to 350 degrees F.
Lightly grease two 9 x 2 inch round cake pans with non-stick cooking spray, line them with parchment paper, then grease the parchment.
Sift together the flour, baking powder and salt into a medium bowl and set aside.
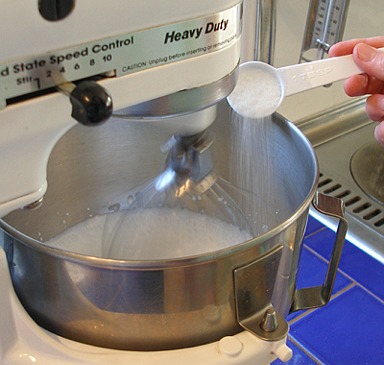
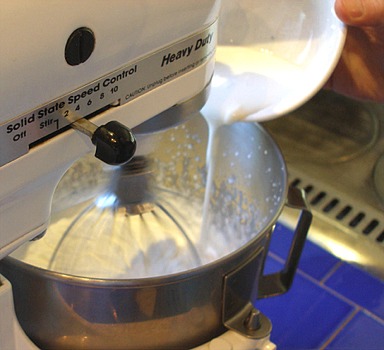
2. In a dry, clean bowl of a stand mixer fitted with the whisk attachment, with the mixer on medium-low speed, beat the egg whites until foamy. Add the cream of tartar.
Continue whipping until the foam is white and opaque. Increase the mixer speed to high and add 1/4 cup sugar slowly at the side of the bowl, beating constantly until sugar is dissolved and whites are glossy and stand in soft to firm peaks. Do not let the whites become stiff or dry.
Scrape whites into a clean bowl and set aside.
3. Using the same bowl, with the mixer fitted with the same whisk attachment, at high speed, beat the egg yolks and remaining 1 1/4 cups sugar until thick and lemon-colored, about 3 to 5 minutes.
The yolks will “ribbon”. That is when you raise the beaters, the mixture should fall in a ribbon pattern that sits on top of the swirl for seconds before sinking.
That's why it's called making the ribbon.
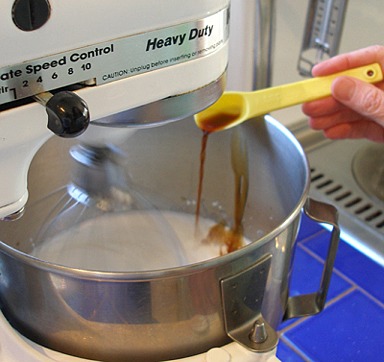
4. Beat in the vanilla and almond extracts, followed by the melted butter and mix until smooth.
5. Sift the dry ingredients over the egg yolk mixture. Using a rubber spatula, fold in stopping just before they are fully incorporated. This will make an egg yolk batter.
6. Stir a little of the whites in the egg yolk batter to lighten it.
In three additions, fold the rest of the egg whites into the egg yolk batter quickly and lightly; this will also incorporate any streaks of dry ingredients that remained.
With the last addition of egg whites, make sure no streaks of egg whites remain.
7. Evenly divide the batter between the prepared pans. Run a thin knife through the cake batter once or twice. This prevents air pockets from forming in the body of the cake.
Gingerly smooth the tops with an offset spatula.
8. Bake the cakes for 35 to 40 minutes, or until they are a light golden brown, the cakes have begun to pull away from the sides of the pan and the top springs back when lightly
touched with a fingertip.
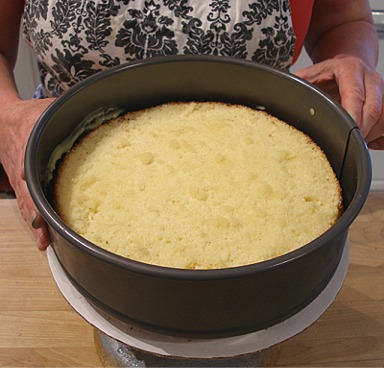
9. Allow the cakes to cool for 5 minutes in the pan, then carefully turn them out onto a wire rack to cool completely.
Gently remove the parchment paper on the cakes. Turn right-side-up to cool completely.
STORAGE
Store at room temperature for a couple of days, or wrap well and freeze for a month or more.
Rum Syrup:
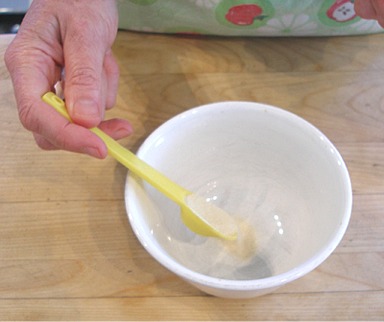
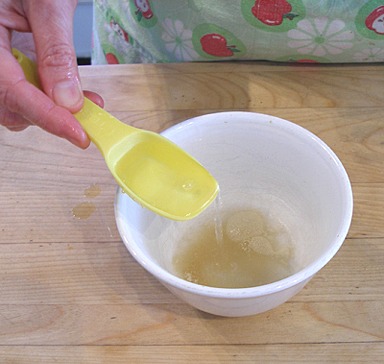
While the cakes are cooling, prepare the rum syrup.
RUM SYRUP
INGREDIENTS
1/3 cup water
1/3 cup sugar
1/4 cup rum, preferably white
INSTRUCTIONS
1. In a saucepan, add the sugar. Pour in the water and stir together.
2. Place the saucepan over medium heat and bring to a boil, stirring occasionally to dissolve the sugar.
3. Remove the pan from the heat, stir in the rum and allow the syrup to cool.
STORAGE
Use immediately or store indefinitely in a container in the refrigerator.
STEP II: MAKE THE RICOTTA CHEESE FILLING
RICOTTA CHEESE FILLING
INGREDIENTS
3 cups whole milk ricotta; drain off any excess liquid
2 tablespoons orange peel
1/2 teaspoon ground cinnamon, optional
1 teaspoon vanilla extract
1 1/4 cups powdered sugar, sifted; measure and then, sift
3/4 cup shelled, whole pistachios, finely chopped; measure and then, chop
4 ounces bittersweet chocolate, highest quality, cut into 1/8-inch size pieces; strain to remove very fine pieces of chocolate
INSTRUCTIONS
SARAH SAYS: It is best to do this step by hand. If done with an electric mixer, do NOT beat the ricotta cheese mixture for any length of time, otherwise it will liquefy.
1. Place the ricotta, orange peel, cinnamon, vanilla extract into a large bowl. With a large rubber spatula, stir it until smooth. Add in the powdered sugar and gently combine.
2. Fold in the chopped pistachios and chopped chocolate with a large rubber spatula, only until combined.
STORAGE
Use immediately or store in the refrigerator for a few days. Does not freeze.
STEP III: ASSEMBLE THE CAKE
INGREDIENTS
Sponge Cake
Rum Syrup
Ricotta Cheese Filling
9-inch springform pan
INSTRUCTIONS
1. Place a 9-inch springform pan ring without a bottom on a 10-inch cake board.
2. Using a serrated knife, carefully split each cake layer in half horizontally.
2. Place 1 layer of the sponge cake on the bottom.
Using a pastry brush, and generously brush the cake with the rum syrup, taking care not to over soak. Spread the cake layer evenly with 1/3 of the ricotta mixture.
Repeat twice with another cake layer, more of the rum syrup, and another 1/3 of the ricotta mixture. Place the final cake layer on top and generously brush with the rum syrup.
3. Using your hands, press lightly on the cake to ensure cake is level. Wrap the springform pan tightly with plastic to help the layers fit snugly on top of each other.
4. Chill the cake in the refrigerator for at least 6 hours or overnight.
STORAGE
Keep the cake refrigerated for up to one day or two. The ricotta cheese will start to separate and leech water after that.
TRADITIONAL MARZIPAN COVERED CASSATA CAKE
The Cassata is traditionally covered pale green marzipan, likely made from Sicily's own almond crop, and decorated with jewel-toned candied fruits, curlicues, swirls and dots of royal icing.
stock photo
MARZIPAN
INGREDIENTS
1 pound marzipan / Recipe alone
Green food coloring
Powdered sugar for rolling
INSTRUCTIONS
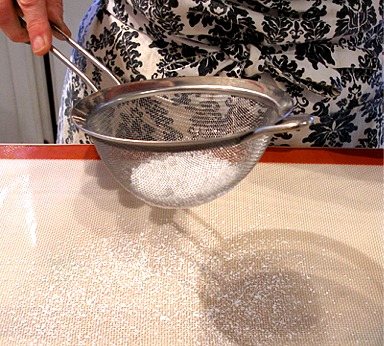
1. Using a sifter or a fine mesh strainer, dust a scrupulously clean work surface with powdered sugar.
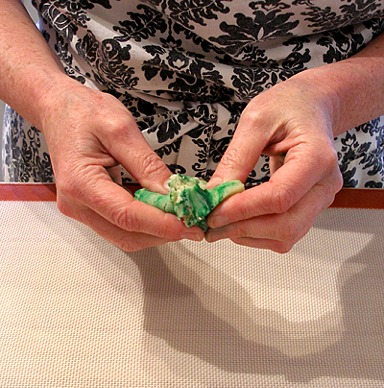
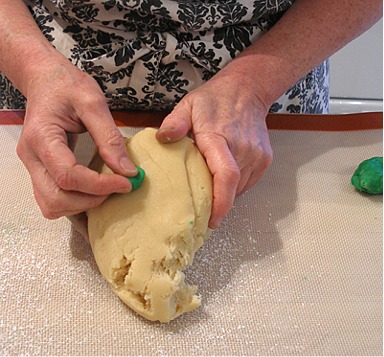
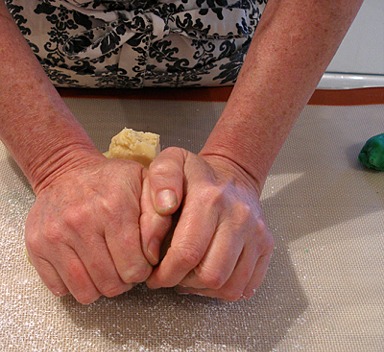
2. Tear off a pea-sized piece of green marzipan and knead it with the remaining marzipan until it is uniform in color.
Add additional pieces from the green marzipan until it achieves a light green color (it should be the color of a Granny Smith apple). Eat the leftover deep green marzipan.
NOTE: Coloring the marzipan takes A LOT of kneading! You might need a coffee break when you're finally done. Plus, your hands and nails will turn a lovely shade of green.
STORAGE
Once made, store marzipan in a plastic bag placed in an airtight container for 1 month in the refrigerator. It can also be frozen for about 6 months.
Thaw in refrigerator overnight and then warm to room temperature before using. (I like to use mine at slightly cooler than room temperature).
Knead to soften, but don't let it get oily. If it does, press paper towels on its surface to absorb.
If at any time the marzipan smells rancid, toss — because it is made from nuts whose oils are perishable.
STABILIZED WHIPPED CREAM / Recipe alone
INGREDIENTS
Gelatin:
2 tablespoons cold water
1 teaspoon unflavored gelatin
Whipped Cream:
2 cups chilled whipping cream
2 tablespoons powdered or regular sugar
1 teaspoon vanilla extract
INSTRUCTIONS:
Prepare the gelatin:
1. Sprinkle the gelatin over the water, and let soak for a few minutes.
2. Dissolve the gelatin with the water by warming in microwave for about 5 seconds on 50% power. Let cool, but do not let cool so long that it sets.

Prepare the whipped cream:
1. Using an electric mixer, fitted with a whisk attachment, beat cream on high speed in its pre-chilled mixer bowl.
Place the empty bowl in the freezer to quickly chill.
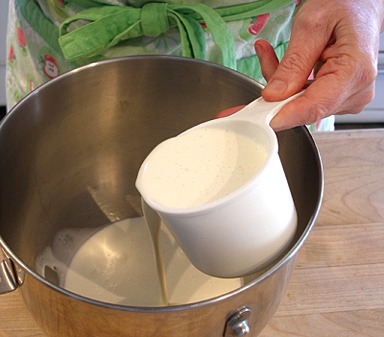
2. Just before it becomes soft and billowy, slowly add the sugar and flavorings to the whipped cream at the sides of the bowl.
Continue to whip on high as you do.
3. Whip the cream until it becomes barely stiffened. Stop the mixer.
4. Add melted and cooled gelatin to the cream mixture.
KELLY SAYS: I find there is less tendency for the cooled gelatin to for blobs in the finished whipped cream using my method:
a. First, take about 2 tablespoons of the cream from the mixer bowl.
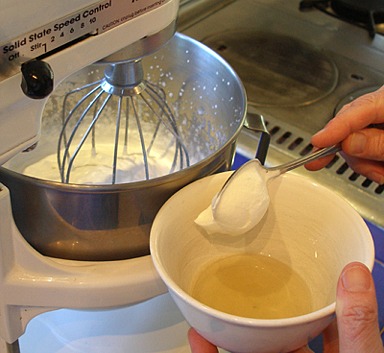
b. Stir it into the cooled gelatin.
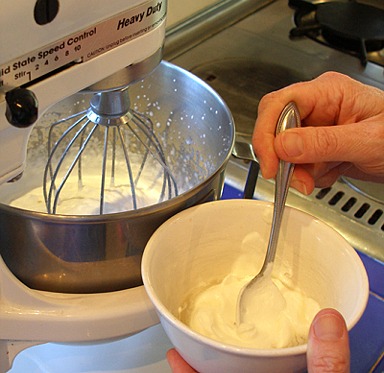
c. Return the cream/ gelatin mixture back into the main mixing bowl with the rest of the semi-whipped cream.
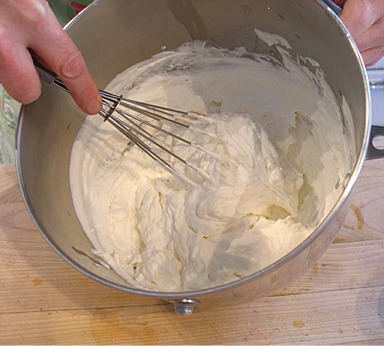
5. Stop whipping when cream forms soft peaks. Finish beating with whisk to adjust consistency.
6. Serve immediately or cover and refrigerate.
STORAGE
If storing, cover and refrigerate for up to 24 to 36 hours. If the cream separates in the refrigerator, whisk the cream together again with a large wire balloon whisk until it has come back together (do not rebeat with an electric mixer).
For longer storage, whipped cream can be frozen by teaspoonful on a wax paper lined cookie sheet. When frozen, remove to a resealable plastic bag and place back in the freezer.
ASSEMBLE THE CAKE
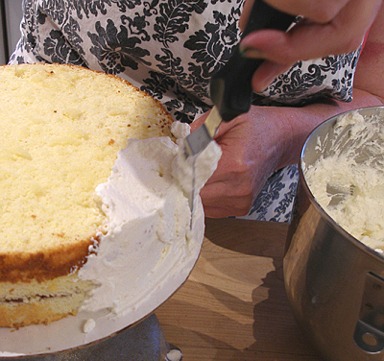
1 . Remove the springform mold from the cake and generously frost the sides with whipped cream.
NOTE: You will want to use a cake decorating turntable.
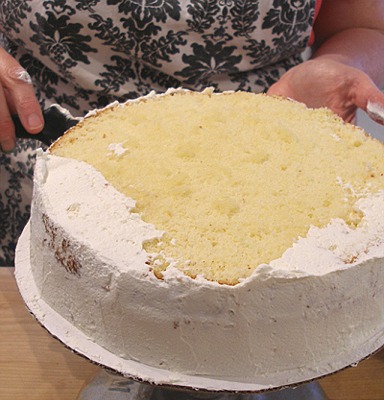
After frosting, put the cake in the refrgerator, while you roll out the marzipan.
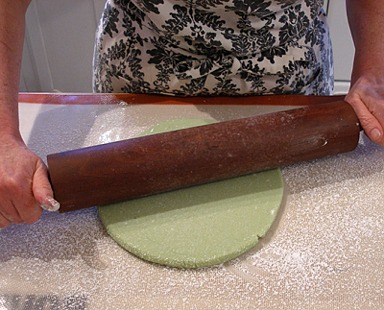
2. Dust a work surface with powdered sugar and roll the light green marzipan to approximately 15-inches in diameter, using as much powdered sugar as necessary during rolling to prevent the marzipan from sticking to the work surface. When you're finished rolling, marzipan should be stretched enough to cover the entire cake and sides.

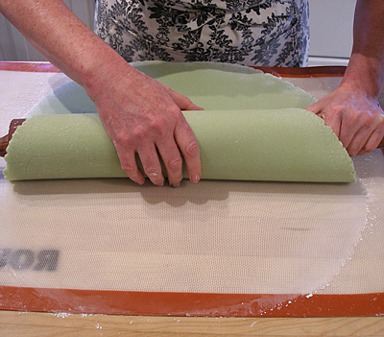
3. Roll marzipan on rolling pin and gently lay it down on top of the cake, gently smoothing it from the center out.
NOTE: This is the scary part! Just try to do this in a nice smooth movement, visualizing the center of the cake, and gently placing the marzipan onto the cake.
4. Continue smoothing the marzipan, going around the sides, gently lifting and smoothing the folds till they are flush with the cake.
5. When the marzipan is smooth cut off the excess marzipan with a pizza cutter and continue to smooth with a fondant smoother, eventually trimming the marzipan so it is flush with the cake board.
STORAGE
Cake must remain refrigerated, well covered with plastic wrap, because it contains pastry cream and whipped cream. Lasts for up to three days, or more.
OPTIONAL – MAKE THE MARASCHINO ICING GLAZE. FINISH THE CAKE AND GARNISH. SERVE
OPTIONAL – If covering the cake with marzipan is too much for you, you can glaze the cake!
MARASCHINO ICING GLAZE AND GARNISH
INGREDIENTS
2 cups powdered sugar, sifted; measure and then, sift
2 large pasteurized egg whites; I use powdered pasteurized egg whites and reconstitute them to make 2 large egg whites for the recipe
2 tablespoons water or maraschino cherry juice; I like to tint my glaze pink from the cherry juice
1/4 teaspoon pure almond extract
1/2 cup sliced, blanched almonds, toasted and cooled
Maraschino cherries
Candid lemon peel
INSTRUCTIONS
1. Place the sifted powdered sugar into the bowl of an electric mixer.
2. Add the egg whites and water and beat the ingredients together with the paddle attachment on medium speed until the mixture is smooth.
Beat in the almond extract.
Glaze the cake:
1. Remove the cake from the refrigerator and carefully remove the sides of the pan. You may need to run a hot knife around the sides of the pan first.
2. Leaving the bottom of the springform pan intact, place the cake on top of a wire rack to ice it; you can put some parchment or wax paper underneath the rack to catch any drips of icing.
3. Pour the icing over the top of the cake, spreading it evenly across the top with an offset icing spatula and allowing the icing to drip over the edges and down the sides of the cake.
4. Scatter the toasted almonds over the top of the cake and let the cake sit until the icing sets. Return the cake to the refrigerator to chill until you are ready to serve it.
SERVE
Carefully transfer the cake to a platter or cake stand, and, if desired decorate the cassata with maraschino cherries and some strips candied orange zest.
STORAGE
Keep the cake refrigerated for up to one day or two. The ricotta cheese will start to separate and leech water after that.