
Blind baking refers to baking an unfilled pie or tart shell to produce a partially or fully baked crust. It is done when making cream pies or tarts if a fillings is particularly moist or where precooked fillings are part of the recipe. However, it's necessary to weigh the crust down as it bakes, so it doesn't bubble up; you can do this in a variety of ways. It is done by lining the dough with parchment paper or foil and filling it with pie weights or dried beans to hold its shape during baking. See also: Pie Crust – How to Weave a Lattice Top for Pies and Pie Crust – How to Weave a Lattice Top for Tarts.
PASTRY RECIPE HELP
INGREDIENTS
KELLY'S PERFECT FOOD PROCESSOR PIE DOUGH – SINGLE CRUST
Makes a single crust for a 9-inch standard or 9 1/2-inch deep-dish pie
KELLY SAYS: For a double crust, go to Kelly's Perfect Food Processor Pie Crust Dough; You will only need a single crust for this recipe, which is below. If you make the full recipe, you can put the other dough disk in a resealable plastic bag and place it in the freezer for later use.
INGREDIENTS
1/2 cup (1 stick) unsalted butter, cold
1 1/4 cups unbleached all-purpose flour; spoon into measuring cup and level to rim
1/2 teaspoon sugar
1/2 teaspoon salt
1/8- 1/4 cup ice water; make with water and ice cubes
1 egg, beaten; for egg wash
INSTRUCTIONS
STEP 1: MIX THE PIE CRUST
1. Cut butter into cubes and place in a bowl and place in the refrigerator to chill.
2. A. Place dry ingredients into the bowl of your food processor, fitted with the metal blade.
KELLY SAYS: Before placing the dry ingredients in the bowl of a food processor, I like to sift together the flour, sugar, and salt. I always do this to make sure there are no lumps in the flour and I find it also helps to mix the ingredients together.
B. Add the well-chilled butter cubes on top of the dry ingredients, in the food processor.
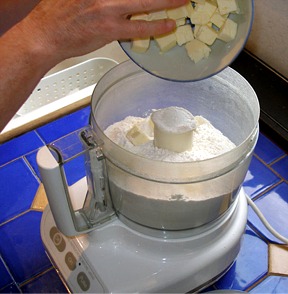
C. PULSE the butter and flour mixture together a FEW TIMES until the butter is no longer in large chunks. You should be able to still see small chunks of butter in the mixture. This helps form the flaky texture you are looking for in your pie crust.
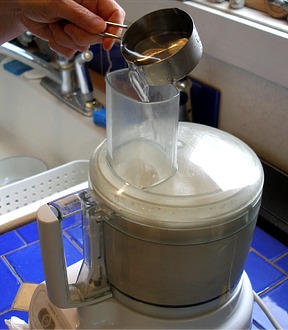
3. Add the water to the dry ingredients.
This is where you must proceed with caution. Too little water and your dough will be crumbly and impossible to roll out. Too much water and your crust will be sticky to roll and tough, when baked. You must use a gentle hand with pie dough and proceed slowly!
A. START with 1/8 cup of water, adding it to the flour mixture, through the feed tube in the food processor, while pulsing the machine until the dough starts clumping together. DO NOT just turn the processor on – use the PULSE button.
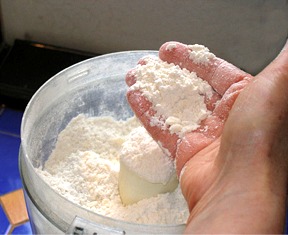
B. Open the processor to check the condition of the dough. It should still be a bit crumbly, but it should start to clump together. To test the dough, squeeze it between your fingertips and it should just stick together. If it does, the dough is done – do NOT add any more water.

If the dough is too dry, add more water, a few drops at a time, up to a teaspoon, and hit the pulse button for a second. Open the food processor and check the dough after each addition. Most of the time, I find that 1/8 cup water total is plenty. Of course, the moisture content of flour can vary, and you MAY have to add more than 1/8 cup, but do so, about 1 teaspoon at a time.
If the dough is too wet, add a teaspoon of flour at a time, and pulse the food processor to combine.
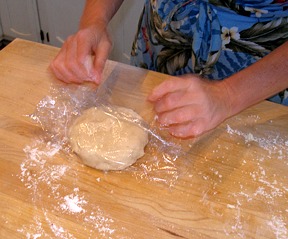
4. Empty the food processor contents out onto your work surface and gather the dough into one mound. Flatten the disk, and make it as round as possible, so it is easier to roll out, when the time comes. Wrap the disk in plastic wrap and place them in the refrigerator, to chill. It is important that your pie dough is well chilled before you go to roll it out.
STEP II: ROLL THE PIE CRUST AND FLUTE THE EDGES
1. Position a shelf in the middle of the oven and preheat to 375 degrees F.
2. Remove the disk of dough from refrigerator and roll it out to fit into a 9-inch deep dish pie pan.
Roll until the pie dough is 3-4″ larger than the pan you will be using for your pie (at least 12″ wide, for a 9″ pie). Your dough should be about 1/8″ thick.
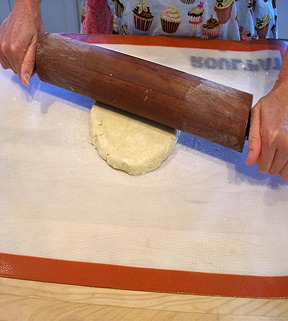
3. Place dough on lightly floured work surface or silpat rolling mat. Flatten dough slightly by hitting it a few times in different spots, with the side of your rolling pin. Otherwise, pat it down with your fingertips.This helps to get you started with your rolling.
LIGHTLY flour your rolling pin and work surface or only enough to keep the dough from sticking.
4. A. To start, begin in the center of the dough and roll outward. Stop the rolling pin as it nears 1/4 inch from the edge of the dough; don't roll over the edges as they crack or become too thin. Do not roll backwards; simply lift the rolling pin when done.
B. Lift and rotate the dough by a quarter before resuming again, tossing a light dusting of flour beneath, only if necessary. This is to ensure that it is not sticking to your rolling surface and that is is being evenly rolled. If your dough is cold enough, it should not stick. If your dough sticks, loosen it with a long offset icing spatula, dusting underneath with a small amount of flour.
5. Fit the rolled out pie dough into the bottom of the pie pan.
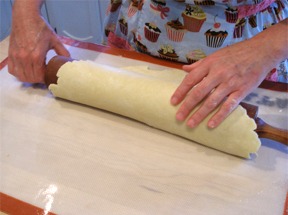
A. To transfer the dough to the pie pan, roll the dough onto the rolling pin. First place a floured rolling pin, centered on the edge away you. Roll towards you and, at the same time, pick up the edge (use a bench scraper or spatula if dough sticks to the countertop) and support the dough as you wrap it around the pin. Be careful not to press it. Keep rolling until all of the dough is rolled onto the pin.
B. Position dough over the pie pan and begin unrolling the dough, starting from one edge, leaving a 2-inch overhang on all sides
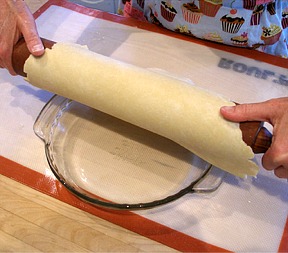
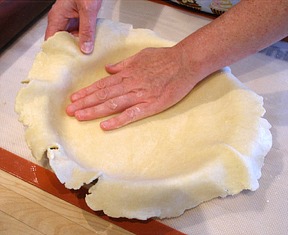
C. When the dough is unrolled, GENTLY ease the dough into place. Lift up the dough edge and ease the dough down into the pan with your other hand. DO NOT stretch the dough because this will make it shrink while baking.
D. Trim the excess dough around the edge of the pie with a sharp knife or with kitchen shears, which I find the easiest to use. Leave about an inch overhang for fluting purposes.
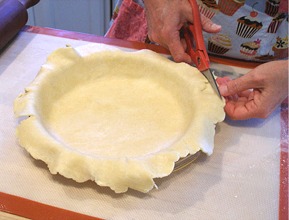
KELLY SAYS: I like to use kitchen scissors for this task.
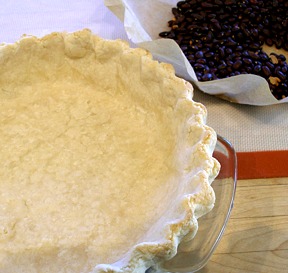
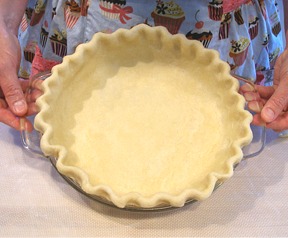
6. Flute or crimp the pie crust edges. Cover and place it in the refrigerator.
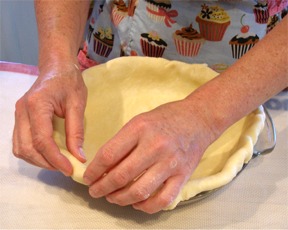
A. Fold the excess dough underneath itself at the pie pan rim and even with the lip making a double layered edge.
B. To flute, pinch the dough by pressing your index finger in between the thumb and index finger of the other hand.
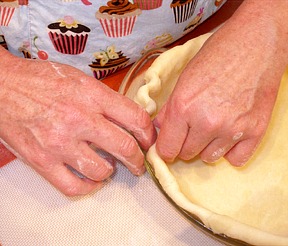
C. The fluting is complete…Pop the crust back into the fridge to chill, for at least an hour.
STEP III: PREBAKE THE PIE CRUST
1. Remove the pie crust from the refrigerator. Dock the sides and bottom of the crust all over with tines of a fork to prevent puffing. Put a piece of parchment into the pan and fill with beans or rice.
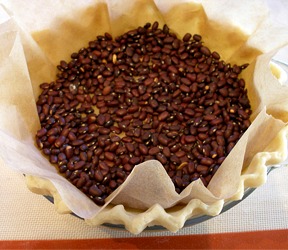
2. Bake crust for about 20 minutes, or until edges begin to brown. Remove crust from oven and remove parchment and beans (place beans or rice in an airtight container to use the next time you need to blind bake a pie crust). Pierce the crust all over with the tines of a fork.
3. Immediately brush bottom and sides of hot crust with beaten egg. This will help create a moisture barrier, so the crust will not get soggy.
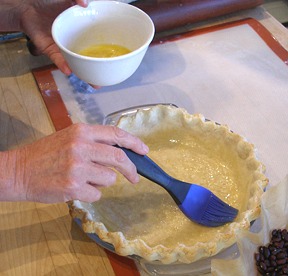
4. Place the pie crust back in the oven for a minute or two to bake. Remove to a wire cake rack to cool before using.
STORAGE
The prebaked pie crust can be stored at room temperature for a day or two, or frozen for a month or more. Thaw at room temperature before using.