
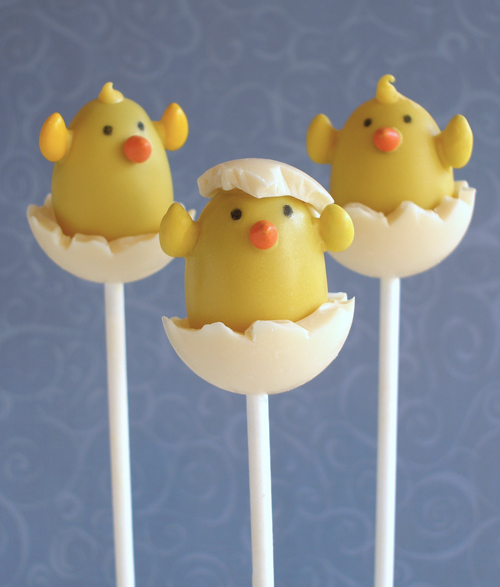
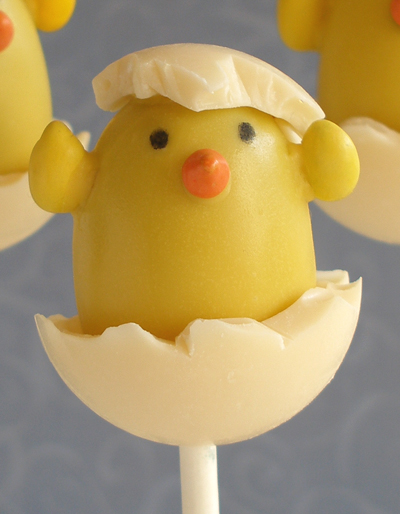
I love the cuteness of cake pops, but I don't always love their texture. So I decided to create chocolate truffle pops made out of rich, velvety chocolate ganache. Now they have all of the cuteness AND amazing texture and flavor. These adorable hatching birdies are perfect for Easter or as a springtime gift. I coat these with yellow or blue candy melts, and share my secrets to success below, including how to best use them as a coating and how to prevent the coating from cracking easily. I'll also show you how to secure the hatching birdie pops to their sticks. You will love how creamy, chocolaty, and charming these cake pops are!
CHOCOLATE RECIPE HELP
INGREDIENTS
To make this project, you will need:
1 recipe chocolate truffle centers (recipe follows)
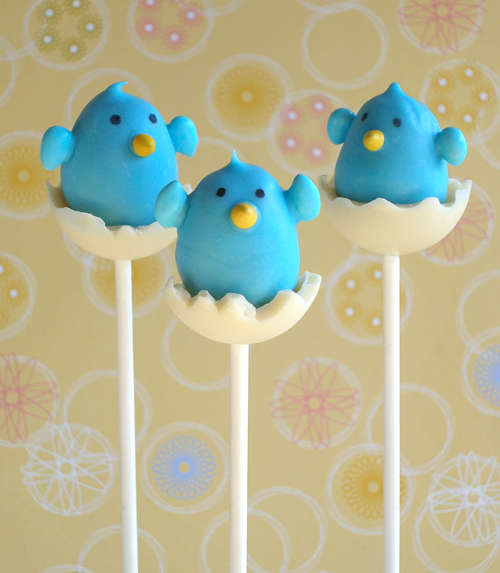
1 14-ounce package Wilton yellow Candy Melts (or blue, if you are making Bluebirds)
1 14-ounce package Wilton white Candy Melts (for the egg shells)
20 8-inch paper lollipop sticks (I used Wilton)
1 Wilton Dessert Dome Candy Mold
1 Black edible ink marker
1 bag Candy covered sunflower seeds (for the wings-yellow for chicks, blue for bluebirds)
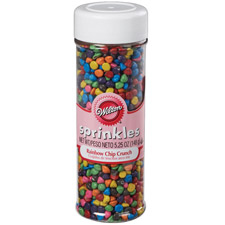
1 5-ounce jar Wilton Rainbow Chip Crunch Sprinkles (for the beaks)
2 small Styrofoam sheets to hold the pops
STEP I: MAKE THE CHOCOLATE TRUFFLE GANACHE RECIPE.
Make the Chocolate Ganache recipe:
CHOCOLATE GANACHE
INGREDIENTS
8 ounces semi-sweet chocolate chips or bittersweet or semi-sweet chocolate, chopped into 1/4-inch pieces
1/2 cup heavy cream
1/2 teaspoon vanilla extract
pinch salt
INSTRUCTIONS
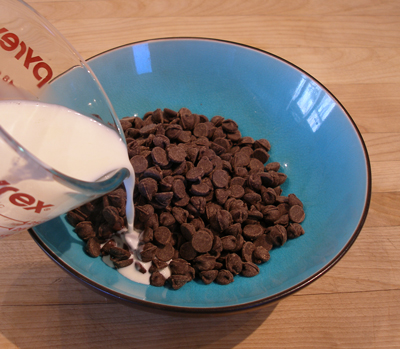
1. Put chocolate in a medium heatproof bowl.
Heat the cream in the microwave in a microwave safe bowl until it is very hot and steaming, then pour it over the chocolate.
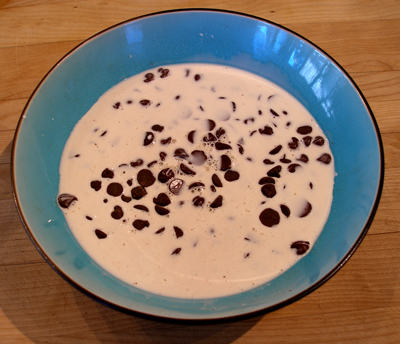
2. Shake the bowl a little to make sure all the chocolate is submerged.
Let the chocolate sit for about two minutes, so it has a chance to melt.
3. Gently whisk the chocolate, stirring in one direction, until a ganache has formed and it is shiny and all the chocolate has melted.
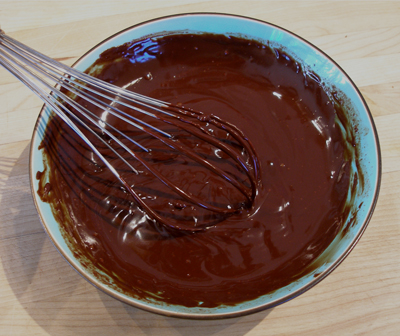
4. Then whisk in the vanilla and salt.

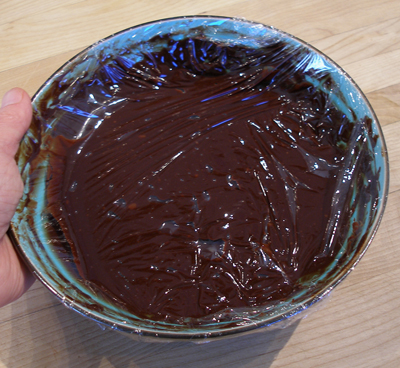
5. Cover the bowl with plastic wrap, pressing it to the surface of the ganache, then place it in the refrigerator, for at least two hours, to set up.
STEP II: MAKE 20 + WHITE CHOCOLATE EGG SHELLS.
While you are waiting for the chocolate ganache to chill, make 20 White Chocolate Egg Shells. (Make a few extra in case of breakage.)
You will be using the Wilton Dessert Dome Mold to make the egg shells. This mold has several different sizes in it. We are going to use the two smallest domes in the mold.
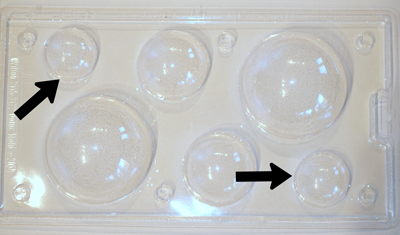
1. Melt about a 1/4 cup of White Candy Melts.
NOTE: I always melt them in the microwave because it is easy. Follow the package instructions for how to.
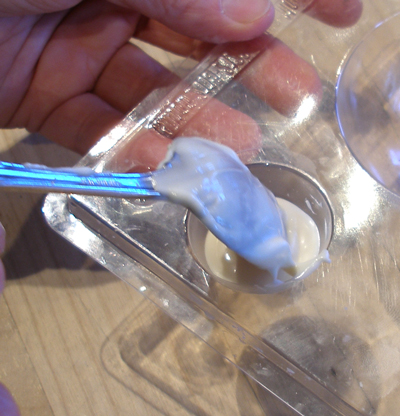
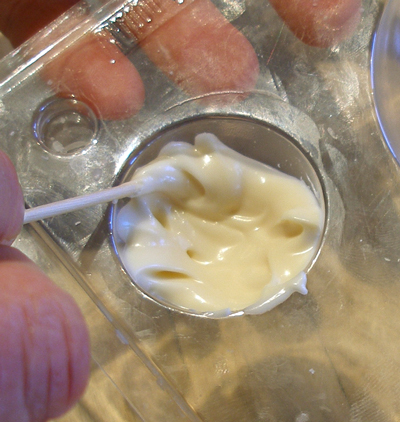
2. Fill the two small cavities about 1/2 way full, then, using a toothpick push some of the candy up on the sides of the mold.
NOTE: The instructions that come with the mold do not tell you to do this, but I found that this helped A LOT when forming the domes.
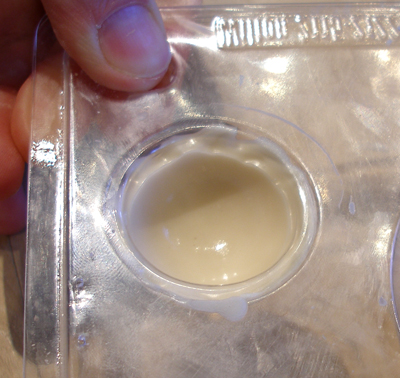
3. Place the top section of the mold in place, and snap the tabs together.
Place the mold in the refrigerator so the melts can set. This takes about ten minutes.
4. After ten minutes, remove the mold from the refrigerator and carefully lift off the top of the mold.
Gently flex the bottom half of the mold to release the dome.
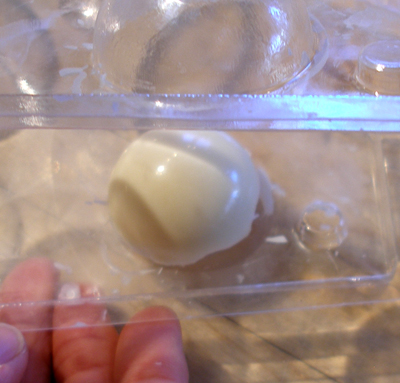
NOTE: You WILL have some breakage as you make these. You can remelt the ones that break, or you can use portions of the broken domes to make the top half of the egg, that you can place on the heads of some of the chicks.
Continue the process until you have 20 egg shells for all of your truffle pops.
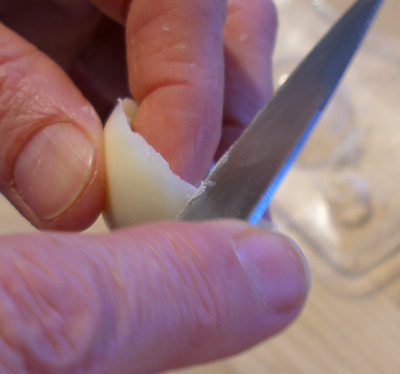
NOTE: We liked to alter the edge of each dome with a sharp paring knife to make it look more like a cracked eggs shell.
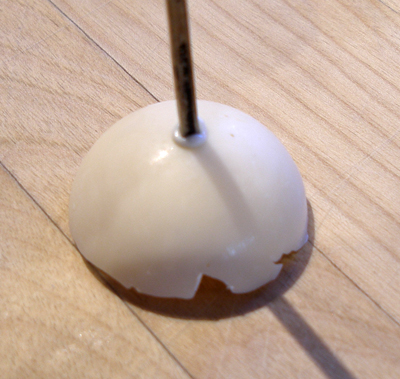
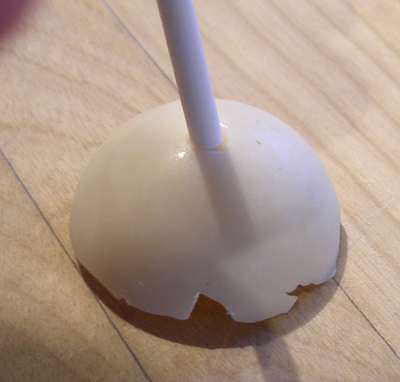
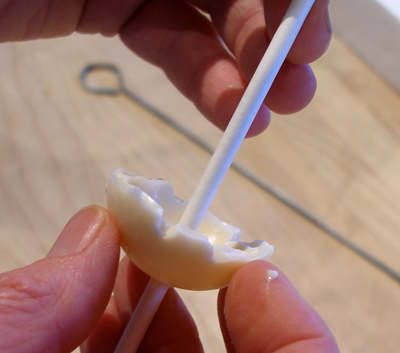
5. Heat up the end of a metal skewer and make a hole in the center of each shell.
Use a lollipop stick to make sure the hole is large enough to be threaded on the stick.
STEP III: MAKE THE CHOCOLATE GANACHE BIRDIE SHAPES. PUT THE LOLLIPOP STICKS IN PLACE. COAT THE CHOCOLATE GANACHE POPS.
Make the chocolate ganache birdie shapes:
1. Check the ganache to see if it has thickened…it WILL NOT be hard, but it will be thick enough to scoop.
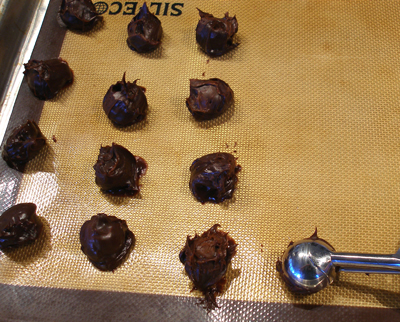
If it is hard enough, scoop out tablespoon size portions, and place them on a silpat or parchment lined baking sheet.
Place the baking sheet into the refrigerator until the scooped portions are nice and firm. If possible, leave them to chill overnight.
The cooler they are, the easier they will be to roll. If you leave them in the refrigerator overnight, a skin will form of the outside, which will greatly facilitate rolling.
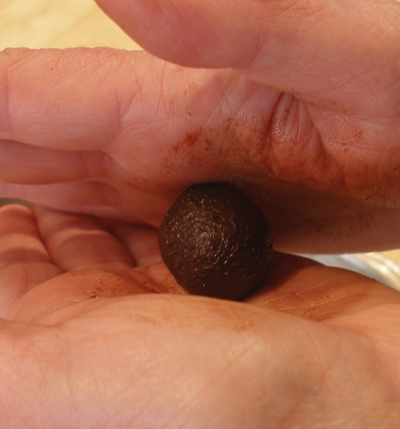
2. Roll the portions of ganache into a tapered egg shape, then place them on a silpat lined baking sheet with the pointy side up.
If, at any time, you feel that the ganache is getting too soft to roll, you can pop them into the freezer for a quick chill.
When all the portions are shaped, place the baking sheet back in the refrigerator for about an hour.
Put the Lollipop Sticks in Place:
When the ganache eggs are nicely chilled, you can put them on the lollipop sticks.
1. Melt about 1/4 cup of the yellow Candy Melts according to the package directions.
NOTE: I always melt them in the microwave because it is easy. Follow the package instructions for how to.
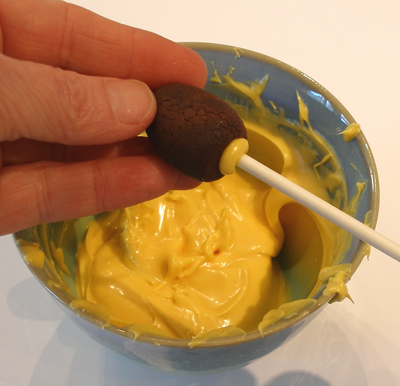
2. Dip the tip of a lollipop stick, about 1/2 inch up in the candy melts, then push it about 1/2 into the ganache egg.
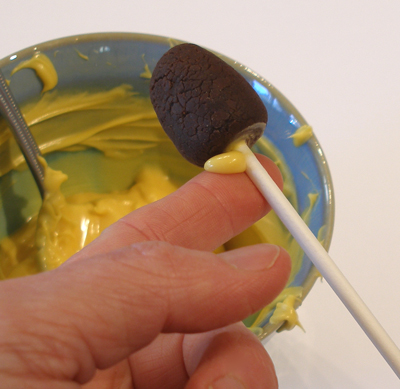
If the shape of the truffle gets a little distorted, reshape it with your fingers.
3. Wipe the excess candy off the bottom of the egg with your finger.
4. Stick the end of the lollipop stick into the Styrofoam block.
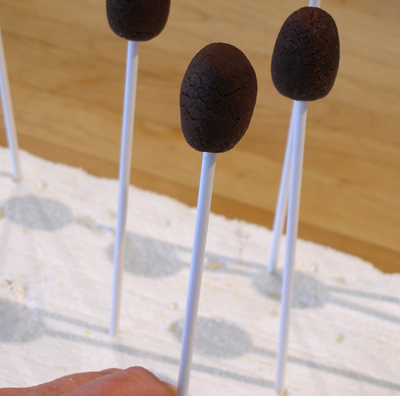
5. Repeat with the rest of the truffles. When all the truffles are on sticks, put the sheet of Styrofoam in the refrigerator, so the pops can chill and firm up.
You should chill them for AT LEAST an hour before coating them in the next step.
Coat the Chocolate Ganache Pops:
When the pops are completely chilled, you can coat them with the yellow(or blue) candy chocolate shells.
This is where it gets tricky. The candy melts are warm, and the truffles need to be cold. You MUST work quickly when you coat them, or the ganache will melt.
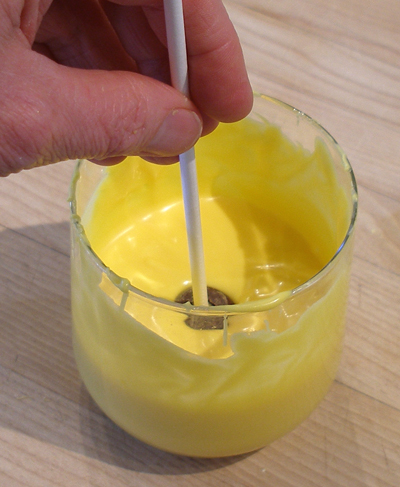
1. Take the truffle pops out of the refrigerator ONE AT A TIME to dip them.
2. Melt about 1 1/2 cups of candy melts and place it in a narrow container. The melts should be deep enough to fully cover the length of the truffle.
NOTE: I always melt them in the microwave because it is easy. Follow the package instructions for how to.
3. Dip it in ONCE, and then lift it up and slowly turn the truffle pop to evenly distribute the candy, letting the excess fall back into the container.

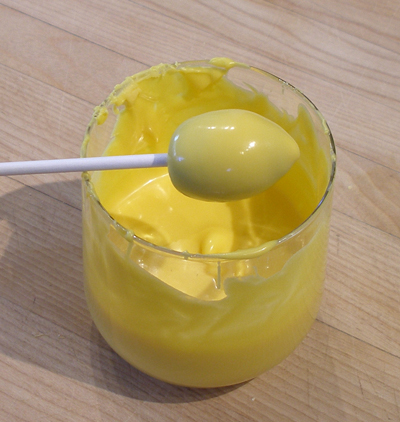
4. Place the coated truffle in a Styrofoam block to set up.
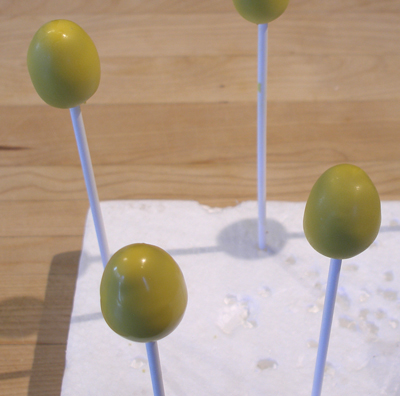
5. Repeat this procedure until all the pops are coated, melting more candy as needed.
STEP IV: DECORATE THE HATCHING BIRDIE CHOCOLATE TRUFFLE POPS.
You can, of course, decorate your birdie pops anyway you desire. We just suggest the following:
1. Remelt the yellow candy melts if necessary following the microwave instructions.
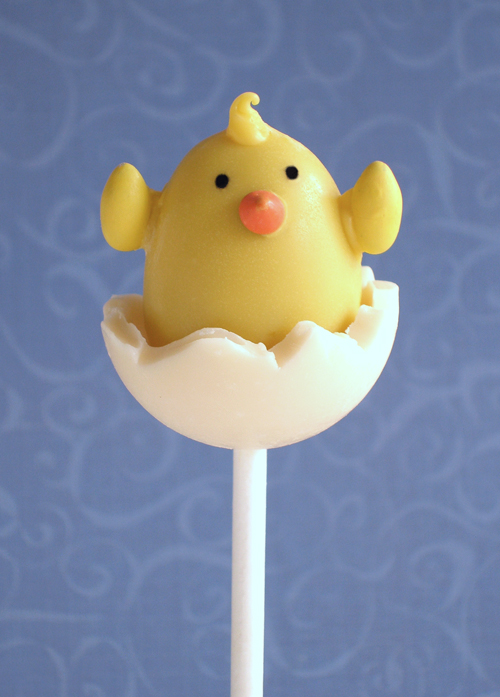
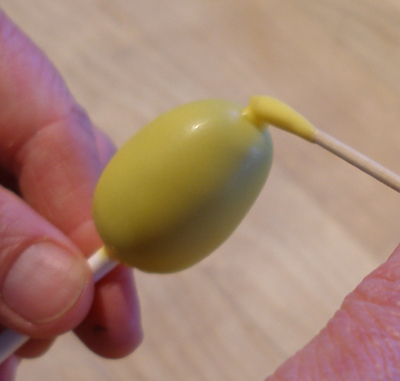
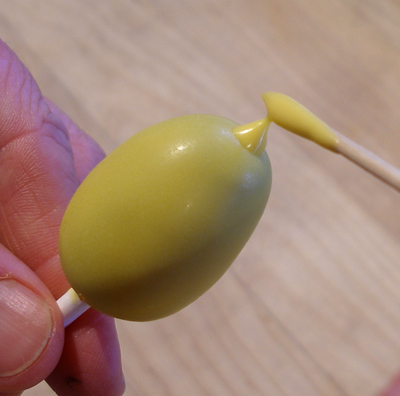
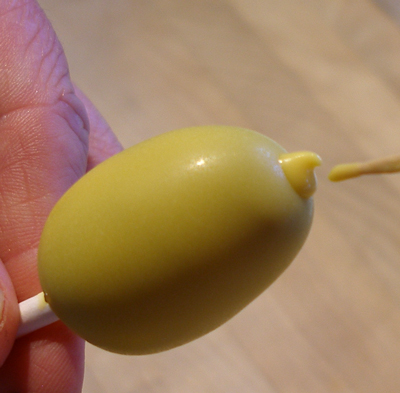
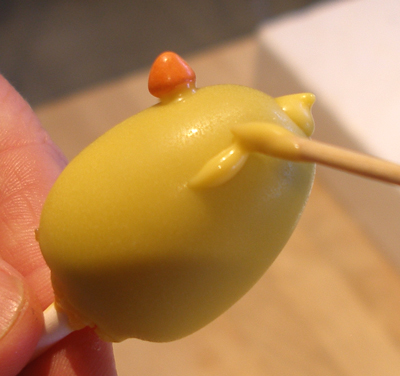
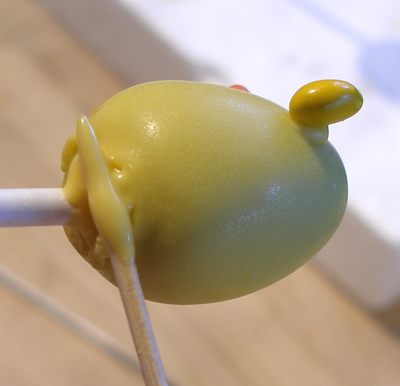
2. For each pop, dip a toothpick into the melted candy and place it on the top of the pop. Pull the toothpick up, and hold it there, briefly, then pull the toothpick to the side, creating a little curl.
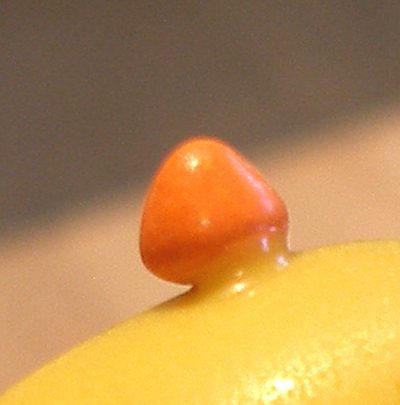
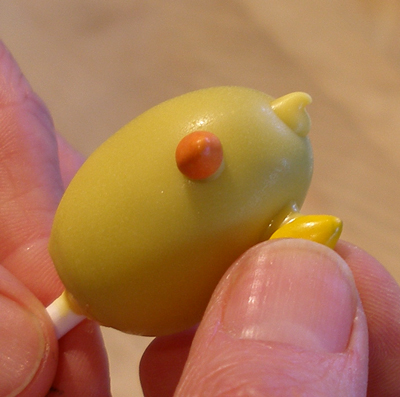
3. Place a small dot of candy melt in the upper center of each pop and put an orange rainbow chip in place, creating the chick's beak.
NOTE: The Rainbow chips vary in shape and size, so it is best to go through and pick out the best looking ones to use as the beaks.

4. Once the beak is in place, turn the pop to the side and place a small dot of melts and set the wing(yellow candy coated sunflower seeds) in place. Do the same on the other side of the pop.
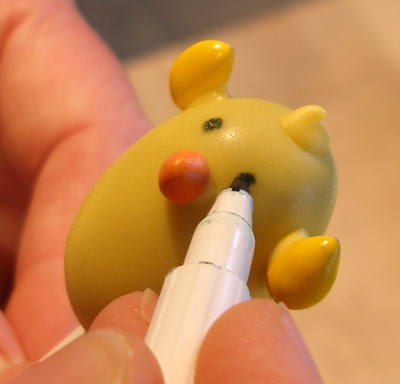
5. Put the eyes on each pop with a black edible ink marker.
6. Remelt the candy melts, if necessary and put a small amount around the bottom of a chick pop.
7. Thread an egg shell on the stick and press it into the melts to adhere. Hold it in place for about 20 seconds to make sure it is set, them place the pop back into the Styrofoam sheet.

8. Repeat with the rest of the pops.
NOTE: If you want to place a top shell on some of the pops, you can use some of the broken scraps and “glue” it in place with the melts.
SERVE
Serve at the cool side of room temperature.
STORAGE
Ganache can be stored at the cool side of room temperature for two days, and then it must be refrigerated.