
Variation: Sarah's Gluten-Free Yellow Butter Cake
This gluten free recipe makes a wonderful everyday layer cake and perfect cupcakes, and uses Sarah's Gluten-free Mixing Method. They have a light and fluffy texture, great color and are very chocolaty!
CAKE RECIPE HELP / GLUTEN-FREE RECIPE HELP
KELLY SAYS: “My neighbor is having back problems and her oven is broken so I offered to make her daughter's birthday cake.
One of the guests, coming to the party, is on a gf diet, so Sarah suggested that I try her gluten-free chocolate cake recipe.
Everyone LOVED the cake and couldn't believe it was gluten-free. ALL the plates were empty…they ate it up with glee.
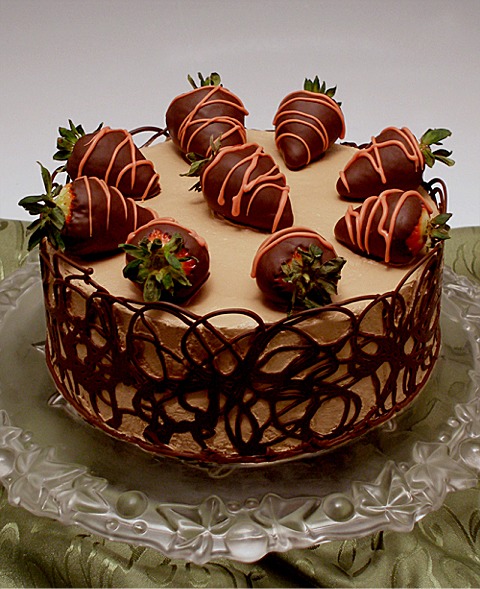
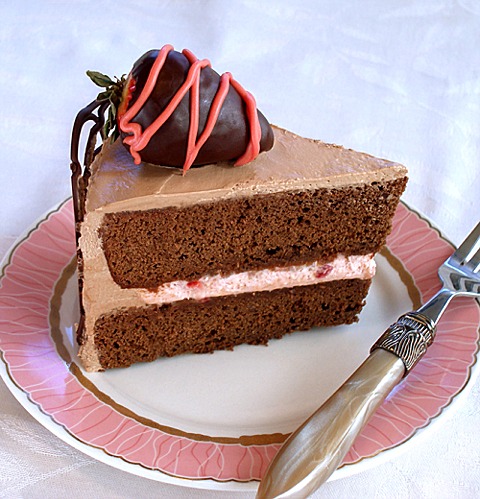
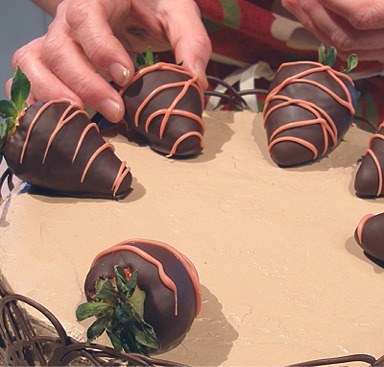
I used a chocolate Swiss meringue buttercream, filled it with strawberry stabilized whipped cream and diced strawberries. I made a lacy chocolate collar to wrap around the cake, and I topped it with chocolate covered strawberries.
The cake is nicely chocolaty, and has a nice moist crumb, just like a REAL cake.”
kake, Premium Member, Says: “I can't believe this is gluten-free chocolate cake. Looks like regular chocolate cake.
congrats for Sarah to make another beautiful gluten free cake.”
STEP I: MAKE THE GLUTEN-FREE EVERYDAY CHOCOLATE CAKE OR CUPCAKES
INGREDIENTS
2 sticks (16 tablespoons) unsalted butter, cold
1/2 cup milk
4 large eggs
2 teaspoons vanilla extract
1 1/2 cups Bob's Red Mill Gluten-Free Flour Blend; spoon into dry measuring cup and level to rim; or any Gluten-free flour blend
1/2 cup plus 2 tablespoons unsweetened cocoa powder (can substitute with Dutch-processed cocoa)
2 1/2 teaspoons baking powder
1 teaspoon xanthan gum, Bob's Red Mill
1/2 teaspoon salt
1 teaspoon instant espresso powder, optional
1 1/2 cups sugar
NOTES: You can substitute the natural cocoa powder with Dutch-process. Do not change the leaveners in the recipe.
INSTRUCTIONS
Preheat the oven and prepare the baking pans:
1. Position an oven shelf to the middle of the oven and preheat the oven to 325 degrees F.
If using dark, nonstick baking pans or ovenproof, Pyrex glass pans, do NOT reduce the oven heat by 25 degrees F.
2. Grease two, 9 x 2-inch cake pans. Set aside.
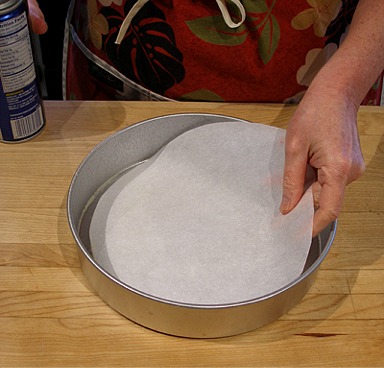
A. Line with parchment paper:
Place one pan on top of a piece of parchment paper and trace around it with a pencil. The lead is nontoxic.
Cut out the round of parchment paper following the pencil marks as a guide.
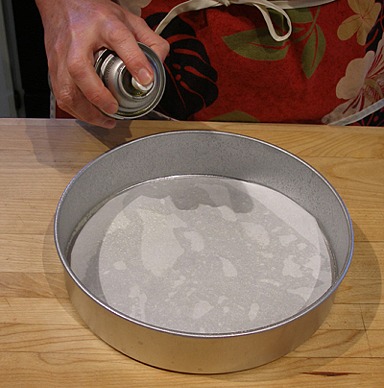
B. Grease the pans with cooking oil spray. Place the parchment paper round in each pan, and grease again. Set pans aside until needed.
Mix the cake ingredients:
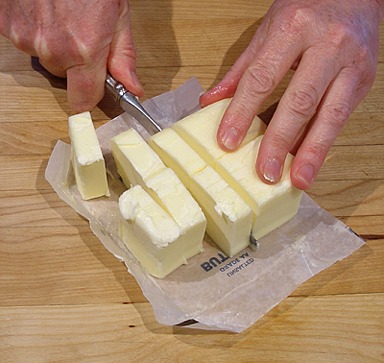
1. Remove the butter sticks from the refrigerator, and cut into approximately 10 – 12 evenly-sliced pieces. Set aside, but the butter must remain cool.
Refrigerate, again, if necessary.
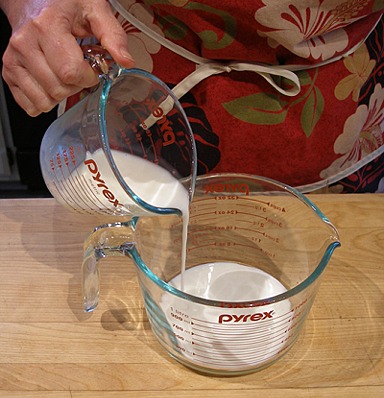
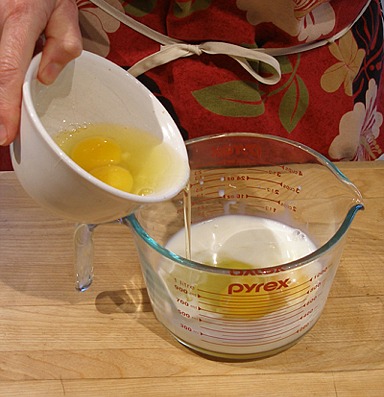
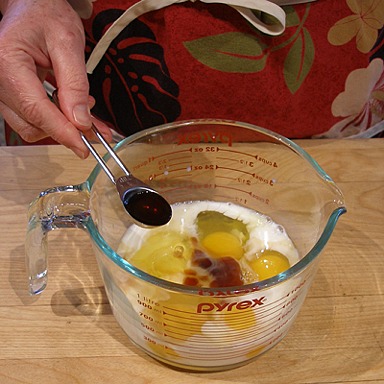
2. In a one or two-cup measuring cup or a bowl with a pouring spout, beat together the milk, eggs and vanilla, and beat together with a fork.
Set aside.
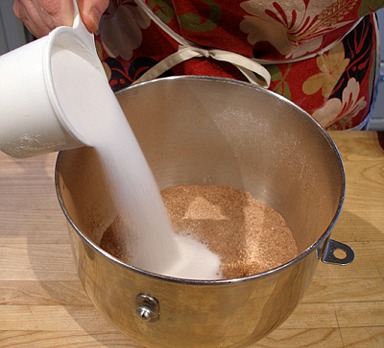
3. Into the mixing bowl of a stand mixer, sift together the gluten-free flour blend, cocoa powder, baking powder, xanthan gum, salt and, optionally, the instant espresso powder. Add the sugar.
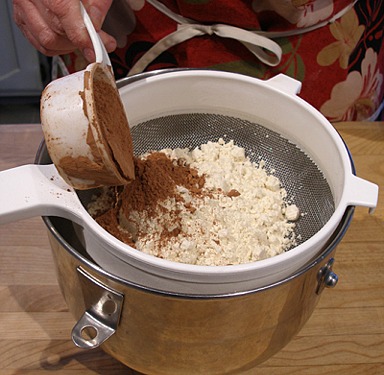
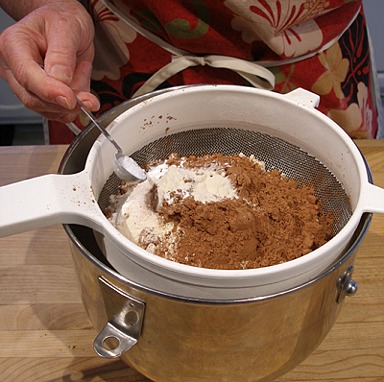
Fit a paddle attachment to the mixer, and mix on low, about 10 to 15 seconds to combine the ingredients. Make sure you get all of the ingredients mixed in from the bottom of the bowl.
4. With the mixer on low speed, add the butter 1 tablespoon or piece at a time at a time into the flour mixture. Keep adding each butter-piece about 1 second apart, until all has been incorporated.
The butter must be COLD.
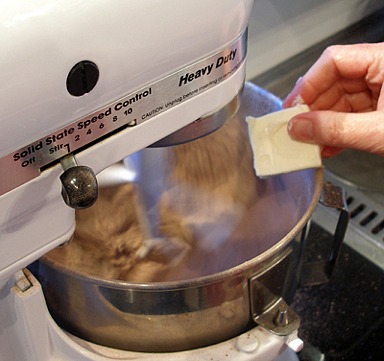
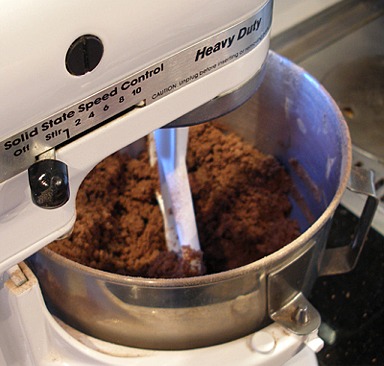
The flour mixture should begin to clump together and look ONLY SLIGHTLY moistened, but not wet.
If it is wet, the cake will not aerate properly in the next steps and bake as well.
You should not see any butter pieces in the mixture.
5. With the mixer speed on low, continuously add the egg/milk mixture at the side of the bowl, taking about 5 seconds to complete.
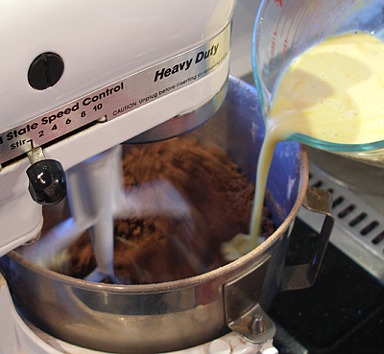
Mix until incorporated, taking about 5-10 seconds. Stop the mixer and scrape down the sides.
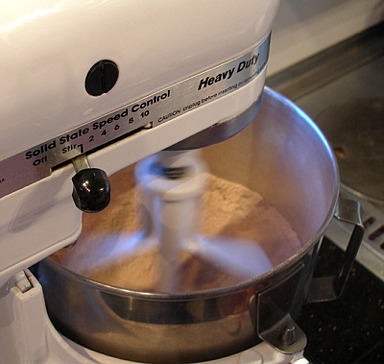
6. Increase the speed to high and beat for 3 to 4 minutes until light and fluffy – like you are whipping whipped cream or egg whites to their fullest. This also activates the xantham gum and after a few minutes, you should start seeing gummy strands forming in the batter as it is beaten. The batter will be thick and somewhat sticky.
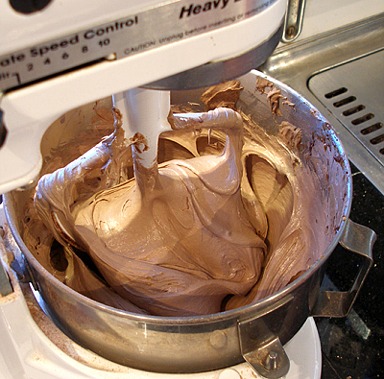
SARAH SAYS: This is a critical part of my new gluten-free mixing method. The cake batter will look pretty strange before this “miracle mixing” process; it magically turns into a “real” looking fluffy cake batter after this important aerating step. If mixed properly, the funny odor from the gluten-free ingredients should pretty much disappear. The batter should not taste bitter, either.
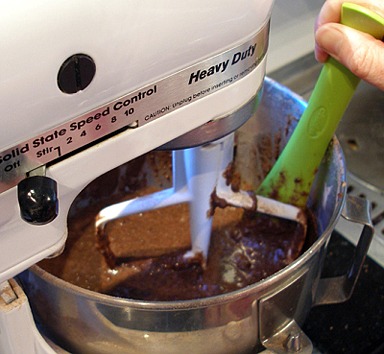
7. Unclamp the bowl, and with a large rubber spatula, give the batter a few turns. Make sure you scrape the sides and bottom of the bowl.
Bake and cool the cake:
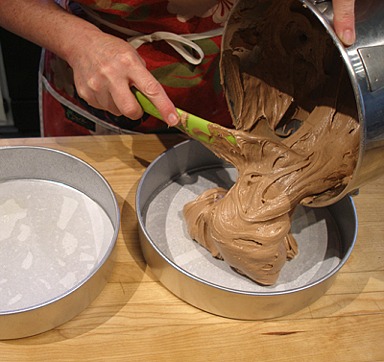
1. Divide the batter evenly into two 9 x 2-inch prepared pans, and lightly smooth their tops. The batter will fill the baking pans about half-full or a little less.

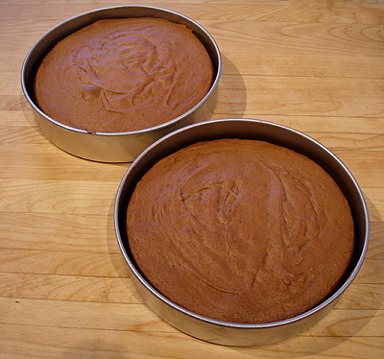
2. Bake for 25 to 35 minutes (two 9 x 2-inch pans). Do NOT underbake or overbake. Gluten-free cakes need to be baked perfectly.
If you insert a toothpick in the middle and remove, it should be clean with one or two moist crumbs attached at most, but not batter. The cake will slightly shrink from the side of the pan.
SARAH SAYS: The cake smells really good while baking! The cake should be just like a REAL cake! It's all because of my new gluten-free mixing methods and recipe's proportions.
3. Remove the cakes to cool on wire racks for 10 to 15 minutes. Loosen the sides with a small metal spatula or sharp knife, if necessary, taking care not to scratch the cake pan.
Invert onto cake rack and place upright to cool completely. Be careful, the cake is delicate when warm. It will shrink slightly during cooling.
STORAGE
Gluten-free cake layers stale faster than conventional cakes made with wheat flour. They can be stored at room temperature for about 1 to 2 days, well wrapped.
Unfrosted cake layers are best stored frozen, wrapped in plastic wrap, for about a month at most; they also do not freeze well as long as conventional cakes.
Thaw in their wrappers at room temperature. Cakes can become sticky when thawed.
VARIATIONS
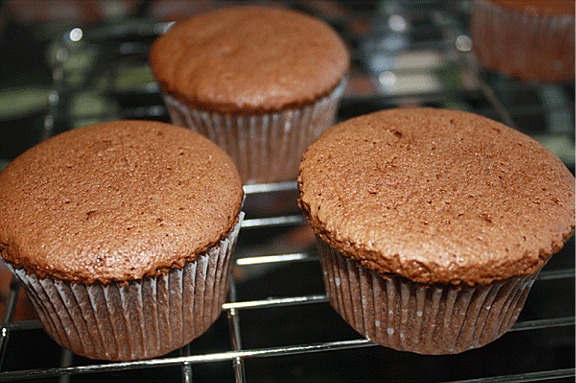
Cupcakes: Fill cupcake tins 1 3/4-ounce full or to the rim. Must bake at 325 degrees F for 30 minutes until done or else will fall in the center when cools if underbaked.
STEP II: DECORATE THE CAKE, OPTIONAL
INGREDIENTS
To decorate the cake as show above, you will need:
For the Icing:
1/2 recipe Swiss Meringue Buttercream or SMBC, Chocolate Variation
For the Filling:
1/2 recipe Strawberries and Cream Filling
1/2 cup diced strawberries; do not add sugar. Dice right when needed for the recipe; do not dice in advance and refrigerate because the berries will leak juice and become watery.
For the Garnish:
1/2 recipe (9 – 10) Classic Chocolate Covered Strawberries
One recipe Chocolate Lace Collar, recipe below
INSTRUCTIONS
Ice the cake:
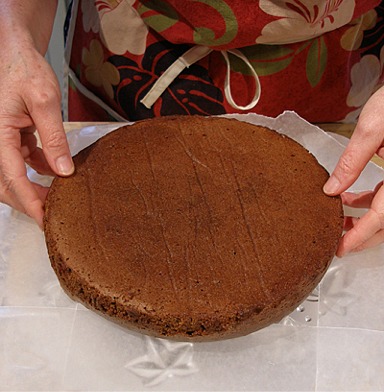
1. Place waxed paper strips on a FLAT cake platter and place one layer on the strips, centered on the baking sheet.
Place the serving plate on a cake decorating turntable. This will make it much easier to ice the cake.
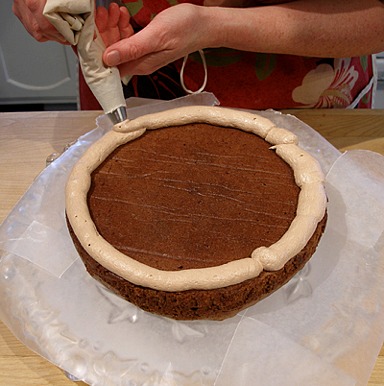
2. Place about 1 cup of SWISS MERINGUE BUTTERCREAM, CHOCOLATE VARIATION, in a piping bag fitted with a large open tip. Pipe an icing dam around the edge of the layer.
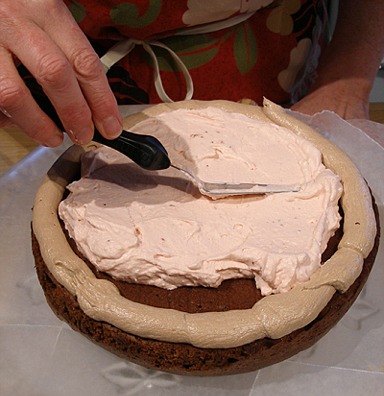
3. Spoon the STRAWBERRIES & CREAM FILLING in the center of the layer and spread it, up to the dam, with a small offset spatula.
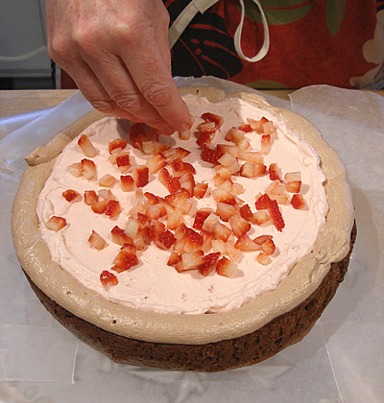
4. Sprinkle the whipped cream with the DICED STRAWBERRIES, then gently press them into the cream with your hand.

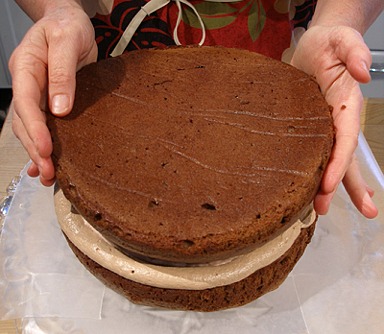
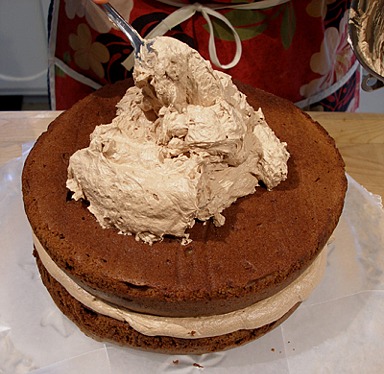
5. Place the remaining layer on top of the filling and strawberries. Then, spoon the remaining SWISS MERINGUE BUTTERCREAM, CHOCOLATE VARIATION on top of the cake.
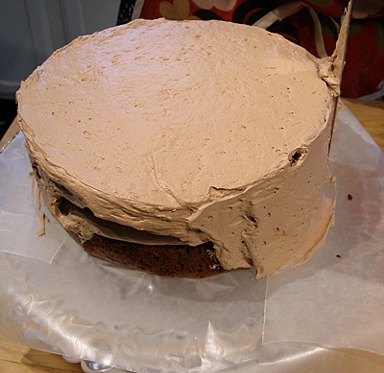
6. Ice the cake with the SWISS MERINGUE BUTTERCREAM, CHOCOLATE VARIATION.
When the icing is smooth, place the cake in the refrigerator while you make the chocolate lace collar.
Make the Chocolate Lace Collar:
CHOCOLATE LACE COLLAR RECIPE / How to
INGREDIENTS
1/2 cup semi-sweet chocolate chips
Equipment:
Acetate sheet or parchment paper
Disposable piping bag or plastic bag
INSTRUCTIONS
1. Measure around the circumference of the cake with a piece of kitchen string.
Cut a sheet of acetate, or a piece of parchment paper that is 1-2 inches longer than the circumference of the cake and about 1 inch taller than the height of the iced cake.
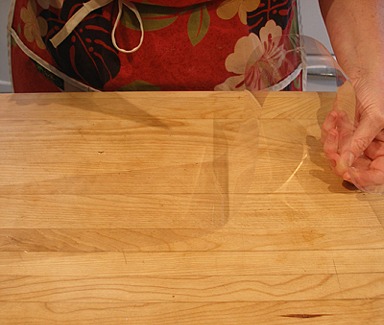
2. Place the acetate strip on your work surface.
3. Place chocolate chips in a disposable piping bag or small plastic sandwich bag. Do not enclose. Place in a microwaveable safe glass for support, open side up.
Melt the chocolate chips in the microwave at 50% power for 1 minute at a time, until almost melted.
Squish the chocolate in the bag after each session until melted.
4. When the chocolate is melted and cooled slightly, clip the tip off the piping bag with scissors to make a small opening.
If using a small plastic sandwich bag, clip off one of the bottom corners.
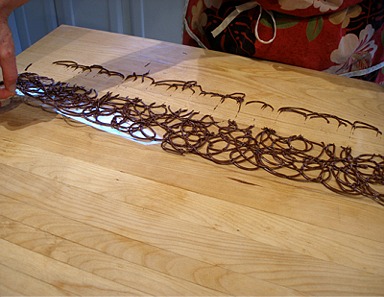
5. Pipe the melted chocolate in a random circular pattern directly onto the acetate strip, making a CHOCOLATE LACE COLLAR.
Make sure you pipe chocolate the entire height of the strip. Pipe the chocolate the whole length of the strip.

KELLY SAYS: It is OK to go over the height of the acetate and end up with some excess chocolate on the work surface that may have gone over its bottom edge.
However, you should keep the chocolate within the confines of the strip on the top.
Move the CHOCOLATE LACE COLLAR away from any excess chocolate piped from it onto the work surface, so it is freed.
7. Let the CHOCOLATE LACE COLLAR sit undisturbed until the chocolate loses its sheen and has set, but not dried or become hard.
You still want the chocolate to remain flexible, but you don't want it to be flowing, either. Do not place it in the refrigerator.
KELLY SAYS: This took about a 1/2 hour in my kitchen.
8. When the chocolate on the CHOCOLATE LACE COLLAR is ready, remove the frosted cake from the refrigerator. The cake's frosting must be cold.
Remove the waxed paper strips tucked under the edges of cake, serving to keep the cake platter clean from excess icing.
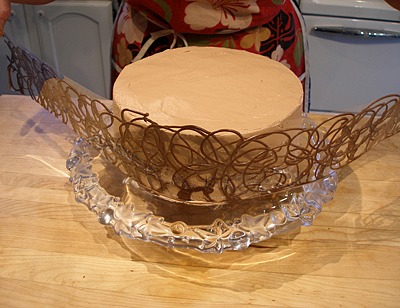
9. Carefully pick up the CHOCOLATE LACE COLLAR, holding each end, align the bottom edge of the middle of the strip with the bottom edge of the cake.
Take care not to press it into the frosting while you adjust it because you will mar both.
10. As you wrap the CHOCOLATE LACE COLLAR around the cake, use GENTLE pressure so it adheres to the icing on the cake, taking care not to wiggle it as you do.
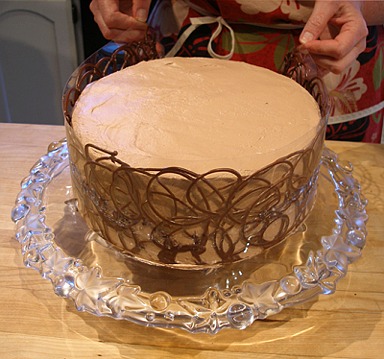
11. Overlap the strip where the two ends meet. Place the cake back into the refrigerator so the chocolate can set. This will take about a 1/2 hour.
If you remove the CHOCOLATE LACE COLLAR too early, the chocolate will not be set and you may mar the icing.
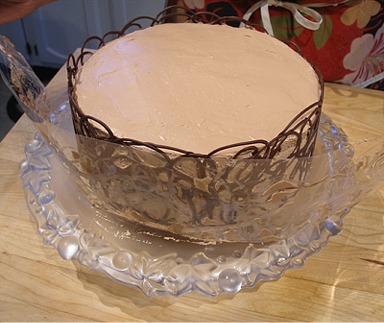
12. When the chocolate is hard and the icing cold, remove the cake from the refrigerator.
Carefully remove the acetate strip from the CHOCOLATE LACE COLLAR by gently pulling it away from the cake; the chocolate should stick to the frosting and the acetate should come off easily.
On the end of the chocolate collar that is exposed, you can trim any excess chocolate off with a hot knife (dipped in hot water and dried). If there is any breakage, you can always patch it with some more melted chocolate.
13. Decorate the top of the cake with CLASSIC CHOCOLATE COVERED STRAWBERRIES.
STORAGE
Cakes frosted with Swiss Meringue Buttercream or SMBC and filled with Strawberries and Cream Filling are perishable and must remain refrigerated. The cake will keep for 2 to 3 days.
Remove the Classic Chocolate Covered Strawberries before you do because they will leech water; they must be eaten within 48 hours and do not need refrigeration.