
INGREDIENTS
Cherry Layer Cake:
3 1/2 cups unbleached all-purpose flour; spoon into dry measuring cup and level to top
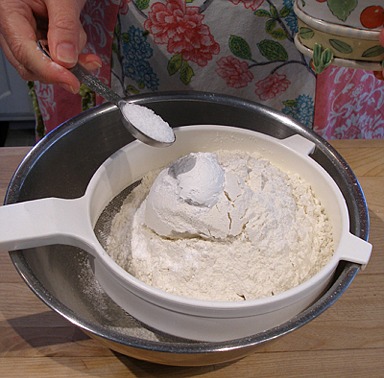
1 teaspoon baking powder
1 teaspoon baking soda
1 teaspoon salt
1 cup whole or 2% milk, can be cold from refrigerator; measure in liquid measuring cup
2 teaspoons vanilla extract
1 teaspoon almond extract
1 cup (2 sticks) unsalted butter, can be cold from the refrigerator
1 1/3 cups sugar or superfine sugar
4 large eggs, can be cold from refrigerator
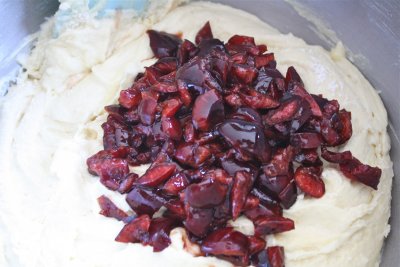
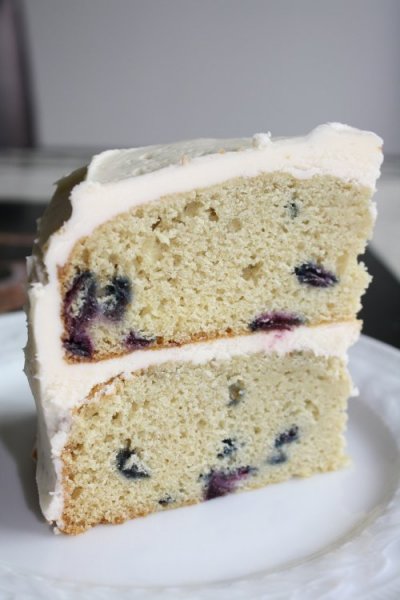
1 cup pitted and chopped fresh, frozen or canned cherries; pit and chop cherries the size of small peas and then measure in a liquid measuring cup (drain canned cherries or cherries in juice and reserve juice for frosting recipe, below. Thaw and drain the frozen cherries before using in the recipe.)
NOTES: It’'s best to use an electric stand mixer for this cake because it is more powerful than a hand-held electric one. Extra horsepower is needed due to the large amounts of ingredients that it has to mix.
1 recipe Tami’s or Perfect Buttercream – Not as Sweet Version or Cream Cheese Buttercream Frosting
INSTRUCTIONS
Prepare the oven and baking pans:
1. Position the oven shelf in the middle of the oven. Preheat the oven to 350 degrees F.
2. Spray two 8- x 2-inch, preferably light colored, heavy NOT nonstick pans with nonstick cooking oil. (If you use dark, nonstick baking pans or ovenproof, Pyrex glass pans, be sure to reduce the oven heat by 25 degrees F, but the recipe will not bake as well in these types of pans; it will result in crusty, dark edges.)
Make the cake batter:
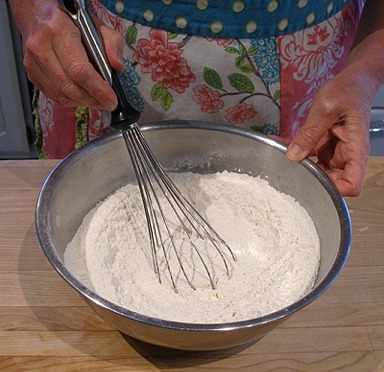
1. In a medium bowl, after measuring, sift together the flour, baking powder, baking soda, and salt; set aside.
SARAH SAYS: Be sure your baking powder and/or baking soda (and salt) are evenly distributed throughout the flour so that the cake doesn’t develop uneven air holes as it bakes, which can cause it to crack or fall apart.
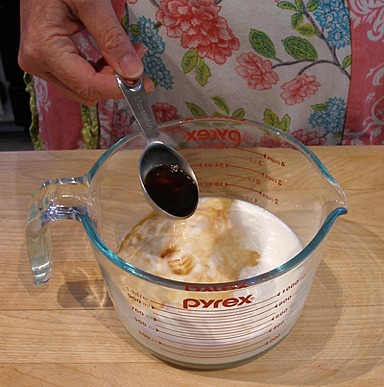
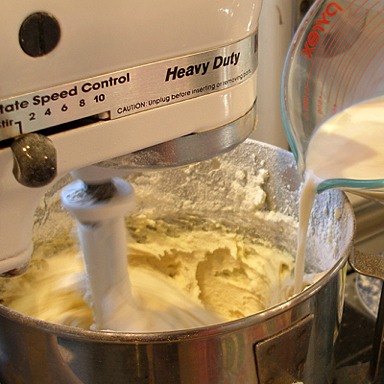
2. Add the vanilla and almond extracts to the milk and set aside.
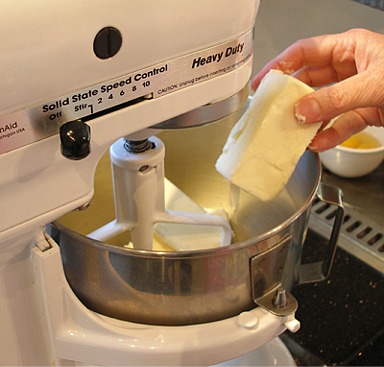
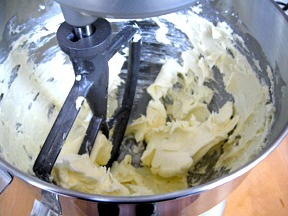
3. Beat the butter in the bowl of a stand mixer, fitted with a paddle attachment, on low until softened. (If the butter is cold, it will warm quickly from the beaters – taking about 60 seconds).
4. Add the sugar in a steady stream at the side of the bowl.
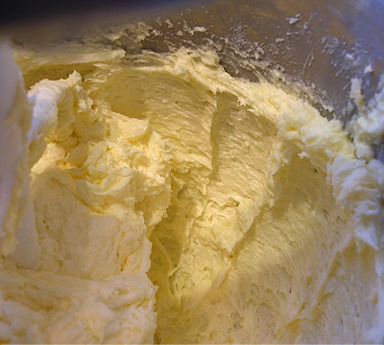
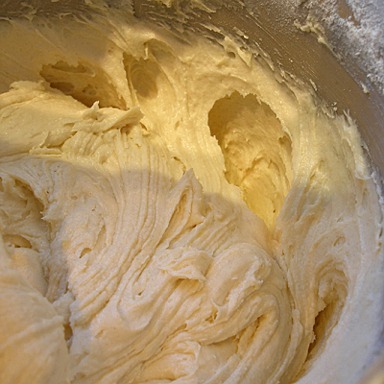
Increase speed to medium and beat for 1 minute until the butter is lighter in color and aerated.
SARAH SAYS: Another way to tell when the mixture is aerated properly, is when there are ridges of butter and sugar left at the side of the bowl as the beater moves through it.
The butter is tacky and not too soft and has not melted.
5. Stop the mixer and scrape the side and bottom of the bowl with a large rubber spatula.
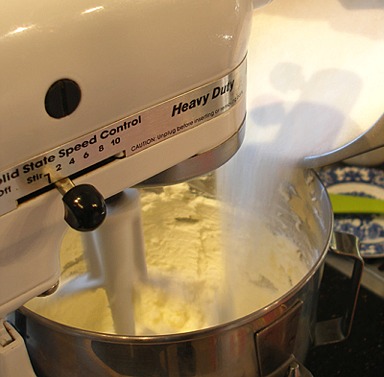
6. With the mixer on low, add the eggs one at a time and beat for 20 seconds after each addition.
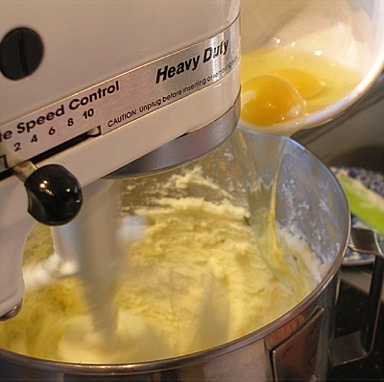
After the eggs have been added, increase the mixer speed to medium and beat the mixture for 2 minutes. (If the eggs are cold, the batter will curdle slightly. It's ok. It will come together as the batter warms from the beaters. ) Set the kitchen timer to help you keep track of the time. The mixture will become fluffy and aerated.
SARAH SAYS: The butter and eggs are an excellent temperature. Notice that it forms ridges on the side of the mixing bowl after the beaters pull through the mixture; the batter is tacky and not too warm so it sticks to the side of the mixing bowl! The batter has become lighter in color as it takes on air bubbles and SOMEWHAT fluffy, as well!
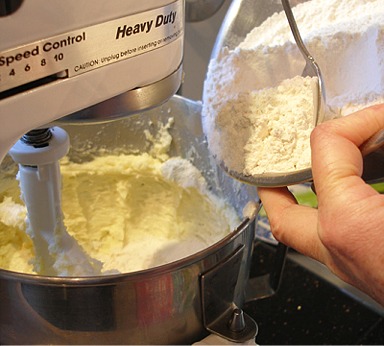
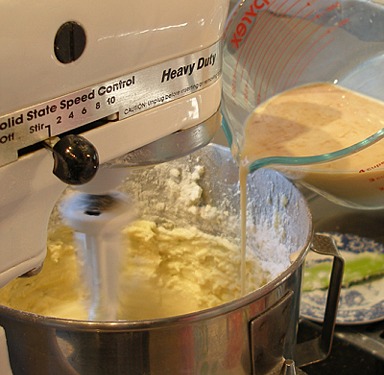
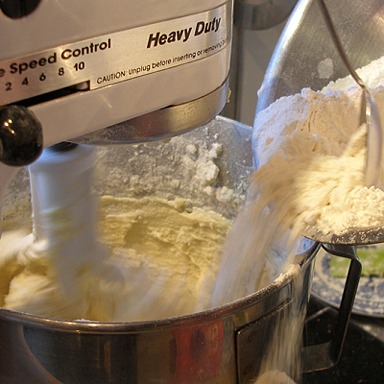
7. With the mixer on LOW speed, add the flour mixture in 3 equal portions, alternating with the milk in 2 equal portions, beginning and ending with the flour. (If the milk is cold, the batter will curdle slightly. It's ok. It will come together when you add the flour.)
Add the flour and liquid ingredients in increments quickly; do NOT wait in between additions too long as you don't want to overmix the batter.
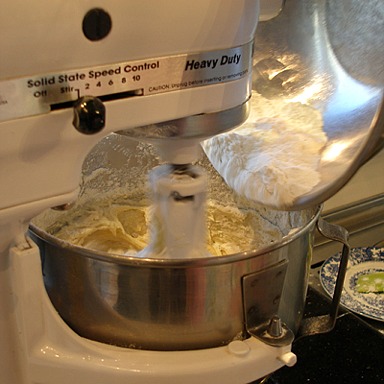
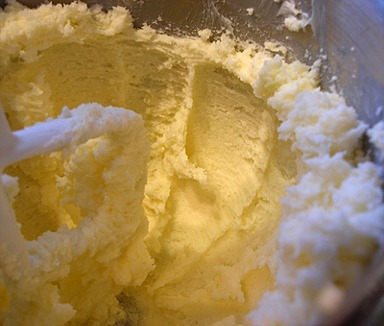
8. After completing the last addition of flour, stop the mixer, and scrape the side and bottom of the bowl with a large rubber spatula.
Then, let the mixer run for 30 seconds on LOW. The batter will be very thick and form ridges on the side of the bowl as the beater pulls through the batter. STOP the mixer. Do NOT overmix.
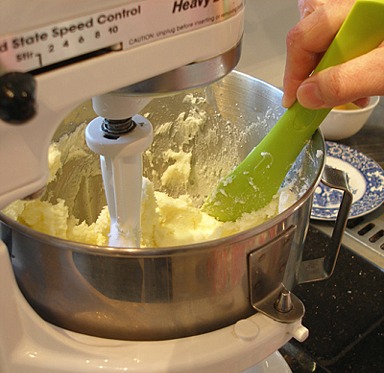
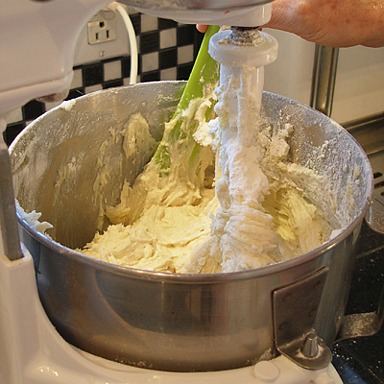
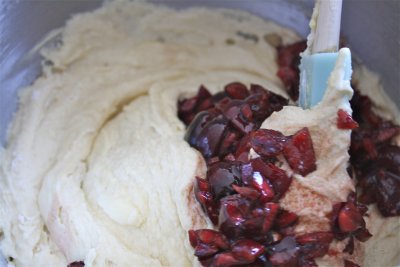
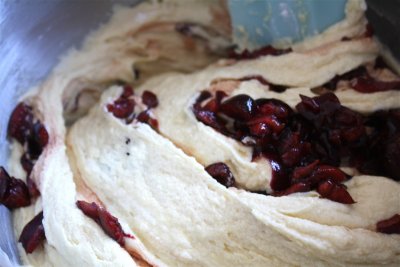
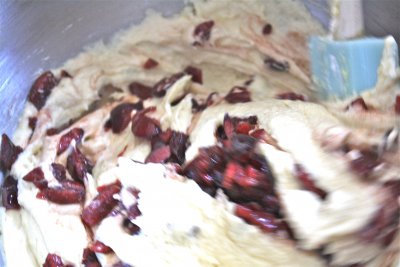
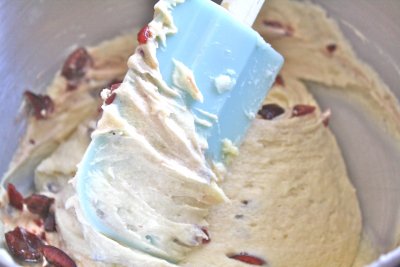
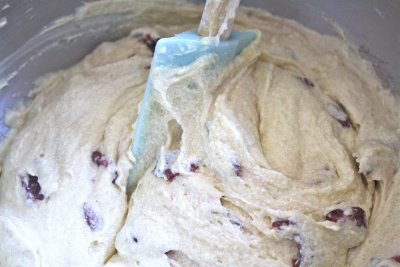
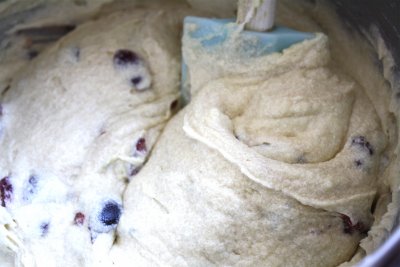
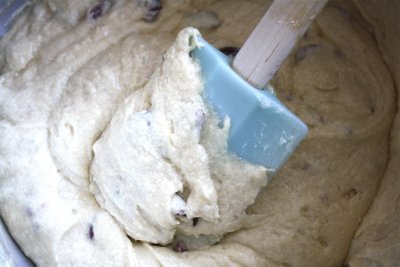
6. Add the chopped cherries and FOLD with a large rubber spatula until JUST combined. DO NOT OVERMIX.
SARAH SAYS: The reason for folding in the cherries is that if you overmix wheat flour when moistened, it produces too much gluten. Too much gluten toughens and dries a cake when baked. It also causes the cake to develop a peak in the middle and deep cracks on the top as well. If this happens, cut the cake into small, bite-size pieces and frost each one. Place on a serving platter and serve anyway – no one will know!
7. Scrape the bowl and divide the batter evenly into the prepared pans. Lightly smooth the tops.

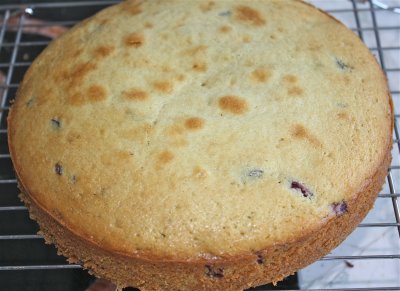
8. Bake the layers for 40 – 45 minutes. To test for doneness, insert a toothpick in the middle of each cake layer and remove. It should have a few moist crumbs attached, but not batter. Lightly touch of the tops of each cake with a cupped hand until the top feels firm and gives slightly. The cake shrinks a little from the sides of the pan. It should also smell done.

SARAH SAYS: Shallow cracks will develop in the top of the cake layers during baking. This is normal. Upon cooling, the cake’s top will settle down and most of the cracks will seem to disappear. The ones that are left will be trimmed anyway before frosting and won’t show.
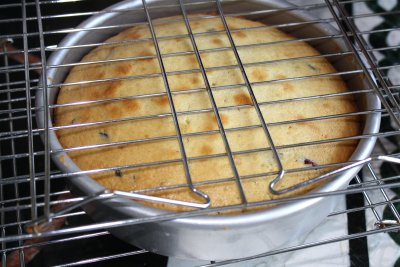
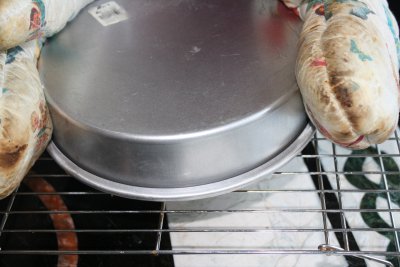
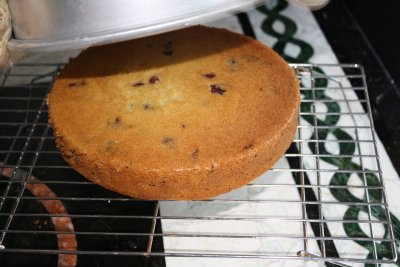
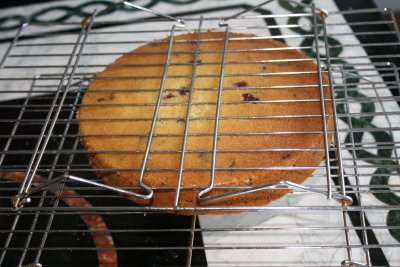
9. Take the cake layers immediately from the oven to a wire cake rack and let them sit for 10 minutes. Loosen the sides with a small metal spatula or sharp knife. Invert onto wire cake rack, peel off parchment paper, if using, and place upright with the support of another wire cake rack to cool completely.
SARAH SAYS: A cake layer is fragile when hot when taken right from the oven and will crack easily and fall apart if unmolded too soon from its pan. Letting it sit for 10 minutes in its pan allows it to cool a bit before unmolding, preventing this from happening. If your cooling rack has short legs and sits close to the countertop, condensation easily forms between the two making the underside of the cake wet. So, prop up your cooling rack by placing a same height glass under each corner. Then air can easily circulate around the cake to cool it and no condensation will form.
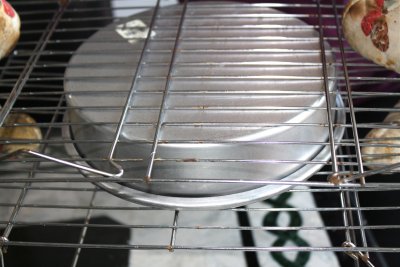

10. Unmold the second cake layer.

ASSEMBLE
Frost and Serve the Cake: When cake layers have cooled, optionally fill and frost.
SARAH SAYS: I used Tami’s or Perfect Buttercream – Not as Sweet Version
STORAGE
The icing and filling that covers your cake determines how you store your cake. The Cream Cheese Buttercream Frosting needs refrigeration, while on the other hand, Tami’s or Perfect Buttercream – Not as Sweet Version is not perishable because the sugar in it acts as a preservative.
The Frosted Fresh Cherry Layer Cake Recipe is a good keeper and stays moist from the cherries. It can be stored, unfrosted or frosted, at room temperature for about 3 days, unless it is warm in your kitchen. Then, I would store the cake in the refrigerator because the cake is so moist. Store the unfrosted layers wrapped individually with plastic wrap and then in foil. Cover the frosted cake with a cake keeper or an inverted bowl so as not to mar its finish.
The unfrosted or frosted layers can be frozen for about 2 months. Wrap the layers well in plastic wrap and then in foil before freezing. Place the frosted cake in a cake box and then wrap the box in plastic and then again in foil. Or, freeze the frosted cake without a wrapper until hard. Wrap in plastic and then in foil. Thaw the unfrosted or frosted cake in its wrappers at room temperature.
VARIATIONS
Apple Cinnamon Crumble Cake
Carrot with Pineapple Layer Cake
Fresh Apple Cinnamon Layer Cake
Frosted Pineapple Layer Cake
Array