
Variations: Ultimate Butter Cake or UBC and Variations; Ultimate Chocolate Butter Cake or UCBC and Variations; Ultimate Fresh Strawberry Butter Cake or UFSBC
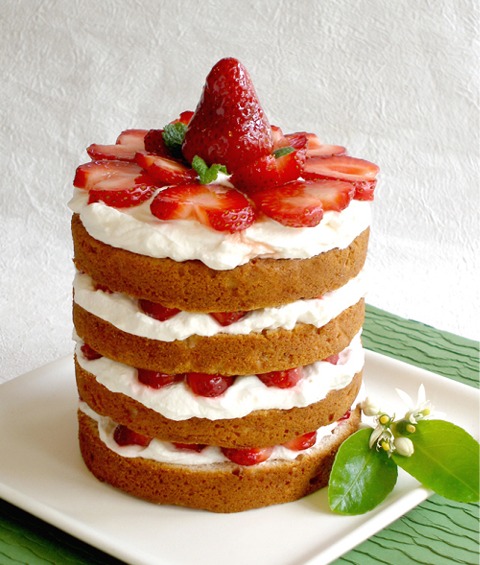
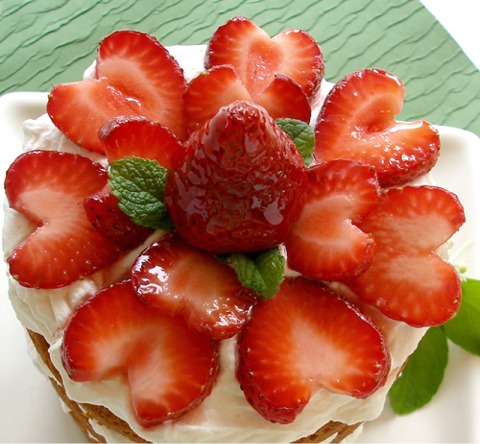
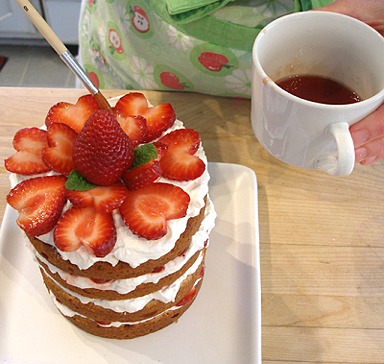
I knew we needed a fresh strawberry cake tutorial on this site. Kelly and I discuss all of the baking projects together, and we came up with the idea of making a mini stacked cake design using my Ultimate Fresh Strawberry Butter Cake or UFSBC. We decided to fill it with whipped cream and California heart-shaped cut strawberries! We show you how to make everything with this recipe tutorial, including the beautiful strawberry cake topper, pictured below. It is so pretty and luscious!
CAKE RECIPE HELP
This delicious dessert is made from a couple of steps and recipes:
STEP I: Make Ultimate Fresh Strawberry Butter Cake or UFSBC
STEP II: Make the Strawberry Hearts
STEP III: make the Stabilized Whipped Cream
STEP IV: Assemble the Strawberries & Cream Cake
STEP V: Glaze the Strawberry Topper
STEP I: MAKE THE ULTIMATE FRESH STRAWBERRY BUTTER CAKE OR UFSBC
THE ULTIMATE FRESH STRAWBERRY BUTTER CAKE OR UFSBC / Recipe alone
For this tutorial: Makes two 5 x 2-inch cakes and about 18 cupcakes. You can use any size pan up to two, 9 x 2-inch pans.
INGREDIENTS
4 cups unbleached all purpose flour, spoon into measuring cup and level to rim
1 tablespoon (3 teaspoons) baking powder
1 teaspoon salt
1 cup strawberries; makes about 1/2 cup strawberry puree; see NOTE with Ingredients, Step II
1 to 2 teaspoons lemon peel or 1/4 teaspoon citrus oil or 1 tablespoon grated orange peel
1 cup whole or 2% milk; can be cold from the refrigerator
2 tablespoons strawberry milk syrup, optional
1 tablespoon vanilla extract
1 tablespoon strawberry extract, optional
1 teaspoon lemon or orange extract
1/2 teaspoon almond extract, optional
2 cups (4 sticks) unsalted butter; can be cold from the refrigerator, cut into chunks
2 cups sugar or superfine sugar
3 large eggs; can be cold from the refrigerator
INSTRUCTIONS
1. Position the oven shelf in the middle of the oven. Preheat the oven to 325 degrees F (if using two 5 x 2-inch pans)
SARAH SAYS: If you use dark, nonstick baking pans or ovenproof, Pyrex glass pans, for this recipe, DO NOT reduce the oven heat lower than 325 degrees F.
NOTE: If using two 9 x 2-inch pans, one 9 x 13-inch pan or 32- 36 (or any amount) cupcakes, preheat the oven to 350 degrees F.
SARAH SAYS: If you use dark, nonstick baking pans or ovenproof, Pyrex glass pans, for this recipe, DO NOT reduce the oven heat lower than 325 degrees F.
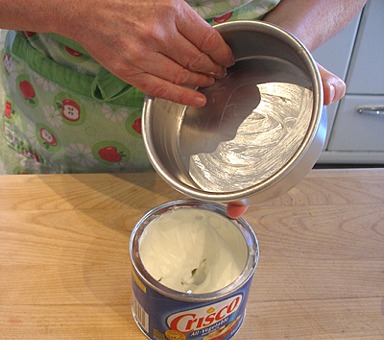
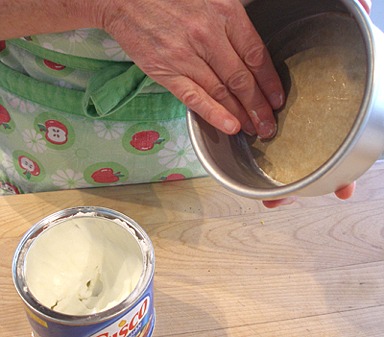
2. Grease two 5 x 2-inch, preferably light colored, heavy NOT nonstick pans.
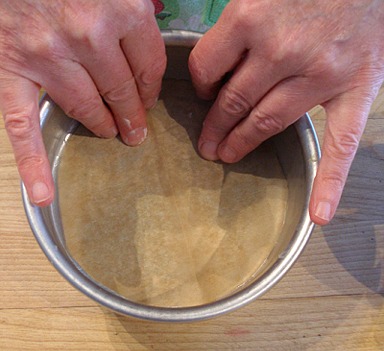
KELLY SAYS:To prevent the cakes from sticking to the pans, I like to use a greased circle of parchment on the bottom of my pans. Then I don't have to worry!
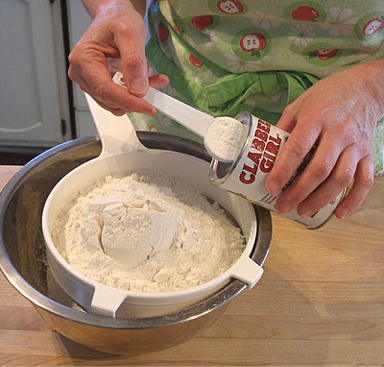
3. In a medium bowl, whisk together the flour, baking powder, and salt; set aside.
KELLY SAYS: After measuring, I like to sift together the dry ingredients.
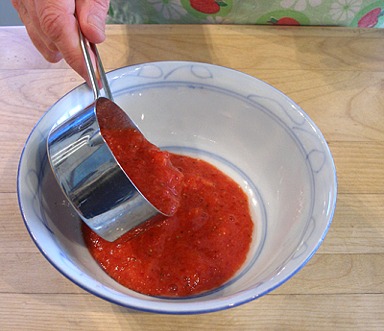
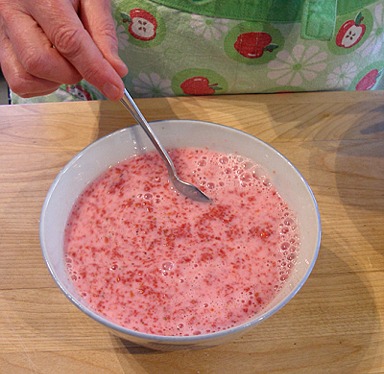
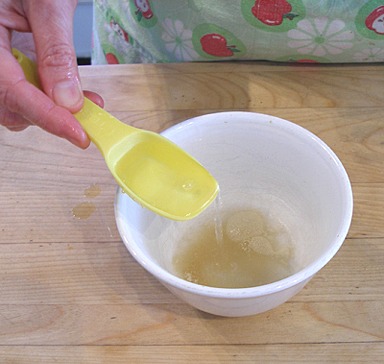
4. Make the Strawberry Puree
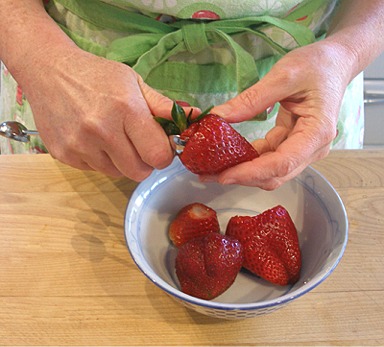
A. Hull the 1 cup strawberries and place them in a food processor fitted with a steel blade.
NOTE: I like to use the small end of a melon baler to hull strawberries. It works like a charm!
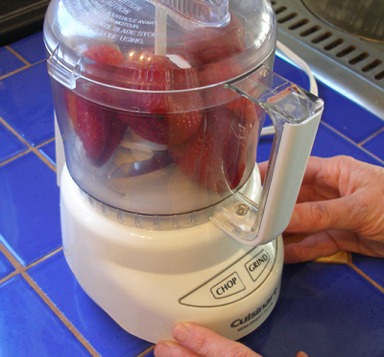
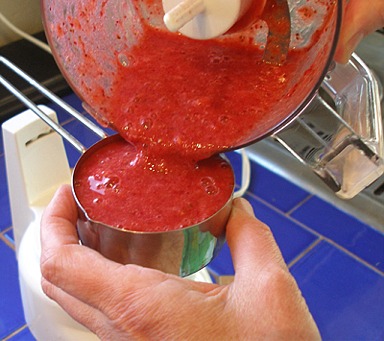
B. Pulse food processor and puree berries until fine, and measure out 1/2 cup and place it in a bowl. Use any extra for another use.
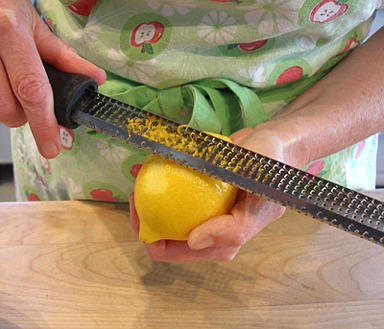
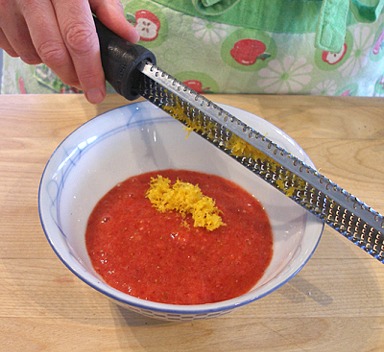
C. Zest one lemon and add the zest to the strawberry puree and stir.
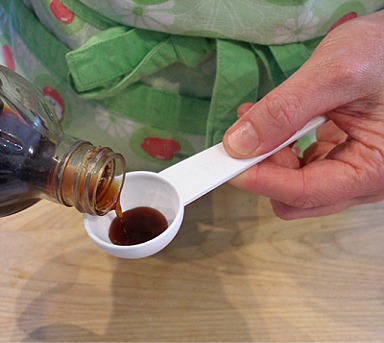
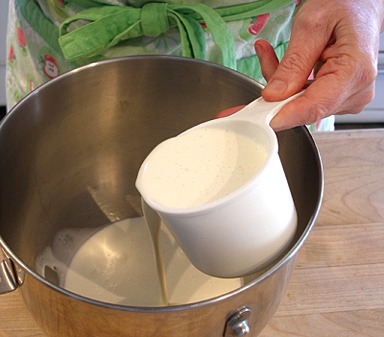
5. In a large mixing bowl, add the milk. Stir in the strawberry milk syrup, vanilla, strawberry, lemon and almond extracts, and the strawberry puree. Set aside.


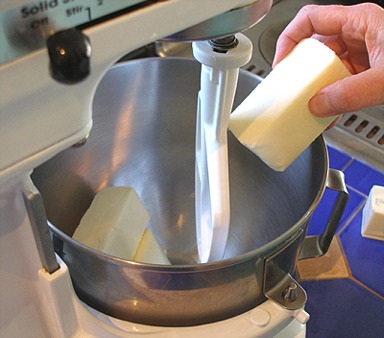
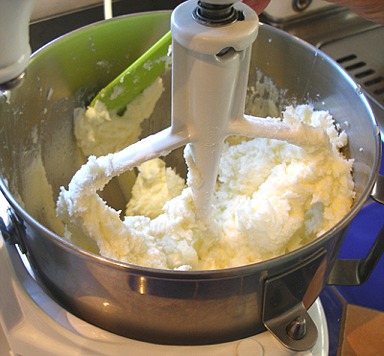
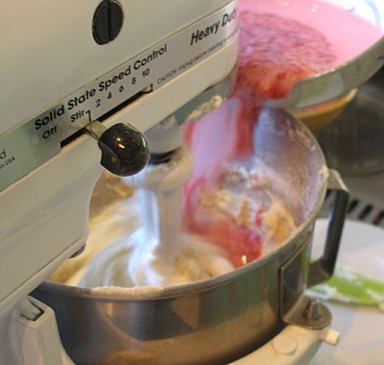
6. Cream the butter and sugar:
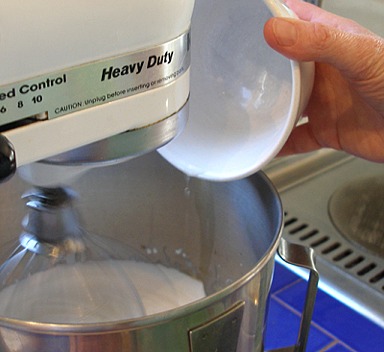
A. Beat the butter in the bowl of a stand mixer, fitted with a paddle attachment, on low until softened. (If the butter is cold, it will warm quickly from the beaters – taking about 60 seconds).
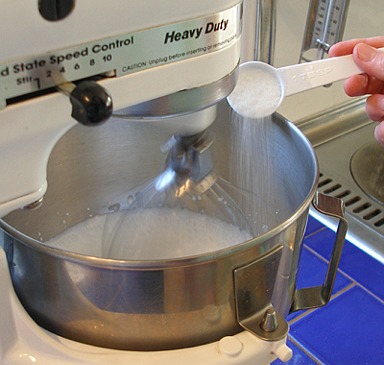
B. Add the sugar in a steady stream at the side of the bowl. Increase speed to medium and beat for 1 minute until the butter is lighter in color and aerated.
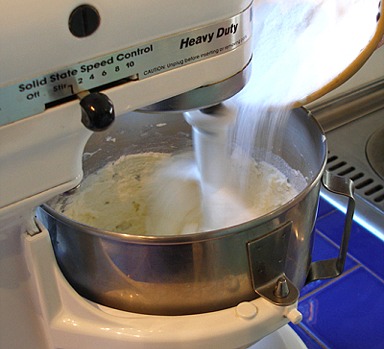
SARAH SAYS: Another way to tell when the mixture is aerated properly, is when there are ridges of butter and sugar left at the side of the bowl as the beater moves through it. The butter is tacky and not too soft and has not melted.
C. Stop the mixer and scrape the side and bottom of the bowl with a large rubber spatula.
7. Add the eggs:
A. With the mixer on low, add the eggs one at a time and beat for 20 seconds after each addition.
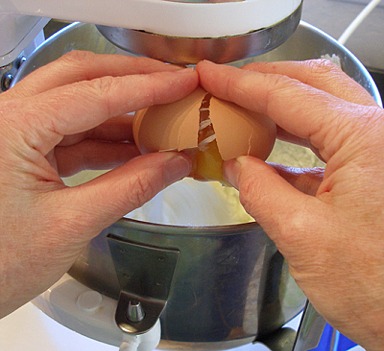
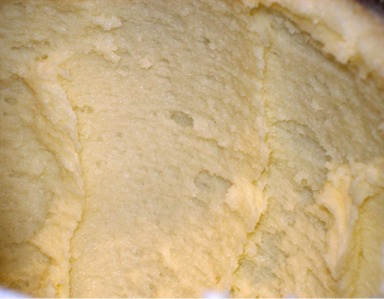
B. After the eggs have been added, increase the mixer speed to medium and beat the mixture for 2 minutes. (If the eggs are cold, the batter will curdle slightly. It's ok. It will come together as the batter warms from the beaters. ) Set the kitchen timer to help you keep track of the time. The mixture will become fluffy and aerated.
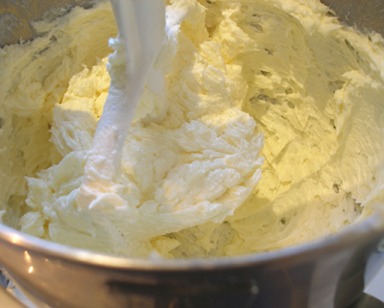
SARAH SAYS: Notice that the mixture forms ridges on the side of the mixing bowl after the beaters pull through the mixture; the batter is tacky and not too warm so it sticks to the side of the mixing bowl! The batter has become light and fluffy, as well!
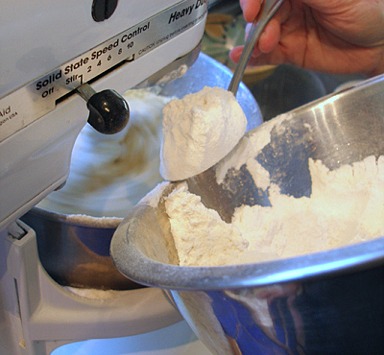
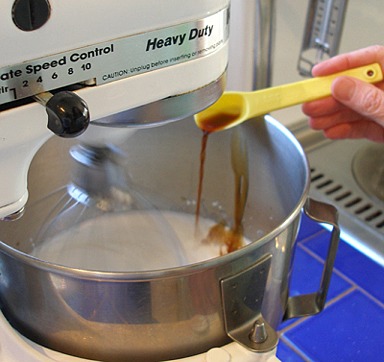
8. Add the flour and milk / strawberry puree mixture to the creamed butter and eggs:
A. With the mixer on low, add the flour mixture in 3 equal portions, alternating with the milk mixture in 2 equal portions, beginning and ending with the flour. (If the milk is cold, the batter will curdle slightly. It's ok. It will come together when you add the flour.)
SARAH SAYS: Add the flour and liquid ingredients in increments quickly; do not wait in between additions too long as you don't want to overmix the batter.
B. After completing the last addition of flour, stop the mixer, and scrape the side and bottom of the bowl with a large rubber spatula.
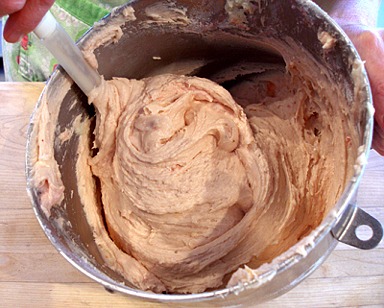
Then, let the mixer run for 30 seconds on LOW. The batter will be very thick and form ridges on the side of the bowl as the beater pulls through the batter. STOP the mixer. Do NOT overmix.
9. Remove the mixing bowl from the mixer. With a large rubber spatula, give the batter ONE or TWO quick folds to incorporate any stray flour or milk left at the sides and bottom of the bowl. Then, STOP!
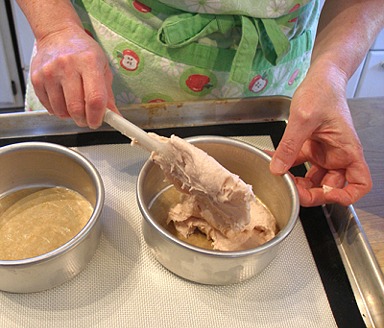
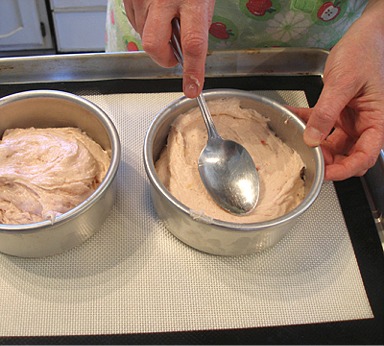
10. Divide the batter in the prepared baking pans (should fill each one 1/2 full) and lightly smooth the tops.
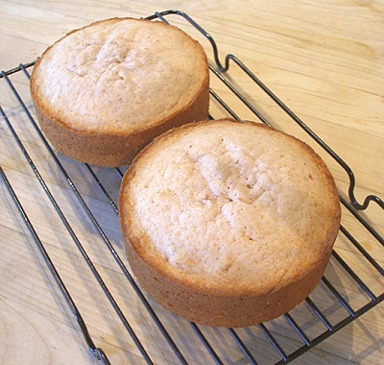
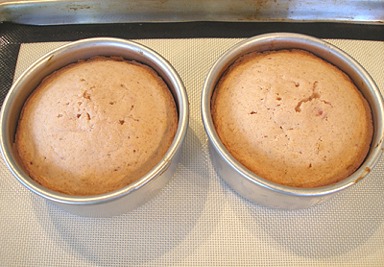
11. Bake for 30-35 minutes or until the top feels firm and gives slightly when touched and will shrink slightly from the side of the pan. The cake will be slightly browned. If you insert a toothpick in the middle and remove, there should be a few moist crumbs attached, but not batter. The cakes will have a slight dome and small cracks on top right when it comes from the oven, but as the cakes cool, they will flatten on top and the tiny cracks will disappear.
NOTE: The cake can be baked in a 9 x 13 x 2-inch, greased cake pan, taking 45 – 55 minutes to bake. Cupcakes take 20 – 30 minutes to bake.
12. Remove cakes to cool on wire racks for 10 to 15 minutes. Loosen the sides with a small metal spatula or sharp knife, taking care not to scratch the cake pan. Invert onto cake rack and place upright to cool completely. Be careful, the cakes are delicate when warm.
STORAGE
The cake layers store nicely. They can be stored at room temperature for about 3 or more days. The cake layers freeze well for about a month or more. Keep well wrapped.
STEP II: MAKE THE STRAWBERRY HEARTS
Making the heart-shaped strawberries is a lot easier than it looks.
STRAWBERRY HEARTS / How To
INGREDIENTS
1 quart strawberries
*NOTE: Use the imperfect or blemished berries to make the puree for the cake batter, Step I. Set aside the most perfect berry for the top of your cake and cut the remaining strawberries into strawberry hearts.
For Soaking the Cut Strawberries:
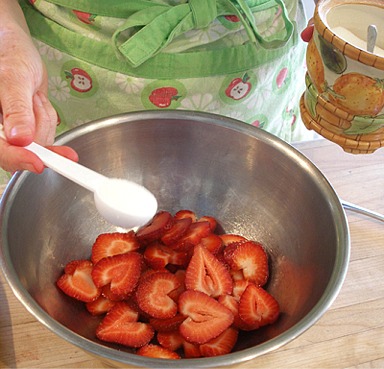
2 tablespoons sugar
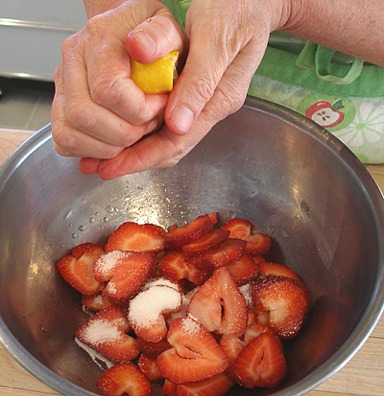
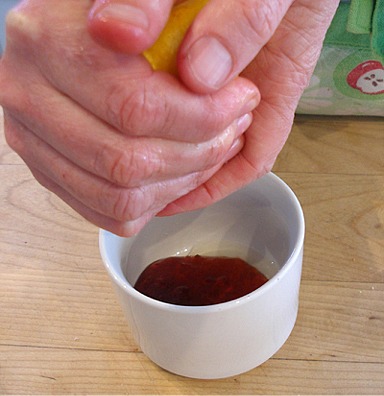
1 tablespoon freshly squeezed lemon juice
INSTRUCTIONS
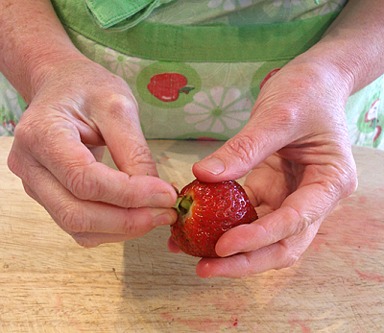
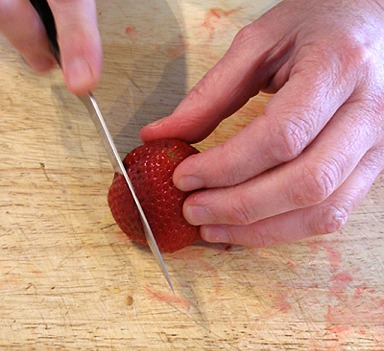
1. Take a whole strawberry in your hands and pull off the leaves.
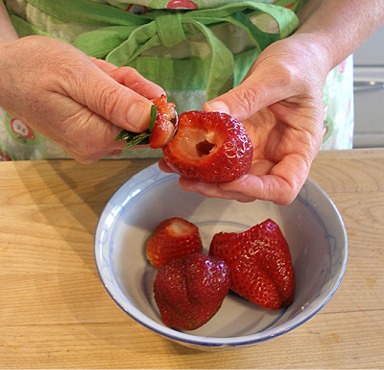
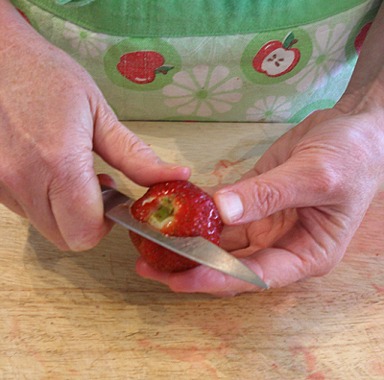
2. Take a sharp paring knife and cut a V-shaped notch on top of the berry and remove the berry's core.
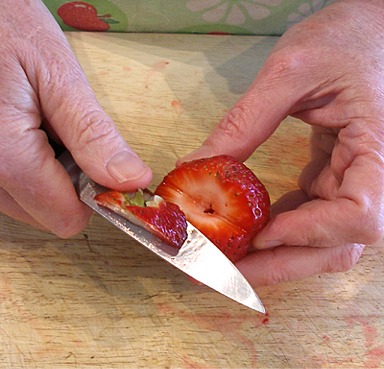
3. Trim a thin slice off of both sides of the strawberry, revealing the heart shape. You can place the scraps in a bowl and eat them later. No sense wasting them!
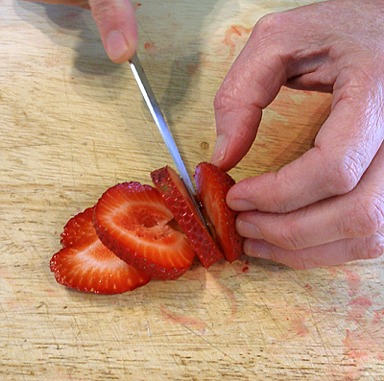
4. Slice the rest of the strawberry into thin heart shapes, less than 1/4-inch thick.
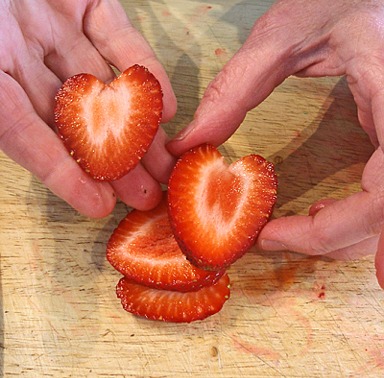
5. Cut all remaining berries in this manner and go through the berries, setting aside the most beautiful hearts for the top of your cake. Save at least 16 perfect hearts for the top of your cake, place them on a plate and cover with plastic wrap, till you are ready to use them.
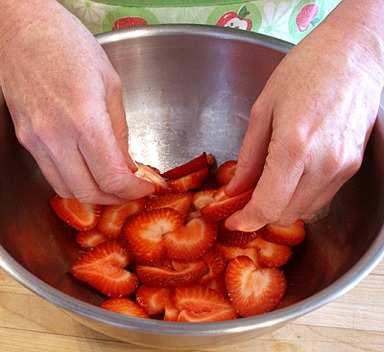
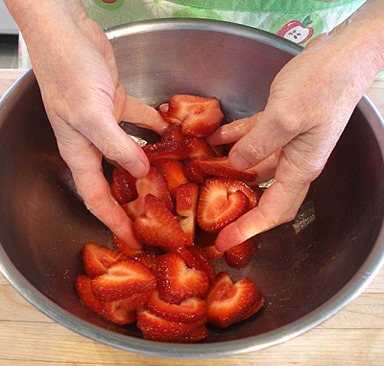
6. Gently place the rest of the hearts in a bowl and add the sugar and lemon juice and mix them, VERY GENTLY with your hands.
You do not want to break the hearts! Set hearts aside.
STEP III: MAKE THE STABILIZED WHIPPED CREAM
STABILIZED WHIPPED CREAM / Recipe alone
If your whipping cream is high in butterfat (40 %) or ultra pasteurized, then you do not need to stabilize it. Gelatin gives it a firm, mouse-like texture, which I like, and it does not weep (bleed water after awhile). You can frost your cake a day ahead, but it must be refrigerated. You can use cornstarch to stabilize whipped cream, but it is not as stable.
NOTES: Iced cake must be refrigerated. Colors to pastels only. Texture remains soft on decorated cake.
INGREDIENTS
Gelatin:
2 tablespoons cold water.
1 teaspoon unflavored gelatin
Whipped Cream:
2 cups (1 pint) chilled whipping cream
1 teaspoon vanilla extract
1-2 tablespoons sugar
INSTRUCTIONS
Prepare the gelatin:
1. Sprinkle the gelatin over the water, and let soak for 5 minutes.
2. Dissolve the gelatin with the water by placing it in a container over a small pot of simmering water, or warm in microwave for about 20-30 seconds. Let cool, but do not let cool so long that it sets.

Prepare the whipped cream:
1. Using an electric mixer, beat cream in a large well-chilled bowl.
2. Just before the whipping cream becomes soft and billowy, slowly add the sugar and flavorings to it at the sides of the bowl. Continue to whip as you do.
3. Whip the cream until barely stiff.
4. Add melted and cooled gelatin all at once to cream during whipping.
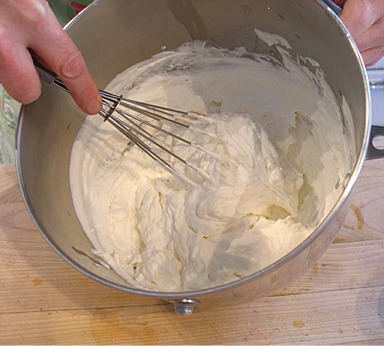
5. Stop whipping when cream forms soft peaks. Finish beating with whisk to adjust consistency.
6. Serve immediately or cover and refrigerate.
VARIATIONS
1. For 1 cup of cream use 1/2 teaspoon gelatin soaked in 1 tablespoon cold water.
2. For 2 cups of cream use 1 teaspoon gelatin soaked in 2 tablespoons cold water.
3. For 6 cups of cream use 1 tablespoon soaked in 1/4 cup plus 2 tablespoon cold water.
SARAH SAYS: Stabilized whipped cream can be flavored, but do it as soon as possible before the gelatin sets.
STEP IV: ASSEMBLE THE STRAWBERRIES & CREAM CAKE
Now you're ready to build the cake!
INGREDIENTS
Two Ultimate Strawberry Butter Cake Layers from STEP I: MAKE SARAH'S ULTIMATE STRAWBERRY BUTTER CAKE
Soaked and Cut Strawberries from STEP II: MAKE THE STRAWBERRY HEARTS
Stablized Whipped Cream, Well Chilled from STEP III: MAKE THE STABILIZED WHIPPED CREAM
Mint leaves
INSTRUCTIONS
1. Prepare the Cake Layers
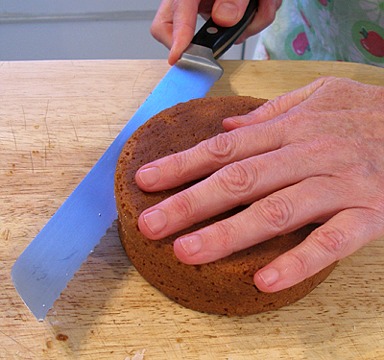
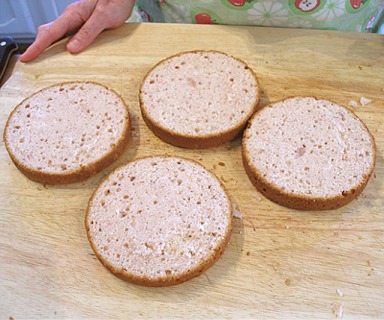
A. If they have a slight dome, like mine did, trim them, so they are even.
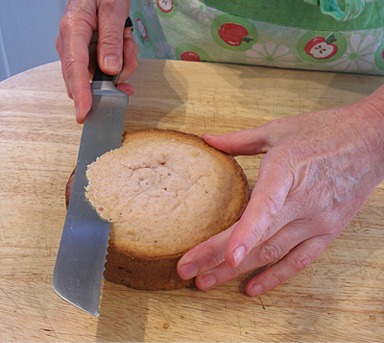
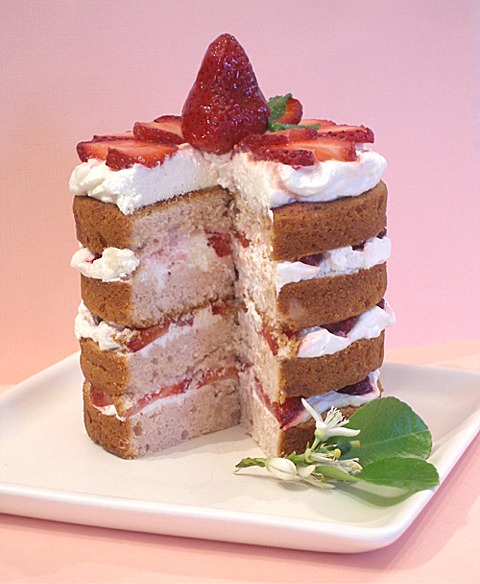
B. Cut the two 5-inch baked and cooled cake layers in half, using a serrated knife.
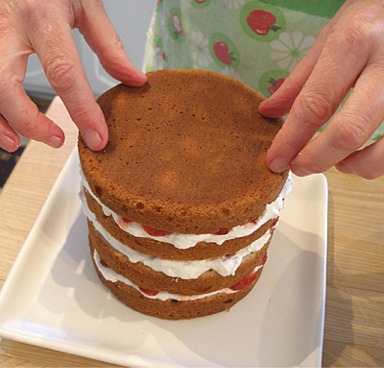
2. Stack the Cake Layers:
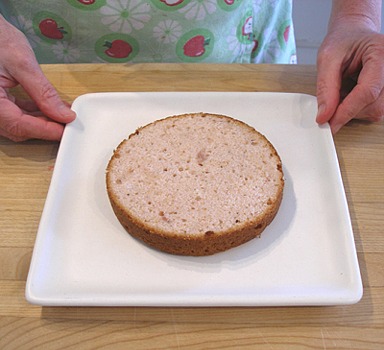
A. Choose your serving plate and place one of the layer, cut side up, on the plate.
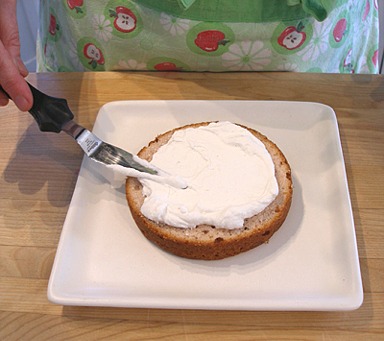
B. Take a large dollop of whipped cream and place it in the center of the layer.
Spread it over the layer with a small offset spatula, leaving a bit of space at the edge of the cake.
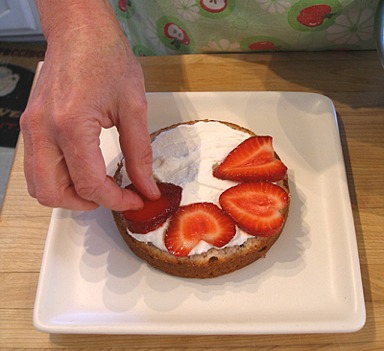
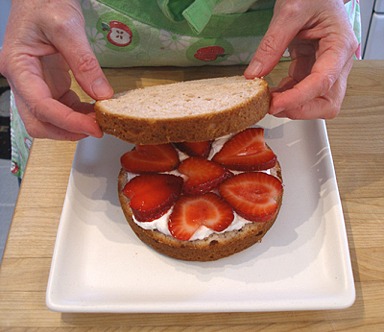
C. Place strawberry hearts (the ones with the sugar and lemon juice added, from STEP II: MAKE THE STRAWBERRY HEARTS, #6) around the edge of the layer, and one in the center, to totally cover the whipped cream.
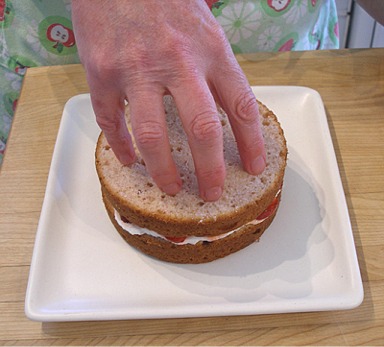
D. Place the second layer on top, and press down gently. This will help the layers stay together and increase the stability of the cake.
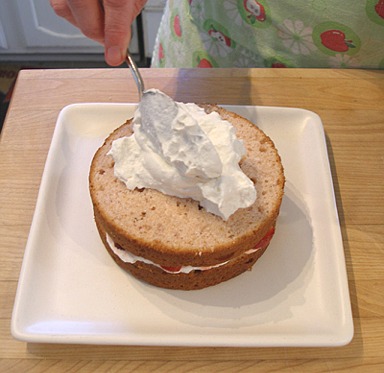
E. Add a dollop cream to the second layer, and spread it out, in the same manner.
Add another layer of strawberries, and, then, the third layer of cake.
Repeat the process again, making sure that your layers are nice and even, as you go.
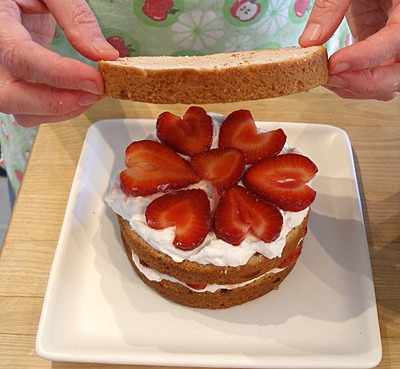
Be sure to place the final layer of cake bottom side up to provide a flat surface!
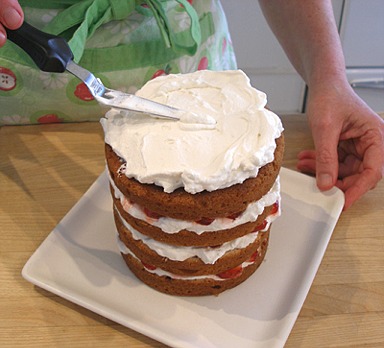
3. Decorate the top of the Cake:
A. Add a very generous dollop of cream on the top layer, and spread it with the spatula.
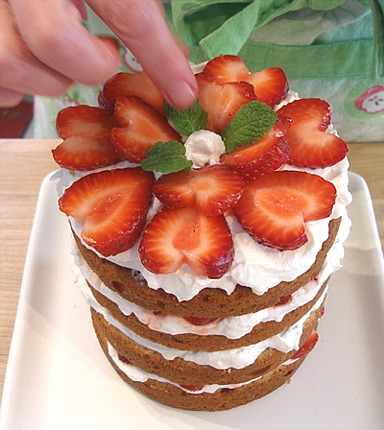
B. Remove the plastic wrap from the plate of “perfect” hearts and place 7 of them, around the edge of the layer.

C. Place 4 more slices, to create an inner layer, and add three mint leaves, for garnish and contrast.
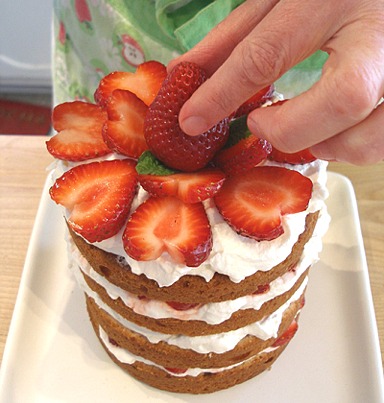
D. Place one perfect whole strawberry in the center of the cake.
STEP V: GLAZE THE BERRIES
The glaze will make your strawberries beautiful and shiny.
BERRY GLAZE
INGREDIENTS
3 tablespoons strawberry jelly
1 teaspoon freshly squeezed lemon juice
INSTRUCTIONS
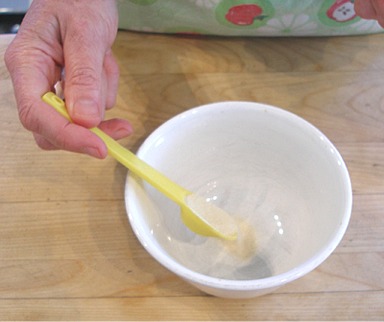
1. Take the strawberry jelly, add the lemon juice to it, and stir.
2. Heat this mixture in the microwave on low for about 15 seconds, or until the jelly is melted.
3. Paint this mixture on the strawberries with a small brush, avoiding the mint leaves as you paint.
SERVE
Refrigerate for an hour ot two before serving. It is best served immediately!
STORAGE
The cake needs refrigeration because it contains whipped cream and cut strawberries. It will last for about 1 to 2 days.
All done!
VARIATIONS
Ultimate Butter Cake or UBC and Variations
Ultimate Chocolate Butter Cake or UCBC and Variations
Ultimate Fresh Strawberry Butter Cake or UFSBC