French bread is typically made with flour, water and yeast. There are two ways to make authentic French bread – one from a straight yeast method and the other from a starter. This recipe uses the straight yeast method. The typical loaf of French bread is shaped into baguettes, which means stick or wand, baked in long crusty and browned loaves with a white interior and lots of irregularly shaped holes — this long shape of loaf offers the maximum amount of crust to bread. It stales quickly because it contains no fat, lasting about a day at most. This is why people visit the local “Boulangerie” (bakery) and buy it daily in France. French bread is eaten at all meals, and forms the most important part of breakfast. For the beginning baker, French Bread is a good recipe to start with. It has few ingredients, requires no special equipment beyond a bowl and a cookie sheet or baking pan. The loaves can be shaped by hand.
I saw this recipe featured in a wine newsletter and became intrigued by it. I lost it in my vast filing cabinet, only to come across the recipe, again, with my notes written all over it, when I recently moved from my suburban house to a New York City apartment. I knew all of you would like it, completely rewritten by me with my alterations and improvements, still retaining the recipe's straight-forward instructions, but with much more details and with altered ingredient amounts, as well. It makes a two darn-good baguettes in the comfort of your home! Kelly's stunning photos certainly bring this recipe to life, and her excellent baking skills help highlight every step!
BREAD RECIPE HELP
KELLY SAYS: “The name of this recipe says it all…this is a very straight-forward recipe with excellent results! The crust is nice and crispy and the interior is soft and chewy.
Who needs to buy baguettes, when you can make them this well at home? YUM!!
I loved the recipe for baguettes so much that I decided to try this dough as a pizza crust. It was GREAT!”
INGREDIENTS
3 cups (14 ounces / 400g) high-quality white bread flour, spoon into measuring cup and level to rim
KELLY SAYS: I used Gold Medal bread flour, called “Better for Bread”
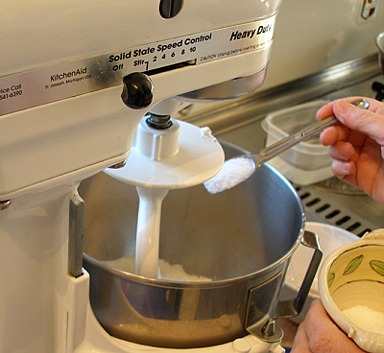
1 teaspoon (5ml) salt
1 teaspoon (4ml) INSTANT active dry yeast
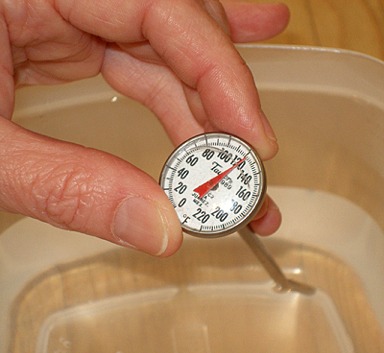
1 1/4 cups (9.8 ounces / 280g) water, about 120 to 130 degrees F, measured with an Instant Read Thermometer
INSTRUCTIONS
STEP I: MIX THE BREAD DOUGH
Start about 6 or 7 hours before you intend to serve the bread.
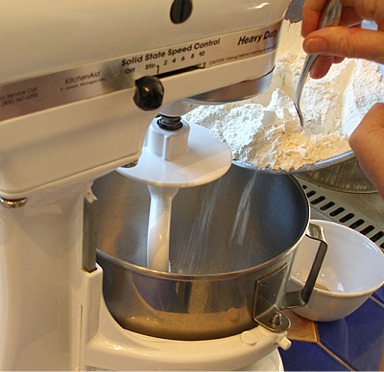
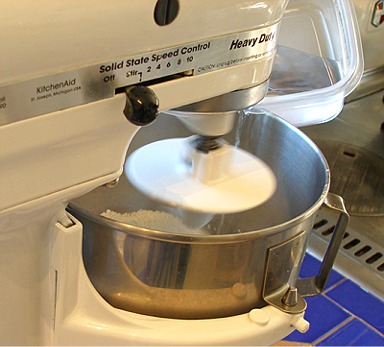
1. In a mixer bowl of a stand mixer, fitted with a dough hook attachment, add the flour, salt and instant dry yeast.
KELLY SAYS:
A. After measuring, I like to sift the flour before adding it to the mixer.
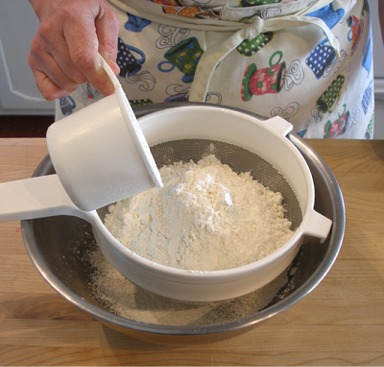
B. Then, I add in the salt:
C. And, the yeast:
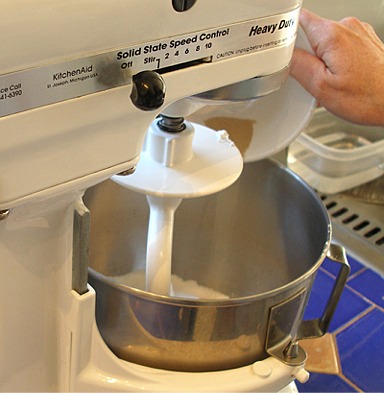
2. With the mixer on low speed, add the water, slowly at the side of the bowl, a beat for about 1 minute until you get a thick, smooth and somewhat elastic dough. It will be rather sticky.
SARAH SAYS: The high water-to-flour ratio helps get you those large irregularly shaped air holes in the finished bread.
STEP II: KNEAD THE DOUGH AND LET IT GO THROUGH ONE RISE
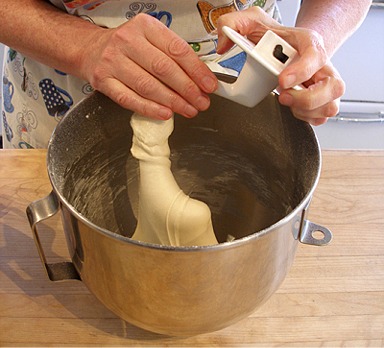
1. Turn the mixer speed up to medium, and knead the dough for five minutes or so.
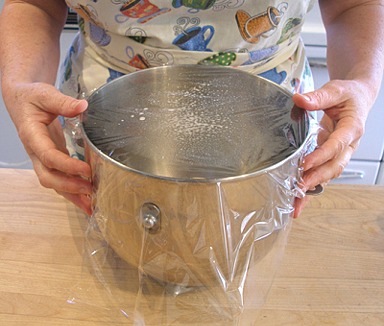
2. When the dough is kneaded until smooth, put it into a tall, lightly oiled bowl with vertical sides so it can rise. Make sure that the dough has enough room to at least double in size.
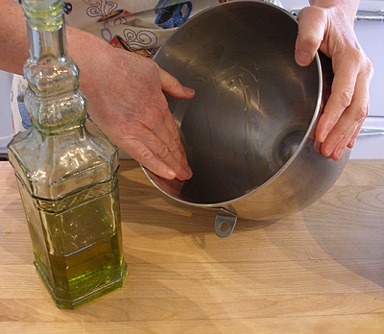
A. Carefully remove the dough from the dough hook.
SARAH SAYS: Take care not to rip or stretch the dough because you in essence ruin the long gluten strands you so carefully produced through moistening the wheat flour and by kneading it.
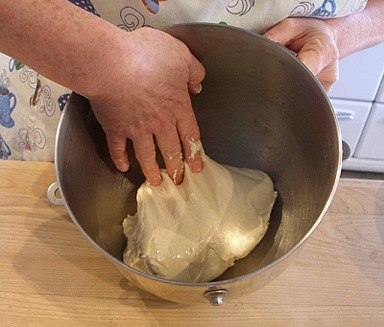
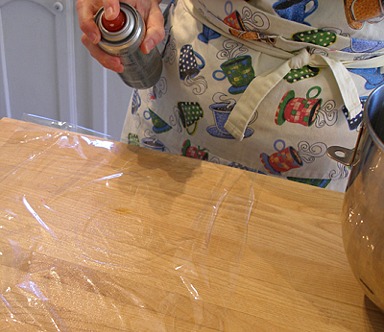
B. Cover the dough with a piece of greased-side-down plastic wrap.
SARAH SAYS: Make sure you seal the bowl. This is so the surface of the dough will not dry out and form a crust. The crust helps prevent the dough from rising fully.
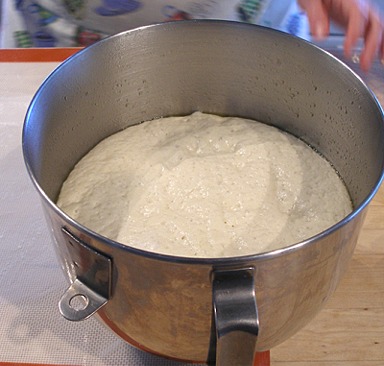
3. Place the dough in a cool place and leave it to rise for three or four hours.
Check it periodically until it rises to a full 2 1/2 times its original height OR Refrigerate for 12-18 hours*, or until dough has at least doubled in size.
*You can mix your dough before going to bed and take it out the next afternoon to bake it up in time for dinner. An extra hour or two in the fridge will not hurt the dough.
SARAH SAYS: Do not try to save time by short-cutting this step. This full rise is critical to getting the classic baguette structure of numerous irregularly shaped air holes.
STEP III: SHAPE THE DOUGH AND LET IT RISE, AGAIN
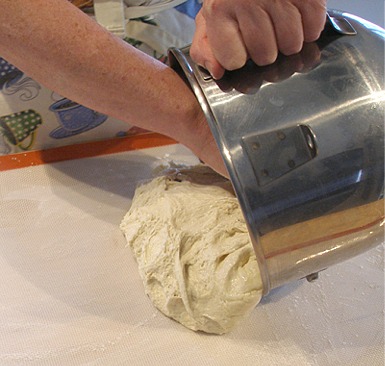
1. When the dough has fully risen, deflate it by pushing the dough lightly with your fist straight down through the dough and then lift straight out.
2. Turn the dough out onto a lightly floured bread board or countertop.
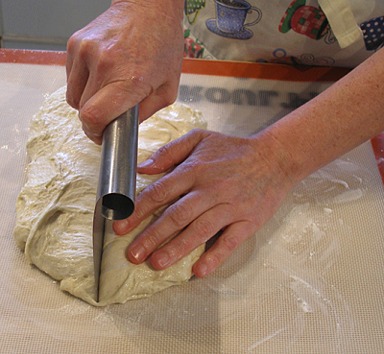
3. Taking care not to handle or “degas” it any more than necessary, push it into a rough rectangle.

4. Using a pastry scraper or heavy, sharp knife, cut straight down to make two long portions.
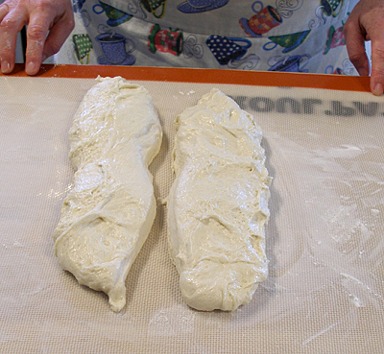
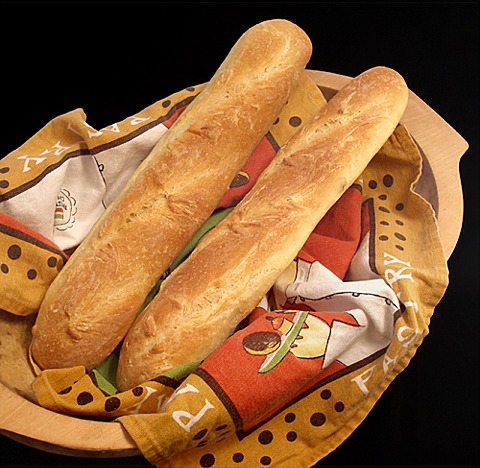
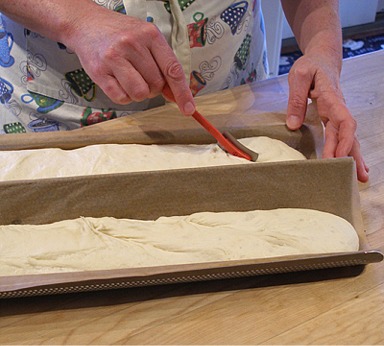
5. Line your two-loaf baguette pan with parchment paper. As gently as possible, lift each piece of dough and, letting it stretch naturally into a baguette shape, drop each piece into one of the parchment-lined channels.
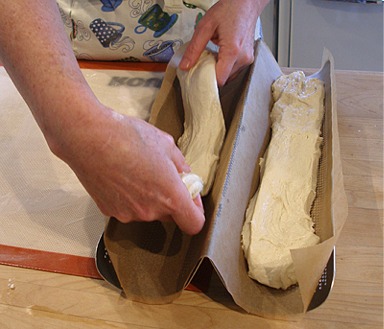
SARAH SAYS: If you don't have a baguette pan, you can use a regular sheet pan lined with parchment paper. Dust under the loaves with a little cornmeal, but the baguette pan forms prettier loaves.
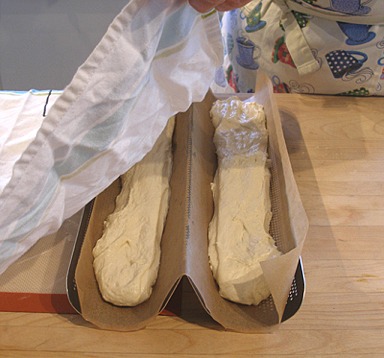
6. Cover the pan with a clean dish towel and put it in a cool place to rise until the loaves have doubled, taking about 1 to 1 1/2 hours.
STEP IV: BAKE THE BAGUETTES
1. While the loaves are rising, position the oven shelf to the middle of the oven. Put a small baking pan on the bottom shelf and preheat the oven to 425 degrees F.
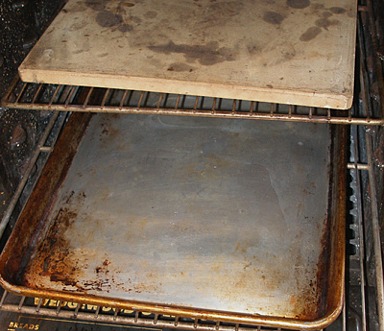
SARAH SAYS: Optionally place a quarry tile baking stone or pizza stone on the middle shelf before preheating.
2. Fill a clean plastic spray bottle with hot water. Set aside.
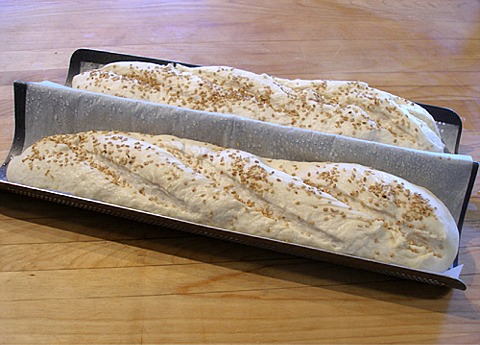
2. Using your utility knife blade, gently cut a few diagonal slashes across the top of each loaf. Kelly is using a lame (lah may) or a French baker's blade, also known as a grignette, to make her cuts with. It is an extremely sharp curved-edged knife.
SARAH SAYS: ON SLASHING BREAD – When the final rising is completed, a lame, or a very sharp knife or razor blade is used to make about 3 to 4 diagonal shallow cuts, depending on the length of your loaves, along the top of the loaf, called slashing. The purpose of cutting the loaf is to let steam escape and prevent the loaf from getting wild cracks during baking. Decorative patterns can be cut into raw bread dough, preferably with a lame. When the bread hits the hot oven, the dough rises, thrusting open these slits to make artistic grape clusters, basket weavings, star shapes, etc. When making the cuts, the blade should be held at a 30 degree angle to the loaf so that the cuts pop open in the oven. Be careful not to press down too hard or let the blade drag on the dough, or you may deflate the loaves.
3. Open the oven door, quickly pour 1 cup (240ml) hot water into the hot pan on the bottom shelf, taking care to avoid being burned by the blast of steam that will instantly arise.

4. Immediately put the loaf pan on the stone (or on the shelf if you don't have a stone), and spray the walls and the floor of the oven with the spray bottle. Close the oven door.
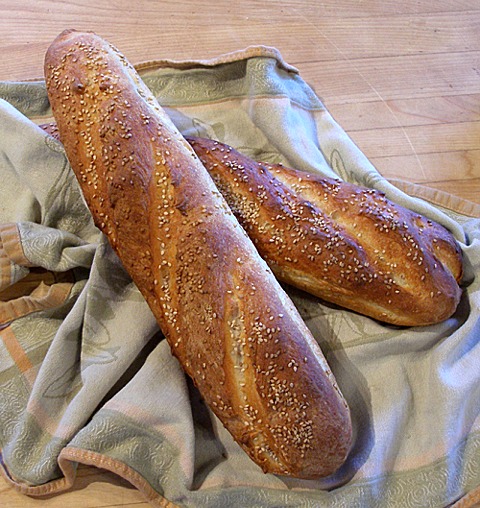
KELLY SAYS: With these loaves, after slashing, I sprayed them with water, and then sprinkled sesame seeds all over their tops.
5. After 30 seconds, open the door quickly and spray again. Repeat a third and final time after another 30 seconds.
6. Lower the oven temperature to 400 degrees F and bake for 15 minutes, leaving the oven closed tightly. At that point, turn the pan around 180 degrees to ensure even baking. If you like, the crust should now be firm enough that you can safely pop the loaves out of the parchment-lined pans and put them directly on the stone.
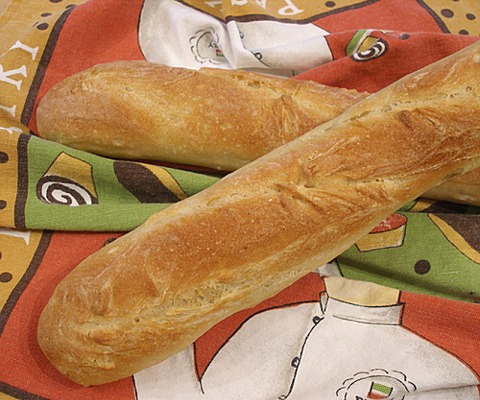
7. Bake for 15 – 20 more minutes (total of 30 – 35 minutes), or until they're done. The baguettes should be a dark reddish-brown and when tapped on their bottoms, they should sound hollow.
SARAH SAYS: I like to use an instant-read thermometer to check for loaf doneness. Simply bake until an Instant Read Thermometer inserted into the bottom of the loaves into their centers registers 205 to 210 degrees F.
8. Take the loaves out and let them cool on a wire cake rack for 30 minutes or so before serving.
STORAGE
French baguettes are meant to be eaten within a few hours because they stale quickly as they contain no fat. Store in a brown paper bag at room temperature.
They keep better in the freezer, lasting about a month, packed in an airtight container.
Baguettes can be “refreshed” within 15 minutes in a 350 degrees F oven, wrapped in foil.

Crispy, golden and delicious: