Variation: Lactose-free and Kosher Easy-Breezy Strawberry Cream Tart; Easy-Breezy Banana Cream Tart; Easy-Breezy Mandarin Orange Cream Tart; Easy-Breezy Raspberry Cream Tart
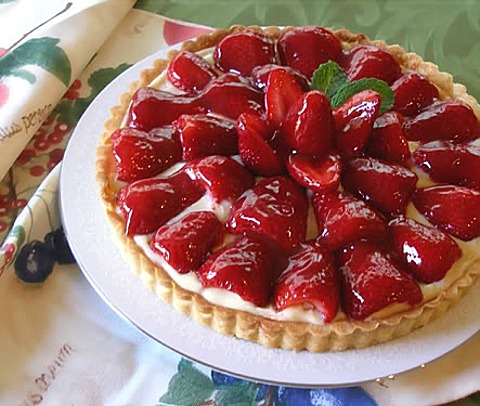

What could be more decadent and perfect than strawberries with cookies and cream and chocolate, for a Sunday brunch or “just because”!? This one is made with an easy pat-in-the-pan cookie crust, with a rich chocolate lining, and then filled to the brim with luscious pastry cream and layered on top with fresh strawberries.
SARAH SAYS: This recipe is based on solving common problems that come up when making pastry-cream filled fruit tarts. Sometimes crusts are coated with real chocolate for more flavor and to prevent the crust from becoming soggy from the pastry cream. Kelly made the first version of my recipe with a chocolate coating and complained to me that it was hard to cut into and it cracked, as well. I came up with a flavorful solution. Find out what I did to solve this problem.
PIE RECIPE HELP
luckyducky, Premium Member, Says: “I made the easy breezy strawberry tart and did the pastry cream with cornstarch. Turned out great! Yay! It's been my first time to make a tart, pastry cream and ganache.”
INGREDIENTS
Pat-in-the-Pan Cookie Tart Crust:
unsalted butter: 1/2 cup (1 stick) / 4 ounces / 113.5 grams; use cold
unbleached all-purpose flour: 1 1/2 cups; spoon into measuring cup and level to rim / 6.62 grams / 187.5 grams
sugar: 1/4 cup / 2 ounces / 50 grams
baking powder: 1/4 teaspoon / 1.25 grams
salt: 1/4 teaspoon / 1.67 grams
egg yolk: 1 large / 0.65 ounces / 18.6 grams; use cold
vanilla extract: 1 teaspoon / 4 grams
ice water, if needed
1 recipe Pastry Cream Tutorial; can be made 3 days in advance and refrigerate.
Simple Chocolate Ganache:
4 ounces semi-sweet or bittersweet chocolate chips
SARAH SAYS: You can use 4 ounces semi- or bitter-sweet chocolate instead of chocolate chips, finely chopped; weigh and then chop into 1/4-inch evenly sized pieces
1/2 cup heavy cream
Assembly:
1/2 cup strawberry jam
1 quart (2 pounds) fresh strawberries
STEP I: MAKE THE TART SHELL AND BLIND-BAKE. SET IT ASIDE AND LET COOL.
Make the crust:
1. Fit a piece of parchment paper in the bottom of the tart pan. Heavily grease the bottom and side of 9- or 10-inch tart pan with nonstick cooking oil spray. Make sure you evenly spread it in the indentations of the tart pan sides. Wipe off excess with a paper towel. Set aside.
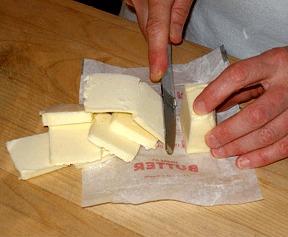
2. Cut the butter into tablespoon-sized pieces and chill.
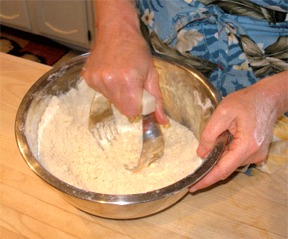
3. In a medium mixing bowl, whisk the flour, sugar, baking powder and salt to combine. Add the butter and toss. Using a pastry blender or two knives, cut in the butter until it resembles coarse cornmeal — no distinguishable pieces of butter should remain.
SARAH SAYS: If you wish, use your fingertips to rub the butter into the flour mixture, but a pastry blender is much quicker. Be sure to use only your fingertips, not the palms, which are warmer. The butter must stay cold.
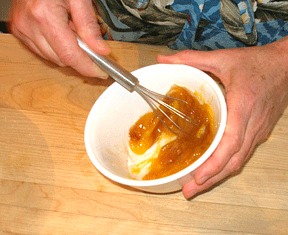
4. In a small bowl, beat the egg yolk and vanilla extract in a small bowl.
Make a well in the center of the flour ingredients and pour the egg into the well of the flour ingredients.
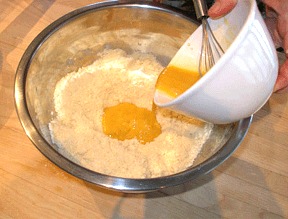
5. Blend together ingredients with a fork until incorporated thoroughly and just clumps together. NOTE: I did not have to add any water to get the consistency shown.
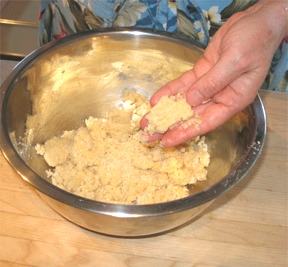
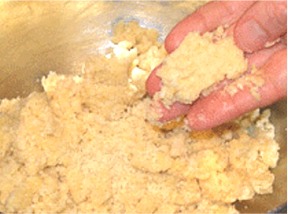
SARAH SAYS: To test the consistency, press the dough between your thumb and forefinger — it should just hold together. If it won't, sprinkle ice water over the mixture, 1 teaspoon at a time, and toss with a fork to incorporate. Do not add so much liquid that the dough clumps into a solid ball — wet dough bakes into a tough pie crust.
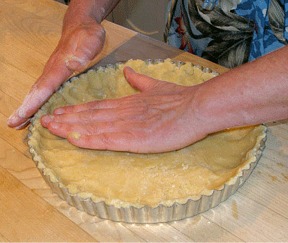
6. Press dough evenly on bottom and side of prepared tart pan. Trim the edge of the tart with a sharp knife.
Prebake the crust:
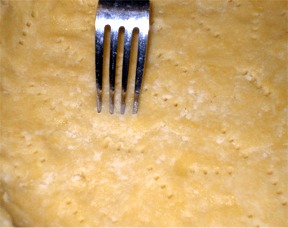
1. Dock the crust by pricking all over the bottom and side with the tines of a fork.
SARAH SAYS: I do not chill my pastry crust before baking. I find it is not necessary with this recipe.
Position the shelf to the middle of the oven and preheat it to 400 degrees F.
2. Place tart pan on baking sheet. Press foil into docked tart shell and fill with pie weights, beans or rice.
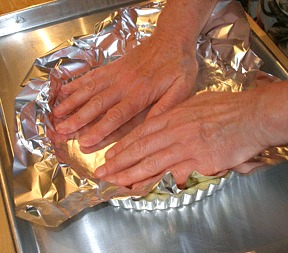
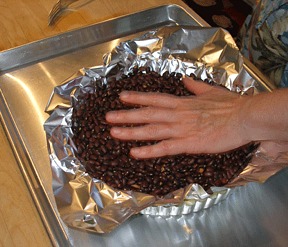
SARAH SAYS: I do not find it necessary to use pie weights when pre-baking this crust. It does not shrink or puff.
3. Bake for about 10 – 20 minutes and then remove foil and weights. Bake for about 5 – 10 more minutes or until golden brown.
4. Cool crust thoroughly on wire cake rack before using.
STORAGE
Store prebaked crust at room temperature for a few days, wrapped, or freeze for a month or more. Thaw in wrappers at room temperature.
STEP III: MAKE THE SIMPLE CHOCOLATE GANACHE AND LINE TART WITH WARM GANACHE
Make the chocolate ganche and when it has thickened, but is still pourable, pour into cooled tart shell and spread it to make a thin layer. Let it set.
Kelly Says: “Sarah came up with the idea that the tart shell in her recipe should be lined with a thin layer of chocolate ganache instead of a thin layer of melted chocolate under the pastry cream, which the original recipe called for. Most pastry chefs use a thin layer of chocolate to serve as a moisture barrier to help keep the crust from becoming soggy when using pastry cream. It was her solution to the problem after I complained to her in a post below, that when lining a pastry shell with just melted chocolate, that when it sets, the chocolate becomes hard, and then splinters and cracks into smaller pieces when trying to serve the tart or eat it. Sometimes the hard chocolate will even break the crust into pieces, runing the tart. See the chocolate layer beneath the pastry cream? GREAT addition!
Sarah felt that the ganache-solution would work because it not only helps keep the crust crisp, it would also adds another layer of flavor, plus most importantly, it is soft enough to cut through without breaking and splintering. It worked brilliantly. Sarah's combination of the rich vanilla filling, the creamy chocolate ganache, the crisp cookie-like crust and the luscious strawberries is truly delish! I told Sarah that I love to make ganache with Hershey's Special Dark Chocolate Chips for more depth, flavor and color!”
INSTRUCTIONS
1. Bring heavy cream to a boil in a heavy bottomed saucepan. Pour chocolate into hot cream. let sit for 60 seconds before stirring.
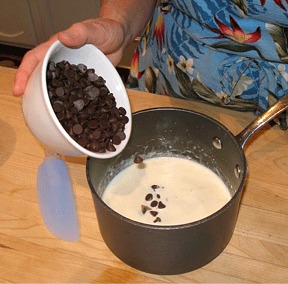
2. Stir, IN ONE DIRECTION, to create a smooth ganache emulsion.
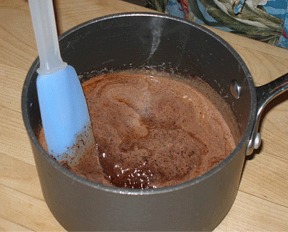
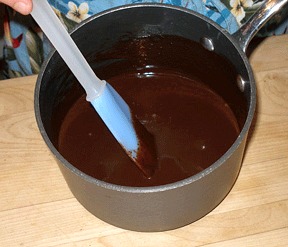
3. Cool Ganache: Refrigerate ganache for 15 minutes, stir well in the same direction as before. Chill another 15 minutes and stir again in the same direction as before or until the ganache has thickened and cooled, but has still remained pourable.
SARAH SAYS: If the ganache has stiffened too much, GENTLY reheat, stirring very slowly, until JUST warmed.
4. IMMEDIATELY spread the ganache into cooled tart shell, to make a layer about 1/4-inch thick, taking care not to crush the crust.
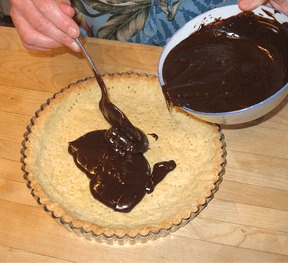
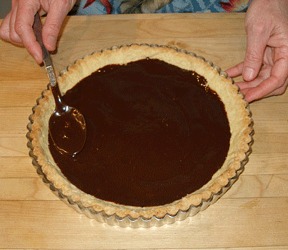
5. Chill ganache filled shell until the ganache has set.
NOTE: Store the remaining ganache in the refrigerator for use in another project. It can be frozen for a month or more.
STEP IV. ASSEMBLE TART AND SERVE
Kelly has written wonderful instructions and taken photos on how to assemble this beautiful Easy-Breezy Strawberry Cream Tart!
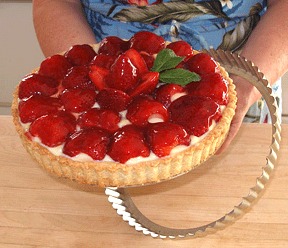
1. Wash strawberries without having removed the green leaves and stem and place on paper towels. Hull strawberries using a teaspoon or the small end of a melon baller.
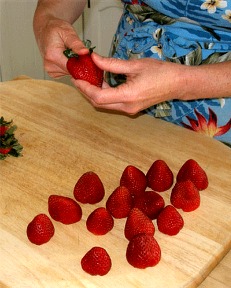
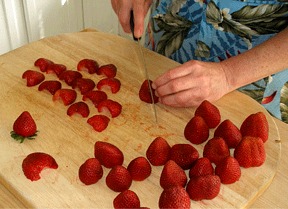
2, Cut strawberries in half, lengthwise, and group according to size. Reserve one perfect whole strawberry for the center of your tart.
3. Remove ganache filled tart shell and cooled pastry cream from refrigerator. Remove plastic wrap from pastry cream and loosen it up by giving it a few stirs with a whisk.
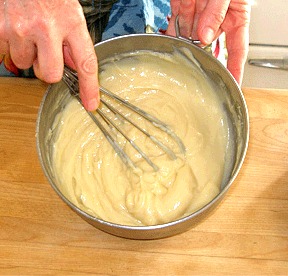
4. Pour pastry cream into the pie shell.
NOTE: Store the remaining pastry cream in the refrigerator.
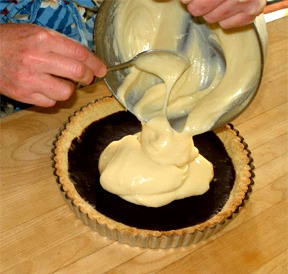
5. Smooth the pastry cream with the back of a tablespoon or a small offset spatula.
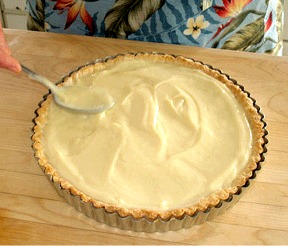
6. Begin adding strawberries to the pastry cream, starting with the larger berries toward the outside of the crust. I like to place 4 strawberry halves at N-S-E-W,and then, fill in from there.
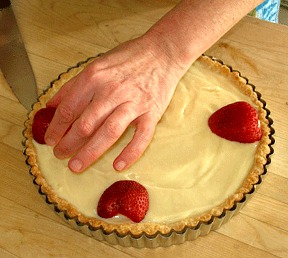
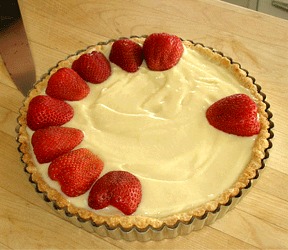
7. Use smaller strawberry halves for your next row.
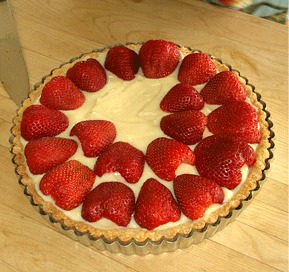
8. Place 4 halves, pointy end up, to create petal-like center.
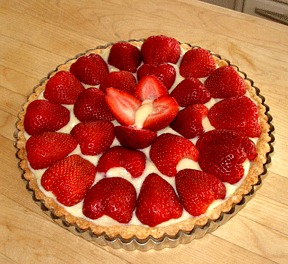
Place reserved whole strawberry in the center.
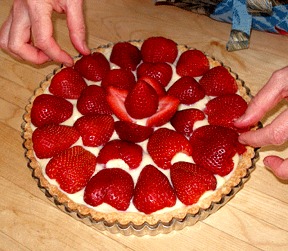
Glaze strawberries:
1. Take 1/2 cup strawberry jam and heat it in on the lowest setting in the microwave until it warms and thins out. Stir jam and then push it through a fine mesh strainer into a small bowl, to strain out the seeds and pulp.
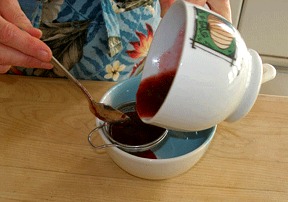
2. Let resulting glaze cool slightly. Brush the warm jam over the strawberries with a pastry brush to coat them very lightly.
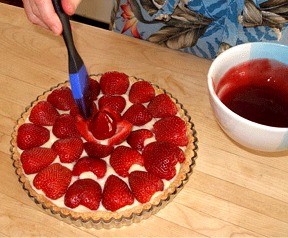
3. Let the glaze set for about 10 minutes in the refrigerator. Add a couple mint leaves for garnish, if desired.

SERVE
Serve immediately.
STORAGE
If you are not serving the tart immediately, keep it covered and refrigerated for up to 12 hours. Keeps for about a day or two, at the most.
VARIATIONS
LACTOSE-FREE AND KOSHER VARIATIONS
1 prebaked Lactose-Free and Kosher Pat-in-the-Pan Cookie Dough Variation
2 cups Lactose-Free and Kosher Pastry Cream variation
1/4 cup Lactose-Free and Kosher Chocolate Ganache
1/2 cup strawberry jam
1 quart (2 pounds) fresh strawberries
FLAVOR VARIATIONS
The beauty of using ganache and pastry cream, is that they can be made in any flavor. Mix and match them with fruit to create your own versions!
Examples:
Easy-Breezy Banana Cream Tart: Dark Chocolate Ganache, filled with Vanilla Pastry Cream and topped with sliced bananas. Slice the bananas and then soak in a small amount of freshly squeezed lemon juice to prevent browning.
Easy-Breezy Mandarin Orange Cream Tart: White Chocolate Orange Ganche, filled with orange pastry cream and topped with Mandarin Oranges.
Easy-Breezy Raspberry Cream Tart: White Chocolate Raspberry Ganache lined pastry crust, filled with Chocolate Pastry Cream and topped with raspberries. Glaze with red currant jelly.


