
Variations: Chocolate Cream Cheese Pound Cake; Cream Cheese Pound Cake and Variations
Cakes and photos by odetteganda, Premium Member © Sarah Phillips
Cakes and photos by odetteganda, Premium Member © Sarah Phillips
Odetteganda, Premium Member, came up with a creative way to make layered mini-cakes – she stacks two layers of my Cream Cheese Pound Cake with my Creamy and Luscious No Crack Cheesecake, both adjusted to fit this recipe. She decorates each one with flavorful Italian Meringue Buttercream, recipe and detailed instructions included. When you make yours, be sure to keep the cakes refrigerated because everything is perishable, except for the pound cake part.
CAKE RECIPE HELP
You will need:
Four, 4-inch springform pans
ASSEMBLY
1/4 cup any flavored jam
INSTRUCTIONS
STEP I: MAKE THE CREAM CHEESE POUND MINI-CAKES
CREAM CHEESE POUND CAKES (Half Recipe) by Sarah Phillips / Full recipe
Makes four 4-inch mini pound cakes
INGREDIENTS
1 cup unbleached all purpose flour; spoon into dry measuring cup and level to rim
1/2 teaspoon baking powder
1/4 teaspoon salt
1 stick (4 ounces/113 grams) unsalted butter
4 ounces cream cheese
1 cup sugar
1 teaspoon vanilla
3 large eggs
INSTRUCTIONS
ODETTE SAYS: For this demo, I am showing you how to make two mini-cakes at a time, instead of four. It's because I only have two 4- x 2-inch mini-cake pans.
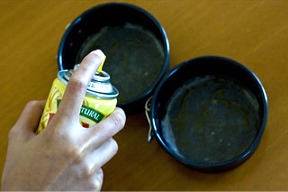
1. Position an oven rack in the middle of the oven. Preheat oven to 325 degrees F. Line four 4- x 2-inch mini-cake pans with round parchment paper and grease with spray oil.
Place on a foil-lined baking sheet.
ODETTE SAYS: I only have two pans in my house. If you have four 4- x 2-inch cake pans, you can use all of them at once. Portion the cake batter evenly between all four pans and bake together. The cakes will take about 20 to 35 minutes to bake.
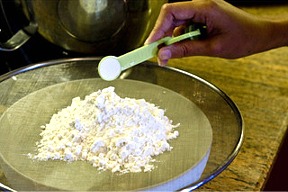
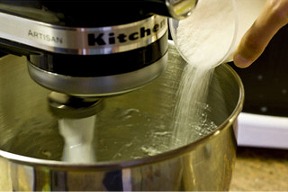
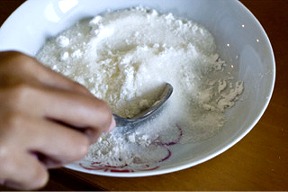
2. In a medium sized bowl, combine the flour, baking power and salt. Set aside.
ODETTE SAYS: I like to sift my dry ingredients first through a fine mesh strainer to eliminate lumps.
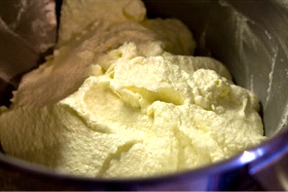
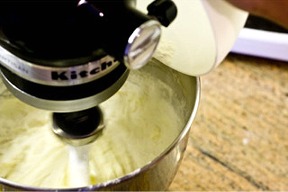
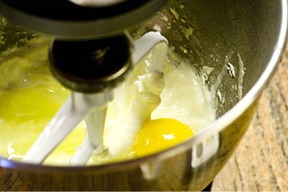
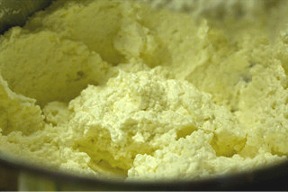
3. In a bowl of a stand mixer fitted with a paddle attachment, beat the butter until softened and add the sugar in a steady stream at the side of the bowl.
Beat until fluffy on medium speed for about 2 minutes.
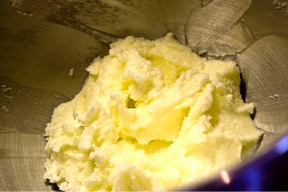
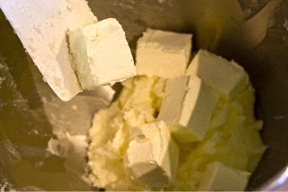
Add in the cream cheese and beat until light and fluffy about 3 minutes more. Make sure to stop the mixer and scrape the sides and bottom of the bowl often with a large rubber spatula.
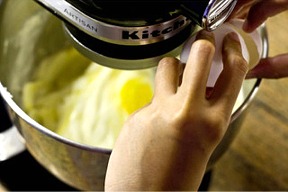
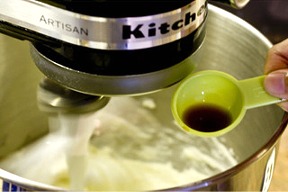
5. With the mixer on low, beat in the vanilla.
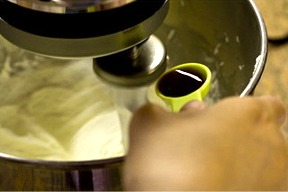
And then two eggs, one at a time, beating for 20 seconds after each addition or until well incorporated and the batter is smooth.
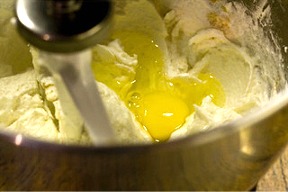
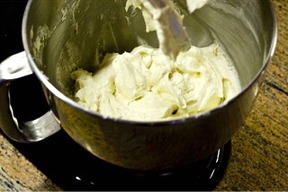
ODETTE SAYS: After adding the last egg and beating for 20 seconds, I scrape the sides and bottom of the bowl, increase the mixer to medium and beat for 2 minutes. The batter will be fluffy and aerated.
6. With the mixer on low, beat in one-half of the flour mixture until absorbed.
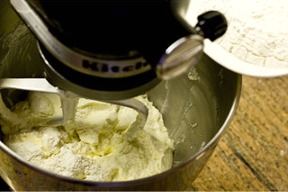
Once absorbed, add the third egg and beat until smooth.
Then add the last half of the flour mixture and beat until absorbed. Be careful not to overmix the batter.
7. Stop the mixer and give the batter one or two turns with a large rubber spatula.
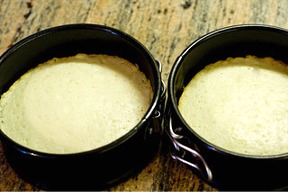
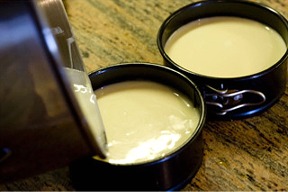
8. Spoon the batter into the prepared mini-cake pans.
And lightly smooth their tops.
9. Bake the mini cakes for 20 to 25 minutes or until the cake is browned. If a toothpick is inserted in the middle and removed, there should be a few moist crumbs attached, but not batter. Cool the cake in the pan for about 10 minutes.
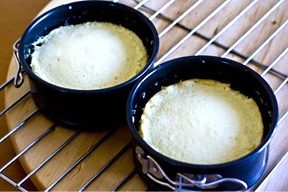
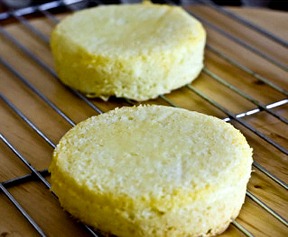
10. Unmold each cake from its pan and invert to cool completely on a wire cake rack.
STORAGE
Store cakes well-wrapped at room temperature. Cakes can be frozen for up to 1 month. Thaw in refrigerator.
STEP II: MAKE THE CREAMY AND LUSCIOUS NO-CRACK MINI-CHEESECAKES
CREAM AND LUSCIOUS NO-CRACK CHEESECAKE (1/4 Recipe) by Sarah Phillips / Full recipe
Makes four 4-inch mini cheesecakes baked on top of 4 mini pound cake layers
INGREDIENTS
1/2 cup sugar
3 tablespoon cornstarch
8 ounces (1 package) cream cheese
1 teaspoon vanilla
3 tablespoon heavy whipping cream
1 large egg
INSTRUCTIONS
ODETTE SAYS: For this demo, I am showing you how to make two mini-cakes at a time, instead of four. It's because I only have two 4- x 2-inch mini-cake pans.
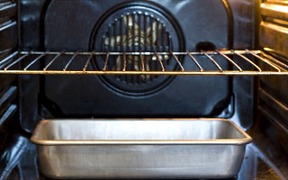
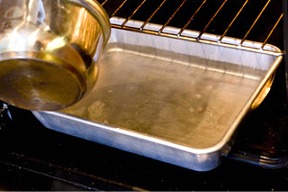
1. Position oven rack in the middle of the oven and place a 9- x 13-inch pan on the shelf below. You will later fill it with boiling water to produce steam in the oven.
Preheat the oven to 350 degrees F.
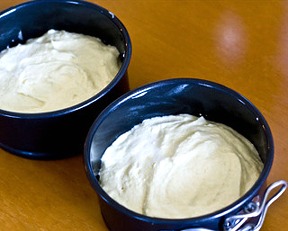
2. Grease the sides of four 4-x 2-inch pans. Place one layer each of Cream Cheese Pound Cake in the bottom of each pan.
Place each filled pan on a foil-lined baking sheet. Set aside.
3. Blend sugar and cornstarch together in a small bowl.
4. Place 1/4 (2 ounces) of the cream cheese and 2 tablespoon of the sugar/cornstarch mixture in the bowl of a stand mixer. Beat with the paddle attachment on low until creamy about 1 minute. Beat in the remaining cream cheese and vanilla. Scrape down the side of the bowl.
5. With the mixer on low, beat in the remaining sugar and cornstarch mixture.
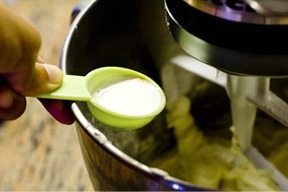
Add the heavy cream in a steady drizzle at the side of the bowl.
Beat in the egg until completely mixed. Be careful not to overmix.
Stop the mixer and remove the bowl. Scrape and mix any unblended ingredients. If the batter has tiny lumps, it is OK. Tap the bowl's bottom on the countertop about six times to get rid of air bubbles.

6. Gently pour the filling into the prepared mini-cake pans.
Tap each pan on its side with the side of the handle of a wooden spoon about a dozen times to get ride of air bubbles. Smooth the top; otherwise it may crack along any overlapping batter.
7. Place the cheesecakes on the prepared baking sheet into the oven. Immediately pour about an inch of boiling water in the heated pan below and shut the door.
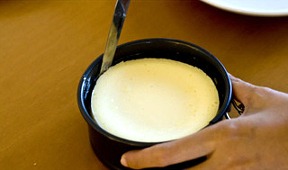
8. The cheesecake portions should be done between 15-20 minutes. The center circle will wobble a bit more and look wet more than the sides, but not soupy.

ODETTE SAYS: My cheesecakes were done at 17 minutes. It looked like a set gelatin.
9. Cool the cakes. Cover with plastic wrap and chill for at least 3 hours, preferably overnight.
To unmold:
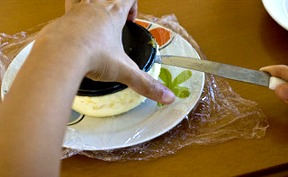
1. Cover a flat plate with a large piece of plastic wrap.
2. One at a time. run a thin sharp knife around the edge of each cake pan. Remove the springform pan side.
3. Invert the cheesecake onto the flat plate covered with plastic wrap. Take a knife and remove the springofrm pan bottom.
4. Wrap the cheesecake with plastic and carefully set it right-side-up. The cheesecake will be on top and the pound cake on the bottom.
5. Repeat with the remaining cake pans.
6. Refrigerate until needed.
STORAGE
Store cakes well-wrapped in the refrigerator. Cakes can be frozen for up to 1 month. Thaw in refrigerator.
STEP III: MAKE THE ITALIAN MERINGUE BUTTERCREAM
Makes enough to frost two mini-cakes
ITALIAN MERINGUE BUTTERCREAM (IMBC) by Sarah Philips
INGREDIENTS
4 large egg whites
1 cup sugar
1/2 teaspoon salt
3 sticks (12 ounces / 350 grams) unsalted butter, 65 degrees F – slightly softened and cool – not runny, greasy or soupy
3 tablespoons pure vanilla extract
INSTRUCTIONS
1. Combine the egg whites, sugar and salt in a medium-sized heatproof bowl.
ODETTE SAYS: Be careful not to mix any egg yolk in the mixture. The egg whites will not get whipped to its proper volume.
SARAH SAYS: Before you begin this recipe, clean all utensils and equipment thoroughly with a paper towel moistened with lemon juice. This eliminates any grease or oil that may prevent the meringue from whipping to its proper volume and consistency.
2. Place a bowl over a pan of simmering water and with a large balloon whisk, whisk gently until the egg whites are hot (about 140 degrees F measured with an Instant Read Thermometer) and sugar is dissolved, about 3 to 4 minutes.
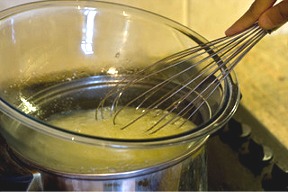
SARAH SAYS: Plain whole eggs without added ingredients are pasteurized but not cooked by bringing them to 140 degrees F and maintaining that temperature for 3 and 1/2 minutes. You can use a stand mixer bowl as the bowl to place the egg whites in.
3. The mixture should look thick and syrupy.
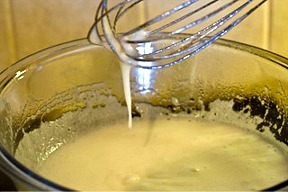
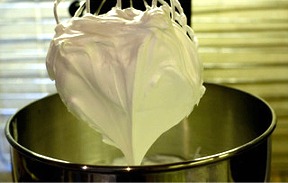
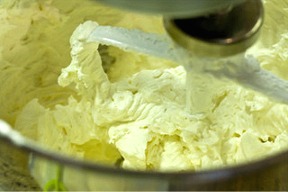
4. Remove from heat and transfer to a stand mixer bowl. With a whisk attachment, whip on high until thick and cooled, about 5 minutes.
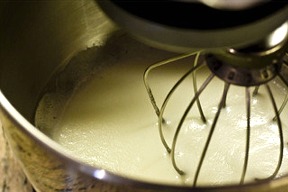
SARAH SAYS: If you used a stand mixer bowl to heat the egg whites in, you need only clamp it onto the mixer.
This is how the egg white mixture will look like after 5 minutes.
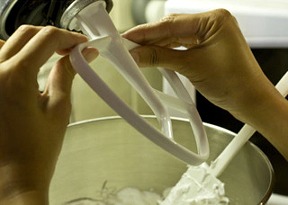
5. On the stand mixer, replace the whisk attachment with paddle attachment.
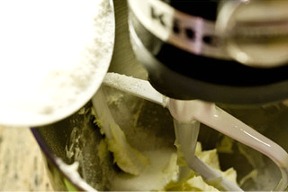
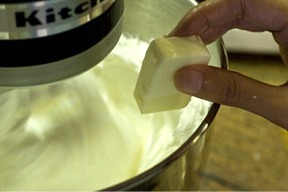
6. With the mixer on low, slowly beat in the butter in large pieces.
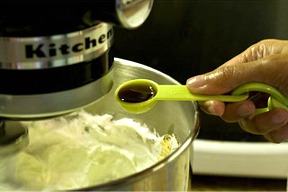
Then add the flavoring. Once all the butter and flavoring are added, increase the mixer speed to medium.
ODETTE SAYS: At one point after adding all the butter and flavoring with the mixer on medium, the mixture will look curdled, as shown below. Don't worry; continue beating and the buttercream will smoothen into a silky mass.
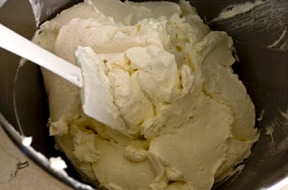
7. Beat for 5 minutes on medium to medium-high until buttercream is smooth and spreadable.
SARAH SAYS: Use buttercream immediately or refrigerate, covered, for up to 5 days. Before using, bring buttercream to room temperature and beat smooth by with a stand mixer fitted with a whisk attachment, on high.
STEP IV: ASSEMBLE THE MINI-CAKES
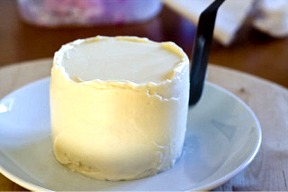
You will end up with two stacked mini-cakes. Each one is stacked with a layer of pound cake on the bottom and another one on top, with two middle layers of cheesecake.
The cheesecakes will have a thin layer jam in between.
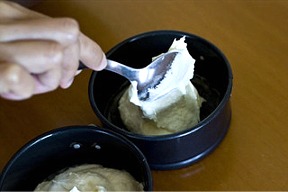
1. On a cake board or flate plate, place a cheesecake-pound cake layer, pound cake bottom side down with the cheesecake layer facing up.
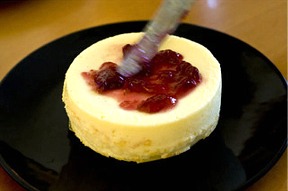
Spread the cheesecake top with 1/8 cup flavored jam.
2. Invert the second cheesecake-pound cake layer on top of the jam. The cheesecake side will be down, touching the jam on the first cheesecake layer, with the bottom of the pound cake layer facing up.
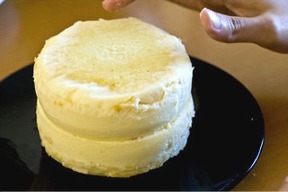
3. Coat the cake layers with a thin layer of buttercream. This will be the crumb coat. Chill the coated cake layers for a few minutes to let the buttercream set.
ODETTE SAYS: I chilled my cake for 20 minutes in the refrigerator.
4. Repeat Step#s 1 and 3 for the second layered mini-cake.
You will have two layered and crumb coated mini-cakes in the refrigerator, each one ready to be decorated.
STEP V: DECORATE THE MINI-CAKES
You should have two stacked and chilled mini cakes.
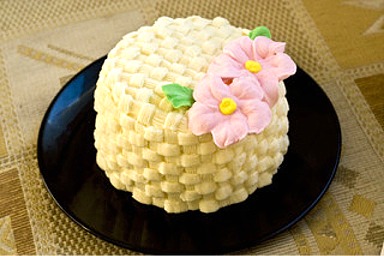
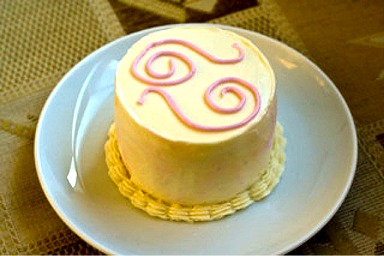
ODETTE SAYS: For the first cake, I decided to do a basket weave design and for the second cake, I decided to do simple decorations.
CAKE 1 – BASKET WEAVE DESIGN
Prepare the following items:
Decorating Tip #47
Piping Bag
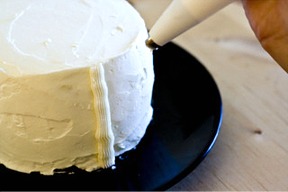
1. Take out one chilled cake from the refrigerator and smooth it with a small offset spatula if there are some bumps in the crumb coat. Fit Decorating Tip #47 in Piping Bag and half-fill with buttercream. To start piping basketweave, pipe a vertical strip from bottom to top.
Then pipe spaced horizontal strips over the vertical strip. The spaces between the horizontal strips should be the same size as the pipe.
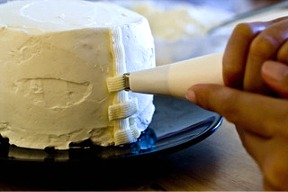
Repeat the vertical strip, but this time, pipe the horizontal strips in between the previous horizontal strips.
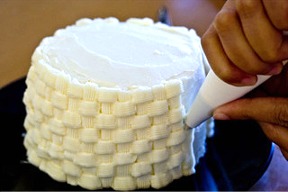
Cover the sides and the top of the cake with basket weave patterns.
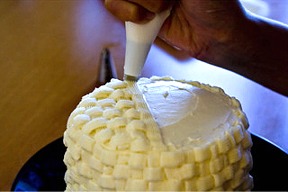
2. Once the cake is covered with the basketweave pattern, I added royal icing flowers in the cake.
CAKE 2 – SIMPLE DECORATIONS
Prepare the following items:
Decorating Tip #22 and #3
Piping Bag
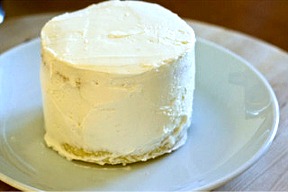
1. Take out chilled cake from the refrigerator and smooth it if there are some bumps in the crumb coat and apply final coat on the cake. Smooth the final coat.
2. Fit Decorating Tip #22 in Piping Bag and half-fill with buttercream. Pipe shell by positioning pastry bag and tip 45 degrees from the bottom of the cake and squeeze out icing. Release pressure, lower tip and pull tip from the cake. Repeat until the done with the entire cake.

3. Apply desired decorations. I piped simple curves on top of the cake using tip #3. To tint the buttercream, I placed a small portion in a bowl, and used gel colors to tint to the desired color.
STORAGE
Cakes are perishable and must remain refrigerated. Store in an airtight container or a well-wrapped cake box for 3 to 4 days.
VARIATIONS
Chocolate Cream Cheese Pound Cake
Cream Cheese Pound Cake and Variations