
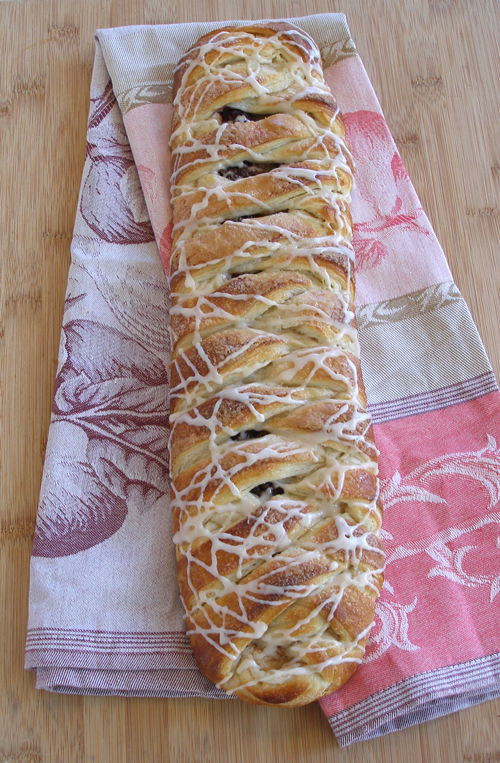

I think this is one of the most elegant, beautiful, and exquisite pastries you could serve for a special brunch. Buttery, flaky Danish dough is wrapped around layers of lemon-scented cream cheese filling, fresh berries, and cinnamon sugar, then baked until golden and drizzled with vanilla glaze.
Once you make the Basic Danish Dough, which we will show you how to do step by step, putting the braid together is a snap (especially if you follow our detailed color photos). We even help you with the exact pastry dough dimensions and measurements, so you can make your finished braid look absolutely perfect.
PASTRY RECIPE HELP
INGREDIENTS
1 recipe Basic Danish Dough, well-chilled
*NOTE: In the recipe's instructions, the dough will be divided in half to make two braids. Instead, you can use one dough half to make 1 Danish Pastry Braid and the other half to make 1/2 recipe or 12 Danish Pecan Snails, if desired. But if you make 1 braid, use half of the cheese filling, cinnamon sugar, fruit filling and icing ingredients, below.
Cheese Danish Filling:
1 8-ounce package cream cheese; use brick cream cheese, not whipped or in tubs
1/3 cup sugar
1 teaspoon vanilla extract
1 teaspoon lemon zest
pinch salt
Cinnamon Sugar:
2 tablespoons sugar
1 tablespoon plus 1 teaspoons ground cinnamon
Fruit Filling:
2 cups fresh blackberries or raspberries, washed and dried
Egg white wash:
2 large egg whites
1 1/2 tablespoons water
Before baking:
2 – 4 tablespoons sugar
Icing:
1 cup powdered sugar, sifted
4 to 6 teaspoons cold milk, strong coffee, lemon or orange juice
1 teaspoon vanilla extract
INSTRUCTIONS
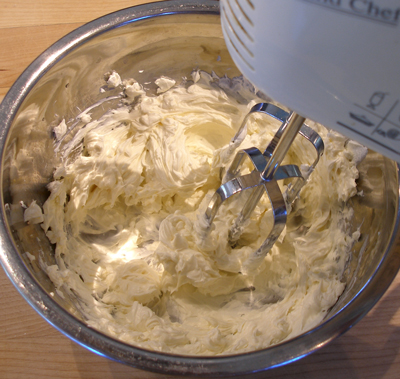
STEP I: MAKE THE CHEESE FILLING
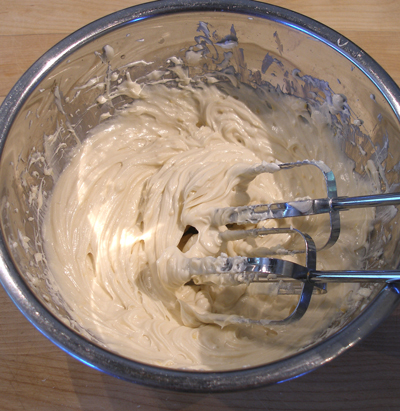
1. Beat cream cheese with a hand mixer until it is soft and creamy.
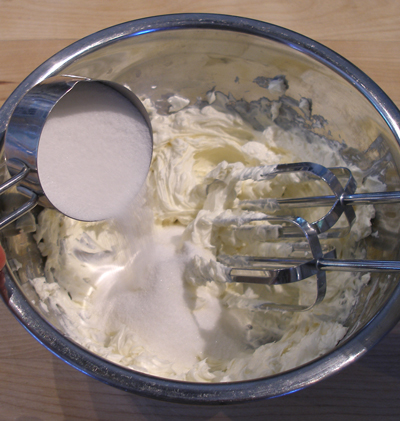
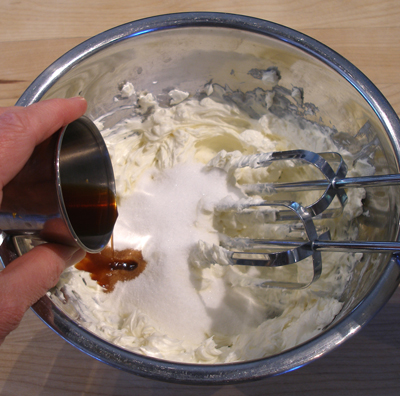
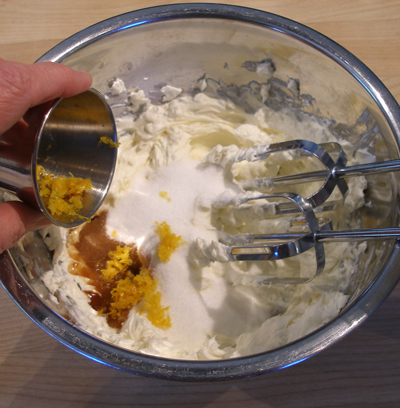
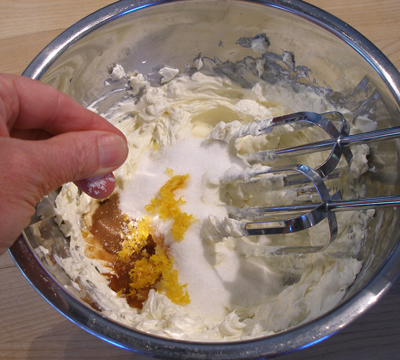
2. Add the sugar, vanilla and lemon zest, and salt. Beat until combined.
3. Cover filling with plastic wrap, and place it in the refrigerator while you roll out the dough.
STORAGE
The cream cheese filling can be refrigerated up to 3 to 4 days, well-wrapped. It does not freeze. Stir well before using.
STEP II: PREPARE THE DANISH DOUGH STRIP
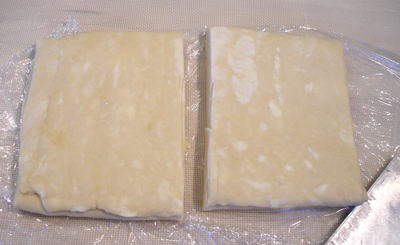
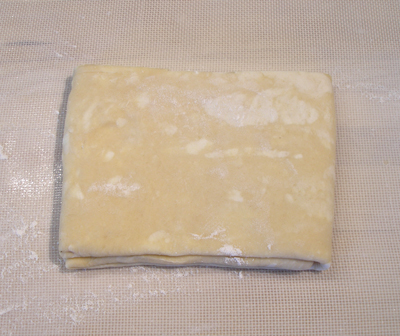
1. Divide chilled dough into 2 equal parts; each part will make one Danish Pastry Braid.
Wrap and return 1 part to the refrigerator until needed for the second braid. (For the second part, follow the same steps below for the second Danish Pastry Braid.)
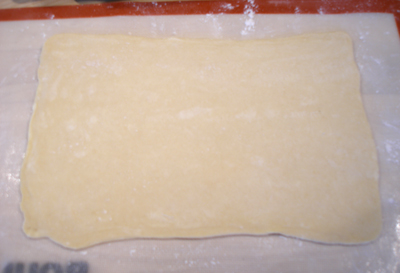
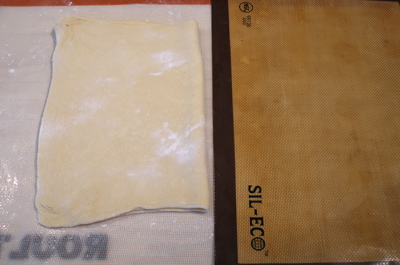
2. Lightly dust a silpat, nonstick mat, with flour. Lightly dust the top of the Danish pastry dough with flour.
NOTE: It is very difficult to roll the dough on a piece of parchment paper. We recommend using a silpat mat.
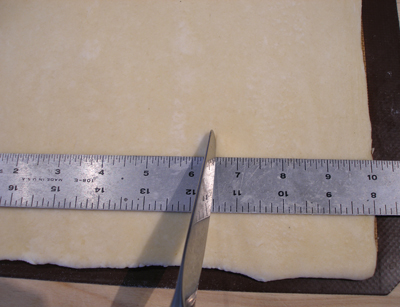
3. Roll out the first dough part to make a rectangle 16 x 10-inches on a silpat mat.
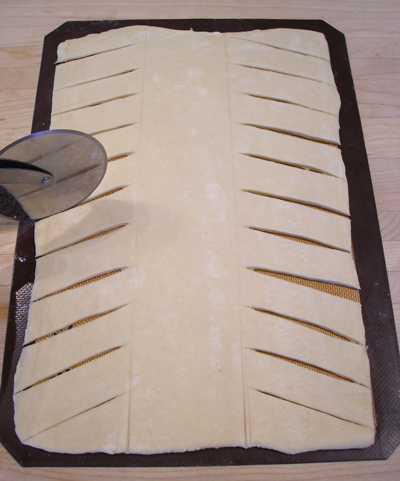
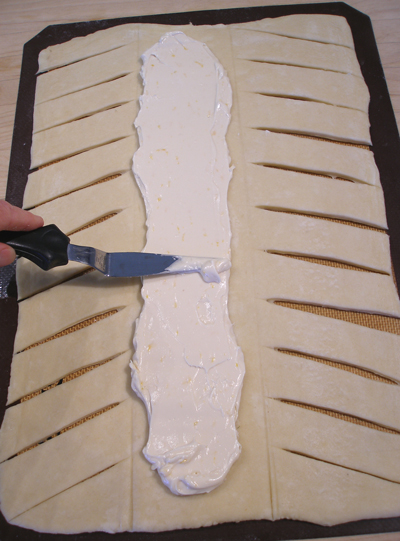
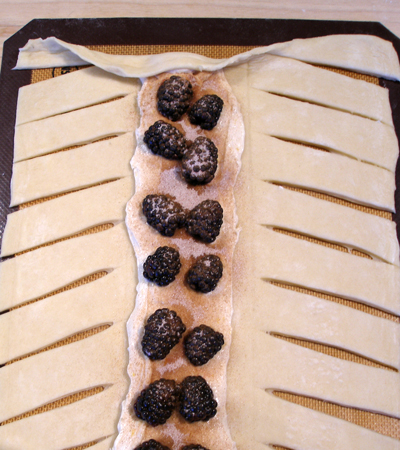
4. Using a pizza cutter, cut 12 to 14 slanting lines down each side of each strip of dough, angling the cuts from the 1/3 of the way from the pastry to the edge, cutting the strips about 3/4 inch wide.
A. Before cutting the strips, mark the center strip of the dough.
The rectangle is 10-inches wide, so it is helpful to mark it into thirds. Mark it at 3 1/3-inches and at 6 2/3-inches.
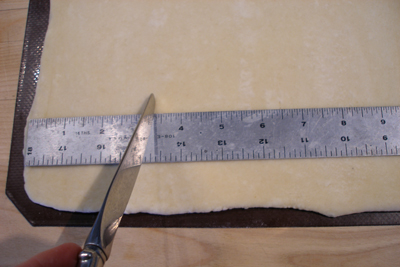
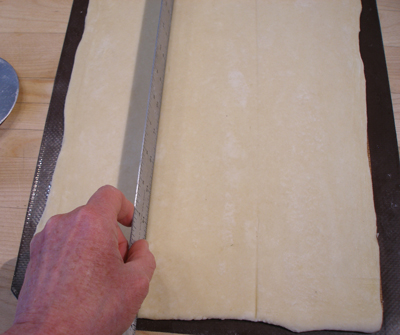
Then use the side of a ruler to GENTLY press straight lines into the dough to indicate the center strip.
B. Cut 12 to 14 slanting lines down each side of each strip of dough, angling the cuts from the 1/3 of the way from the pastry to the edge, cutting the strips about 3/4 inch wide.
STEP III: FILL THE PASTRY. MAKE THE BRAID AND BAKE.
Fill the pastry:
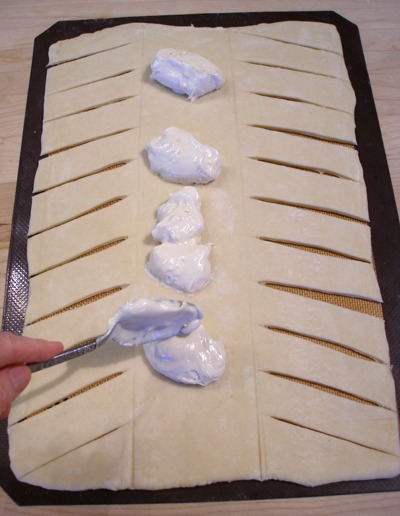
1. Remove the cream cheese filling from the refrigerator and give it a few turns with a whisk to loosen it up.
2. Working with one dough strip at a time, spread half the cheese filling down the length of the center of the dough, leaving an inch at both ends.
Wrap and return the cream cheese filling to the refrigerator for the second Danish Pastry Braid.
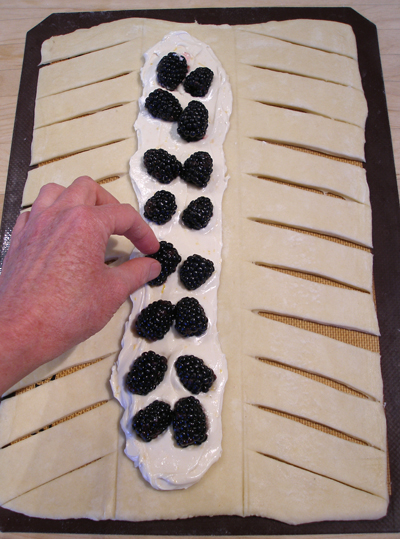
3. Then top with half of the fresh berries. Save the remaining half for the second Danish Pastry Braid.
DO NOT overfill the pastry with fruit.
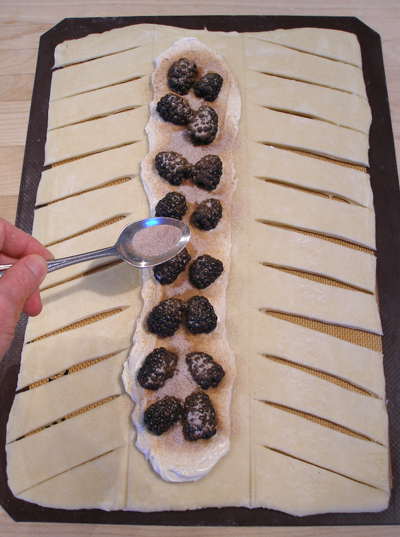
4. Mix the cinnamon and sugar. Sprinkle 1/2 the cinnamon sugar mixture over the filling. Reserve the remainder for the second Danish Pastry Braid.
Braid the pastry:
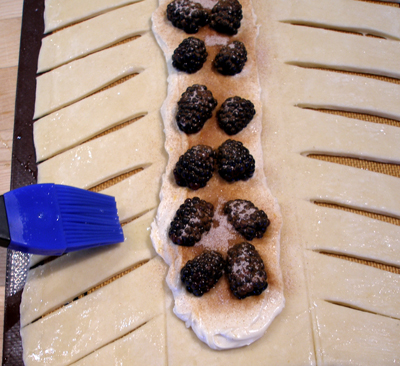
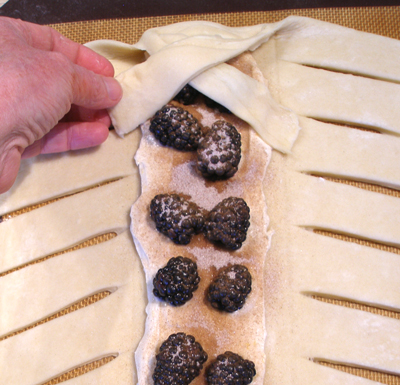
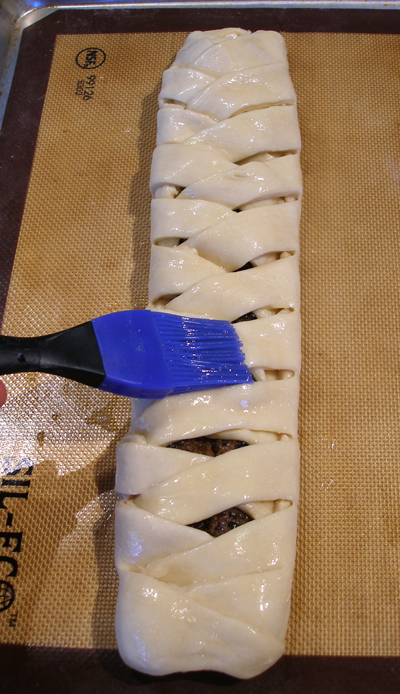
1. Beat the egg whites with water. Brush the strips lightly with egg white wash. Cover and refrigerate the remaining egg white wash; it will be needed later in the recipe.
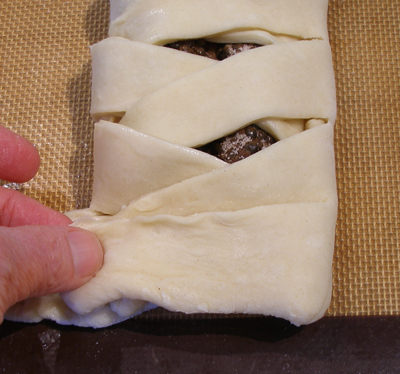
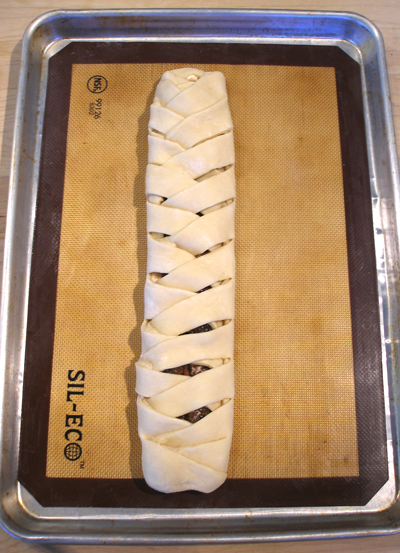
2. Starting at one end of the pastry, fold the end up over the filling, then fold in the two end strips, criss-crossing at the center of the braid
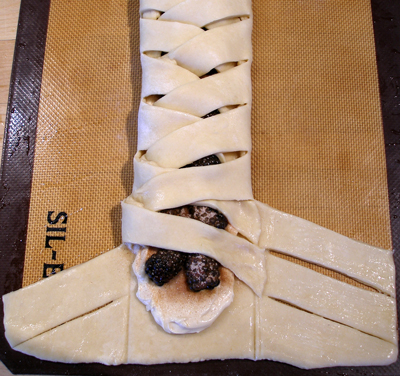
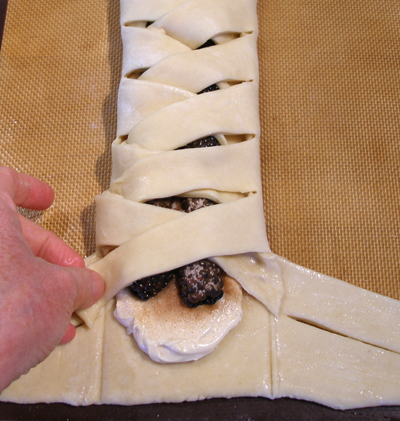
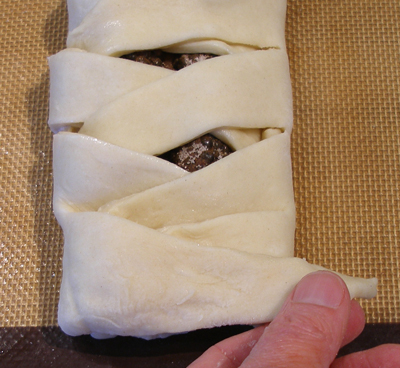
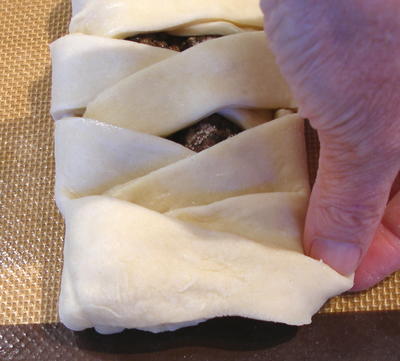
3. Fold the strips of pastry onto the center, criss-crossing the filling by alternating one strip from the left side of the pastry with one from the right.
Lightly press the ends together to seal. Run your hands along the sides of the pastry to straighten it.
4. When you reach the end of the braid, fold the end up and over the filling, then criss-cross the last two strips and tuck the tail of the last strip under the braid.

Let rise:
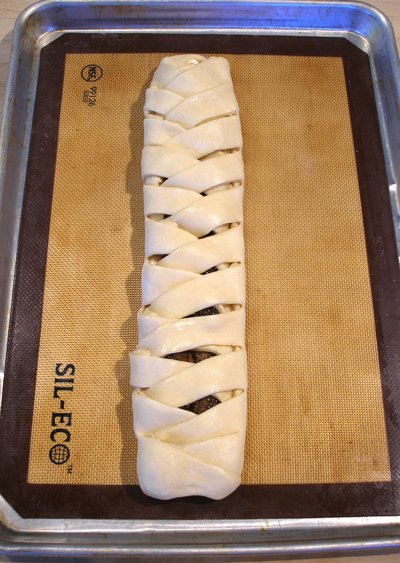
1. Lift up silpat and transfer the braid to a large baking sheet.
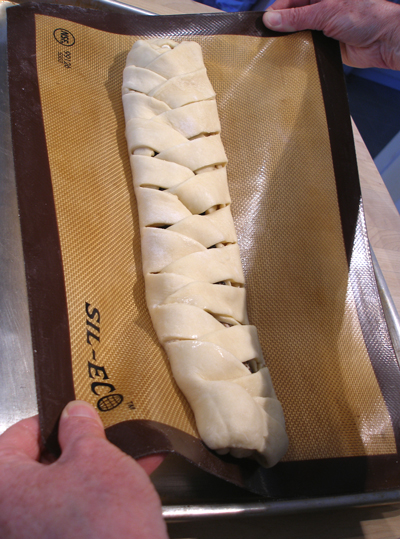
2. Run your hands along the sides of the pastry to straighten it.
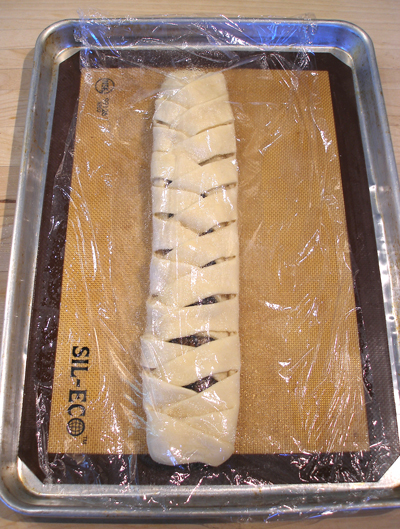
Cover with a greased-side-down piece of plastic wrap. Let rise for 30 minutes, just until puffy; it will not double in bulk.
SARAH SAYS: Let rise at room temperature. Do not place it in an especially warm place to rise as you do not want the buttery layers to melt.
Bake:
1. Meanwhile, position an oven shelf to the middle of the oven and preheat the oven to 400 degrees F.
2. When ready to bake, brush with the egg white wash and sprinkle with sugar. Place the egg white wash back in the refrigerator for the second Danish Braid.
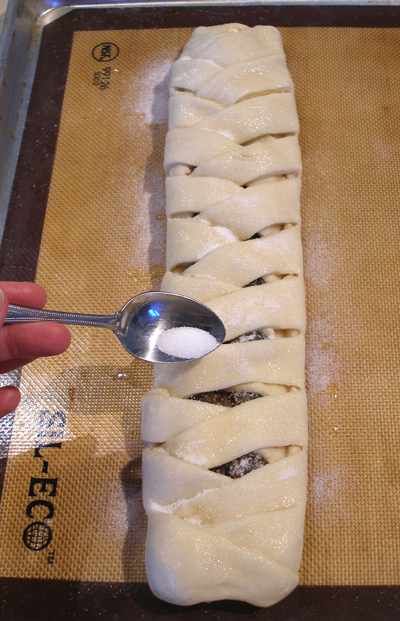
3. Bake for 15 to 20 minutes or just until golden.
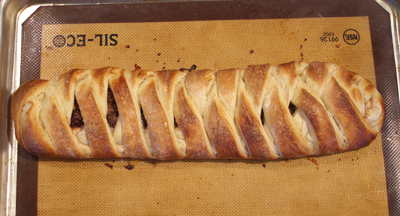
STEP IV: ICE THE BAKED DANISH PASTRY BRAID
1. Transfer the pastry onto a cooling rack and make the icing.
NOTE: Ice and serve the pastry while still warm.
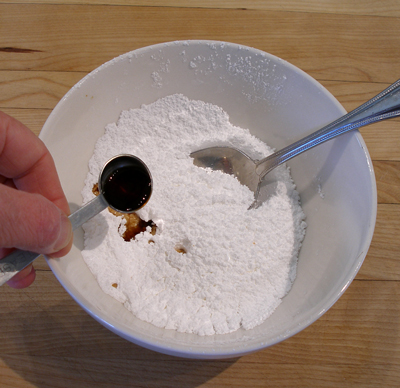
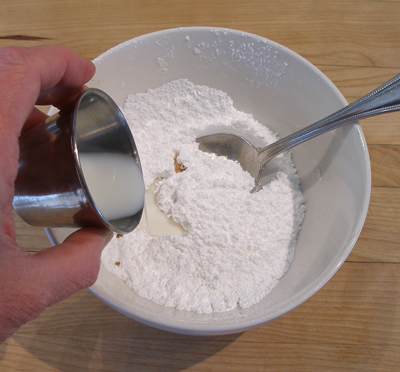
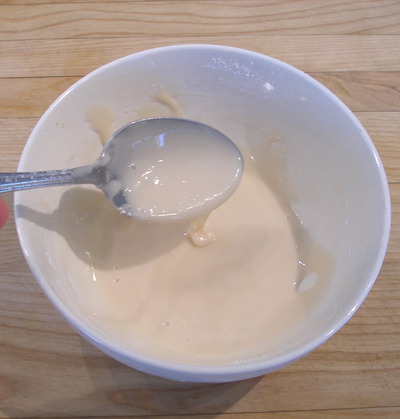
2. In a small bowl, mix the powdered sugar, milk and vanilla extract to a drizzling consistency.
3. Spoon half of it into a small zip-lock plastic bag, seal the top, and snip a bottom corner to create a little decorating tube. Cover and save the remainder for the second Danish Pastry Braid.
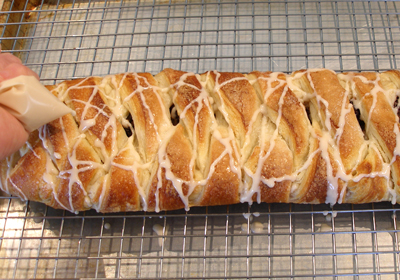
4. Squeeze squiggles of the icing over the pastry, set on a cake rack positioned over a piece of parchment paper to catch any drips. Allow it to set for a few minutes.
SERVE
Serve while the pastry is still warm.
STORAGE
Cool before storing. The baked Danish Pastry Braids can be stored, well wrapped, in the refrigerator for a few days, or frozen for a month. Reheat in a 325 degree F oven, wrapped in foil.