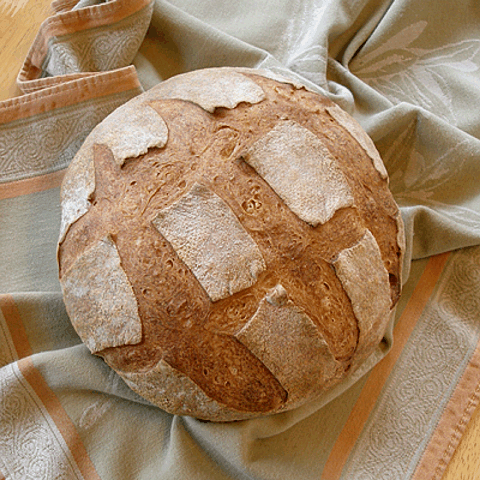
Variation: Crusty Sourdough Boule
This recipe makes loaves that have a very crispy, blistered, crust and a chewy texture with a nice sourdough tang.
BREAD RECIPE HELP
INGREDIENTS
3 3/4 to 4 cups unbleached all purpose or bread flour; spoon into measuring cup and level to rim
1/2 cup white whole wheat flour; spoon into measuring cup and level to rim; can substitute with all-purpose flour
1 1/2 cups water, at warm room temperature
1 cup ripe Wild Yeast Sourdough Starter
2 teaspoons salt
1 teaspoon sugar(optional)
INSTRUCTIONS
STEP I: MAKE THE DOUGH
1. In the bowl of a stand mixer fitted with a dough hook attachment, add 3 3/4 cups flour, white whole wheat flour, water, and starter.
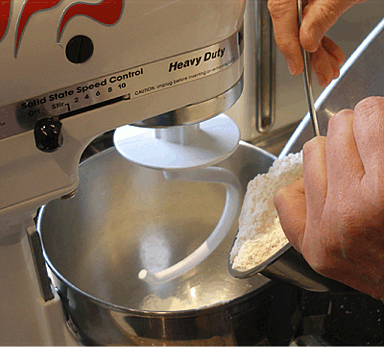

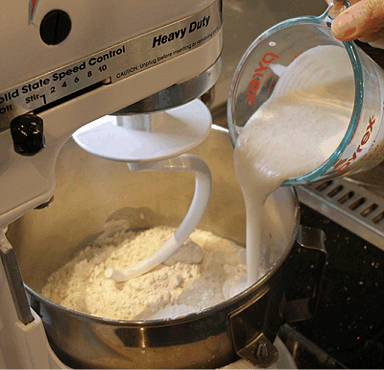
2. Mix at low speed until combined.
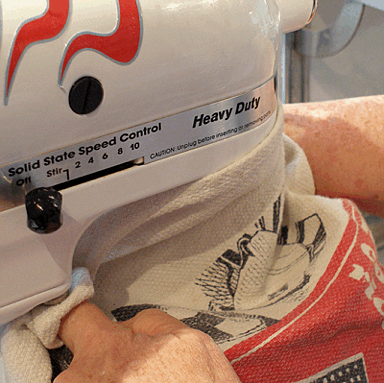
3. Cover the bowl with a clean kitchen towel and let the dough rest for 30 minutes. This will allow the flour to absorb the liquid, a process called autolysis.
4. After the 30 minute rest, add the salt and optional sugar to the bowl.
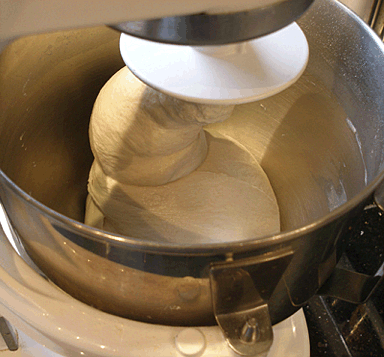
Knead the dough for about 4-5 minutes by turning on the mixer to medium speed.
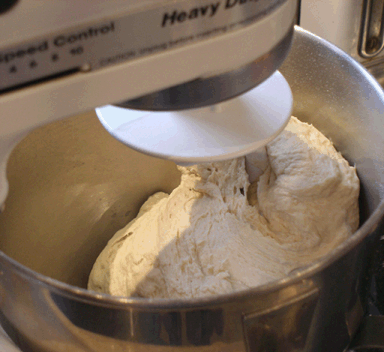
5. Stop the mixer and check the dough. It should be slightly sticky, and start releasing from the sides of the bowl and start wrapping itself around the dough hook during kneading.
If your dough is too sticky, you may add the remaining flour, 1 tablespoon at a time, with the mixer on low, until it resembles the dough in the photo below.
Do not add too much flour. The dough is not supposed to be stiff.
STEP II: THE FIRST RISE AND SHAPE THE BOULE
The first rise:
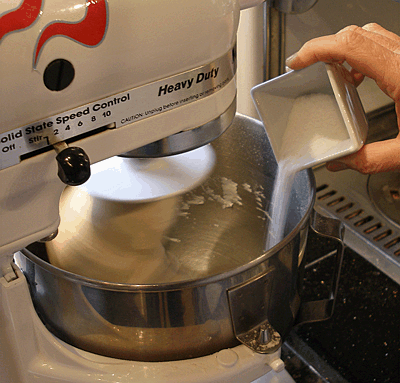
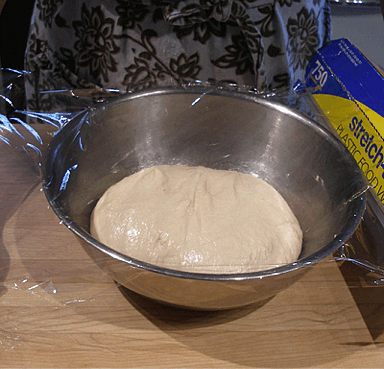
1. After kneading, scrape the dough into a greased bowl, turning the dough over so the top of the dough is oiled.

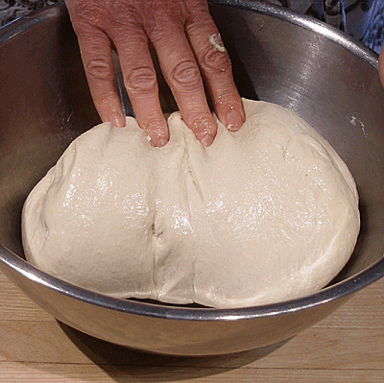
2. Place plastic wrap on the bowl and set it aside, in a warm place, for 3 1/2 to 4 hours, or until doubled.
NOTE: Sarah's Microwave Bread Proofer is PERFECT for this step and will shorten the rising time.
Shape the loaves:
1. After the first rise, tip the bowl and let the dough fall onto on a floured surface.
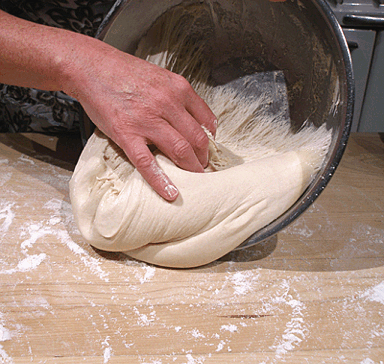
2. Cut the dough in half with a bench scraper.
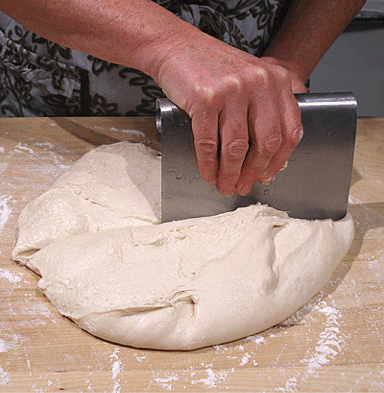
Loosely cover 1/2 of the dough with a piece of greased side-down plastic wrap while you shape the other half.
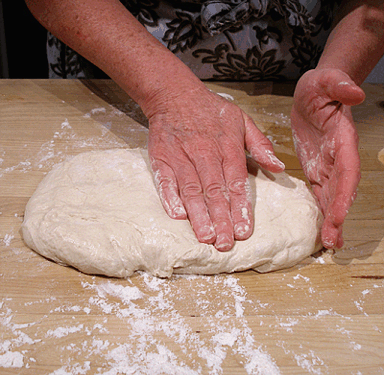
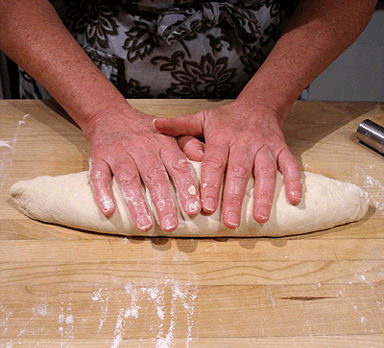
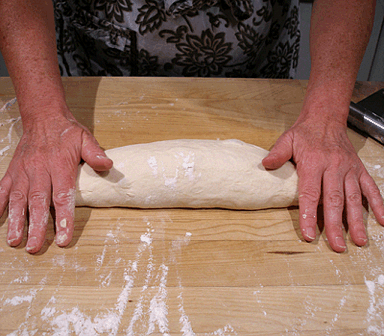
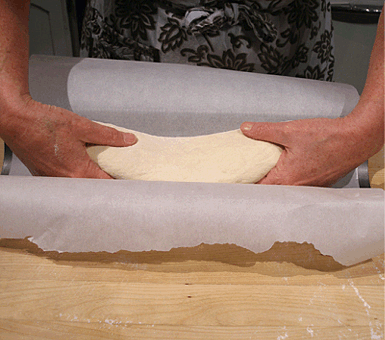
3. Gently stretch and flatten the dough into an oblong shape.
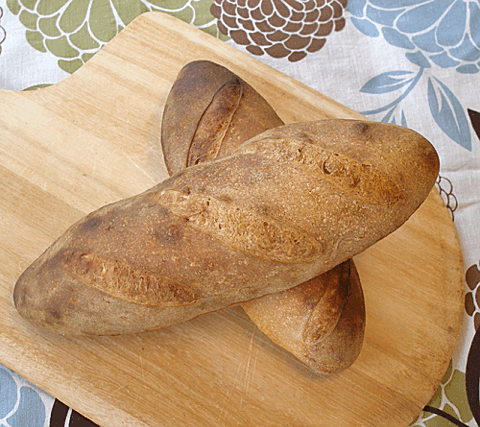
4. To form the baguettes:
a.Turn the dough so the short side is facing you.
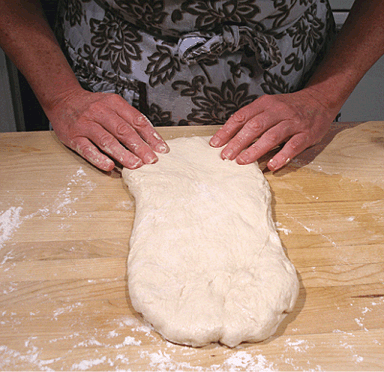
b. Fold the top of the dough down to the center and press it down, to seal.
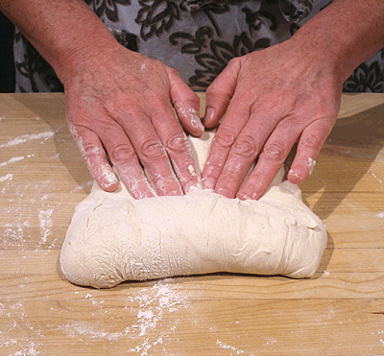
c. Fold one corner down toward the center, then fold the other one down and press to seal.
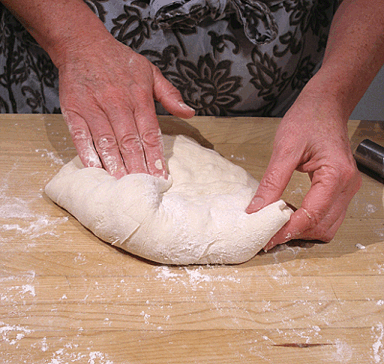
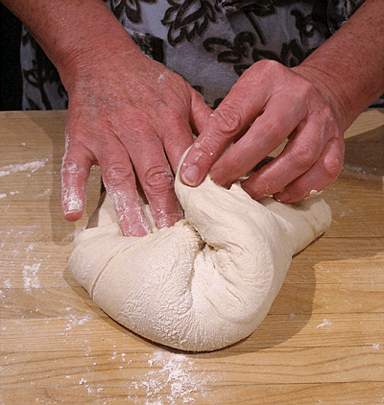
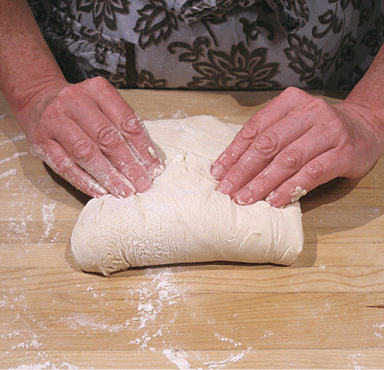
d. Fold the top of the dough down and roll to form an even cylinder.
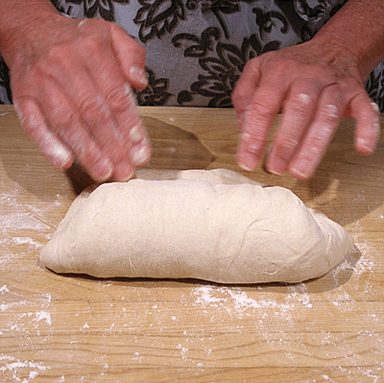
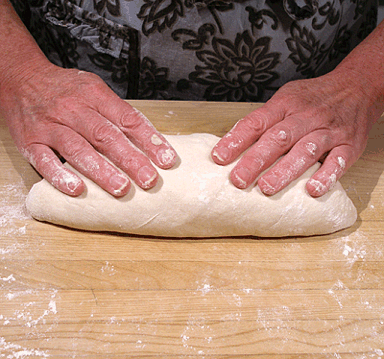
e. Roll the dough back and forth to make an even loaf. Press a little harder on the ends of the dough to form nicely tapered ends.
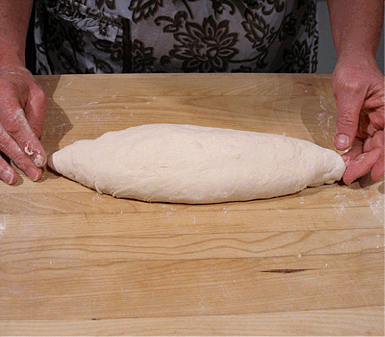
8. Line a perforated French bread pan with parchment and gently place the loaf in the pan.
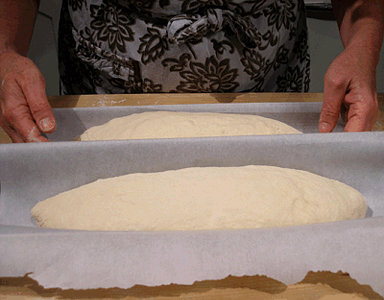
9. Loosely cover the pan with a piece of greased side-down plastic wrap while you shape the other half.
STEP III: THE SECOND RISE AND BAKE THE LOAVES
The second rise:
1. After you have shaped both loaves, cover them with a piece of greased-side-down plastic wrap and set aside for 1 hour to proof or rise.
NOTE: Sarah's Microwave Bread Proofer is PERFECT for this step and will shorten the rising time.
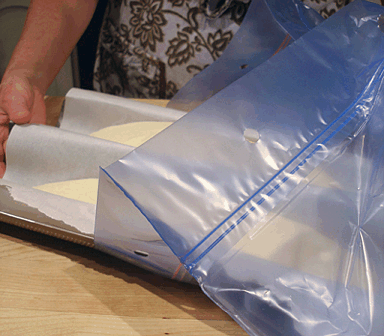
2. After the loaves have risen, place the baking sheet in a large plastic bag and set it in the refrigerator overnight.
This process, called retarding, slows down the fermentation of the dough and greatly improves the taste and texture of the bread.
Bake the bread loaves:
1. The next morning, remove the bread from the refrigerator and take it out of the plastic bag. Cover the loaves with a piece of greased-side-down plastic wrap and let them rise, at warm room temperature, for about three hours, or until doubled in size(double the original size, before the overnight stay in the fridge).
NOTE: Sarah's Microwave Bread Proofer is PERFECT for this step and will shorten the rising time.
2. After the dough has been rising for two hours, place the oven shelf to the lowest rung. Place two pizza stones in the oven shelf.
Preheat the oven to 450 degrees F.
NOTE: If you have an electric oven, place the oven shelf on the lowest rung, and then one right above.
3. When the loaves are ready to bake, place about 18 ice cubes on an old baking sheet and place it on the floor of your oven. As the ice melts, it will form steam in the oven, which will give your loaves a nice crispy crust.
NOTE: If you have an electric oven, place the pan with ice on the lowest rack, and place the pan of ice on that.
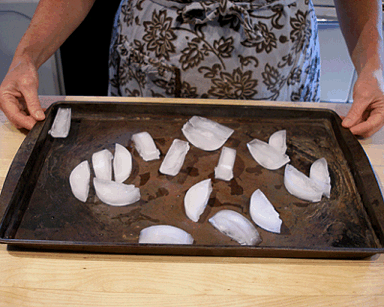
Do not use a nice baking sheet for this job, because it will, most likely end up warping. I keep one ugly baking sheet in my cupboard just for this use.
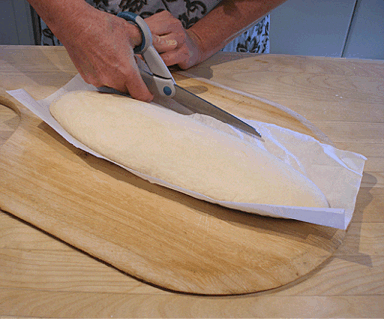
4. Cut the parchment between the two loaves, then slide one of the loaves onto a peel or an upside down baking sheet.
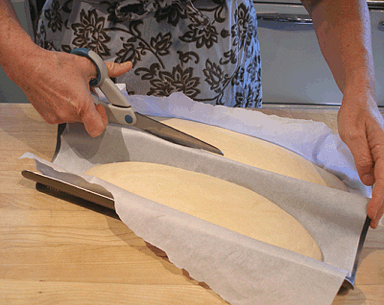
Trim the excess parchment away.
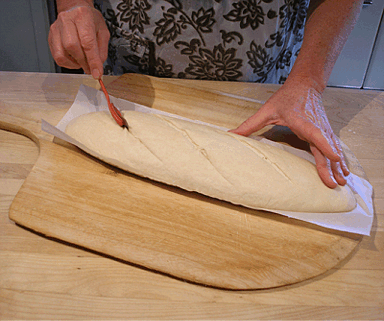
5. Using a baker's lame, or a single edged razor blade, cut several slashes in top of the loaf.
The slashes allow the bread to expand, without tearing, while it bakes.
Repeat with the second loaf.
6. Slide each loaf onto the preheated pizza stone and quickly close the door.

7. Bake the loaves for 12 minutes, then remove the baking sheet with ice(there may not be any ice left at this point).
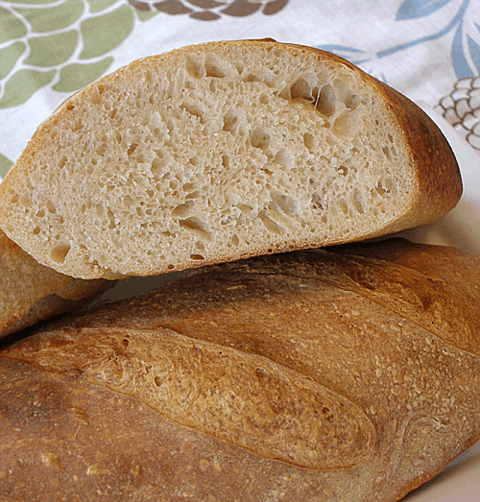
8. Lower the oven temperature to 425 degrees F and continue to bake about 16 minutes, or until the loaves are nicely browned and sound hollow when you tap them on the bottom.
The loaves should have a golden, very crispy, blistered, crust and a chewy texture with a nice sourdough tang.
As tempting as it may be, you MUST allow the bread to fully cool before you dive in and eat it.
Oh man, It's SO GOOD!
STORAGE
Store the loaves in paper bags and not in plastic wrap, but are best eaten the day they are baked because they stale quickly. For longer storage, wrap the bread in plastic wrap, place in a resealable plastic bag and freeze or store in a cool, dark place, but their crusts must be recrisped.
VARIATION
Crusty Sourdough Boule: To learn how to form the dough into a Boule shape, go to Kalamata Olive and Rosemary Boule