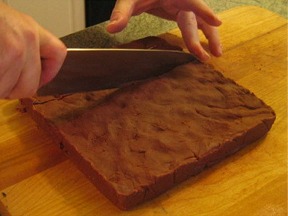
Fudge and photo by Sarah Phillips © Sarah Phillips
Fudge is a creamy, semi-soft crystalline candy. The key to its smooth and creamy texture is achieving fudge that's filled with tiny sugar crystals that are so small that they are imperceptible to the tongue. Making homemade fudge is as much technique and timing as it is a recipe, so it takes experience to make it well consistently.
The most popular fudge flavor is chocolate, usually dark, with white becoming more popular. Other flavors such as white chocolate, caramel, maple, butterscotch, and vanilla are also favorites. Typical chocolate fudge ingredients are melted chocolate, milk, sugar, light corn syrup, butter, vanilla extract and salt.
CANDY RECIPE HELP
INGREDIENTS
10 ounces (1 1/4 cups) half-and-half, room temperature or 5 ounces (1/2 cup plus 2 tablespoons) heavy cream AND 5 ounces (1/2 cup plus 2 tablespoons) whole milk; added as an interfering agent and adds flavor
1 1/2 pounds (3 1/4 cups plus 2 tablespoons) sugar; Use a fresh or new bag of sugar when making candy recipes
2 1/2 ounces (5 tablespoons) light corn syrup; Added as an interfering agent
1/8 teaspoon salt
1/2 pound (8 ounces or 8, 1-ounce squares) highest quality unsweetened chocolate, chopped into 1/4- to 1/2-inch pieces; Measure and then chop;
3 tablespoons unsalted butter, room temperature; Added as an interfering agent
1 teaspoon vanilla extract
Soft butter for buttering pan. Some recipes call for spraying it.
NOTES:
Suggested equipment:
Heavy 5 – 6 quart saucepan with at least 4 1/2 to 5-inch sides. Don't use “insulated” pans. This causes the fudge to cool too slow, resulting in a softer fudge. A heavy pan will help prevent scorching, and a large one will prevent messy boil-overs. Butter the sides to keep sugar crystals from forming.
Wooden or Large Heat-Proof Spoon; prepared by spraying with a non-stick vegetable spray
Bench scraper
Candy Thermometer: The “dial” type of Candy Thermometers are notoriously inaccurate. I recommend the Candy thermometer that looks like a thermometer. Mine is mounted on a metal frame and made by Taylor, and it works very well for this. SARAH SAYS: Verify the accuracy of the thermometer in water that has boiled for three minutes. It should read 212 degrees F at sea level. If not, get a new thermometer.
Heat proof pastry brush and a cup of tap water
Bowl of Cold Ice Water – in case of burns
Measuring Cup & Spoons
8 x 8-inch Glass or Aluminum Baking Pan: do NOT use an “insulated’’ pans. This causes the fudge to cool too slow, ie: still warm after an hour. This could result in a softer fudge.
Heavy- Duty Aluminum Foil; SARAH SAYS: I like to use heavy-duty foil because it holds up well.
Marble Slab – if don't have, use a large cookie sheet with sides or polished granite countertop. Keep it ungreased. Use a firm, flexible bowl scraper instead of a bench scraper which will scratch the cookie sheet. If poured on formica, the glue underneath could loosen, ruining your countertop.
QUESTION: What kind of a spatula is used to knead fudge on a marble slab?
SARAH SAYS: For large quantities, I use a bench scraper. You can also use a heavy putty knife. Find it in the hardware store.
How to Chop Chocolate: Chop into 1/4- to 1/2-inch pieces:
A. Start with a piece of chocolate from a block or an individual chocolate square. Using a large sharp knife, place the handle in your right (left) hand and apply pressure with your left (right) palm on top of the blade. Push downwards along the edge of the block of chocolate to shave off pieces.
SARAH SAYS: To remove a large piece of chocolate from the main bar: score it first with a sharp, serrated knife, where you want to break it; run the knife blade, in a sawing motion on top of the block where you want to cut it, to make a small trough. Then, push knife, with the help of your left hand on the top of the blade, into the score and the chocolate will break off in a chunk. Weigh to make sure it is the proper amount; you can place it directly on the scale. Return the large block of chocolate to storage.
B. Chocolate comes off more easily if you cut across a corner, turning the block of chocolate to the next available corner.
Then, chop chocolate into 1/2 to 1/4-inch pieces. Gather the chocolate pieces by scraping them with the side of the knife's blade, in a circle with the diameter almost as wide as the blade. Holding the top of the knife at the point, rock the blade briskly from point to hilt, gradually turning the knife towards you in a semicircle. Gather the pieces together with the side of the knife and repeat the process until the proper size is obtained. Do not chop into a fine texture; you have gone too far.
Scrape the chocolate into a mixing bowl; do not handle it as it will melt or soften. Set aside in a cool place in the kitchen until needed in the recipe.
INSTRUCTIONS
1. Prepare the baking pan:
A. Cut a piece of foil larger than an 8-inch square pan.
B. Line a straight-sided, 8-inch square pan with aluminum foil so that the foil extends above the sides of the pan. Butter the foil inside the pan.
With a paper towel, remove all but a light film or use a non-stick spray. Set aside.
3. Prepare the sugar solution: Add the ingredients in the order suggested. Why?
A. Pour the cream, milk (or half-and-half) and corn syrup and place the salt in a heavy-bottomed sauce pan. Do not stir.
Slowly pour the sugar dead-center in the middle of the cream and milk mixture. Make sure you don't splatter sugar on the side of the pan.
SARAH SAYS: Always pour the ingredients in the center of the pan avoiding the sides. You want to keep the side of the pan clean, especially when boiling the sugar solution, beginning with Step #5A. You don't want the sugar crystals to start hardening and forming on the side of the pan.
I add the liquid ingredients first and then the sugar; the opposite of what most candy makers suggest. The traditional way leaves some sugar dry spots in the bottom of the pan causing them to burn even though traditional instructions have you draw an “x” in the sugar to moisten it slightly or to stir the two together. Stirring often causes sugar grains to cling to the inside of the pan. If they aren't washed off with a moistened pastry brush before boiling, the loose grains will cause the syrup to crystallize. My way is more convenient. That is, if done carefully (i.e., adding the liquid first followed by sugar), you can skip the initial wiping with the pastry brush.
B. Place pot over low to medium heat.
SARAH SAYS: If you are using a gas range, take care that the flames do not rise up the sides of the pot, which would cause the mixture to burn.
If the sugar mounds, gently push down on the mound with a spoon so that all the sugar is moistened.
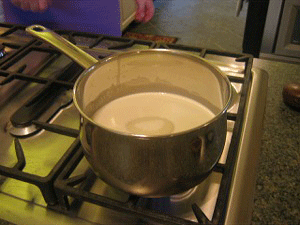
C. Stir constantly and heat until very hot and steams rises from the pot. Remove the mixture from the heat. DO NOT DIP YOUR FINGER DIRECTLY INTO THE HOT MILK MIXTURE!
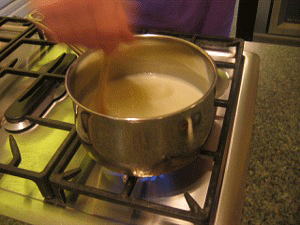
4. Stir in the chopped chocolate, melt it and make sure the sugar has completely dissolved:
A. Remove the pot from the heat and immediately add the chopped chocolate to the hot milk mixture.
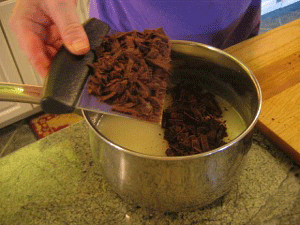
B. Stir the chocolate until it melts. The hot milk solution is so hot that it has enough heat to melt the chocolate without using direct heat from the stove.
C. Feel the melted chocolate between your fingertips. If the mixture feels gritty, the sugar is not completely dissolved. If it is gritty, reheat the chocolate mixture until just warmed and remove from the heat.
5. Boil the chocolate mixture without stirring until a candy thermometer registers 235 degrees F (the soft-ball stage):
A. Return the pot to the burner, but do not turn on the heat. Using a heat proof pastry brush dipped in clean water, wipe the inside walls of the pot above the surface of the choclate mixture. Dip the brush in water every time before washing the side of the pan! This step removes crystals that may have accumulated on the inside of the pot. If allowed to remain, these crystals would cause the fudge to become grainy.
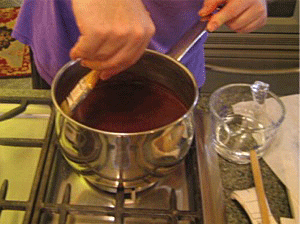
B. Place or clamp on the CANDY THERMOMETER at the side of the pot. It must be dry and clean when putting into the candy pot.
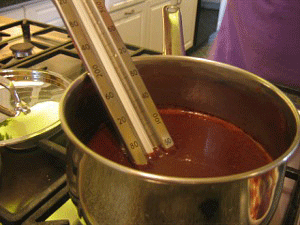
C. Turn on the burner to medium-high heat and slowly bring the mixture to a boil WITHOUT stirring. Then lower the temperature to about Medium or even medium-low to sustain a rolling boil and to avoid burning the chocolate mixture. Do NOT stir. Boil until the candy thermometer registers 235 degrees F or the Soft Ball Stage.
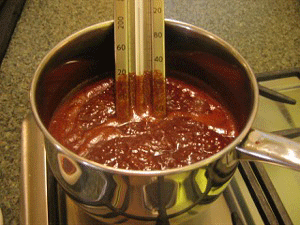
SARAH SAYS: Stopping the boil at 235 degrees F really means 235 degrees F. Fudge will sometimes crystallize if it boils above 238 – 240 degrees F. If it goes too high WITHOUT crystallizing, remove the fudge from the stove. Add 1 tablespoons of whole milk or water while standing back to avoid the steam, stir, then place back on the stove. The Boiling Point should fall about 2-4 points. Reheat to 234 degrees F.
SARAH SAYS: The temperature that you boil the chocolate mixture to is CRITICAL. If it goes beyond 240 degrees F, the fudge will come out dry and crumbly. If the temperature doesn't reach
235 degrees F, the fudge will be too soft and will not set up during the kneading stage to follow.
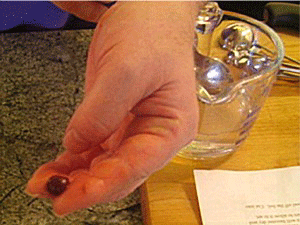
Soft ball: A small amount of syrup dropped into chilled water forms a soft, flexible ball, but flattens like a pancake after a few moments in your hand.
SARAH SAYS: During boiling, occasionally use a pastry brush dipped in clean water to wipe the inside walls of the pot above the surface of the chocolate mixture. Dip the brush in water every time before washing the side of the pan! This step removes crystals that may have accumulated on the inside of the pot. If allowed to remain, these crystals would cause the fudge to become grainy.
6. When the chocolate mixture has reached 235 degrees F:
A. Immediately pour the hot chocolate syrup at once onto a large marble slab. (This pan has a heat-proof handle.) Do not scrape the bottom or sides of the pan. This will prevent any burned bits of chocolate from spoiling the fudge.
Be careful! The fudge is HOT! It's 235 degrees F and burns! Keep a bowl of ice water nearby in case you get any on your skin. Immediately dip the affected area in cold water to stop the burn and seek medical attention!
SARAH SAYS: You can put the fudge on the countertop that won't burn or discolor and knead it with a bench knife. Do you have one? You can also use a heavy putty knife. Find it in the hardware store. An immersion blender will beat too much air into it. So will a mixer.
B. Dot the surface of the pool of syrup with the butter, and allow the syrup to cool to lukewarm (about 110 degrees F). Then, dot the surface with vanilla extract. At this temperature you will be able to comfortably touch the surface of the syrup with your finger.
The flavor of uncooked butter comes through if added at this step. If cooked with butter, the butter will brown and add a different flavor.
SARAH SAYS: Touch the syrup at the edge first to see how hot it is before testing the center. The center will be hotter than the edge. Be careful!
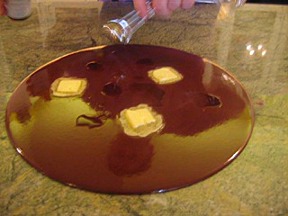
7. Once the chocolate syrup has cooled to lukewarm (about 110 degrees F), work it with a bench scraper for 10 to 20 minutes. Work the syrup in this way until it loses its shine and begins to firm:
SARAH SAYS: This step crystallizes the sugar in a controlled manner, giving the fudge its characteristic texture. Agitating, or stirring, the fudge mixture after it is cooked affects the size of the sugar crystals, which controls the consistency of the finished fudge. If you stir when the mixture is too hot or too cold, it will either stay soft or get too firm to cut neatly. It is important to let the fudge mixture cool, undisturbed to the specified temperature before the last stirring step.
A. Starting at one edge, using a bench scraper, scrape and work the syrup towards the center.
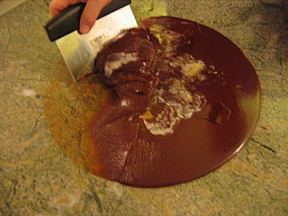
B. …making sure you get all sides…
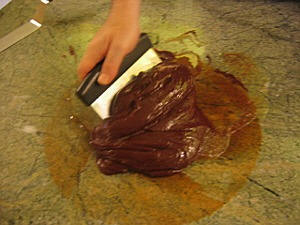
C. …and then smear the fudge on the work surface. Scrape spatula frequently with a knife, do not add grainy scrapings to the candy. Simply throw them away.
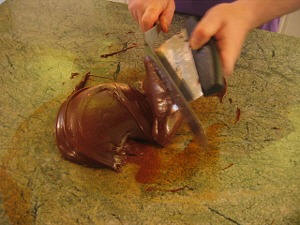
D. Gather the fudge towards the center, again.
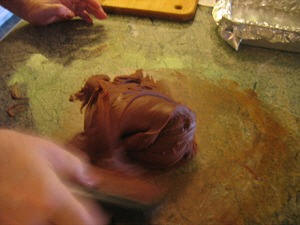
E. Keep repeating gathering the fudge into the center and smearing it on the work surface. The fudge will begin to get firm and dull. This may take 10 to 20 minutes. DO NOT work the fudge beyond the point shown in the picture above where it begins to firm up. If you do, it will become dry and crumbly.
8. When the fudge is ready, transfer it to the prepared pan:
A. Push the fudge into the corners of the pan. If necessary, butter your hands lightly and press the fudge out to make an even layer in the pan. Rest the fudge at room temperature for an hour or more to allow it to set. Do not refrigerate. Cold fudge gets too firm with a gummy texture! Room temperature is best!
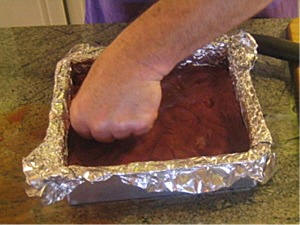
B. Remove the fudge (with the foil) from the pan, and gently peel off the foil. Cut into 1-inch squares.
Use a bench scraper or a large, very sharp, heavy, straight-edged knife to cut the fudge into pieces; it will be necessary to run the bench scraper or knife blade under hot, then cold, water, then dry it off, frequently, to keep the cuts neat. With a bench scraper, to cut, all you have to do is push down and it makes a nice even cut. It is a handy tool for the kitchen.

STORAGE
Store fudge in a cool, dark, dry place in an airtight container (tin or plastic), between layers of waxed paper or individually wrapped for about 1 to 2 weeks. Fudge stored in an air tight container at room temperature will “ripen” over the first 24 hours. That is, the texture will become creamier and more velvety.
Fudge stored in the refrigerator can last 2-3 weeks when kept in an airtight container.
Fudge left out in the open will last a couple of hours depending upon the foot traffic in the area.
It can also be frozen quite successfully for long term storage, about 3 to 6 months. Just be sure to wrap well in waxed paper, the foil, and placed in an airtight container so it doesn't absorb flavors from the freezer. Thaw fudge in its wrappers and storage container at room temperature. It will take about a day to thaw.
Some Questions and Answers:
Question: I would like to make fudge ahead of time for Christmas. How long will it last?
SARAH SAYS If I am keeping chocolate fudge for more than a week or two, I like to freeze it. Not so much that it will go bad, but it begins to dry out and isn't as creamy.
Question: When do I add chopped nuts to the recipe?
SARAH SAYS: If you like your fudge with nuts, have ready 1/2 cup chopped, toasted, cooled walnuts or pecans. When the fudge seems to be creamy throughout, but before it gets firm, add nuts a few at a time and work in well until all are added.
Question: When do I add flavoring?
SARAH SAYS: Fudge can be flavored with candy oils such as mint, lemon and orange. Add flavoring in Step # 5B as you would the vanilla extract, when the fudge mixture has cooled to about 110 degrees F. When using candy oil, use no more than 1/4 teaspoon per recipe, as they are very strong. I always keep the vanilla extract called for in the recipe, as well. Vanilla helps round the flavorings.
Fudge is too hard and crumbly
Was cooked beyond 240 degrees F and/or kneaded too much
There's not much you can do if the fudge is overcooked or overkneaded.
Fudge is too soft
Not cooked hot enough and/or was no kneaded enough
If cooked to the proper temperature, but not kneaded enough, will firm-up, but will be sticky. Cut-in chunks and dip into tempered chocolate and use as a center for a candy. If not properly cooked, there's nothing you can do to fix it. Warm it up and use it as fudge sauce.
Fudge is grainy
Kneaded too soon
Wait until fudge is 110 degrees F which is comfortably warm to the touch.


