
Cake and photo by odetteganda, Premium Member © Sarah Phillips
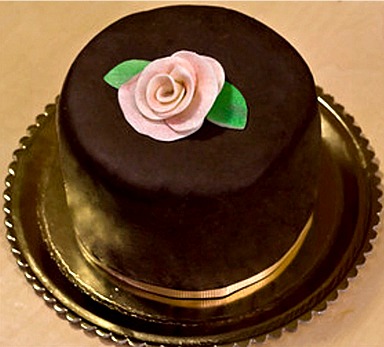
Perfect for the holidays, a birthday or celebration cake, this cake will literally make your toes curl when you taste its triple hit of deep, dark chocolate! First, the three-layer cake is dense and fudgy, layered in between sublime, melt-in-your mouth chocolate ganache, and then, covered with dark chocolate plastic, which tastes like a grown up Tootsie Roll. A pretty gum paste rose completes the creation!
CAKE RECIPE HELP
INGREDIENTS
Recipes:
Ultimate Chocolate Butter Cake, below
Chocolate Fudge Buttercream Ganache, below
Dark Chocolate Plastic, below
STEP I: MAKE THE ULTIMATE CHOCOLATE BUTTER CAKE OR UCBC
ULTIMATE CHOCOLATE BUTTER CAKE OR UCBC / Recipe alone
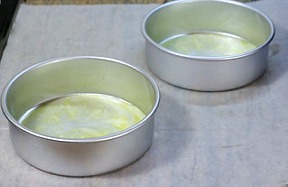
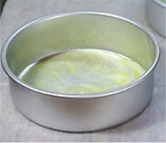
Odette says; For this tutorial, I baked the recipe in three 6- x 2-inch pans plus made 6 standard size cupcakes
Cake typically makes three 9- x 2-inch or three 8 x 2-inch pans or 42 standard-size cupcakes.
INGREDIENTS
3 1/2 cups / 15.44 ounces / 437.57 grams unbleached all-purpose flour; spoon into dry measuring cup and level to top
1/2 cup cocoa powder, natural (do not use Dutch-process); spoon into dry measuring cup and level to top
2 teaspoons instant espresso powder (optional)
2 teaspoons baking powder
1/2 teaspoon baking soda
1 teaspoon salt
2 cups whole or 2% milk; use cold – does not have to be at room temperature; measure in liquid measuring cup
1 tablespoon (3 teaspoons) vanilla extract
1 1/2 cups / 3 sticks / 339 grams unsalted butter; use cold – does not have to be at room temperature
2 3/4 cups sugar or superfine sugar
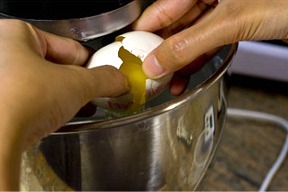
6 large eggs; use cold – does not have to be at room temperature
12 ounces (squares) bittersweet or semi-sweet chocolate, melted and cooled to tepid
NOTES:
1. Cake is mixed using a 325 watt KitchenAid Mixer. If you are using a more powerful one, adjust the mixing times downward or use the descriptions rather than mixing times with the instructions, otherwise the baked cake will fall apart and/or crumble or dome in the middle from overmixing.
2. How to melt chocolate – I melt my chocolate in the oven while it preheats. Place squares on a flat sheet of aluminum foil and place on middle shelf. When the chocolate melts, it does not drip over the sides of the foil. They take about 5 minutes at most.
Another way to melt the chocolate is to microwave it in a medium size, microwave-safe bowl on 50% power for 30 seconds at a time until chocolate is almost melted. It takes about 3 to 4 minutes.
Looks are deceiving — when done, the chocolate square collapses slightly, but has a recognizable shape and will look shiny. When you touch the top with the tip of a knife (not your fingertip because its hot), you'll see that it's melted. Take care the chocolate doesn't burn which happens quickly. Remove from oven and stir.
Cool to room temperature (70 degrees F) until needed in recipe.
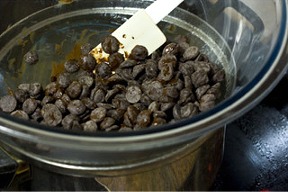
ODETTE SAYS: I used 12 ounces chocolate chips instead of chocolate, and used a double boiler to gently melt mine.
INSTRUCTIONS
1. Position the oven racks in the lower and upper third of the oven. Preheat the oven to 325 degrees F and spray three 6-inch, preferably light colored, heavy NOT nonstick pans with nonstick cooking oil. (If you use dark, nonstick baking pans or ovenproof, Pyrex glass pans, keep the oven heat at 325 degrees F, but the recipe will not bake as well in these types of pans; it will result in crusty, dark edges. Use cake strips to help prevent this when using these types of pans.)
Also, place cupcake liners in 6 standard size cupcake tins. Set aside.
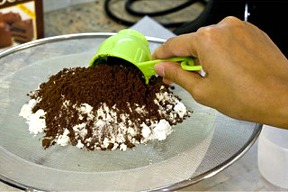
2. In a medium bowl, whisk together the flour, instant espresso powder, baking powder, baking soda and salt. Sift the cocoa powder into the mixture and combine all ingredients. Set aside. Add the extracts to the milk and set aside.
SARAH SAYS: Cocoa powder does not blend well with other ingredients and lumps easily; that's why sifting is recommended because it removes the lumps. I am using a fine mesh strainer to sift the cocoa powder with. I measure the coca first, and then sift.
ODETTE SAYS: After measuring, I sift all the dry ingredients together.
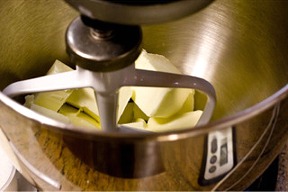
3. Beat the butter with a stand mixer, fitted with a paddle attachment, on low speed until softened. (If the butter is cold, cut it into pieces and it will warm quickly from the beaters).
Add the sugar in a steady stream at the side of the bowl.
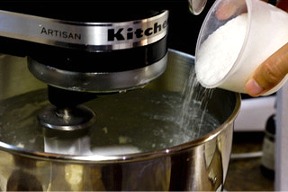
Increase speed to medium and beat for 2 minutes or until the mixture is light yellow in color and fluffy.

Stop the mixer and scrape the side and bottom of the bowl with a large rubber spatula.
4. With the mixer on low, add the eggs one at a time and beat for 20 seconds after each addition.
After the eggs have been added, increase the mixer speed to medium and beat the mixture for 2 minutes. Set the kitchen timer to help you keep track of the time.
If the eggs are cold, the batter will curdle slightly. It's ok. It will come together as the batter warms from the beaters.
ODETTE SAYS: Here's how the curdled batter looks like.
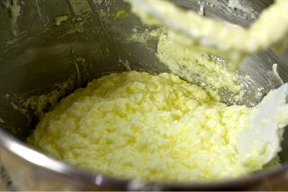
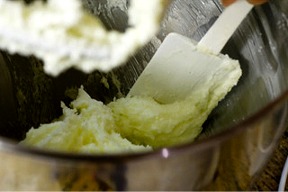
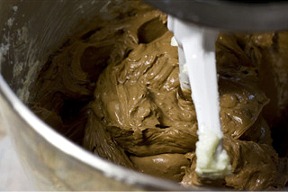
At the end of mixing, the mixture will become fluffy and aerated.

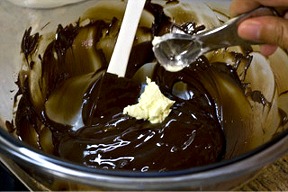
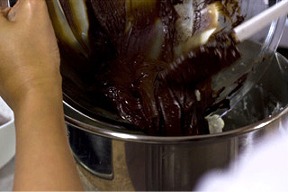
5. Add melted and cooled chocolate: Temper the chocolate by adding a teaspoonful of the butter/sugar/egg mixture at a time to the cooled chocolate and mix thoroughly after each addition.
SARAH SAYS: Tempering the chocolate properly is a very important step. If the chocolate is too warm, and added to the batter, it will seize, creating small bits of hardened chocolate in the batter. These bits will never melt and incorporate into the batter when the cake bakes; they will remain as hardened pieces of chocolate in the final cake.
You can increase the amount of cake batter added to the chocolate after the initial first few teaspoons to tablespoons.
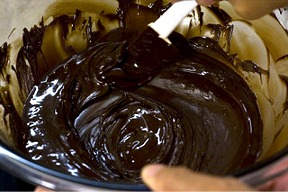
Add about 1/2 cup or more of butter/sugar/egg mixture to the melted chocolate before returning it to the main mixing bowl.
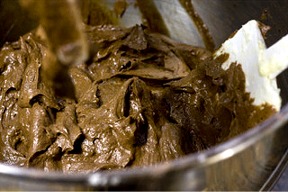
Mix all the ingredients on low speed until combined and creamy.
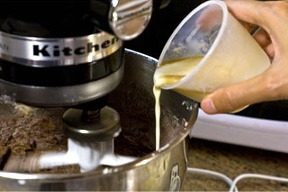
6. With the mixer on low, add the flour mixture in 3 equal portions…
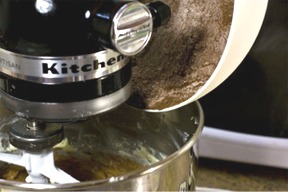
…alternating with the milk in 2 equal portions, beginning and ending with the flour. (If the milk is cold, the batter will curdle slightly. It's ok. It will come together when you add the flour.)
SARAH SAYS: Add the flour and liquid ingredients in increments quickly; do not wait in between additions too long as you don't want to overmix the batter.
After completing the last addition of flour, let the mixer run for 30 seconds on LOW. The batter should look mixed. STOP the mixer. Do NOT overmix.
7. Remove the bowl. With a large rubber spatula, give the batter ONE or TWO quick folds to incorporate any stray flour or milk left at the sides and bottom of the bowl. Then, STOP!
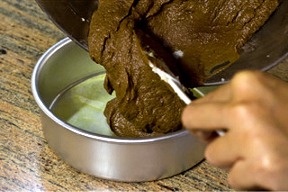
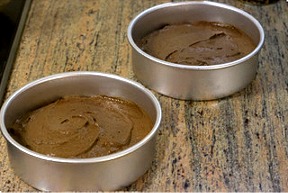
8. Divide the batter in the prepared baking pans, filling each one half full and lightly smooth the tops.
Divide the remaining batter among the six prepared cupcake tins. Refrigerate until needed.
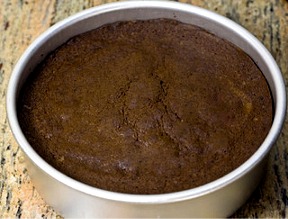
9. Place two pans on the lower shelf of the oven and center the third on the upper shelf. Bake for 25 to 40 minutes, or until the top feels firm and gives slightly when touched on the top with a cupped hand (will not spring back when touched with a fingertip) and shrinks a little from the sides of the pan – it should also smell done. The cake may develop cracks on its top. It will be trimmed later and you will no longer see the cracks.
SARAH SAYS: Chocolate cakes are hard to tell when done and it's easy to overbake them. If you insert a toothpick in the middle and remove, it should have a few moist crumbs attached, but not batter. You can still hear a few air bubbles popping. A small amount of cracking on the top is normal.
10. Take the cakes immediately from the oven to a wire cake rack and let sit for 10 to 15 minutes and then unmold onto wire cake racks (set your timer to keep track of the time) – the cake is fragile and will crack easily if you unmold it before the time is up. The cake's top will flatten more as it cools. Allow to cool completely before assembling.
Cupcakes:
1. If you can, using hot oven mits, position the top oven shelf to the middle of the oven. Shut oven door and let preheat to 325 degrees F.
2. Remove the cupcake pan from the refrigerator. Fill any unused tins half way with water. Place cupcake pan on the middle oven shelf.
3. Bake cupcakes for 25 – 35 minutes or until done.
4. Let cupcakes sit in their pan for 5 minutes and remove to wire cake rack to cool. Frost with Chocolate Fudge Buttercream Ganache Frosting, below, when cooled.
STORAGE
The icing and filling that covers your cake determines how you store your cake. Perishable frostings and fillings containing, for example, eggs, cooked custards, whipped cream, dairy and fresh fruit and berries that are NOT baked into the batter MUST be refrigerated, where the cake will keep for a few days.
Cakes iced and filled with nonperishable recipes can be stored under a cake-keeper at room temperature for about 2 days or frozen for 2 months. “Open-freeze” them (freeze without wrappers) until the icing is firm and then wrap in plastic wrap, foil and/or then in an airtight container.
Unfrosted butter cakes should not be refrigerated because it dries the cake and can be stored at room temperature for about 2 days. Unfrosted cake layers freeze well for about 2 months. Make sure you wrap them with plastic wrap and then foil.
Because the Ultimate Chocolate Cake tends to be moist, remove the cake from its wrapping while still frozen and allow it to thaw on a wire cake rack at room temperature. If not using right away, rewrap in foil, and store at room temperature in a cool, dry place as this chocolate cake tends to be moist. Do the same if the cake is frosted, but store under a “cake keeper” or airtight container.
STEP II: MAKE THE CHOCOLATE FUDGE BUTTERCREAM GANACHE
CHOCOLATE FUDGE BUTTERCREAM GANACHE / Recipe alone
INGREDIENTS
Two, 12 oz bags (24 oz total) Nestle's or Ghirardeli's semi-sweet chocolate chips
1 cup heavy whipping cream
1/4 cup corn syrup, light
2 sticks (1 cup) unsalted butter, softened
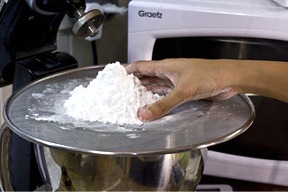
2 cups powdered sugar
2 teaspoons vanilla extract
ODETTE SAYS: I sifted the powdered sugar after measuring.
INSTRUCTIONS
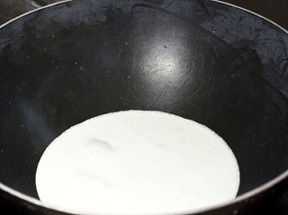
1. Place chocolate chips in a medium-sized bowl.
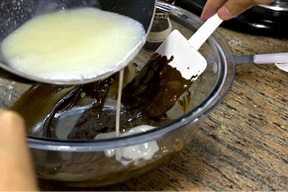
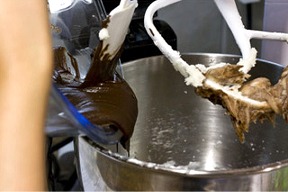
2. Heat the cream, corn syrup and 1 stick (1/2 cup) butter on the stove until it JUST BARELY comes to a boil.
Pour over chocolate chips. Let stand 1 minute and stir until smooth. Let mixture cool slightly (but not harden) for a few minutes. The ganache should cool to tepid, about 100 degrees F (body temperature).
2. In a mixer bowl, fitted with a paddle attachment, beat together 1 stick (1/2 cup) butter and confectioner's sugar until light and smooth.
Add in the cooled ganache and vanilla extract and beat until smooth and light.
NOTE: Frost the cake while the ganache is at room temperature. If refrigerated, let sit to room temperature before using.
SARAH SAYS: If the ganache gets too stiff to work with, even at room temperature, beat on low with a mixer. Note that overbeating the mixture can cause it to become gritty. If necessary, beat in a small amount (1 or 2 tablespoons) of heavy cream to soften slightly. However, the more cream you add, though, the softer the end buttercream will be. Stiffen with more powdered sugar.
STEP III: MAKE THE DARK CHOCOLATE PLASTIC
DARK CHOCOLATE PLASTIC / Recipe alone
INGREDIENTS
1 pound (16 ounces) semi-sweet or bittersweet chocolate
2/3 cup light corn syrup
INSTRUCTIONS
1. Finely chop the chocolate with a large serrated knife.
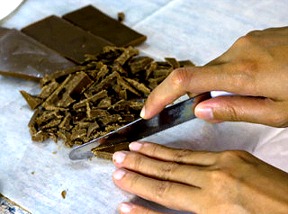
Place in a clean, dry heatproof bowl.
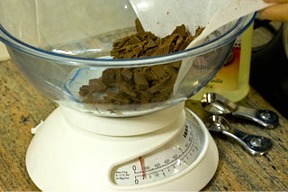
ODETTE SAYS: I am chopping and then re-weighing the amount of chocolate I need for the recipe.
2. Place the bowl over a pan of water that has been brought to a boil and removed from heat. Stir chocolate to melt evenly.
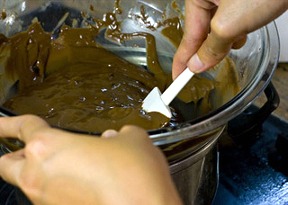
Remove bowl from the surface of the water and stir to cool slightly.
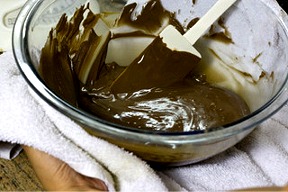
ODETTE SAYS: I dried the bottom with a towel.
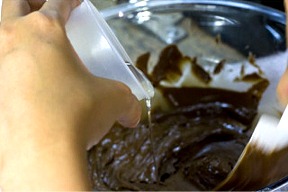
3. With a heat proof rubber spatula, stir in the corn syrup thoroughly.
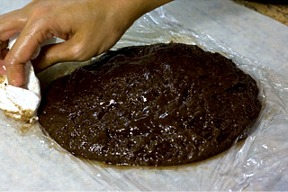
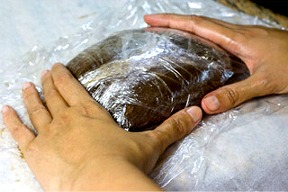
4. Scrape the paste from the bowl onto a large sheet of plastic wrap. Allow the paste to cool and harden.
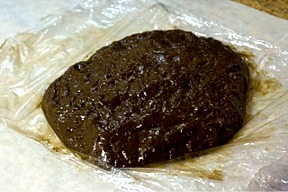
With paper towels, wipe the fat on the surface of the paste before wrapping.
Then wrap tightly in several layers of plastic wrap. Set aside for 24 hours. The chocolate plastic will harden.
4. To start working with the hardened paste, squeeze fat from plastic on paper towels before kneading.
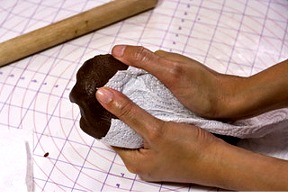
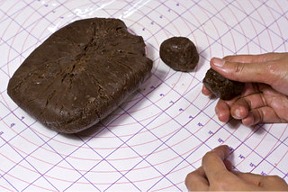
5. On a silpat or nonstick heavy plastic mat. Optionally, divide the batch into workable pieces to make them easier to work with.
SARAH SAYS: If your chocolate plastic is excessively sticky, lightly dust the work surface and chocolate with sifted cocoa powder.
ODETTE SAYS: The non-stick heavy mat is a Wilton Brand roll and cut mat which has measurements. I use it also for rolling out fondants.
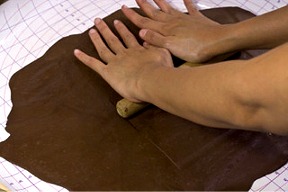
Or, work with the entire batch at once. First pound it with the side of a rolling pin to soften it and make it pliable. Then, knead until smooth and pliable. It takes awhile.
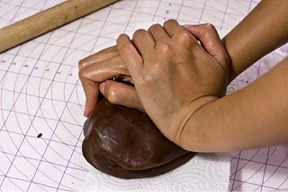
SARAH SAYS: You may need to use a few paper towels to help mop up the fat that oozes from the mixture.
For this tutorial, it will be rolled and used to cover a cake with.
STEP IV: ASSEMBLE AND DECORATE THE CAKE
SARAH SAYS: The beauty of this cake is that the layers bake flat and require no trimming. You can just assemble this cake, and then you are ready to go! Most of my cakes bake flat or with a slight dome. In fact, well-written and professional cake recipes should bake that way, requiring very little or no trimming at all, which is the way I like to go. I don't believe in fussing around with a recipe – I like my recipes to bake like a workhorse, and be able to be put together with ease without a lot of extra steps in between. I like my cakes to look like a professional did them – instantly! HA! It's just my philosophy. Life is too short and time is so precious to be fussing around with a cake – trying to get it level and straight! I believe that the cake recipe should do all the work for you and all you have to do is slap it together and it should look and taste great every time you bake it! LOL! That's a technical term I like to use – “slap it together!” HA!
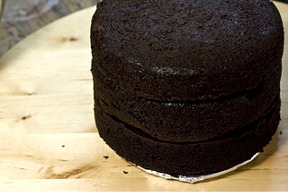
1. Fill layers of cake with chocolate ganache and stack the layers:
Start with the first layer. Smear some Chocolate Fudge Buttercream Ganache in the middle of the cake board and place the thickest layer top side down on the cardboard cake round. Fill with 4 tablespoons chocolate ganache.
SARAH SAYS: The Chocolate cake layers bake flat, but if necessary, trim the cake layers before using; it's not necessary, though.
Place the second layer, top side down, on top of the first. Fill with 4 tablespoons Chocolate Fudge Buttercream Ganache.
Stack the third layer on top, top side down.
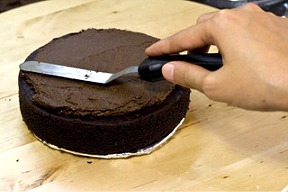
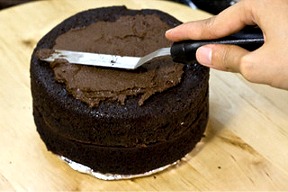
2. Frost the cake with the Chocolate Fudge Buttercream Ganache, using about 2 to 2 1/2 cups.
ODETTE SAYS: You will have about 3/4 cup of Chocolate Fudge Buttercream Ganache left over. You can freeze it for about a month or more, in an airtight container and use it later.
3. Smooth the top and sides of the cake. Chill cake in the refrigerator for 10 minutes to let the frosting settle.
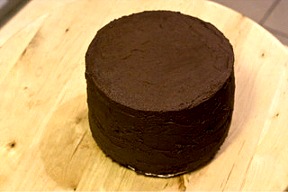
4. Roll out the chocolate plastic to a diameter of 20 inches and about 1/4-inch thick on a large piece of acetate.
ODETTE SAYS: To calculate diameter, measure the top and add it to twice the sides. Then add a buffer of 4 to 8 inches on the result. I used a small roller which I found easier than using a full sized rolling pin.
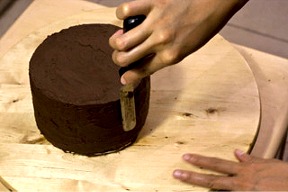
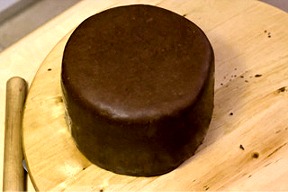
5. Cover the chilled cake with the rolled chocolate plastic. To do, flip the entire piece over, with the plastic attached, centering it with the cake, and gently peel off. If at any time the chocolate plastic becomes too warm and begins to stick, place it as is in the fridge. to harden slightly.

ODETTE SAYS: I tried peeling the chocolate off of the heavy plastic a couple of times before covering the cake just to make sure that the plastic will not break once I put it over the cake.
Smooth the chocolate plastic with the palms of your hands very lightly after covering the cake layers. Refrigerate the cake for about 1/2 hour to set. Serve at room temperature.
ODETTE SAYS: I wanted to achieve an elegant look so I just topped it with a homemade gumpaste rose and a thin ribbon at the bottom as lining.
Cake and photo by odetteganda, Premium Member © Sarah Phillips