

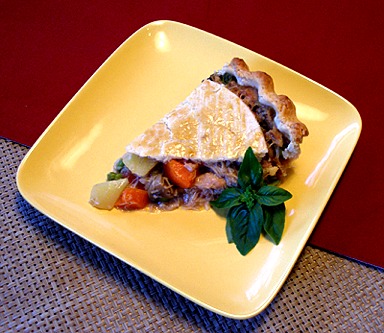
Nothing says comfort food like homemade chicken pot pie. There's frozen chicken pot pie…which CAN taste pretty darn good…and then there's homemade chicken pot pie. It is a whole meal. We developed some innovation baking steps and healthy alternatives with my recipe. Find out how. we also solved the problem with most soggy chicken pot pies. Our recipe can also be made ahead in steps or frozen in its completion and then baked and simply served as a complete meal with a nice salad and a glass of white wine! It's my family's go-to favorite! This pot pie is heaven on a plate!
PIE RECIPE HELP
STEP I: MAKE THE RICH CHICKEN STOCK AND SEPARATE THE CHICKEN MEAT
Rich Chicken Stock and Chicken Meat
Makes approximately 4 cups chicken stock and 2 cups chopped and deboned chicken meat

KELLY SAYS: The first step in making homemade chicken pot pie is making a nice rich chicken stock.
I like to brown the chicken in the oven, before I make the stock. This makes a more flavorful stock than one made with raw chicken. Instead of homemade, you can use canned stock, and the meat of a purchased rotisserie chicken or other cooked chicken, but the results will not be quite as delish. If you do, skip this step and go to Step II.
INGREDIENTS
2 1/2 – 3 pounds of chicken pieces or one whole chicken, cut into quarters
1/2 large onion
1 carrot, peeled and cut in large pieces
1 stalk celery cut in 1/2
1 can chicken stock, if needed
INSTRUCTIONS
1. Preheat oven to 375 degrees F. Spray baking sheet with nonstick cooking spray. Place chicken pies on the prepared baking sheet. Sprinkle chicken pieces with salt and pepper.

KELLY CA SAYS: I like to use dark meat but you may use white meat, if you prefer.
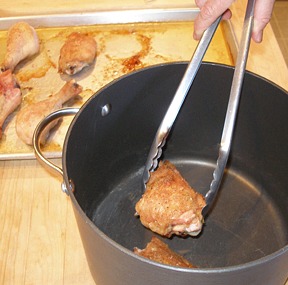
2. Bake the chicken for about 30 minutes, or until skin is nicely browned. Remove chicken pieces from baking sheet and place in a large stock pot.
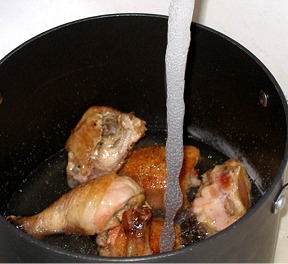
3. Add tap water until it is about 3-inches above chicken pieces
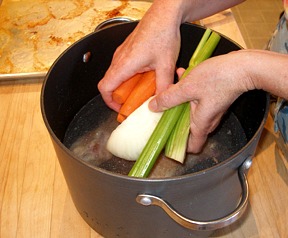
4. Add the onion, carrot and celery to the stock pot.
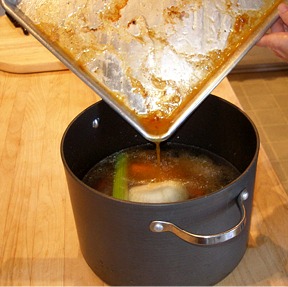
5. Pour the drippings from baking sheet into the stock pot.
KELLY CA SAYS: YES, you are adding a lot of fat to the stock when you pour in the pan drippings, BUT, there is a lot of flavor there too. When the stock is cold, we will skim all the fat from the top anyway, leaving a virtually fat-free chicken stock.
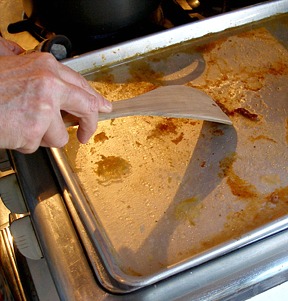
6. Put the baking sheet on stove top and turn burners on high. Add about 1 cup of water to deglaze pan.
KELLY CA SAYS: If you are using a nonstick pan, skip this step; just scrape the browned bits from the pan into the stock pot.

Scrape up browned bits that have adhered to the baking sheet.
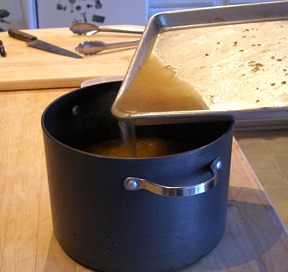
Pour the drippings into the stock pot.
7. Put the stock pot on stove top and simmer, briskly, for about two hours.
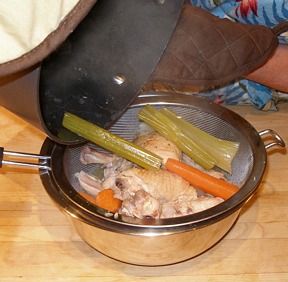
After two hours, strain stock through a fine mesh strainer to use in the Chicken Pot Pie Recipe. You should have about 4 cups. Place stock in the refrigerator overnight.
KELLY SAYS: If you have less than 4 cups stock, add enough canned chicken stock to get the proper measurement.
8. Remove chicken pieces from strainer and set aside to cool. They will be used in the Chicken Pot Pie Recipe. Discard the vegetables, or, you may eat them, if desired.
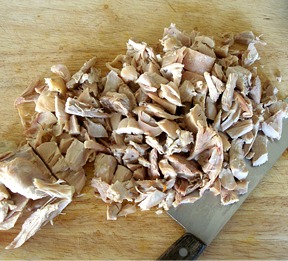
9. When the chicken pieces are cool, remove the meat from the bones. Chop the pieces into large bite-sized pieces and place them in a bowl.
You should have about 2 cups chopped chicken meat. Cover with plastic wrap and refrigerate.
STORAGE
The chicken stock and strained chicken pieces can be made a few days in advance and refrigerated or frozen for up to a month or more. Thaw in refrigerator before using.
STEP II: MAKE THE PIE DOUGH
Kelly's Perfect Food Processor Pie Dough
Makes a 2 crust pie dough
{C}
{C} KELLY CA SAYS: You can use premade pie crust, if desired. If you do, skip to Step III.
INGREDIENTS
1 recipe Kelly's Perfect Food Processor Two-Crust Pie Dough
INSTRUCTIONS
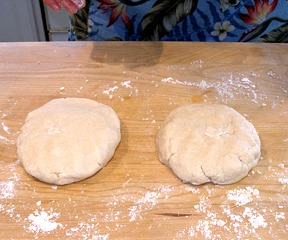
1. After making, separate the dough into two disks, wrap each in plastic wrap and refrigerate for at least 1 hour, and while you make the Chicken Pot Pie Flling, Step III.
KELLY SAYS: It is important that your pie dough is well chilled before you go to roll it out in Step IV.
STORAGE
The pie crust can be made 2 to 3 days in advance and refrigerated or frozen for up to a month. Thaw in refrigerator before use.
STEP III: MAKE THE CHICKEN POT PIE FILLING
KELLY CA SAYS: Chicken pot pie can be a very fat laden, calorie dense affair, because the filling is often thickened with a flour and butter roux. I go out of my way to make the filling very lean, thickening it with a milk and cornstarch slurry, instead. This lessens guilt a little and makes the butter crust seem all the more rich.
INGREDIENTS
2 teaspoons olive oil
3 carrots, cut in 1/2″ chunks
1 stalk celery, finely chopped
1/2 large onion, diced
1 1/2 cups white or crimini mushrooms, cut in 1/2″ chunks
2 cups reserved chicken meat, from Step I
4 cups reserved chicken stock, from Step I
2 medium potatoes, cut in 1/2″ chunks
3/4 cup frozen green peas
1/4 cup milk or soy milk
1 1/2 tablespoons cornstarch
salt and pepper to taste
INSTRUCTIONS
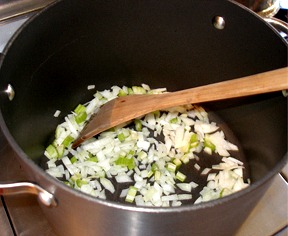
1. Add olive oil to a large saucepan and sauté the chopped onions a celery until slightly softened, about 5 minutes.
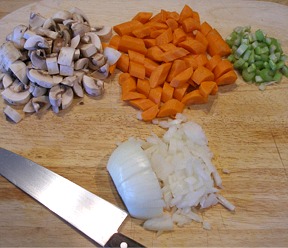
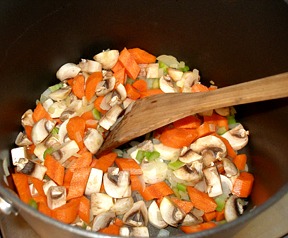
2. After onion and celery are softened, add the carrots and mushrooms to the pan and sauté for about 3 minutes.
3. When you are ready to make your pot pie, remove stock from refrigerator. It will be very thick and gelatinous. You will see that the fat has formed a thick layer on top of the stock.
Remove the layer of fat from the top of the stock with a large spoon.
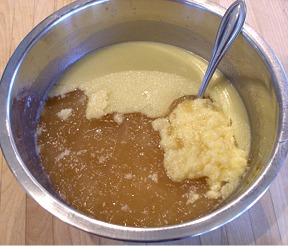
KELLY CA SAYS: You can discard the fat, or you can save it in the refrigerator in an airtight container to make matzo balls. Seriously, it's GREAT for matzo balls!
4. Add defatted chicken stock to a large pot and remove chicken pieces from the refrigerator and stir them into the stock.

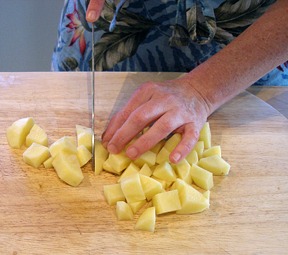
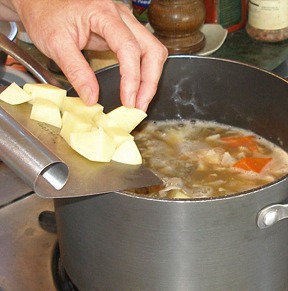
Let the filling simmer, on medium heat, for 30 minutes and then add the chopped potatoes.
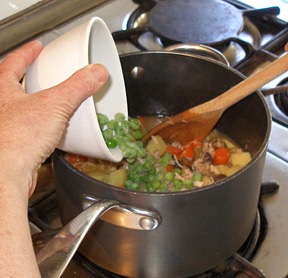
5. Simmer filling for 20 minutes, or until potatoes are beginning to soften. Then, add the frozen peas and stir until combined.
KELLY CA SAYS: You do not want the potatoes to cook until too soft, or they will fall apart as the pie bakes and become mushy.
6. Thicken the filling.
KELLY CA SAYS: Many people use a butter and flour roux to thicken chicken pot pie filling. I like to try to keep it as low fat as possible, so I use a milk and cornstarch slurry.
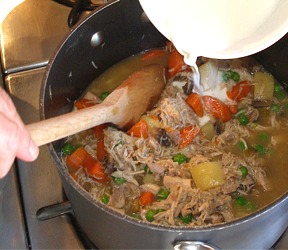
A. Place milk in a small bowl. Add the cornstarch and stir until combined and smooth.
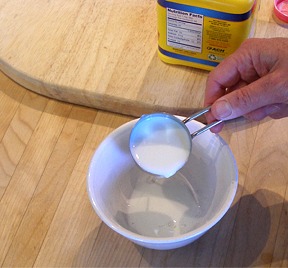
B. Add the milk / cornstarch mixture to the simmering filling, stirring constantly. Stir filling until nicely thickened. You may not need to use the whole amount of thickener.
C. When mixture is thickened, remove from heat and taste the filling. Then, add salt and pepper, to taste.
D. Set aside to cool while you roll out your pie crust, Step IV.
STORAGE
The filling can be made ahead and refrigerated for 3 to 4 days, or frozen for a month or more. Thaw in the refrigerator and cook until thickened and cool, again, before using.
STEP IV: PREPARE THE BOTTOM PIE CRUST
KELLY CA SAY: I prebake the bottom of the pie crust. I like a double crust chicken pot pie, but, many times, the bottom crust of these pies can be very soggy. I developed this recipe to combat this “soggy bottom syndrome”. Blind baking the bottom crust and then painting the cooked crust with an egg wash, helps keep it crisper, longer.
INGREDIENTS
Chilled Perfect Food Processor Pie Dough from Step II
1 egg, beaten; for egg wash
INSTRUCTIONS
1. Position a shelf in the middle of the oven and preheat to 375 degrees F.
2. Remove one disk of dough from refrigerator and roll it out to fit into a 9-inch deep dish pie pan.
Roll until the pie dough is 3-4″ larger than the pan you will be using for your pie (at least 12″ wide, for a 9″ pie). Your dough should be about 1/8″ thick.
KELLY CA SAYS: I like to use a Pyrex ovenproof glass pie pan for baking my pie in. I can easily see if the pie crust is done baking on the bottom so I do not take it from the oven too soon.
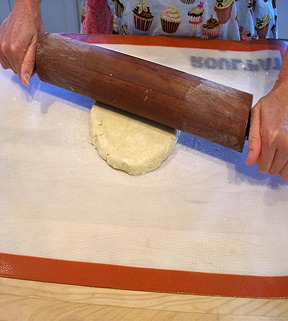
3. Place dough on lightly floured work surface or silpat rolling mat. Flatten dough slightly by hitting it a few times in different spots, with the side of your rolling pin. Otherwise, pat it down with your fingertips.This helps to get you started with your rolling.
KELLY CA SAYS: It is important to add as little flour to the work surface during the rolling process because it toughens the pie crust dough. LIGHTLY flour your rolling pin and work surface or only enough to keep the dough from sticking.
4. A. To start, begin in the center of the dough and roll outward. Stop the rolling pin as it nears 1/4 inch from the edge of the dough; don't roll over the edges as they crack or become too thin. Do not roll backwards; simply lift the rolling pin when done.
B. Lift and rotate the dough by a quarter before resuming again, tossing a light dusting of flour beneath, only if necessary. This is to ensure that it is not sticking to your rolling surface and that is is being evenly rolled. If your dough is cold enough, it should not stick. If your dough sticks, loosen it with a long offset icing spatula, dusting underneath with a small amount of flour.
4. Fit the rolled out pie dough into the bottom of the pie pan.
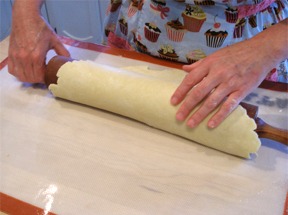
A. To transfer the dough to the pie pan, roll the dough onto the rolling pin. First place a floured rolling pin, centered on the edge away you. Roll towards you and, at the same time, pick up the edge (use a bench scraper or spatula if dough sticks to the countertop) and support the dough as you wrap it around the pin. Be careful not to press it. Keep rolling until all of the dough is rolled onto the pin.
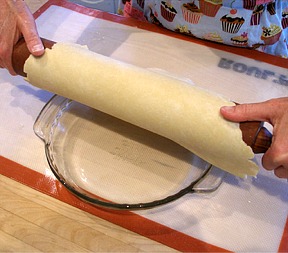
B. Position dough over the pie pan and begin unrolling the dough, starting from one edge, leaving a 2-inch overhang on all sides
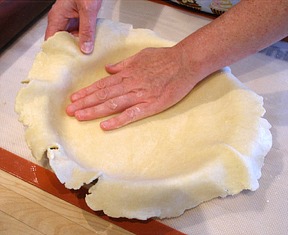
C. When the dough is unrolled, GENTLY easy the dough into place. Lift up the dough edge and ease the dough down into the pan with your other hand. DO NOT stretch the dough because this will make it shrink while baking.
D. Trim the excess dough around the edge of the pie with a sharp knife or with kitchen shears, which I find the easiest to use. Leave about an inch overhang for fluting purposes.
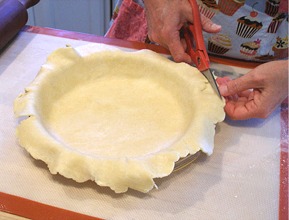
KELLY CA SAYS: I like to use kitchen scissors for this task.
5. Flute the pie crust edges. Cover and place it in the refrigerator.
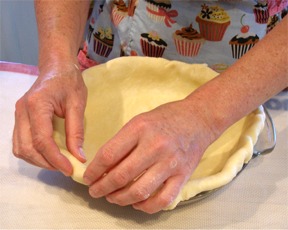
A. Fold the excess dough underneath itself at the pie pan rim and even with the lip making a double layered edge.
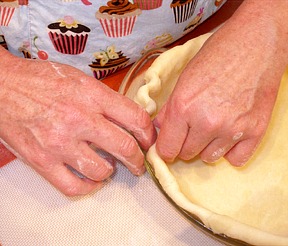
B. To flute, pinch the dough by pressing my index finger in between the thumb and index finger of the other hand.
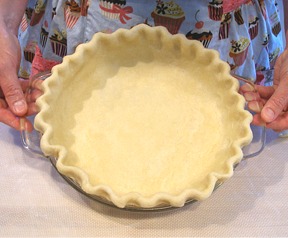
C. The fluting is complete…Pop the crust back into the fridge to chill, for at least an hour.
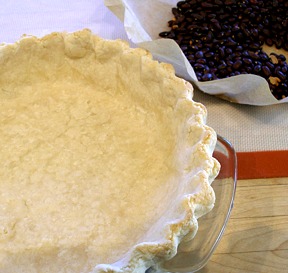
6. Dock the sides and bottom of the crust all over with tines of a fork to prevent puffing. Put a piece of parchment into the pan and fill with beans or rice.
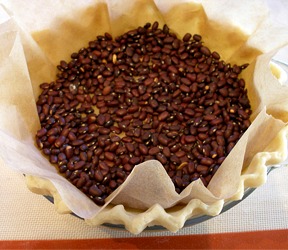
7. Bake crust for about 20 minutes, or until edges begin to brown. Remove crust from oven and remove parchment and beans(set aside beans or rice to use the next time you need to blind bake a pie crust).
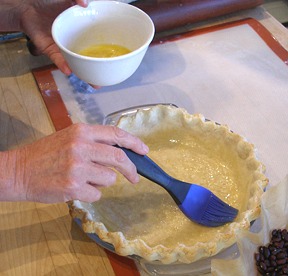
8. Immediately brush bottom and sides of hot crust with beaten egg. This will help create a moisture barrier, so the crust will not get soggy. Set bottom crust aside on a wire cake rack to cool.
STEP V: FILL THE PIE CRUST AND BAKE
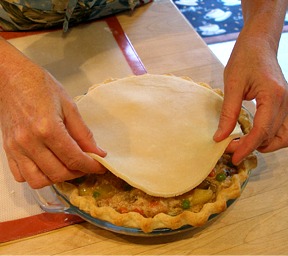
Since you cannot attach a top crust to a bottom crust that is already cooked, I use a circle of crust as a “topper”. This approach allows you to have a deliciously crisp bottom crust and a nice filling to crust ratio.
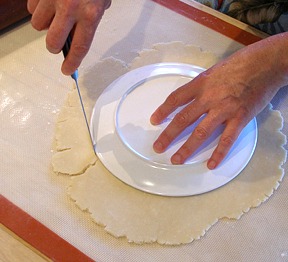
1. Remove the other dough disk from the refrigerator and roll out top crust. Cut a circle of dough that is big enough to almost come to the edge of the bottom crust. An easy way to do this is to find a plate, cardboard cake round or baking pan that is 8-inches or so in diameter, and cut around it. Set aside.
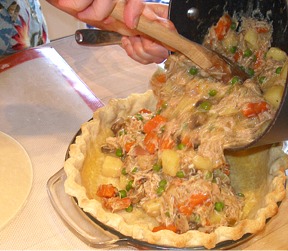
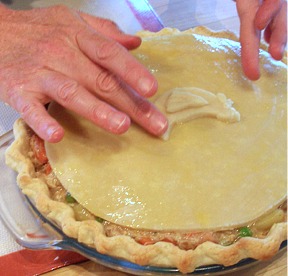
2. Fill the cooled bottom crust with the cooled filling. Be generous but do not overfill. You may have a small amount of filling left over. Refrigerate left-overs and eat for lunch!

3. Center the circle of dough on top of filled pie.
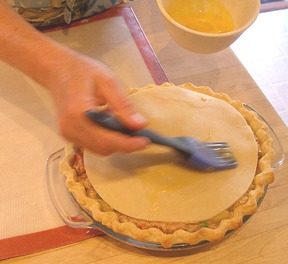
4. Brush the top crust with the egg wash and then set pie aside.
KELLY CA SAYS: I like to make a little chicken to decorate the top of my pot pies. This, of course, it totally optional.
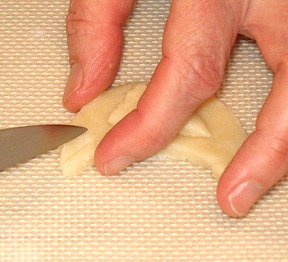
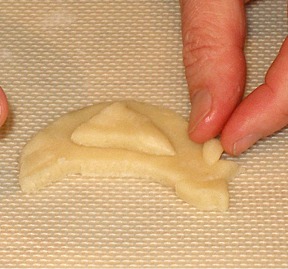
Here are the steps to making a cute little chicken topper.

A. Using the scraps left over from cutting out the top crust, cut out the body of your chicken. I use a small paring knife to do this.

B. Cut out a wing shape and adhere it to the body, using a little water for “glue”.

C. Use the paring knife to press “feathers” into he tail and wing of the chicken. Do not cut all the way through.
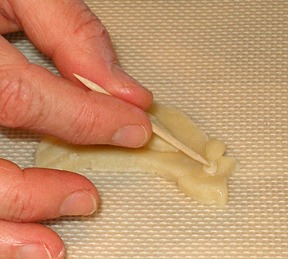
D. Shape a little “wattle” and “comb” from a small balls of dough and adhere them to the chicken's head with a little water.
E. Add a tiny ball of dough for the eye and make a “pupil” by gently pressing the center of the ball with the end of a toothpick.
F. Place your chicken in the center of your pot pie. The egg wash will act as the “glue”, to keep the chicken in place. Do not brush the chicken with egg wash.
5. Cut steam vents into top crust with the paring knife.

KELLY CA SAYS: I usually do 4 sets of two cuts, placed evenly …8 cuts in all.
6. Place pie on a silpat or parchment paper lined baking sheet and place in oven to bake.
7. Bake pie for about 40 minutes, or until top crust is golden brown and filling is bubbling around edges. Remove from oven and let sit on a wire cake rack for about 15 minutes before serving.
KELLY CA SAYS: If the edge of crust begins to brown too much, cover it with a pie shield.
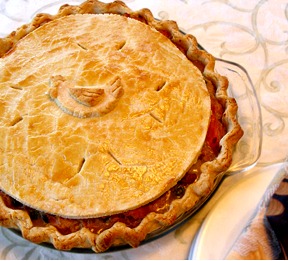
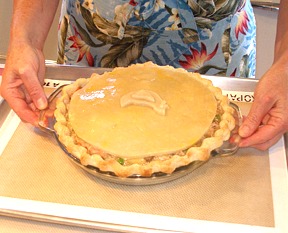
KELLY CA SAYS: Here you can see the nice contrast between the egg-washed crust and the chicken, that was not brushed with egg wash.
Serve with a nice salad and a glass of white wine, this pot pie is heaven on a plate!
STORAGE
Store pie in the refrigerator for about 2 to 3 days, well covered. Reheat in a microwave or a 350 degree F oven.
You can freeze the pie for about a month or more. To reheat, preheat a 350 degrees F oven and place frozen pie directly into oven on a silpat mat or parchment paper to bake for about an hour. Make sure you recut the steam vents in the crust before baking. Check after 1/2 hour. Make sure the pie's filling is bubbling.
VARIATIONS
Chicken pot pie and photo by Kelly CA © Sarah Phillips CraftyBaking.com
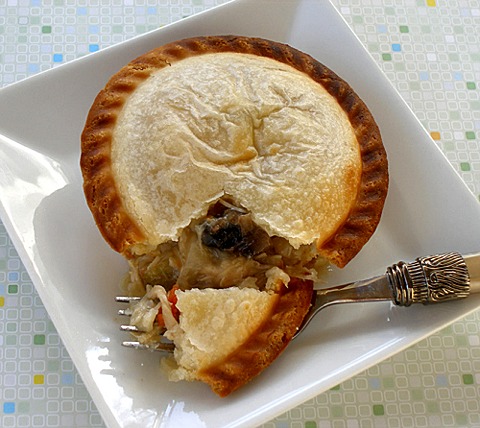
KELLY CA SAYS: I was so excited the first time I saw the new “Personal Pie” machine by Breville.
A dear little elf sent me one as a gift, and I tried it out for the first time last night.
I made chicken pot pie and, let me tell you, it worked like a charm.
My son was enchanted by the whole “little pie” aspect, and hubby said the crust was flaky and delish. I am trying to be “good”, so I just had some filling on a bit of rice, but the fact that they had left-over pies for breakfast tells me that they were really, REALLY good.