
Variations: Almond Caramels; Coconut Caramels; Coffee Caramels; Rum Caramels; Vanilla Caramels; Chocolate Enrobed Caramels
Sweets, often square-shaped, made from a mixture of sugar … and dairy products…” Larousse Gastronomique, 1988
It sounds so simple — to make caramel candy. Crystalline table sugar and liquid (usually water) are boiled to a high temperature on the stove. There are literally hundreds of different caramel recipes, each producing a different variation on the same theme depending upon how to what stage the sugar and water are boiled to and extra ingredients used. For example, soft caramels are a candy made with caramelized sugar, butter and cream; the softness is mainly a result of the cream. The principals of candy making are the same: under high heat, the sugar's crystalline structure breaks down and undergoes several chemical processes called caramelization as it is heated, stirred and cooled where it rearranges itself to produce different recipes. Chewy caramels can be easily formed into lengths and cut into desired shapes. And, remember – do not attempt any sugar making on a humid day unless you have the air conditioning on!!
Desirable quality characteristics for soft, chewy caramels:
Appearance: smooth, glossy, evenly-colored.
Consistency: soft-plastic, neither syrupy nor brittle.
Texture: chewy, not excessively tough, not grainy.
Flavor: mild, caramel-like, not burnt or off-flavor.
This is achieved through ingredients, temperature and agitating or stirring the ingredients at the appropriate time. Here we show you how!
CANDY RECIPE HELP
MelStead, Premium Member, Says: “Dear Sarah, I finally got a chance to make the caramel! The taste is phenomenal! Very smooth & buttery.”
INGREDIENTS
1 cup water, room temperature; tap water is perfect to use
1/2 teaspoon cream of tartar or lemon juice; to prevent crystallization
5 cups pure CANE sugar; use a fresh or new bag of pure cane sugar when making candy recipes; sometimes brown sugar contains impurities that will prevent caramelization from time-to-time
1/4 teaspoon salt SARAH SAYS: You can increase the salt to 1 teaspoon, if desired. I like to use fleur de sel, available at specialty food stores! It's French for “flower of the salt.” provides a very delicate and somewhat earthy flavor.
6 tablespoons unsalted butter, room temperature; of you use salted butter, cut back on the added salt by 1/4 teaspoon
1 cup heavy cream, room temperature
NOTES:
Suggested equipment:
Heavy bottomed 2 – 3 quart saucepan with at least 4 1/2 to 5-inch sides; do not use a nonstick pan
Wooden or Large Heat-Proof Spoon
Heat proof pastry brush and a cup of tap water
Bowl of Cold Ice Water – in case of burns
Measuring Cup & Spoons
8 x 8-inch Glass or Aluminum Baking Pan NOTE: A silicone pan works nicely! (Lightly grease it with butter!)
Aluminum Foil or parchment paper
Soft butter for buttering pan
Cellophane candy wrappers
INSTRUCTIONS
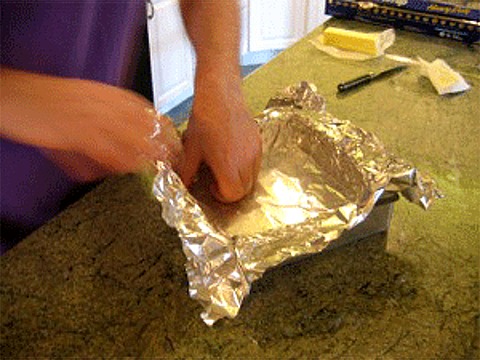
1. Prepare the baking pan:
A. Cut a piece of foil larger than an 8-inch square pan.
SARAH SAYS: I like to use heavy-duty foil because it holds up well.
B. Line a straight-sided, 8-inch square pan with aluminum foil so that the foil extends above the sides of the pan. Generously butter the foil inside the pan. Set aside.
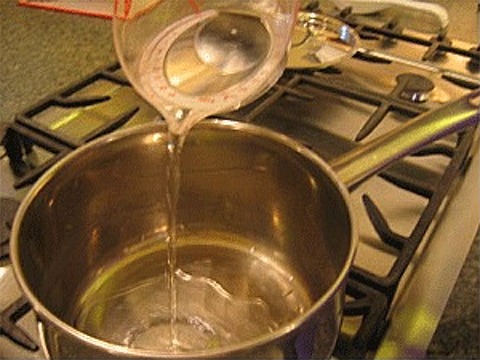
2. Prepare the sugar solution: Add the ingredients in the order suggested.
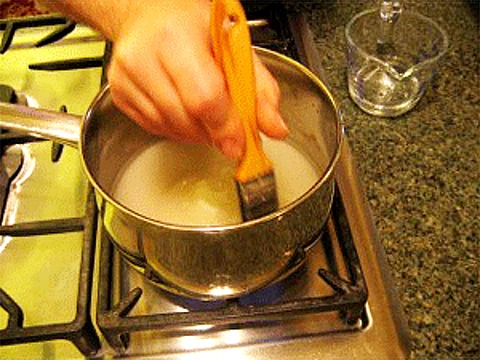
A. Place the pan on a burner, but do not turn on the heat. Pour the water in a heavy-bottomed sauce pan. Dissolve the cream of tartar in it.
B. Slowly pour the sugar dead-center in the middle of the water. Make sure you don't splatter sugar on the side of the pan. Add the salt. If the sugar mounds, gently push down on the mound with a spoon so that all the sugar is moistened.
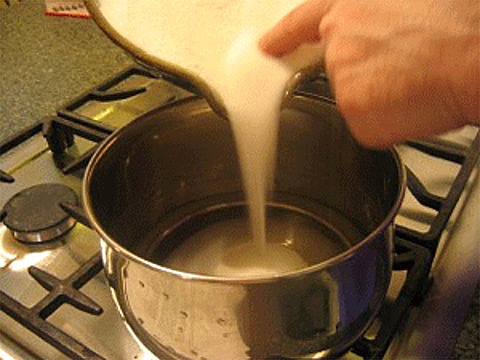
SARAH SAYS: I add the liquid ingredients first and then the sugar; the opposite of what most candy makers suggest. The traditional way leaves some sugar dry spots in the bottom of the pan causing them to burn even though traditional instructions have you draw an “x” in the sugar to moisten it slightly or to stir the two together. Stirring often causes sugar grains to cling to the inside of the pan. If they aren't washed off with a moistened pastry brush before boiling, the loose grains will cause the syrup to crystallize. My way is more convenient. That is, if done carefully (i.e., adding the liquid first followed by sugar), you can skip the initial wiping with the pastry brush, the next Step C, below.
C. Before the mixture boils, if necessary, wash the sides of the pan using a heat proof pastry brush dipped in clean water on the inside walls of the pot above the surface of the syrup. Dip the brush in water every time before washing the side of the pan! This step removes crystals that may have accumulated on the inside of the pot. If allowed to remain, these crystals might cause the caramel to become grainy.
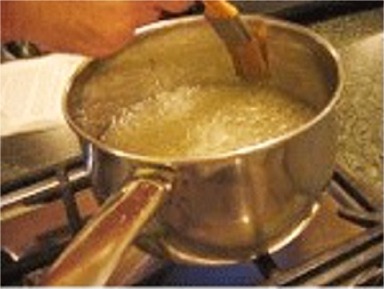
3. Without stirring, bring the pot to a boil, and continue to boil until the syrup caramelizes and takes on a medium amber color with a corresponding rich and sweetly mellow flavor. Take careful note of the color *stages* of the syrup from the start to the end goal.
A. Turn on the stove top's heat to high.
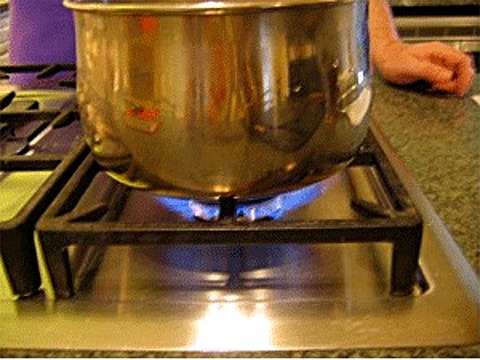
B. The sugar mixture will start to boil.
SARAH SAYS: However, during boiling, occasionally wash the sides of the pan using a heat proof pastry brush dipped in clean water on the inside walls of the pot above the surface of the syrup. Dip the brush in water every time before using!
As the sugar syrup continues to cook, it gets darker as the water in the syrup evaporates and the sugar heats. The concentration of sugar also increases. As the color darkens, the intensity of the caramel flavor increases as accordingly. Eventually, when virtually all of the water has been cooked away, the sugar syrup will begin to darken in color and caramelization sets in.
If allowed to become too dark, an otherwise appealing flavor and aroma will become overbearing and bitter. From clear:
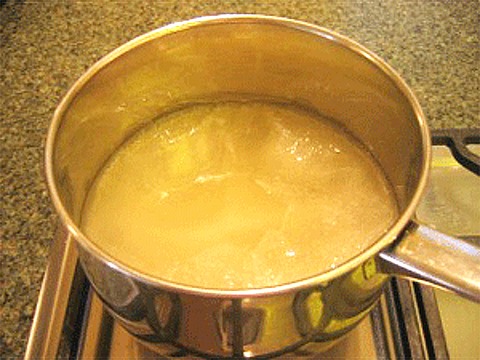
When the sugar water mixture begins to boil it starts out as clear.
If left on the heat, caramel will continue to cook and quickly change from pale amber to dark amber — I counted 15 seconds !! When you reach the desired color and temperature (242 to 248 degrees F), immediately remove the caramel from both the heat and the pot, as it will continue to cook and turn dark brown.
SARAH SAYS: Watch the cooking caramel carefully! If the color of the sugar syrup becomes excessively dark, the caramel will be bitter and can quickly burn. If you undercook it, it won't have enough flavor. Once the caramel burns, you can't fix it.
A. The just melted sugar syrup is called a simple sugar solution. As the sugar solution heats, it begins to take on a slight color.
B. Meanwhile, place the cream in a small saucepan and warm on the stove until it is just at a simmer. Turn off the heat and cover the saucepan to keep the cream warm (you do not want to add cold cream to the hot caramel or it will seize up and harden.)
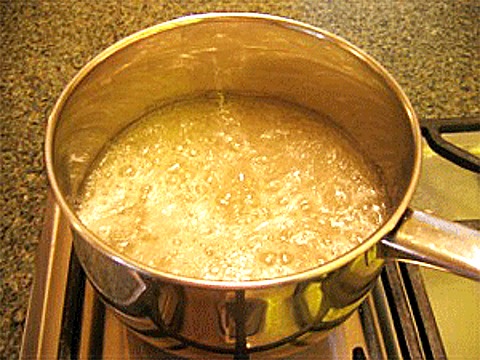
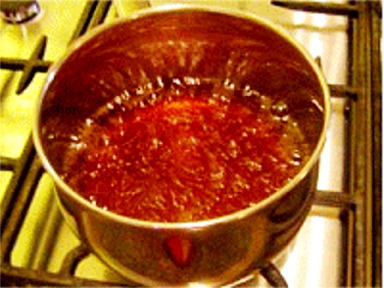
C. As the sugar syrup continues to cook, it gets to a pale amber. At this point, you can lightly swirl the pan to evenly distribute the heat.

D. The last stage is when the syrup takes on a medium amber color (242 to 248 degrees F). Immediately turn off the stove's heat and/or remove the pot from the stove!
4. Add in the additional ingredients – Be careful! The caramel is HOT and it burns! Keep a bowl of ice water nearby in case you get any on your skin. Immediately dip the affected area in ice cold water to stop the burn and seek medical attention!
SARAH SAYS: Carefully remove the Candy Thermometer, if using, and place on a wire cake rack to cool. Do not place in cold water; its a good way to shock and possibly ruin it.
A. Standing back from the pot so as not to get hit by a burst of hot steam, add in the butter all at once and stir. Be careful because the mixture may bubble and rise in the pan…
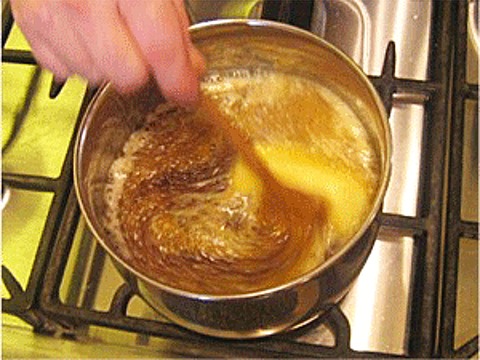
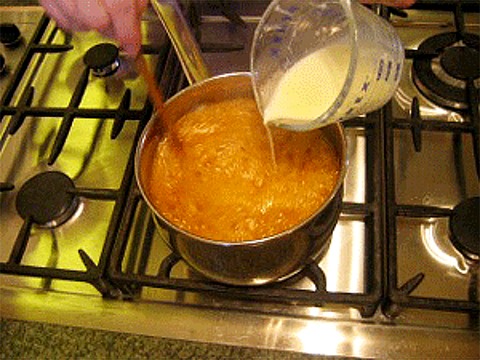
B. …Right after, VERY slowly add in the warmed cream and stir. Stand back while you do and be careful because the mixture will bubble, splatter and possible rise in the pan.
Stir until the mixture is a uniform consistency.
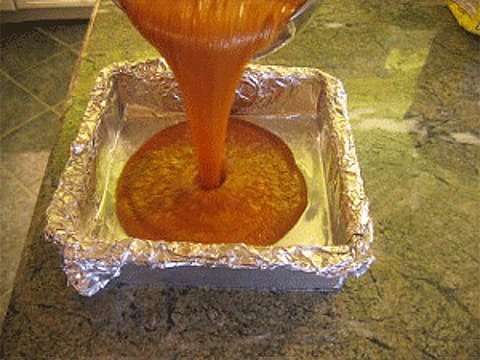
5. Immediately pour the caramel into the prepared 8 x 8-inch pan:
Notice how uniform the mixture is with a nice caramel color.
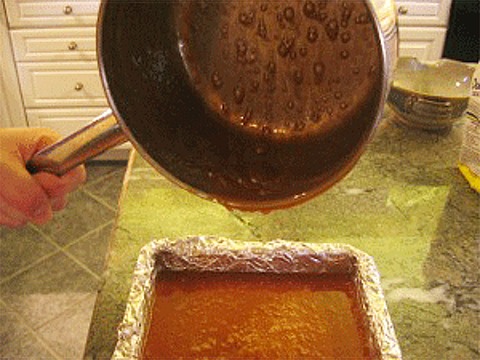
Do not scrape the bottom of the cooking pan even if there is remaining syrup in it. This is so you will not risk getting any burned bits of caramel in the batch and spoiling it. (This pan has a heat-proof handle).
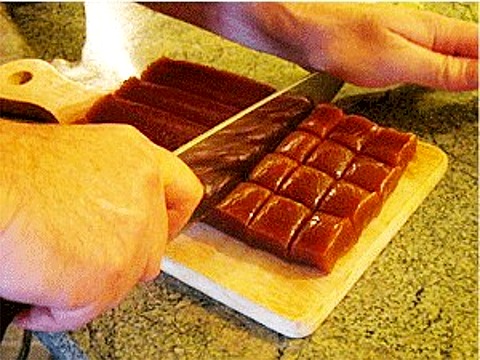
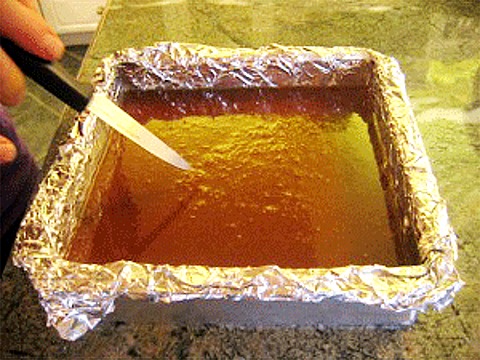
6. Let the caramel set and cut into individual squares:
A. Allow to the caramel to set at room temperature. To test, poke the surface with the tip of a sharp knife or toothpick. The caramel should give be firm, but not hard.
SARAH SAYS: DO NOT place the caramel in the refrigerator to speed the setting process! It gets sticky! Room temperature is best!
B. When set, remove the caramel (with the foil) from the pan in one piece, and gently peel off the foil. The finished caramel is quite flexible and easy to cut.
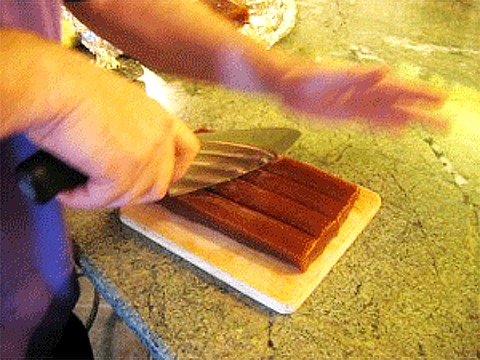
Using a sharp buttered knife, cut the caramel slab into 1-inch squares.
To do:
First, cut the 8- x 8-inch square in half. To cut, place your hand on the top of the knife and press straight down to cut.

Set aside one half. Slice the other half in strips, 1-inch apart.

Cut the strips cross-wise, 1-inch apart. The result is 32, 1-inch squares. Repeat with the other section. The total result will be 64, 1-inch squares.
7. Wrap each caramel square in a candy wrapper. Wax paper works, too, but it has a tendency to unravel unless taped or twisted at the ends. Aluminum foil is to be avoided, since it sticks to the caramel and is really hard to remove. If left unwrapped, the surface dries out and takes on a gummy texture.
SARAH SAYS: Cellophane type candy wrappers are the way to go. They can be purchased from candy supply stores. Confectionary Twisting Wax Paper works well, too.
NOTE: To clean the pot: For a large pot, soak it in hot soapy water, and do the same for the utensils. When the caramel dissolves (you may have to periodically add more hot water), you can clean it. If it doesn't, place on stovetop, filled with water (NOT SOAPY WATER) and bring to a gentle boil for 5 to 10 minutes to loosen the caramel.
VARIATIONS
Almond caramels: Stir in 1/2 teaspoon almond extract and 1/2 cup sliced almonds (optional) before pouring the caramel into the pan or the molds.
Coconut caramels: Reduce the amount of cream to 1/2 cup. Add 1/2 cup unsweetened coconut milk with the remaining cream.
Coffee caramels: Warm the cream and add 1 tablespoon instant espresso powder to it. Stir until it completely dissolves, then add the coffee-flavored cream with the sugar and corn syrup.
Rum caramels: Stir in 1 tablespoon rum extract before pouring the hot caramel into the pan or molds.
Vanilla caramels: Stir in 1 tablespoon vanilla extract before pouring the hot caramel into the pan or molds.
Chocolate enrobed caramels: Let the cut caramels firm up for an hour, uncovered, in the refrigerator. Enrobe in tempered chocolate Then, sprinkle the top with some grains of sea salt or press in some culinary lavender before the chocolate sets.
STORAGE
For long-term storage of the uncut block of caramel, remove from the foil and wrap in wax paper and then foil. Avoid pressing aluminum foil to the surface of the caramels since it sticks and is really hard to remove. Cut caramels should be wrapped, as well.
Store all caramel for 1 1/2 to 2 weeks airtight at room temperature, preferably in a dry place.
QUESTIONS & ANSWERS
Question: I made a batch of caramels and poured the mixture into a buttered pan. When I tried to cut them into squares, I found the task exceedingly difficult. Should I have cut them before they were cooled or after?
SARAH SAYS: Cut them after they have cooled and set, Step #6. If the recipe was correct, and then measured and cooked correctly, these should be easy to cut. Put another way, if they are too hard to cut, then something is wrong.
Question: The caramels I made are too hard to bite into and they crack. Why is this happening and is there anything I can use them for?
SARAH SAYS: Make sure that you carefully measure the liquid in the recipe. Hard caramel is yummy in it's own right!
Question: Why would caramels crystallize a week or so after they were made? They were OK when they were first made. What is causing this?
SARAH SAYS: Your caramel crystallizes because of the way in which it's being stored. They have to be stored airtight in a cool, dry place. The crystallization tells me the sugar crystals in the caramel are becoming damp from humidity from the refrigerator or being stored at room temperature and not in an airtight container. The sugar in caramels attracts water and it's certainly doing its job!!
Question: I live in Phoenix, Arizona where the altitude is 1,117 feet. To what degree would I cook my caramel?
SARAH SAYS: This altitude is not high enough to be of any concern. In any case, cook the syrup until the color is right, and don't worry about the temperature.
Question: I made a batch of caramels and the whole thing crystallized. Is there any way to reheat this pan of crystal to try and save it??
SARAH SAYS: No. Unfortunately, it's ruined. Next time, resist all temptation to stir!
Question: My caramels are too soft and don't hold their shape. Can I save them?
SARAH SAYS: Yes. Place the mixture back on the heat and reboil.
Question: I've read that recipes for cooked candy, such as caramels, should not be doubled as larger batches will supposedly not set, even when cooked to the proper temperature. Why is this?
SARAH SAYS: This is a myth, and simply not true. Almost any recipe can be doubled, tripled, quadrupled, etc., and this one is no exception. In fact, commercial candy makers routinely make successful recipes just like this one, and they work in quantities hundreds of times greater than those here. However, if you more than double the recipe, it's wise to weigh the ingredients because it's more accurate.
One thing to note, however, doubling the amount of water only doubles the cooking time, which is unnecessary. The water is basically cooked off anyway, right? So if you do want to double the recipe, it's only necessary to increase the water to, say, 1 1/2 cups. Use just enough water to ensure that the starting sugar/water mixture is not too thick and sandy to begin with. Also, be sure to increase the size of both the pan that you cook the syrup in and the pan that you mold the caramel in!!
Note: Remember your math. It's an 8 X 16-inch pan (if such a thing exists), and *NOT* a 16 x 16 pan that is double the size of an 8 x 8 pan. Think of an 8 x 16 pan as two 8 x 8 pans side-by-side. In other words, do not get a pan that is double the size in both width *and* length. A 16 X 16 inch pan is *four* times the size of an 8 X 8! Best thing to do: Use two 8 x 8 pans and carefully pour half the finished syrup in one and half in the other.