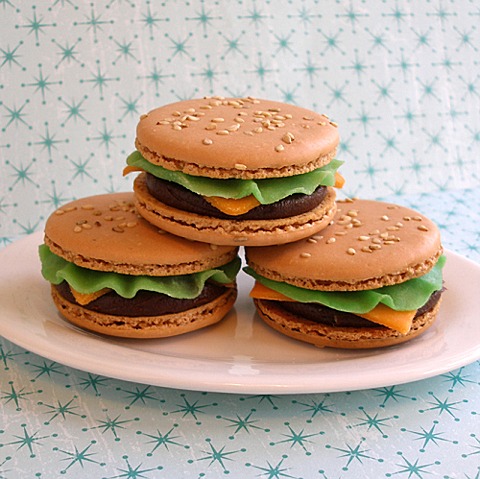
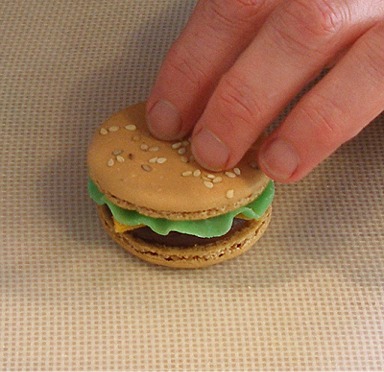
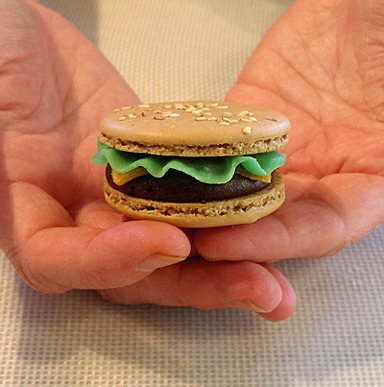
These cute little “Cheeseburger” macarons make a great treat for a children's party or a barbecue.
They really DO look like little tiny cheeseburgers, plus, they are delicious, to boot!
I use some fondant/gumpaste tools to make these cookies. All of the items needed can be found in the Wilton “Gumpaste Flowers” kit, that can be purchased online.
These are actually gluten-free (gluten free).
COOKIE RECIPE HELP
You will need:
1 recipe French Macarons: see notes under STEP I of this tutorial
sesame seeds
1 recipe chocolate ganache
1 8 ounce (1/2 pound) Marzipan; homemade or store bought
brown gel food color
yellow gel food color
orange gel food color
non-stick fondant roller
1 1/2″ square cookie cutter
1 1/2″ round cookie cutter
1 gumpaste modeling stick
Leaf veiner(optional)
gumpaste forming foam square
STEP I: PREPARE THE MACARONS
1. Follow the recipe steps for making French Macarons
STEP I: PREPARE THE EGG WHITES
STEP II: PREPARE THE BAKING PAN
STEP III: COMBINE THE POWDERED SUGAR AND ALMOND FLOUR
STEP IV, #1 – 5: BEAT THE EGG WHITES AND FOLD IN THE ALMOND FLOUR MIXTURE.
2. CONTINUE HERE WITH THE FRENCH MACARON RECIPE, except:
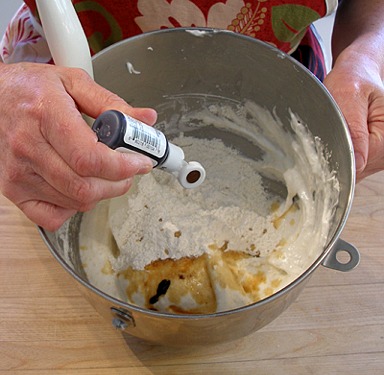
STEP IV, #6: add two-three drops of brown gel food coloring, along with the vanilla extract.
KELLY SAYS: You want the color to be a pale tan, the color will look a little darker after it is baked, so be careful not to add too much.
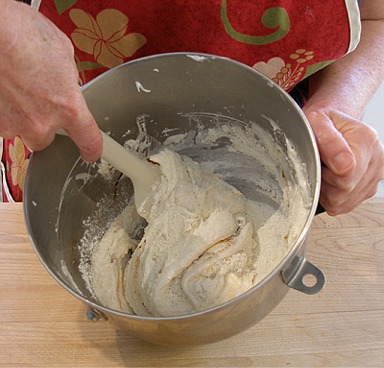
STEP IV, #7: Carefully fold the batter till it falls off the spatula like “magma”. This is the classic description in macaron recipes. It is also hard to imagine what “magma” looks like……the batter should flow slowly in a thick, even ribbon, when you hold up the spatula. You may also take a small spoonful and place it on a plate. If the peak dissolves, the batter is ready to be baked.
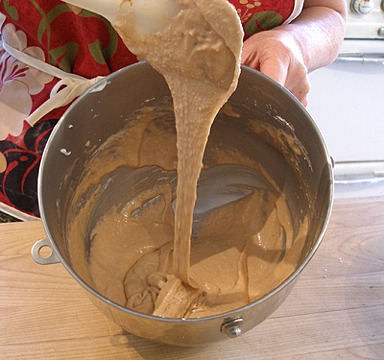
SARAH SAYS: Magma is not too liquidy, nor too stiff. Lift the batter with your fingertip, any peak formed should fall into the batter and quickly dissolve.
STEP II: PIPE THE MACARON BATTER AND LET DRY FOR ONE TO TWO HOURS
1. Fit a pastry bag with a 1/2-inch plain, round tip (such as Ateco #806). And, fill the pastry bag no more than half full with the macaron batter.
Pipe the batter into the marked circles onto the prepared baking sheets, starting next to the edge of the circle and spiraling into the center.
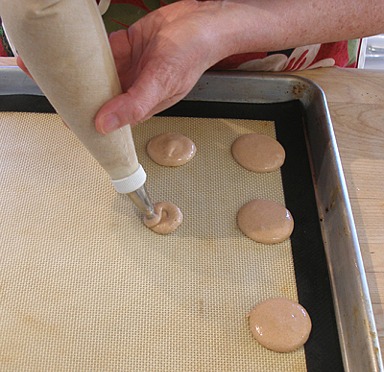
2. Repeat until all of the batter has been piped. Tap the underside of the baking sheet to remove air bubbles.
SARAH SAYS: If the cookies form peaks on their tops after piping, flatten them with a wet fingertip.
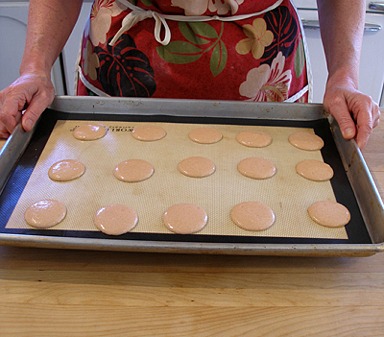
3. Sprinkle the top of the macarons with sesame seeds, and then set the macarons aside to dry for 1-2 hours.
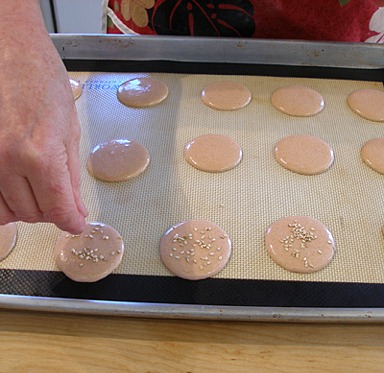
SARAH SAYS: Let the piped macaron batter dry at room temperature for 1 to 2 hours, to allow skins to form on top and so the feet can form on the bottom of the cookie when baked. This is very important.
Letting the batter rest before baking and leaving the oven door slightly ajar during baking helps prevent the tops of the macarons from being too soft or fragile. I believe the feet are formed because, as you let the batter sit, the edges of the piped cookie batter circle dry out. So, when you bake the cookie, the dried edges form the pretty feet and the more liquidy part of the inner batter puffs up to form the cookie part. A thin sugar shell dries on top of the batter, allowing a thin sugar skin to form on top, stretching and helping keep the macaron flat and shiny on top as it bakes. So, resting the batter is essential. I think the whole making of a macaron is an exercise in food architecture and engineering!
STEP III: BAKE THE MACARONS
1. Meanwhile, position an oven shelf in the middle of the oven. Preheat the oven to 325 degrees F (160C) for 30 minutes.
2. Bake one sheet at a time, for 10 to 11 minutes. Use a wooden spoon to keep the oven door slightly ajar.
Check at 30 second intervals because these cookies overbake very quickly; do not open the oven door to check, but rather peak through the opening in the oven door.
Bake until macaroons are slightly firm and can be gently lifted off parchment (bottoms will be dry).
SARAH SAYS: Letting the batter rest before baking and leaving the oven door slightly ajar during baking helps prevent the tops of the macarons from being too soft or fragile.
3. Let cool on sheets 5 minutes. Remove macarons from oven and transfer parchment to a cooling rack. When cool, slide a metal offset spatula underneath the macaron to remove from parchment.
4. Pair macarons of similar size, matching them to find the best fit. Set aside each pair.
STEP IV: MAKE THE MARZIPAN “CHEESE” SQUARES AND “LETTUCE”
Make the marzipan cheese squares:
1. Open the tube of marzipan and knead it to soften it. A silpat mat is the perfect surface to knead the marzipan on.
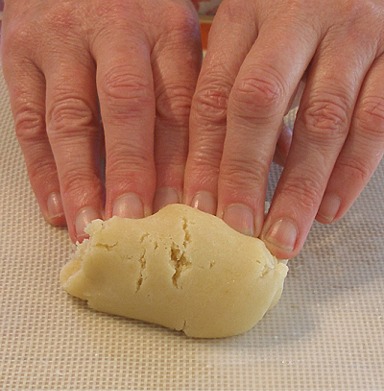
2. Cut the marzipan in two equal portions of 4-ounces each.
3. Take one portion and add a little orange gel coloring, with a toothpick.
Knead the food color in, till the color is uniform.
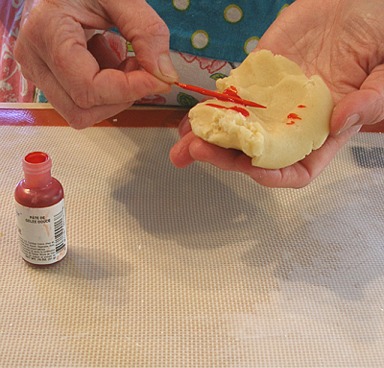
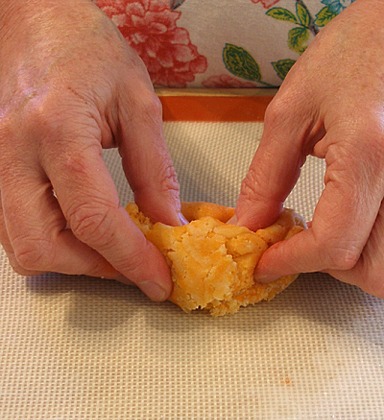
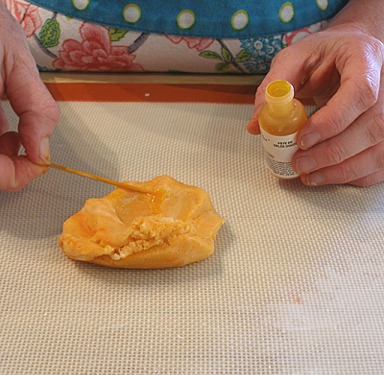
NOTE: I found that a tiny bit of yellow food coloring was needed as well, to get an accurate “cheese” color.
Knead the yellow in, till the color is uniform.
4. On a powdered sugar dusted silpat mat, roll out a portion of the marzipan, with a fondant roller, till it is very thin.
NOTE: It is easier to roll out a small piece of marzipan at a time. While you are working, make sure to place the rest of the marzipan in a zip-top bag, so it does not dry out.
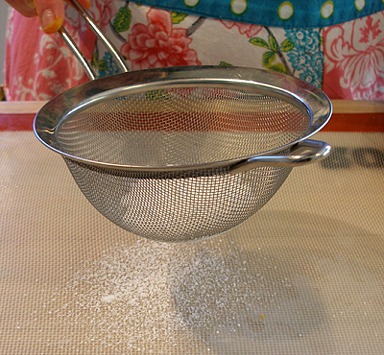
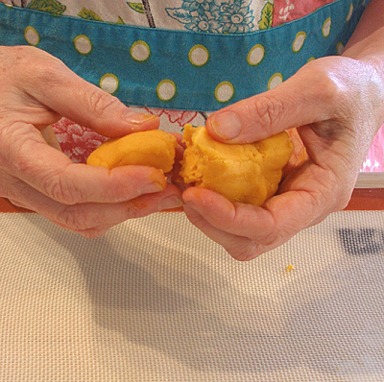
NOTE: Be sure to dust the top of the marzipan with powdered sugar, so the roller does not stick to it.
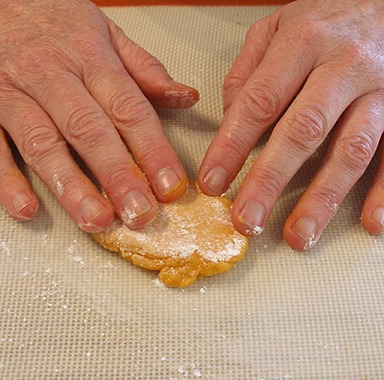
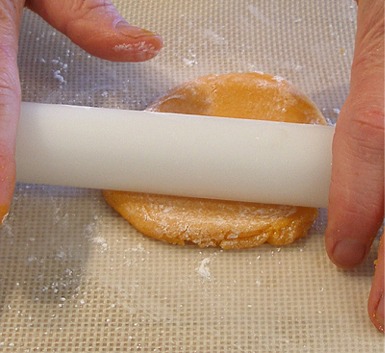
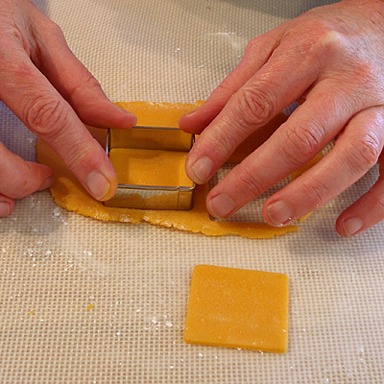
5. Cut out the cheese shapes.
When I measured the macarons, I determined that the 1 1/2-inch square cutter was the perfect size to use.
You want the “cheese” to peak out from the sides of your “burger”. If your macarons are larger, or smaller, you may need to use a different size square cutter.
If you do not have square cutters, you can make a cardboard template and cut the squares out with a paring knife.
If a few of your macarons are larger than most (it is difficult to make them all EXACTLY the same size), you can roll the “cheese” a little thinner, after it is cut, to make it the correct size.
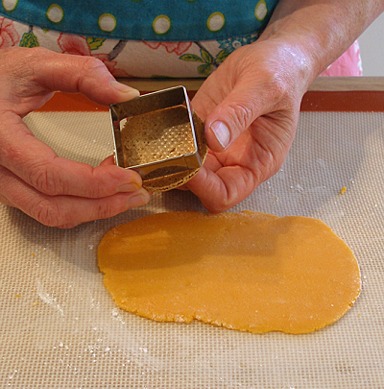
Cut the squares out, and set them aside on your silpat mat.
Continue cutting and rolling till you have enough squares for your cookies.
Make the marzipan lettuce:
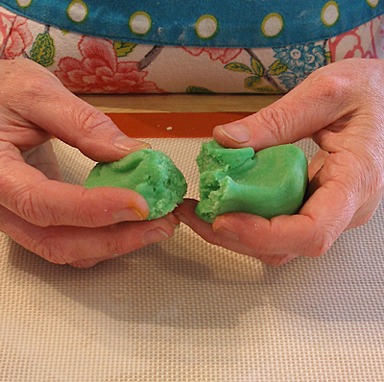
1. Take the other half of the marzipan and color it lettuce green.
Start slowly with the food coloring, so you do not make it too dark.
When the coloring is kneaded in, and uniform, break off a section, and roll it out.
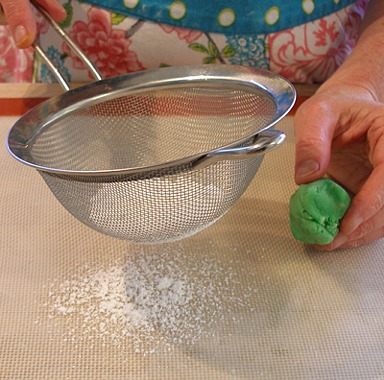
2. On a powdered sugar dusted silpat mat, roll out a portion of the marzipan, with a fondant roller, till it is very thin.
Be sure to dust the top of the marzipan with powdered sugar, so the roller does not stick to it.
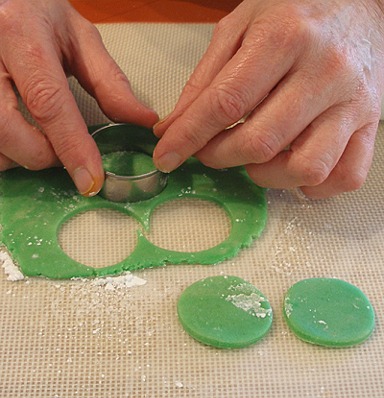
3. Cut out as many circles as you can from the rolled out marzipan.
4. Take each circle and place it on the leaf veiner. Roll over the circle, pressing gently, and turning the veiner so the circle shape is more or less maintained.
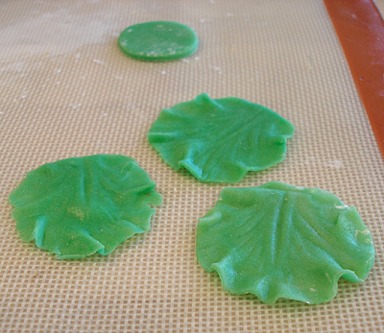
You are striving for a leaf of iceberg lettuce shape.
You want the leaf to be just large enough to peak out of the edges of the cookie.
If you do not have a leaf veiner, you can simply roll the circle thinner and continue to the next step.
Most of the veins will be covered by the “bun” so it is not essential that you use a leaf veiner, but I found it looks more realistic if you do.
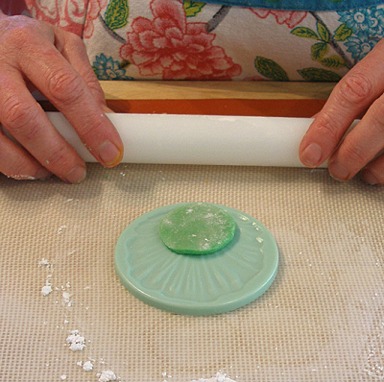
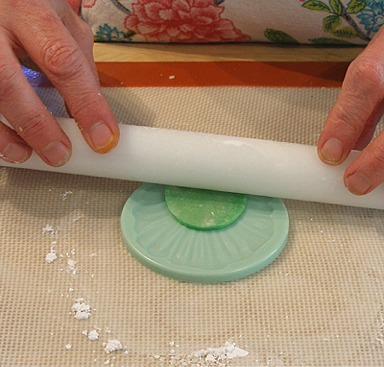
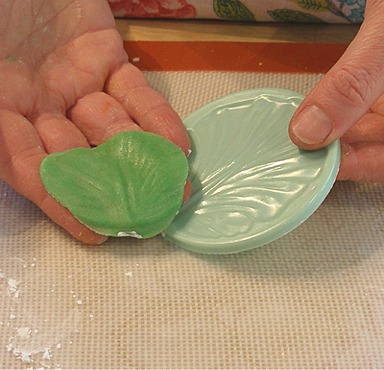
5. Take the “lettuce” leaf, textured side up, and place it on the foam square.
Using the modeling stick, roll around the edges of the leaf to make it thinner along the edge.
This will make the leaf curl and ruffle, as you roll.
KELLY SAYS: Please excuse my food color stained fingernails!
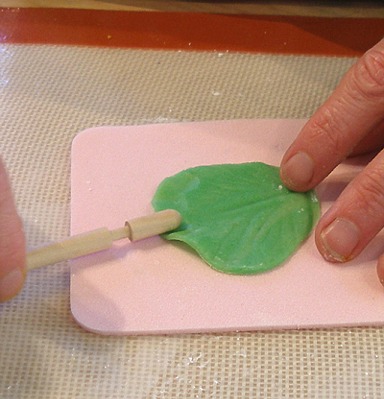
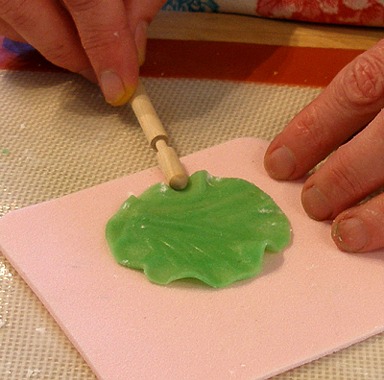
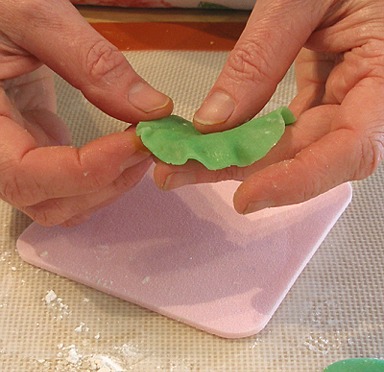
6. When the edge is curled to your liking, pick up the leaf and exaggerate the curls a little by gently pinching them in a few places.
Set the formed leaves aside, and continue making leaves with the rest of the marzipan.
STEP V: MAKE THE CHOCOLATE GANACHE FILLING
CHOCOLATE GANACHE
INGREDIENTS
10 ounces chopped chocolate, or chocolate chips
2/3 cup heavy cream
INSTRUCTIONS
1. Place chopped chocolate in a medium size bowl.
Heat 2/3 cup cream in the microwave, or in a pan, until it reaches a gentle boil.
Pour hot cream oven chocolate, and gently shake bowl to cover the chocolate with the cream.
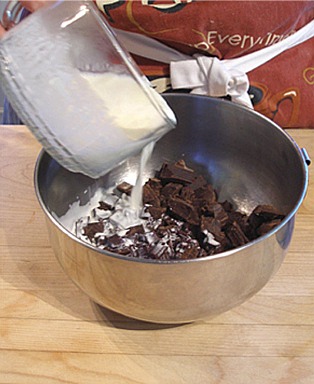
2. Stir the chocolate mixture, with a whisk, in one direction, until the chocolate is fully melted and smooth.
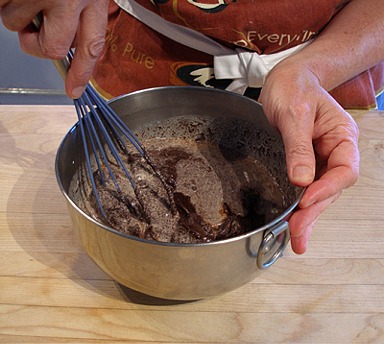
3. Set aside to cool, stirring occasionally, until the ganache is firm enough to pipe.
NOTE: Ganache can be stored for two days at room temperature, covered with the piece of plastic wrap pressed on its surface. After that, it must be refrigerated.
If your ganache is too firm, place on the top of a double boiler of previously simmering water, and let sit a few minutes. Stir gently until softened or let sit as room temperature for a couple of hours until softened. DO NOT beat, again.
STEP VI: ASSEMBLE THE CHEESEBURGER MACS
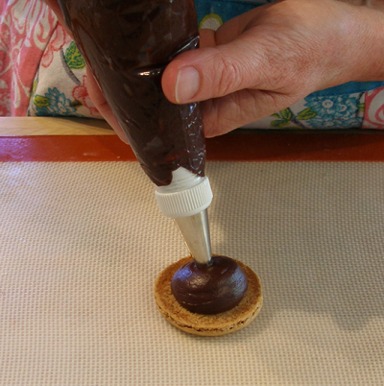
1. When the ganache has cooled to piping consistency, place it in a piping bag with a medium sized plain tip.
2. Have your macarons paired by size, and ready to fill.
3. Fill macarons by piping a generous mound of ganache in the center of one cookie.
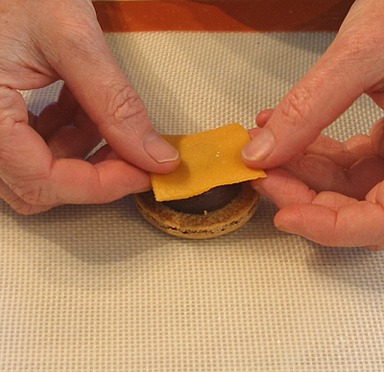
4. Take one piece of marzipan “cheese” and center it on the cookie.
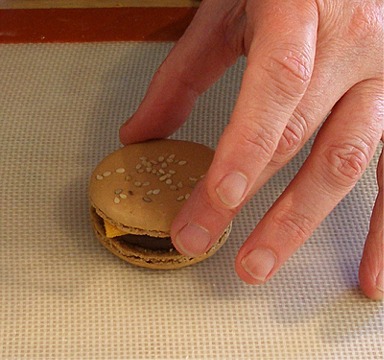
5. Take the second macaron and gently press on the “cheese” to evenly spread the ganache.
You do not want to make the ganache flow over the side of the cookie.
6. Remove the top macaron and then pipe a small amount of ganache in the center of the “cheese” this will act as a glue, adhering the “lettuce” to the “cheese”.
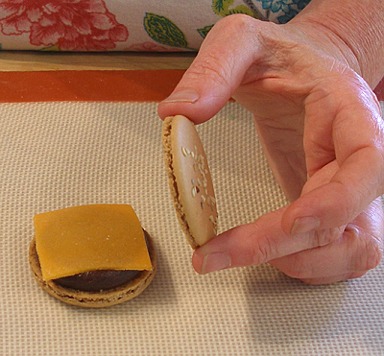
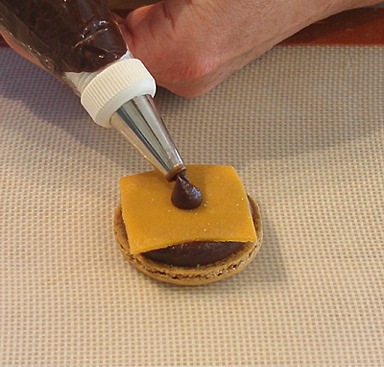
7. Take on of the “lettuce” leaves and center it on the “cheese”.
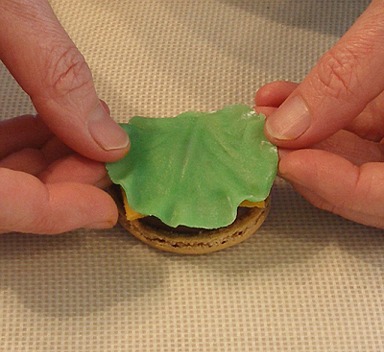
8. Pipe a small amount of ganache in the center of the “lettuce” leaf. This will adhere the top macaron to the “lettuce”.
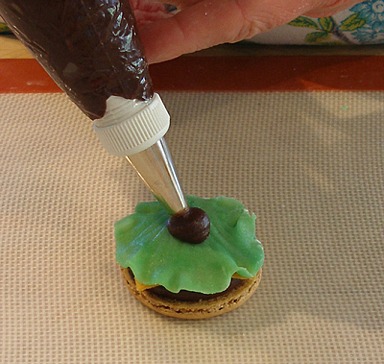
9. Place the top of the macaron on top of the “lettuce”, pressing gently, to make sure it is securely “glued” in place.
STORAGE
Best eaten right away; they get soggy as filled macarons sit.
Store filled in an airtight container for up to 3 to 5 days, or freeze. If you freeze them, defrost them in the unopened container, to avoid condensation which will make the macarons soggy.


