Variation: Gluten-Free (Gluten Free) Carrot Stix – Rice Krispies Treats Tweaked

Kids LOVE Rice Krispies Treats! They love them even more when they are dressed up with a sweet candy coating, and put on a stick.
COOKIE RECIPE HELP
KELLY SAYS: “I made these for my son's end of the year picnic. It was raining on the day of the picnic, so I was holding the umbrella over him while he handed them out. He was swarmed, and they disappeared immediately.
After that, all I could hear was 'YUM'!”
INGREDIENTS
1 recipe Rice Krispies Treats
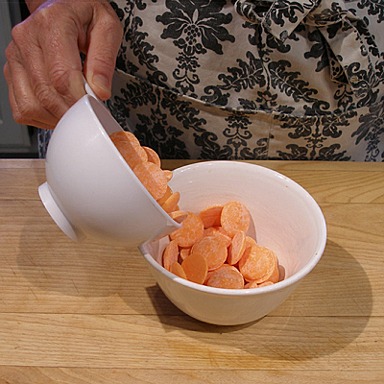
2 bags orange Wilton Candy Melts
1 bag green Wilton Candy Melts
Shortening or Paramount Crystals (to make the melts more fluid)
15-16 paper lollipop sticks
Equipment:
9- x 13-inch baking pan
Carrot-shaped cookie cutter
Two food-safe squeeze bottles with fine tips.
STEP I: MAKE THE RICE KRISPIES TREATS, TWEAKED
RICE KRISPIES TREATS, TWEAKED / recipe alone
INGREDIENTS
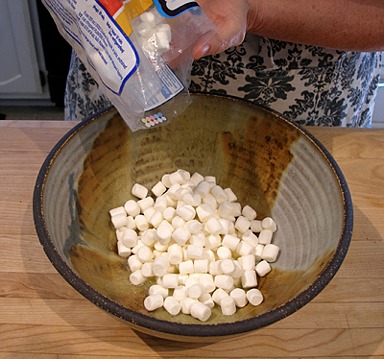
10 ounces marshmallows, mini or regular size
3 tablespoons unsalted butter
1 teaspoon vanilla extract
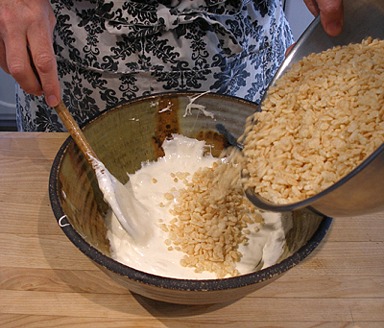
6 cups Rice Krispies Brand Cereal (whole)
INSTRUCTIONS
STEP I: MAKE THE RICE KRISPIES TREATS
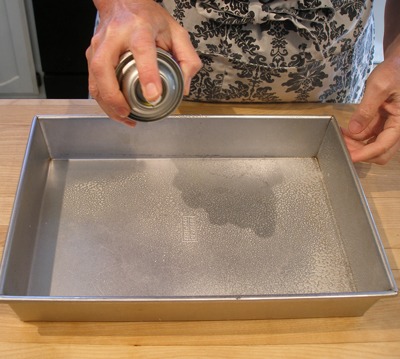
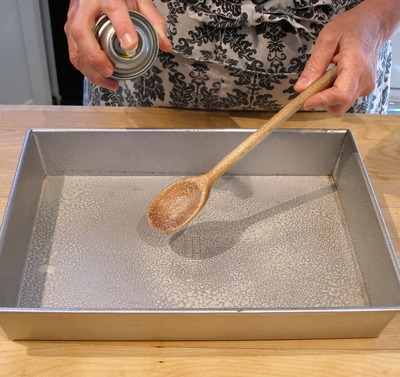
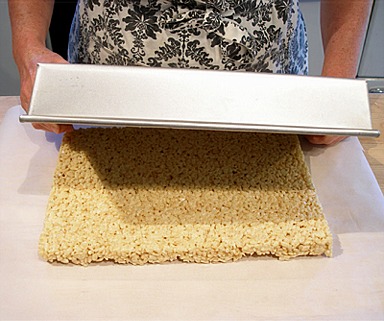
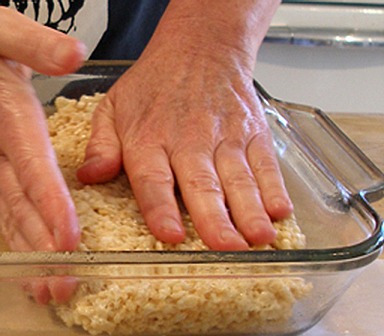
1. Spray a 13- x 9- x 2-inch pan with cooking spray. Spray a large wooden mixing spoon with vegetable oil. Set aside.
2. Place marshmallows in a large microwave safe bowl. Cut butter into tablespoon size pieces and add.
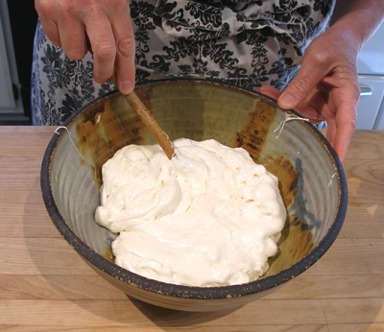
Microwave the mixture on HIGH for 2 minutes. Stir mixture. Microwave an additional 30 seconds to 1 minute on HIGH, if needed.
Stir until smooth. (Microwave cooking times may vary.)
NOTE: Alternatively, on the stovetop, in a large heavy-bottomed saucepan melt butter over low heat.
Add marshmallows and cook under low heat, stirring continuously until completely melted. Remove from heat.
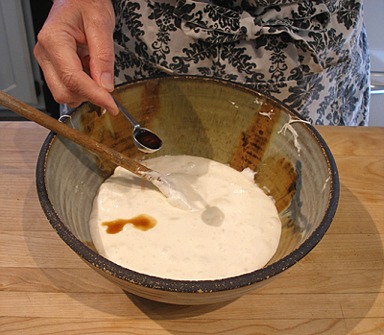
3. Add the vanilla and stir to combine.
4. Add the Rice Krispies to the bowl and stir until well combined.
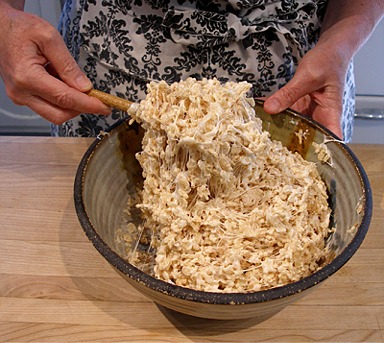
5. Spoon the mixture into the prepared pan, spread evenly.
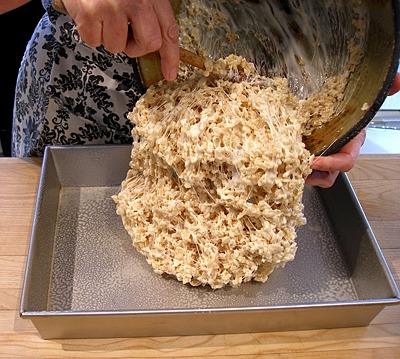
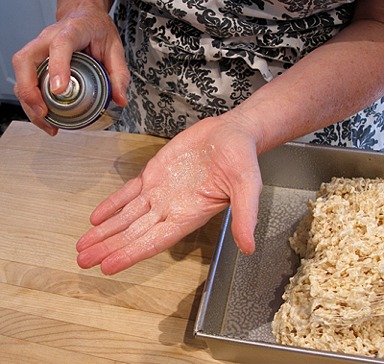
6. Then, spray your hands with non-stick spray and compress the mixture with your hands.
NOTE: Since you are going to cut shapes out, it is very important that the mixture is really compressed, so the shapes will hold together when cut.
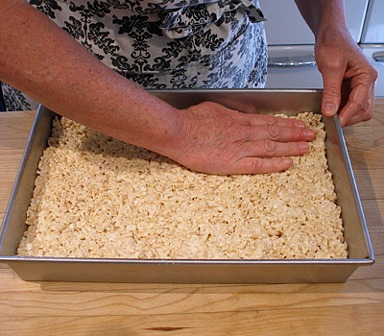
7. Set pan aside for about 20 minutes so the mixture can cool and set.
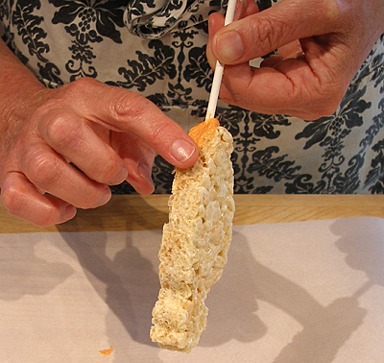
STEP II: CUT OUT THE CARROT STIXS
1. Put a piece of parchment paper on your work surface and release the cooled Rice Krispies Treats mixture from the pan.
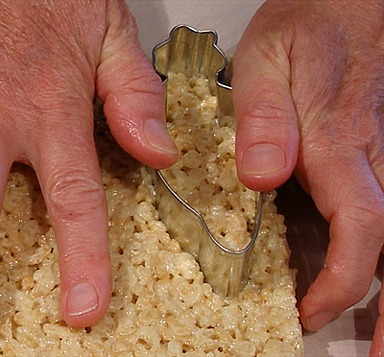
2. Spray the carrot cookie cutter with non-stick spray.
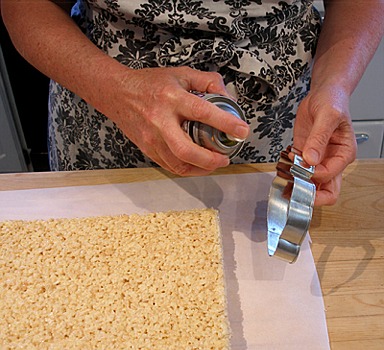
3. Then, cut out the carrot shapes, leaving as little scrap as possible. You should be able to cut out at least 11 on the first go round.
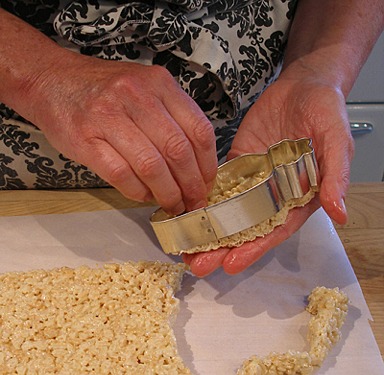
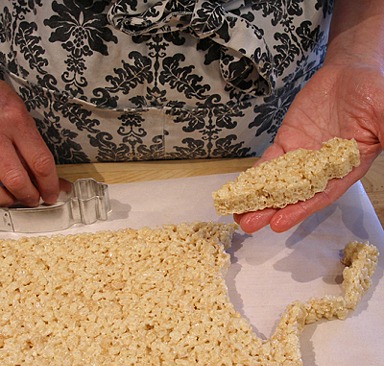
4. When you are done cutting out as many carrots as you can, place the scraps back in the bowl and heat in the microwave for about 30 seconds, or until rewarmed.
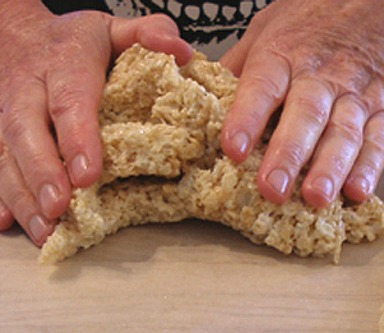
Place scraps back in the pan, and, using only part of the pan, compress the mixture to the same thickness as the first batch.
5. Let cool, then cut out more carrots.
The scraps you get from the second batch are best eaten as is…..Chef's Treat.
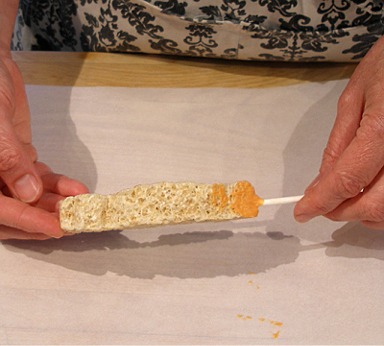
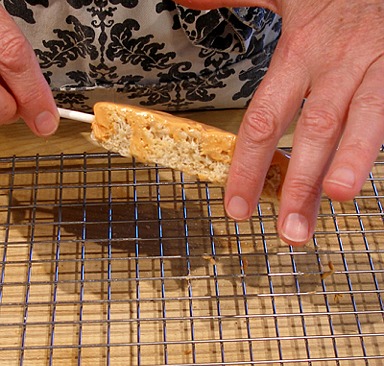
STEP II: PLACE THE STICKS IN THE RICE KRISPIES TREATS CARROTS
1. Melt about 1/2 cup of the orange candy melts in the microwave, according to package directions.
2. Dip 1-inch of the stick into the candy melts.
3. Then, while pressing down on the carrot shape with your hand, push the stick into the center of the carrot, until it is about 1/2 way to the top of the carrot.
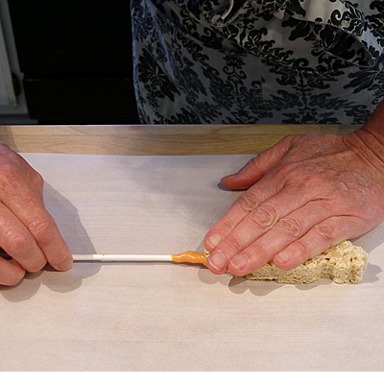
4. Remove any excess candy melts on the bottom of the carrot with your finger. Then, set it aside on a rack and repeat with the rest of the shapes.
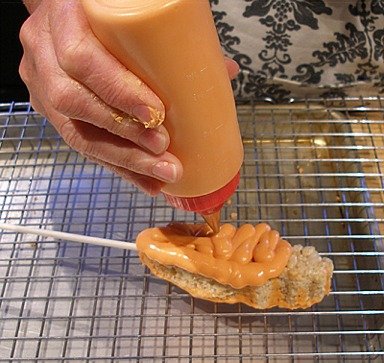
STEP III: COAT THE BACK OF THE CARROT STIXS
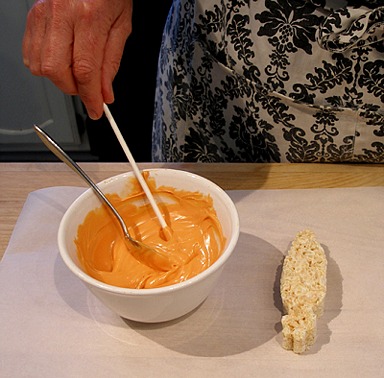
1. Melt 1 cup of the orange candy melts, according to package directions, and stir until fully melted.
2. Add 1 teaspoon Paramount Crystals or shortening, stir to combine.
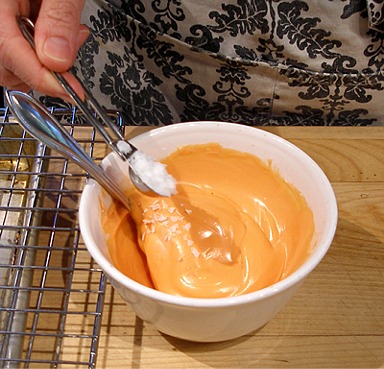
3. Place the melted candy melts into a squeeze bottle.
Pipe and outline all around the back of the shape, then fill in.
4. Gently spread the candy melts with a small offset spatula.
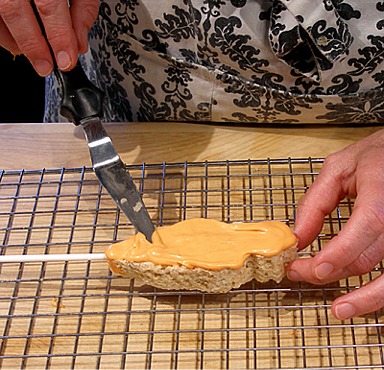
5. Tap the back of the pop on a rack. Tapping the pop will settle the candy melts and make a nice even layer.
If any dribbles over the side, simply wipe the drips off with your fingers.
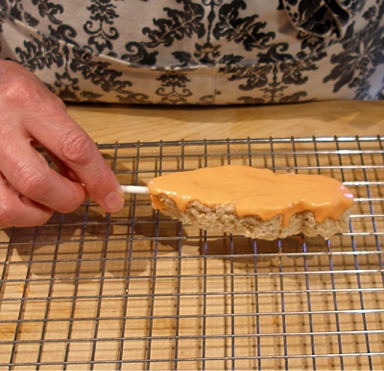
6. Repeat with the rest of the pops, then set them aside, until the candy melts are set, about 20 minutes.
if there are any melts left in the squeeze bottle when you are done, squeeze it into a small bowl, to use later.
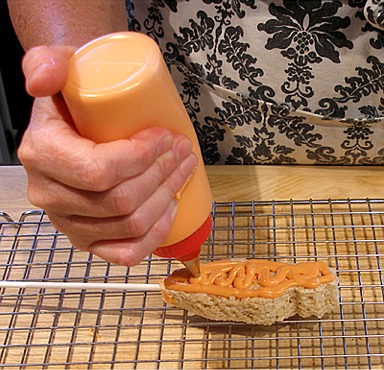
STEP IV: COAT THE FRONT OF THE CARROT STIXS
Coat with the orange candy melts:
1. Place a rack on top of a clean baking sheet.
2. Melt 1 cup of the orange candy melts, according to package directions, and stir until fully melted.
3. Add 1 teaspoon Paramount Crystals or shortening, stir to combine.
4. Put melted candy melts into a squeeze bottle.
Squeeze a generous amount on the front of the carrot stix, avoiding the 'leaf' area of the carrot.
NOTE: You will need more than 1 cup of orange candy melts to coat all of the Carrot Stix, but it is easier to melt 1 cup at a time. When the squeeze bottle is empty, just melt some more.
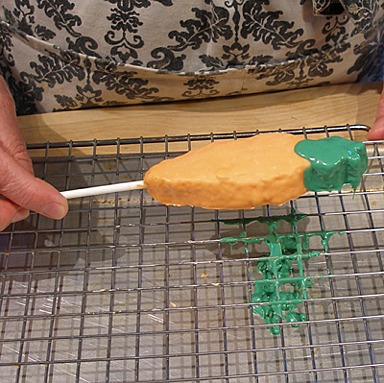
5. Tap the carrot stick on the rack, allowing the excess to fall onto the baking sheet.
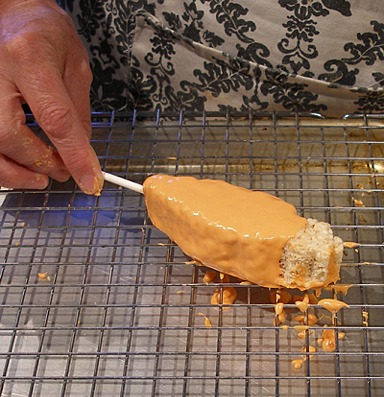
6. Place the coated carrot onto a clean rack, that has been placed over a piece of parchment paper.
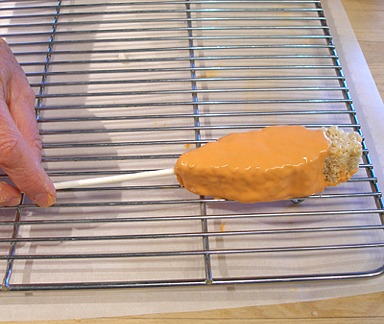
7. Repeat with the rest of the Carrot Stix, then set them aside, on the rack, until the orange candy coating has set, about 20 minutes.
NOTE: After coating about 10 of the Carrot Stix, remove the rack from the baking sheet and scrape the candy melts that have dripped onto the sheet into a small bowl and remelt in the microwave.
After it is remelted, put it back in the squeeze bottle, and reuse.
Coat with the green candy melts:
1. Place 1 cup of the green candy melts in a small bowl and melt according to package directions.
2. When melted, add 1 teaspoon of Paramount Crystals or shortening, and stir to combine.
3. Place melted candy coating in a squeeze bottle and squeeze it over the 'leaf' section of the Carrot Stix.
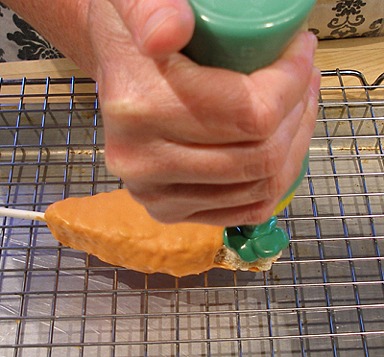
4. Tap it on the rack until the coating is even.
5. Set it on a clean rack to set, for about 20 minutes.
6. Repeat with the rest of the Carrot Stix.
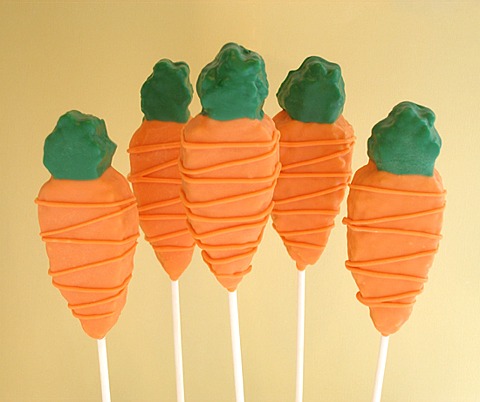
Finish the Carrot Stix:
1. After the green candy coating is set, remelt left-over orange candy coating, or melt another cup plus 1 teaspoon paramount crystals or shortening and place it in a squeeze bottle.
2. Squeeze it over the Carrot Stix, in a criss cross fashion.
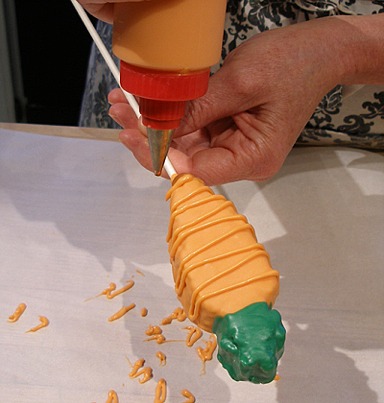
3. Place finished Carrot Stix on the rack until the coating is set. Repeat with the rest of the Carrot Stix, until done.
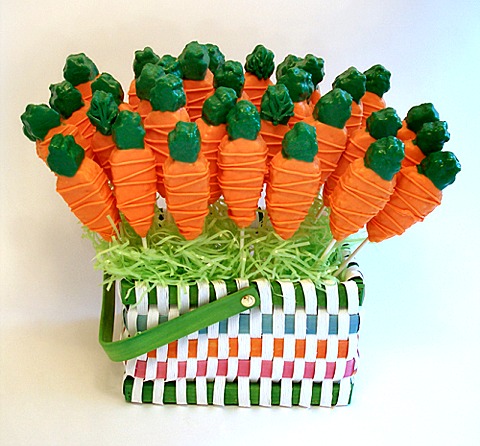
STORAGE
Finished Carrot Stix can be stored in an airtight container at room temperature for several days.