
CHOCO-MINT” BROWNIE BITES
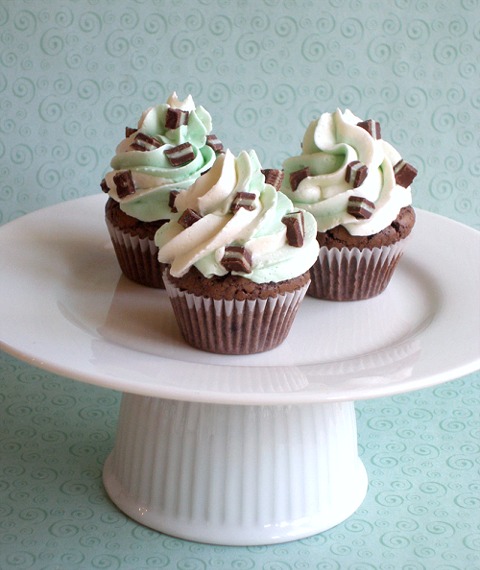
These tantalizing “Choco-mint Minis”! They're made from a base of Double Chocolate Fudge Brownie Bites with Mint Swiss Meringue Buttercream and sprinkled with chopped Andes Candies. Added bonus, a Junior Mint or York Peppermint Patty, hidden under the luscious Mint Swiss Meringue Buttercream!
“MOCHALICIOUS” BROWNIE BITES
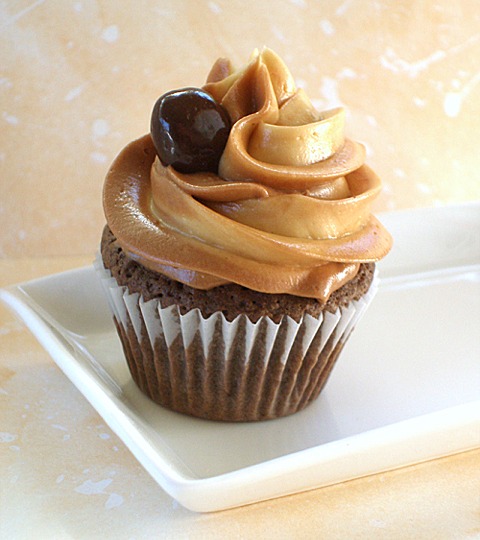
These decidedly adult, “Mochalicious” brownie bites! They're made from a base of Double Chocolate Fudge Brownie Bites topped with Coffee and Mocha Swirled Perfect Buttercream and adorned with a chocolate covered espresso bean. Caffeine never had it so good!
CraftyBaking is hopping on the brownie craze!! Sarah's perfect Double Chocolate Brownie Bars, transformed into two differently flavored mini-brownie bites: Choco-Mint and Mochalicious!
COOKIE RECIPE HELP
catwhisper97, Premium Member, Says: “I made Double Chocolate Fudge Brownie Bites Topped with coffee and Mocha swirled buttercream. Thanks to The Step by Step tutorial really help me lots. The brownies are heavenly…everyone loves it.”
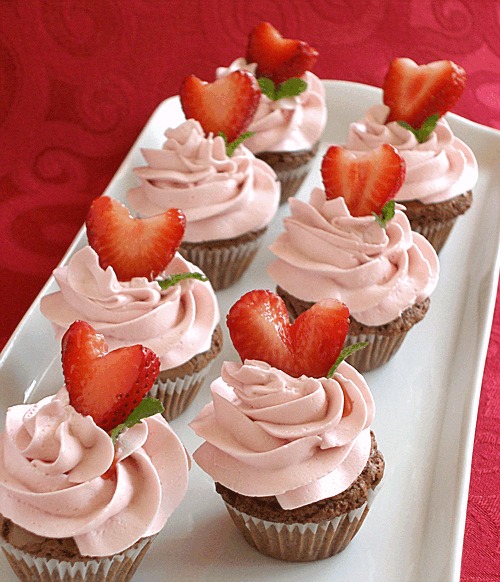
Strawberry Brownie Bites by Kelly Hong © Sarah Phillips
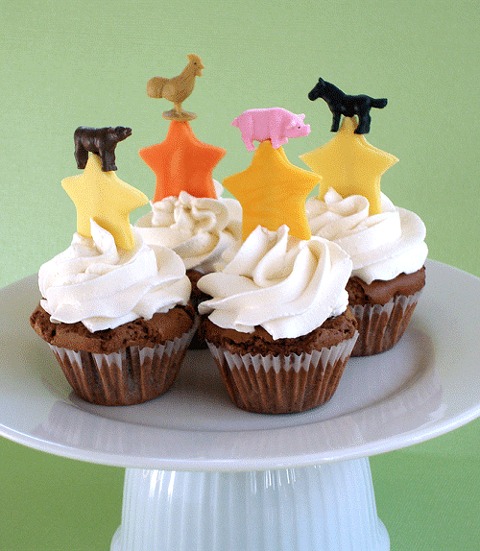
Barnyard Brownie Bites by Kelly Hong © Sarah Phillips
INGREDIENTS
The dessert is made from a couple of recipes included here:
Double Chocolate Fudge Brownie Bites
Mint Swiss Meringue Buttercream
Coffee and Mocha Swirled Perfect Buttercream
STEP I: MAKE THE BROWNIE BITES
Makes 32 Mini-Brownies
DOUBLE CHOCOLATE FUDGE BROWNIE BITES from Double Chocolate Brownie Bars
INGREDIENTS
1/4 cup unsweetened Dutch-process or Natural cocoa powder
1 cup unbleached all-purpose flour (spoon flour into measuring cup and level to top)
1/2 teaspoons baking powder
1/4 teaspoon salt
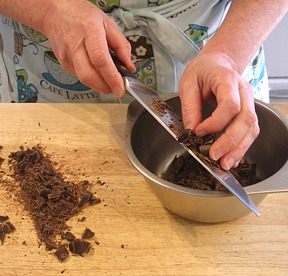
3 ounces bittersweet or semisweet chocolate, finely chopped (any cacao% will work)
1/2 cup (1 stick) salted or unsalted butter
3 large eggs
2 teaspoons vanilla extract
1 1/2 cups sugar
optional: 1/2 cup toasted pecans or walnuts, coarsely chopped
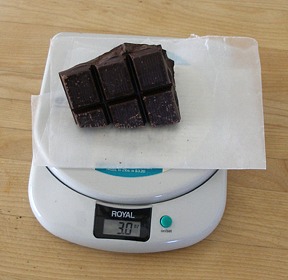
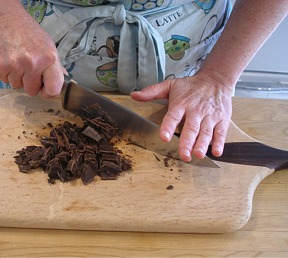
KELLY SAYS: I weigh my chocolate before chopping in 1/4-inch evenly size pieces.
INSTRUCTIONS
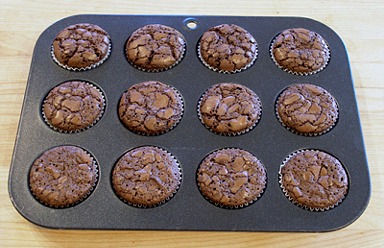
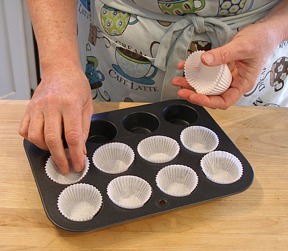
1. Position a rack in the center of the oven and preheat to 350 degrees. Place paper liners to fill 32 individual mini muffin tins and set aside.
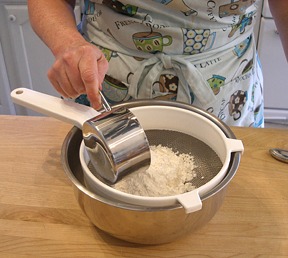
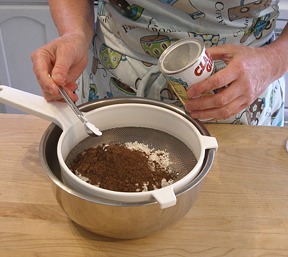
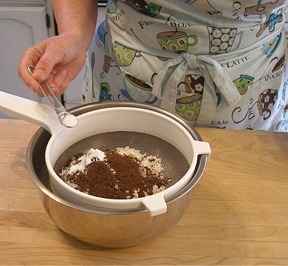
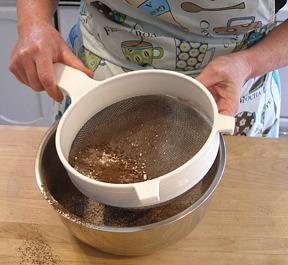
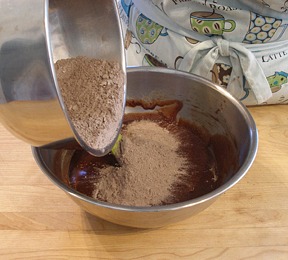
2. In a medium size bowl, after measuring, sift together the flour, cocoa powder, baking powder, and salt. Just push the lumps through the strainer with your fingertips. Set aside.
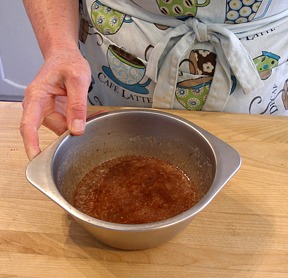
3. Combine the melted butter and chocolate:
A. Put the chopped chocolate in a small bowl.
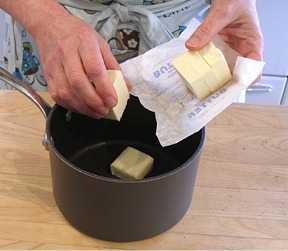
B. Warm the butter in a saucepan until just melted and remove from the heat. Let cool slightly.
C. Pour the butter over the chocolate.
SARAH SAYS: If the butter is too hot, the chocolate will seize. So, let the butter cool to tepid or body temperature.
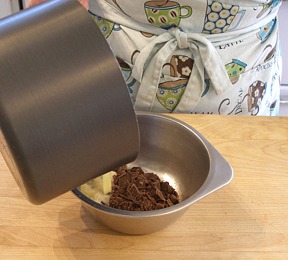
D. Swirl the pan so the hot butter warms all the chocolate and covers it. Let the mixture sit 2 minutes. Stir to melt the chocolate. Let cool until slightly warm.
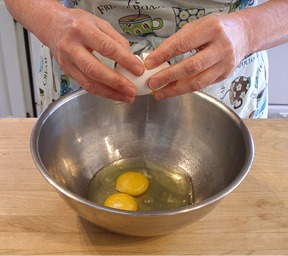
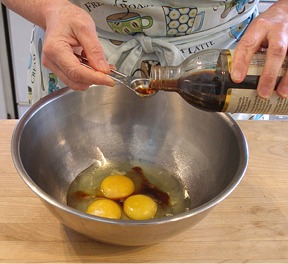
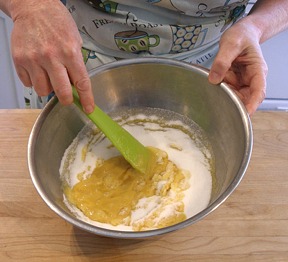
4. With a fork, beat the eggs and vanilla together in a medium bowl until just combined.
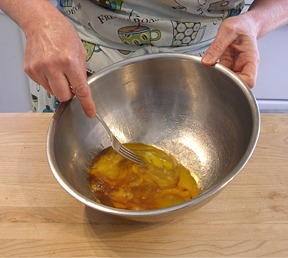
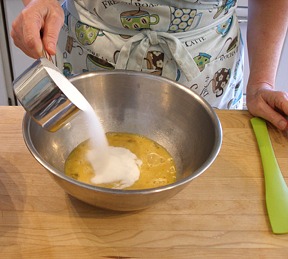
5. Stir in the sugar with a rubber spatula.
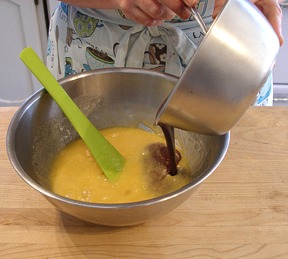
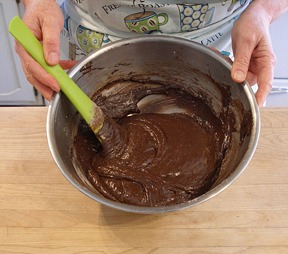
6. Pour in the cooled butter-chocolate mixture and mix until smooth. Do NOT whip.
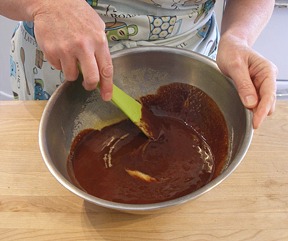
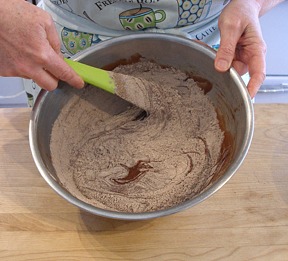
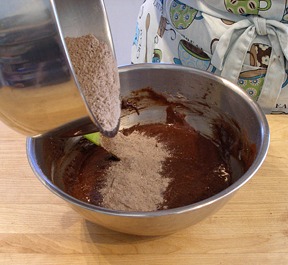
7. In two additions, fold in the flour mixture until almost combined, and then the walnuts until all are fully combined. The batter will be thick and look like fudge.
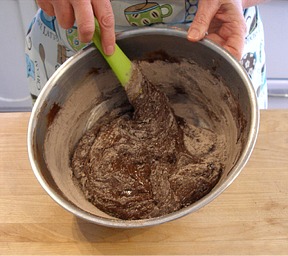
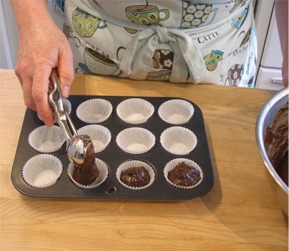
8. Spoon a tablespoon of batter into each mini muffin cup. I used a one tablespoon sized cookie scoop and it worked perfectly.
9. Bake the brownie bites for 13-14 minutes. The brownies will seem underdone in the middle but will harden as they cool. DO NOT OVERBAKE.

STORAGE
Store well-covered at room temperature for 3 to 5 days. Freezes well for up to 3 months.
STEP II: MAKE THE BROWNIE BITES VERSIONS
A. “CHOCO-MINT” BROWNIE BITES
B: “MOCHALICIOUS” BROWNIE BITES
A. “CHOCO-MINT” BROWNIE BITES VERSION
This version takes the basic brownie bites and turns them into a chocolate-mint lovers dream! The brownies are fudgy and have a nice crunch on top, which is a great counter-point to the smooth and silky mint buttercream.
Make as many or as little as you desire from the batch!
INGREDIENTS
16 to 32 baked and NOT cooled Brownie Bites from DOUBLE CHOCOLATE FUDGE BROWNIE BITES recipe, above
1 box (4.75 oz.) Junior Mints Brand; contains about 56 per box
Mint Swiss Meringue Buttercream, recipe below
1 box (4.67 oz.) Andes Candies Brand; contains 28/box. KELLY CA SAYS: I used about 3/4 of one candy per brownie bite
INSTRUCTIONS
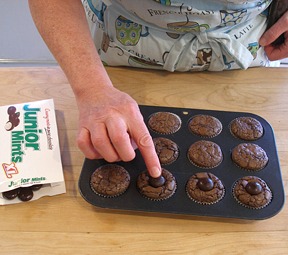
1. When you remove your brownie bites from the oven, immediately place one Junior Mint in the center of each one, pressing down SLIGHTLY.
KELLY SAYS: The Junior Mints will partially melt, adhering them to the surface.
2. Cool Brownie Bites in its pan on a wire cake rack.
3. While your Brownie Bites cool, make the Mint Swiss Meringue Buttercream Recipe, below.
KELLY SAYS: This buttercream can be made several days ahead, and stored in the refrigerator. It can also be frozen and made several weeks ahead.
MINT SWISS MERINGUE BUTTERCREAM / Recipe alone
This buttercream is silky smooth and the mint flavor is nicely rounded by the addition of vanilla. I LOVE this buttercream! It's delicately minty, not toothpaste minty.
INGREDIENTS
4 large egg whites
1 1/4 cup granulated sugar
1 cup (2 sticks) unsalted butter, at cool room temperature
1 teaspoon vanilla extract
1 teaspoon peppermint extract
INSTRUCTIONS
Make the Swiss Meringue Buttercream:
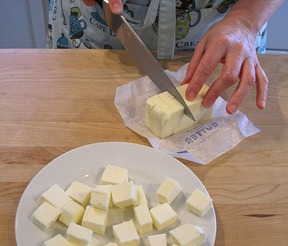
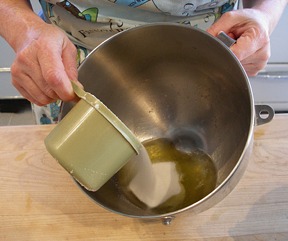
1. Cut the butter into cubes and set aside.
2. Put egg whites and sugar into your stand mixer bowl and whisk to combine.
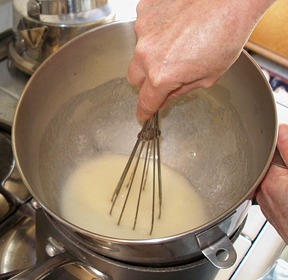
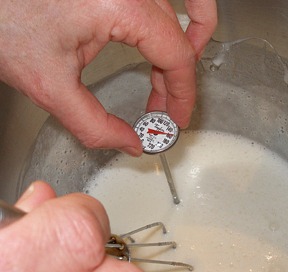
3. Set the bowl over a pan of simmering water, whisking constantly, until the sugar is dissolved and the mixture reaches 160 degrees F, as measured with an Instant Read Thermometer.
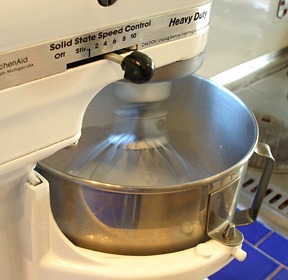
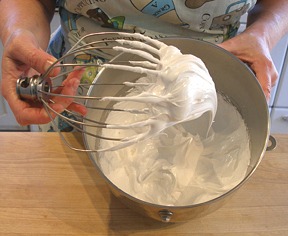
4. Fit a stand mixer with a whisk attachment. Beat the egg white mixture on high speed, until it forms stiff peaks and the outside of the bowl no longer feels warm. This will take about 6 to 8 minutes.
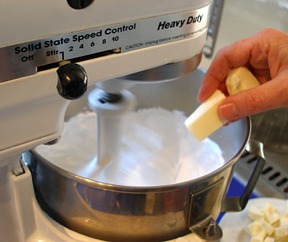
5. Switch to the paddle attachment and begin adding the room temperature butter, on medium speed, a few cubes at a time, beating well after each addition. Do so until all the butter has been incorporated.
The mixture may appear curdled at first, but continue to beat, 3 to 5 minutes more, until it is thick and smooth.
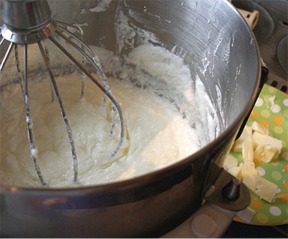
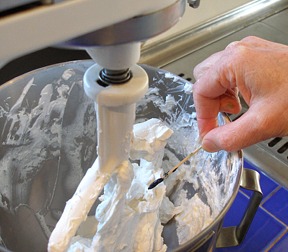
When you are about 1/2 way through your butter additions, the mixture may curdle.
Do not be alarmed by this! Continue to add your butter, whisking, and the mixture will become creamy again.
Stop the mixer once, to scrape down the sides of the bowl, and continue to add the rest of your butter.
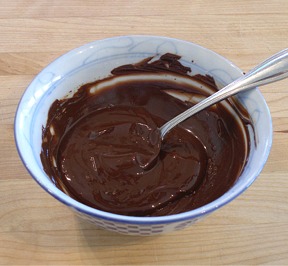
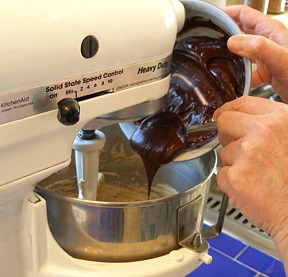
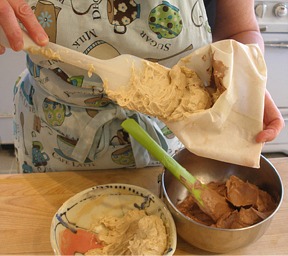
The mixture goes from this….
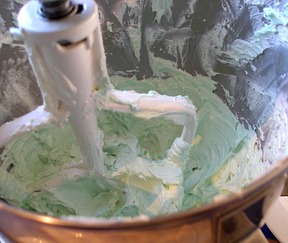
….to this:
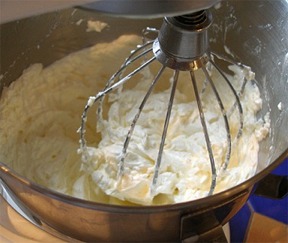
6. Beat in the extracts on low speed and continue to beat on low for 2 to 3 minutes, to help eliminate air bubbles.
STORAGE
This buttercream can be made several days ahead, and stored in the refrigerator.
When you are ready to ice your cake, or cupcakes, remove frosting from the refrigerator, bring it to room temperature, then return it to the mixer and beat, ON LOW, with the paddle attachment, until smooth and creamy.
You may also freeze this buttercream. When you want to use it, thaw it in the refrigerator. Then, bring it to room temperature, return it to the mixer and beat, ON LOW, with the paddle attachment, until smooth and creamy.
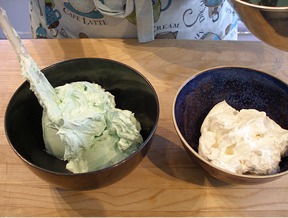
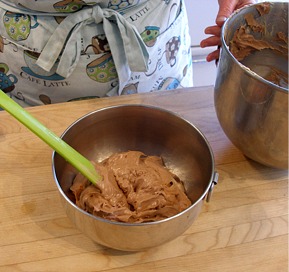
Tint the buttercream:
1. Remove 1/2 of the frosting from the bowl and place it in a medium bowl. Set aside.
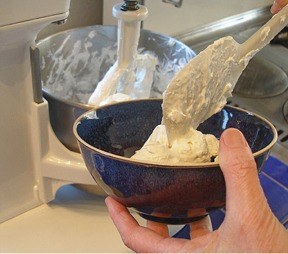
2. Add a small amount of green gel paste coloring to the remaining buttercream and mix on low, to combine. You're going for a pale mint green, so add color sparingly.
KELLY SAYS: You will now have the original white buttercream and the mint green buttercream.
We are going to load them into the piping bag so you have a white and green swirl, when you pipe them out.
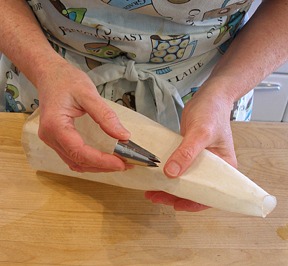
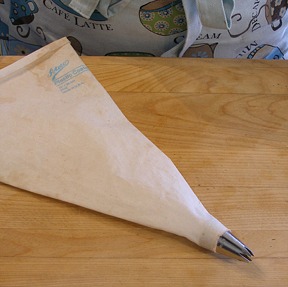
Pipe the buttercream:
1. Take a large open star tip, I used a Wilton 1M, and place it in your piping bag.
KELLY SAYS: There is really no reason to use the piping bag coupler, for this application.

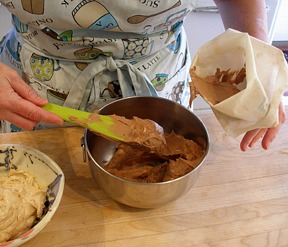
2. Begin loading ONE SIDE of your piping bag with the white buttercream. To do, wipe the rubber spatula along one wall of the bag with buttercream.
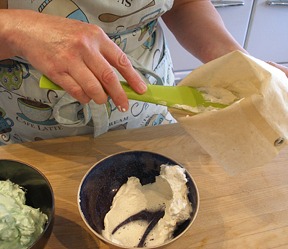
3. Load the other side with the green buttercream.
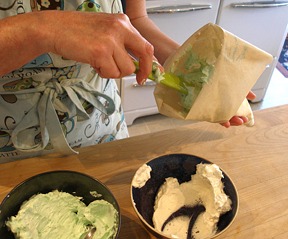
4. Roll down the top of your piping bag, and give a little squirt, till your icing is coming out with a white and green swirl.
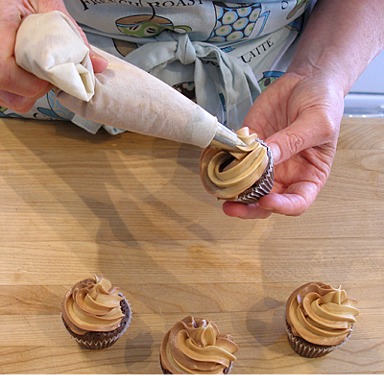
You can then begin frosting your brownie bites.
To get the little swirl, start near the edge and go all the way around, then, continue the spiral on top of the first layer and continue around, ending at the center top of your brownie bite.
VIDEO of buttercream swirling technique

Decorate the Brownie Bites:
Chop some Andes Candies into little cubes and decorate the top.
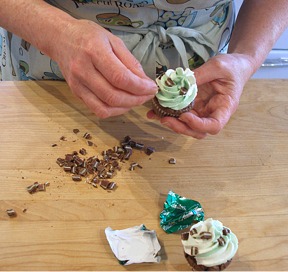
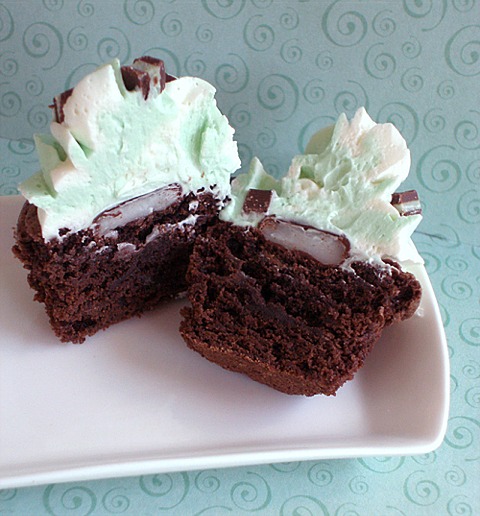
See the little Junior Mint tucked there under the frosting? A nice little surprise.
Some people may find the need to add even MORE Andes Candies to the tops of their Mint-Minis.
VERSION B: “MOCHALICIOUS” BROWNIE BITES
If you're the type of person who likes a little coffee with your chocolate, these are right up your caffeine loving alley! Make as many or as little as you desire from the batch!
INGREDIENTS
16 to 32 baked and COOLED Brownie Bites from DOUBLE CHOCOLATE FUDGE BROWNIE BITES, recipe above
Coffee and Mocha Swirled Perfect Buttercream, recipe below
INSTRUCTIONS
1. When you remove your brownie bites from the oven, immediately cool in the pan on a wire cake rack.
2. Make Coffee and Mocha Swirled Perfect Buttercream Recipe
COFFEE AND MOCHA SWIRLED PERFECT BUTTERCREAM / Recipe alone
I made a coffee flavor variation, and added in chocolate to half of the recipe. Then, I swirled the two flavors together!
INGREDIENTS
4 tablespoons (1/4 cup) heavy whipping cream
1 tablespoon instant espresso powder
1 teaspoon vanilla extract
1 cup (16 tablespoons) butter, slightly soft not mushy or Crisco Shortening (can use hi-ratio shortening, if desired)
PLUS 1/2 stick (4 tablespoons) butter, slightly soft not mushy, or Crisco Shortening (can use hi-ratio shortening, if desired)
1 pound (4 cups) powdered sugar, sifted; measure than sift, divided
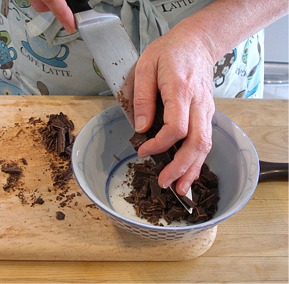
3 ounces (squares) bittersweet chocolate, chopped, melted and cooled
KELLY SAYS: I weigh my chocolate before chopping in 1/4-inch evenly size pieces. Melt it in the microwave, or over a double boiler. Set it aside to cool to room temperature.
INSTRUCTIONS
Make the Coffee Buttercream:
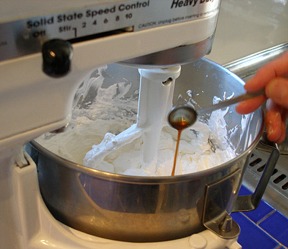
1. Warm 1/4 cup cream slightly in the microwave. Dissolve 1 tablespoon of instant espresso powder into it and stir. Let cool.
2. In your mixer bowl, fitted with a paddle attachment, beat the 20 tablespoons butter until smooth and light and fluffy.
3. Add 1/4 cup of the heavy cream / espresso powder mixture and the vanilla to the beaten butter, and mix well.
SARAH SAYS: The cream has to be cooled completely because you do not want to melt the beaten butter.
4. Add powdered sugar to the butter mixture, slowly at the side of the mixing bowl with the mixer on low.
Beat for 5 minutes on low to medium-low speed.
5. Add the remaining powdered sugar, slowly at the side of the mixing bowl with the mixer on low, to the butter mixture.
Mix well, on low.
Divide the Coffee Buttercream in Half, and Add Melted Chocolate to One Portion:
1. Remove 1/2 of the frosting from the mixing bowl and place it in a medium bowl. Set aside in a cool place.
2. To the coffee buttercream remaining in the mixing bowl, when chocolate has cooled, add it, mixing on low speed.
This makes a mocha buttercream.
3. Remove mocha buttercream from mixer to a smaller bowl.
Pipe the Swirled Coffee and Mocha Buttercream
1. Place Wilton 1M, or any large open star tip, into a pastry bag. There is no need to use a coupler for this application.

2. Load one side of your piping bag with the mocha frosting, scraping your spatula against the side of the bag, leaving the center open.
3. Do the same with the coffee buttercream, on the other side of the bag.
4. Squeeze frosting out of the bag, until you see both colors coming out of the tip.
Swirl frosting on top of brownie bites.
VIDEO of buttercream swirling technique
5. Decorate “Mochalicious” Brownie Bites with a chocolate covered espresso bean.
Coffee never tasted so good!