
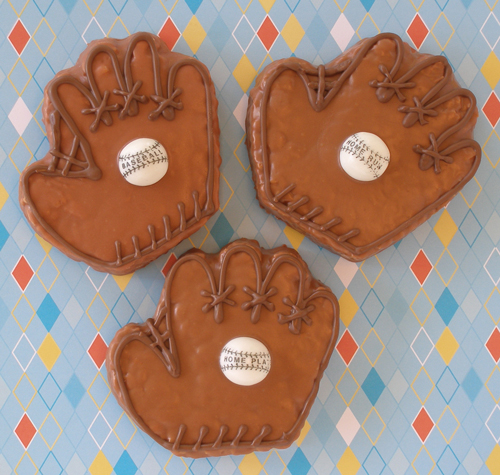
Kids LOVE Rice Krispies Treats! They love them even more when they are dressed up with a sweet candy coating.
COOKIE RECIPE HELP
KELLY SAYS: “I made these treats for my son's Little League team. They were a HUGE hit!”
INGREDIENTS
You will need:
1 recipe Rice Krispies Treats Tweaked
Baseball glove cookie cutter, about 3 1/2-inches across. BUY
10 Homerun Gumballs or any large white gumballs or jaw breakers BUY
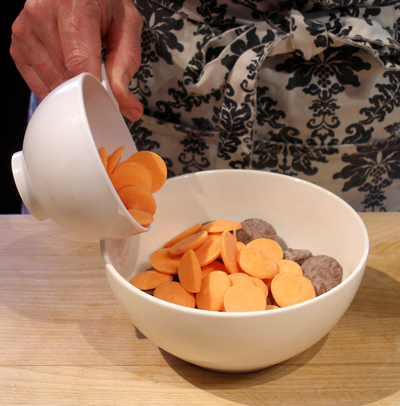
2 packages orange Wilton Candy Melts
1 package Light Cocoa Wilton Candy Melts
1 Wilton Candy Squeeze Bottle or a disposable plastic decorating bag
1 CK Products fine tip candy squeeze bottle BUY
INSTRUCTIONS
Cut out the Baseball Gloves:
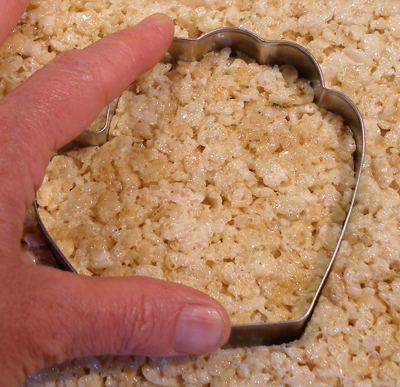
1. When the Rice Krispies Treats Tweaked have cooled, cut out baseball glove shapes, leaving as little scrap as possible.
2. Determine what will be the front side of the baseball glove. Define the fingers of each glove with a chopstick by pressing down gently.
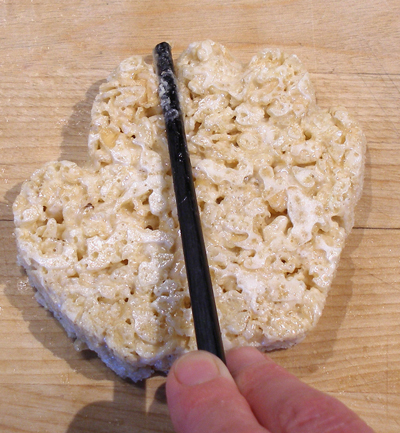
3. Define the webbed area of the glove with the chopstick the same way.
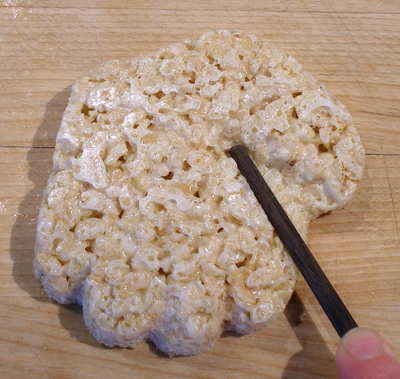
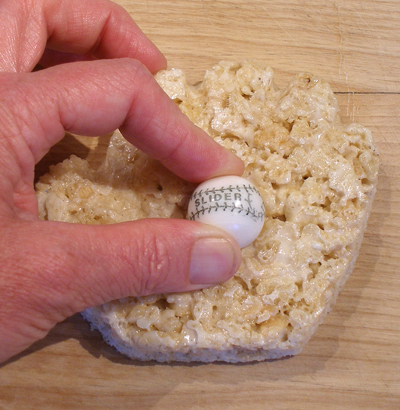
4. On the same front side of the glove, take a gumball and gently press it into the center of each glove, to make a depression for it to sit in after it is coated with candy, then remove the gumball.
Repeat process with the remaining treats.
Coat with Candy Melts:
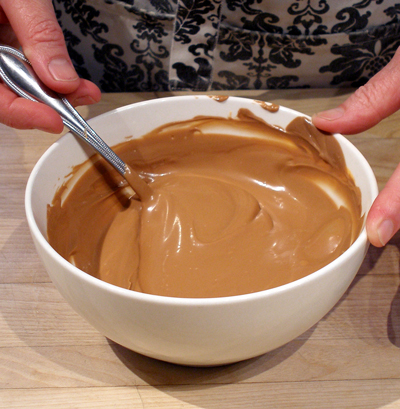
1. Melt together 2 cups orange Wilton candy melts with 1 cup light cocoa candy melts according to package directions. This will give you the right color for the baseball gloves.
NOTE: I like to use the microwave to melt the candy melts.
2. Put the melted candy in a squeeze bottle or a disposable decorating bag. If using a decorating bag, snip a small hole in the end after you have filled the bag.
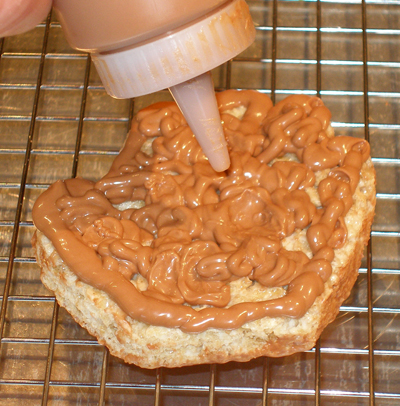
3. On the back side of the baseball glove, pipe the melted candy around the perimeter of the treat, then fill in the center.
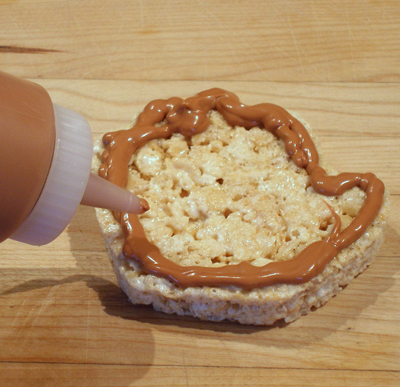
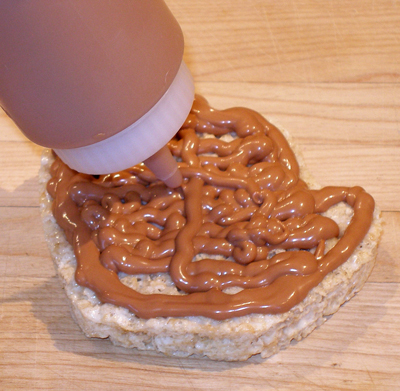
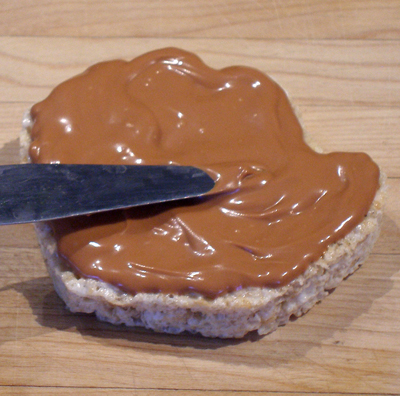
3. Spread the candy melts with a small off-set spatula, then tap the treat on the work surface to level the candy.
Wipe any drips off with your finger, then set the treat on a wire cake rack, in a cool place, until the candy is set.
This will take about 20 minutes.
4. Repeat the process with the rest of the backsides of the baseball glove treats.
5. When the candy has set, rewarm the excess candy melts in the microwave until it is fluid again.
NOTE: If you run out of the candy melt mixture, melt another batch in the 2 cups orange to 1 cup light cocoa proportion, as you did before.
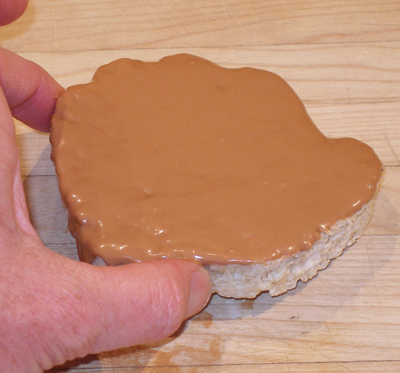
6. Take one treat and turn it over to its front side, so the candy coated back side is on the bottom. Place it on a rack, that is set on a baking sheet.
Outline the perimeter of the treat with the candy, then fill in the center as you did before.
Make sure you also coat the sides.
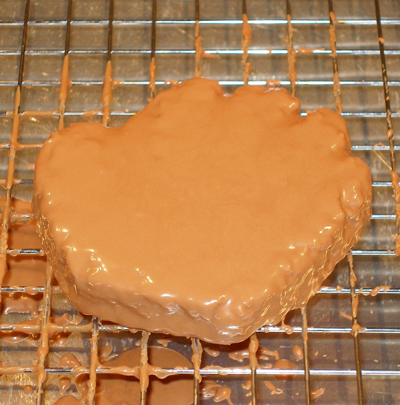
7. Afterwards, level the candy coating by lifting the corner of the rack and tapping it on the baking sheet. If you see any bare spots, fill them in and tap again to level.
8. Leave it on the wire cake rack until you have finished the process with the rest of the front sides of the rest of the baseball glove treats.
Do NOT let the candy melts on the baseball gloves dry fully.
Finish decorating the baseball gloves:
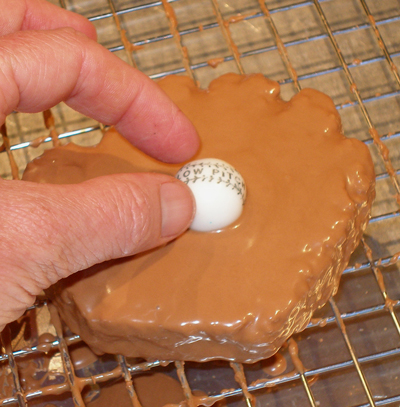
1. When the candy melts are still tacky, but not yet dry, place a gumball in the center of the front side of each glove where you previously made the indentation.
NOTE: The candy melts will adhere the gumball to the finished treat, once it has set.
2. Lift the finished treat off the rack with a spatula and place it on a clean wire cake rack, to set.
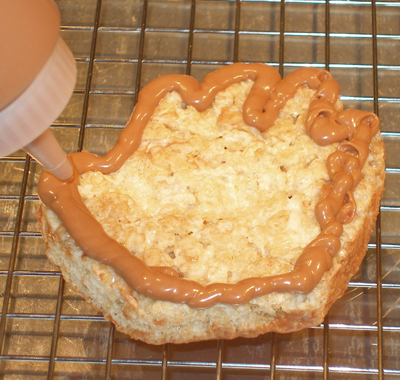
3. When dry, melt about 1/2 cup of light cocoa candy melts and place it in the fine-tipped squeeze bottle.
4. Outline the perimeter of each glove, then pipe two lines between the thumb and first finger, delineating the webbing of the glove.
Repeat process with the rest of the gloves.
Set gloves aside on a wire cake rack for about 20 minutes so the candy can set.
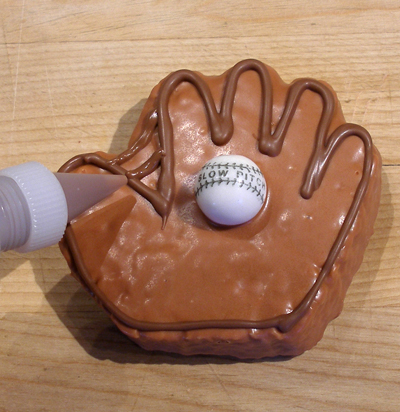
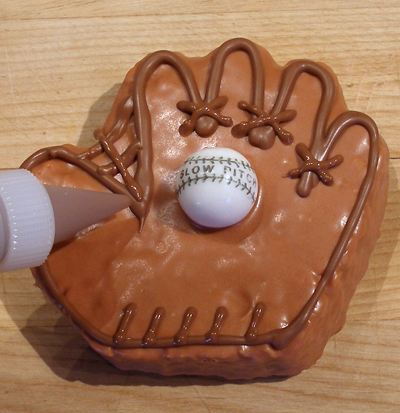
5. When dry, pipe stitching lines on the bottom of each glove.
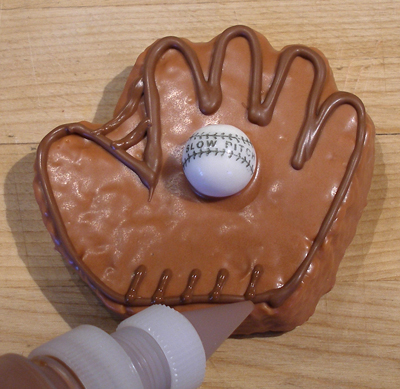
6. Pipe Xs on the bottom of each finger
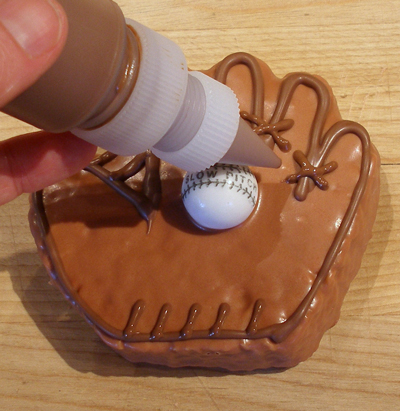
7. Pipe a line down the center of the space between the thumb and first finger, to further delineate the webbing.
Now your rice krispies treats look like real baseball treats! Aren't they so cute?
8. Repeat process with the rest of the gloves, then set them aside until the candy has fully set.
They are so tasty, too!
STORAGE
Finished Baseball Gloves can be stored in an airtight container at room temperature for several days.