

stock photo
The banana flavor really shines through in this Banana Chiffon Cake. I always glaze mine with a lemon or coffee scented glaze.
CAKE RECIPE HELP
INGREDIENTS
12 large eggs; separated (You'll need 12 egg yolks and 12 egg whites for the recipe)
2 1/4 cups unsifted cake flour (not self-rising); spoon into dry measuring cup and level to top; DO NOT use a cake flour substitute.
1 1/2 cups sugar or superfine sugar, divided
1 tablespoon (3 teaspoons) baking powder
1 tsp salt
1/2 tsp cinnamon
1/4 tsp ground nutmeg or 1/8 teaspoon if freshly ground
1/2 cup vegetable oil
3/4 cup cold water
2 teaspoons vanilla extract
zest (about 2 teaspoons) and juice from 1 lemon (about 1 tablespoon)
3/4 cup (about 2 medium) ripe bananas*, mashed
1/2 teaspoon cream of tartar
1/2 finely chopped walnuts, optional; chop and then, measure
*NOTE: For a heightened banana flavor, substitute 1 cup mashed banana with Banana Scmutz, if desired.
INSTRUCTIONS
1. Position the oven rack in the lower third of the oven and preheat the oven to 350 degrees F.
Remove the top racks so the cake has enough room to rise to the rim of the pan (pan is 4-inches tall).
SARAH SAYS: In my oven, it has six rungs. The beginning of the lower third, starts at the second rung from the bottom.
2. Prepare the baking pan: Set the pan aside until needed in the recipe.
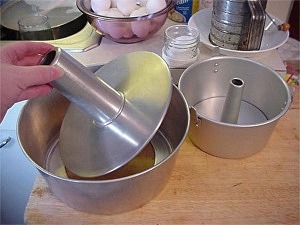
Use a light colored aluminum pan called an “Angel Food” Cake or Tube Pan that is 10- x 4-inches with a removable bottom. DO NOT use a non stick pan. Grease the bottom of the cake pan ONLY – DO NOT grease the sides.
SARAH SAYS: Many stores still call the pan a “tube” pan because of the tube in the center, but be sure to purchase a pan with a removable bottom. You need it to ensure the cake will come out smoothly. The cake needs to be inverted to cool, so do not use a non stick pan. You don't want the cake to fall out; it needs to stick to the sides when inverted.
For light-colored cake sides, use light, heavy aluminum pans (pictured below), not dark-colored ones.
3. In a large bowl, combine the dry ingredients:
In large mixing bowl, preferably with a wide rim, sift together the flour, baking powder, salt, cinnamon and nutmeg. Make a well in the center and set aside.
Repeat two more times. If you don’t have a sifter, use a fine mesh strainer.
Add in 3/4 cup sugar. Whisk together to blend.
Make a well in the center of the flour mixture and set aside.
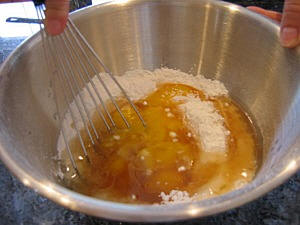
4. Prepare the batter mixture; add the wet ingredients in the well of the flour / dry ingredients in the following order without mixing…It is VERY important!
A. Add the oil
B. Add the egg yolks
C. Then, the water
D. And, finally, the vanilla, lemon zest and juice.
SARAH SAYS: The reason for layering the ingredients in a certain order before mixing helps form the batter properly. I have found, through my extensive testing of a wide variety of Chiffon Cake Recipes (and I mean extensive), that some failed while others didn't. I set out to find out why. I found that one of the biggest causes of failed Chiffon Cakes, besides the improper beating of egg whites and not properly folding the recipe together, is ALSO the improper formation of the cake batter (not written about anywhere — yes, you heard it here first!) Many recipes have you simply dump all of the batter's ingredients into the bowl without regard to order or mixing method, which you'll observe if you look through most cookbooks, leading to many failed recipes and unhappy bakers.
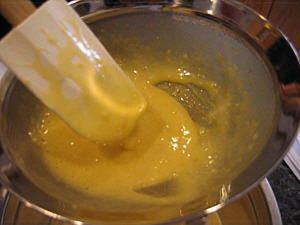
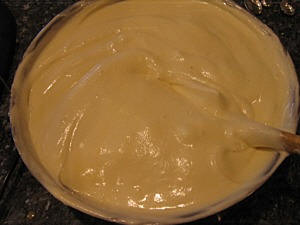
With a wire whisk, mix together the ingredients until smooth and light in color. It is critical that the resulting batter mixture is smooth and without lumps because when the cake bakes, the flour lumps will stay that way.
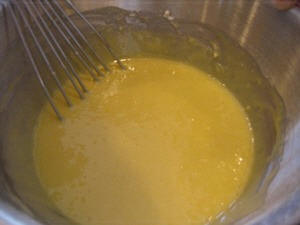
But, there will always be a few small flour lumps, so I advise straining the mixture through a fine mesh strainer by pushing the mixture through with the help of a rubber spatula to a large bowl below. Discard any flour lumps that are left in the strainer. Cover the batter with plastic wrap and set aside.
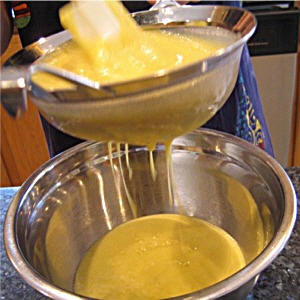
HELP! I had to throw away a lot of flour lumps. I'm worried that there isn't enough flour left for the recipe. What should I do?
CRAFTYBAKING RESCUE: ONLY if there is a tablespoon or MORE of flour lumps left in the strainer, sprinkle a tablespoon of flour on top of the mixture and stir. But, be careful you don't get into the vicious cycle of adding flour and then straining the batter mixture.
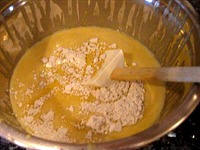
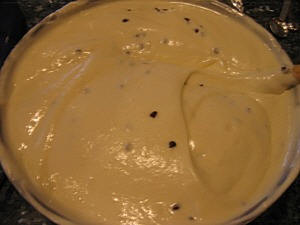
5. Add the mashed bananas to the batter mixture and stir until JUST incorporated. Do not mix so much so the bananas become too smooth in the batter,
otherwise the baked cake will become rubbery.
6. Beat the 12 egg whites until they are stiff and glossy: Use a stand mixer when you have a large amount of whites to beat, such as this recipe.
A. Place egg whites in a clean, dry grease-free mixer bowl of a stand mixer. Make sure there are no egg shells in the mixture.
SARAH SAYS: You can whip the egg whites if they are still cold. The real issue with egg whites is their freshness, not temperature, so you can beat whites right from the refrigerator, althought they may require slightly more beating time. Newer fresh eggs have thicker whites and will reach more volume and have greater stability when beaten than older eggs.
B. With a stand mixer fitted with a whisk attachment, beat egg whites on low until foamy.
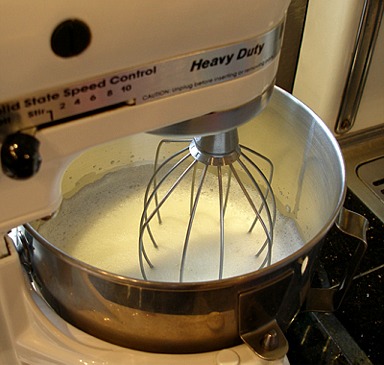
SARAH SAYS: As air is beaten into the egg whites, they will start to lighten in color. This beginning step is one of the most overlooked and important steps. If egg whites are beaten too quickly at the beginning, the structure of the foam will not be as strong, and later the egg whites will not beat as high as they should.
Keep mixing the egg whites on low speed. The egg white foam will increase in volume and become white and have large bubbles.
C. With the mixer running, immediately add the cream of tartar at the side of the bowl.
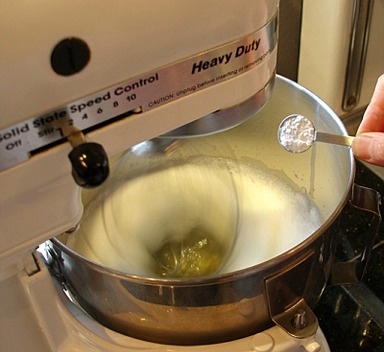
SARAH SAYS: Adding a small amount of acid, such as cream of tartar, lemon juice or vinegar, stabilizes egg whites and allows them to reach their full volume and stiffness. It does this by making the egg coagulate faster.
D. The bubbles in the egg white foam will become smaller and more even in size. When it reaches this stage, increase the mixer speed to medium-high.
E. Then, add 3/4 cup sugar slowly in a steady stream at the side of the bowl. After the sugar has been added, increase the mixer speed to high.
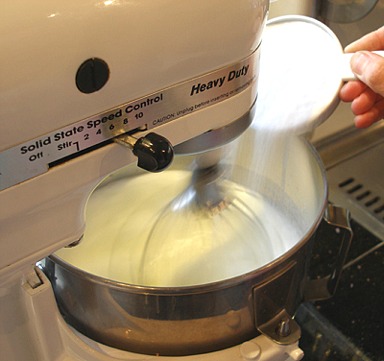
Always add sugar in a stream, slowly at the side of the bowl while the whites are being whipped; do not dump it in the center — you don't want to risk deflating the whites.
SARAH SAYS: I stopped the mixer so you could see how the egg white foam is beginning to become glossy. This is called the soft peak stage. It is reached when the peaks of the whites droop slightly, when the beater is turned off and lifted.
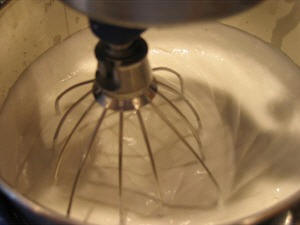
But, this recipe calls for beating the whites to the stiff peak stage…so keep beating with the mixer on high.
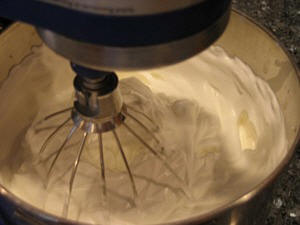
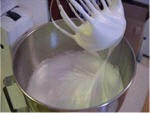
F. Beat until the egg whites are white, fluffy, very stiff and still very glossy.
For this recipe, the whites should be stiffer than most. They will form lumps as the mixer beats. STOP beating when they start to form lumps around the beater as shown in the photo.
To test if properly beaten to the stiffly beaten stage, take the mixer bowl from the mixer or lift the beaters. You can gently cut a table or icing knife through the middle of the beaten egg whites; it creates a narrow grove with stiff walls. If not, continue beating for a few seconds more and perform the test, again.
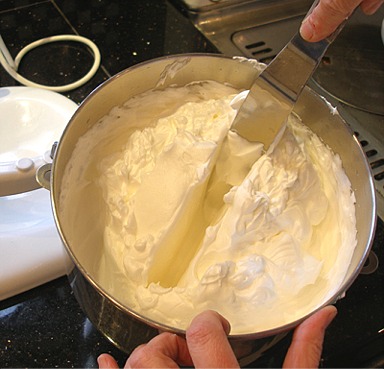
SARAH SAYS: Another test to perform to see if your egg whites are stiffly beaten are to stop the beaters and then lift them — straight and stiff peaks should form.
HELP! I've overbeaten my egg white mixture. Do I have to throw them out and start again! I just wasted twelve eggs and all of the time separating them…I'm heart broken!
RESCUE: Do not overbeat the egg whites; if they are beaten too stiff, they lose their gloss and look curdled. Unfortunately, there is no more stretch left for them to rise when baked — some or will pop during the whipping stage and will collapse. To fix, try whisking in another egg white with a wire whisk — DO NOT use the electric mixer. If you can't fix them, unfortunately, you have to start over again with fresh egg whites…
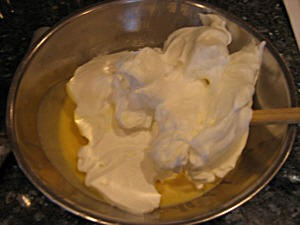
7. Fold the egg whites and the batter mixture until thoroughly blended:
SARAH SAYS: When you fold the batter and beaten egg whites together, they must be thoroughly blended together; you need to make sure all of the air bubbles are encased in batter, otherwise the cake won't rise properly. The batter will set around the air bubbles when the cake bakes in the oven, allowing it to puff properly. In essence, the folding action breaks up the air bubbles into smaller ones and encases each one in batter, like putting mortar in between small tiles to hold them in place. If the “mortar” isn't evenly distributed between the “tiles” and you have some large and small tiles, you'll get an uneven looking “floor” or cake crumb. Some “tiles” or air bubbles will be “loose” or escape from the cake batter and cause large holes in the cake. You'll see a pattern of “tiles” or egg whites grouped together separately from a layer or “mortar” or batter grouped together. Your “floor” or cake will be uneven and won't rise as high in the oven. With foam cakes, it's normal to see some uneven air holes in the cake's crumb (inside), but not large pockets of air holes, egg whites and/or batter. That means that the folding action was not done enough or was done too much where you managed to pop a lot of air bubbles. Folding takes a lot of practice to get right.
A. To start, use the batter mixture that was previously set aside. Stir it a few times to mix it thoroughly before using.
With a large rubber spatula, gently scrape 1/3 of the beaten egg whites on top of the mixture. Never add the batter to the whipped whites or the heavier mixture on top of the lighter, beaten they'll deflate.
B. With the rubber spatula, in a large circular sweeping motion as if you are turning a crank, lightly combine the egg whites and batter. Do this one or two times. Be sure to scrape the bottom of the bowl.
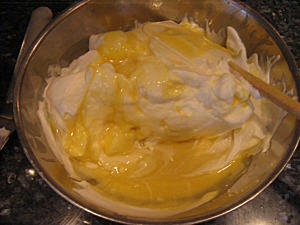
C. Starting on the top, cut down from the center of the mixture to the bottom of the bowl, then draw the scraper quickly towards yourself against the edge of it, and up to the left and out. You are thus bringing a bit of the mixture at the bottom of the pan up over the egg whites or “folding it over”. Then turn the bowl a quarter turn and repeat until you only see slight streaks of white. You will need to scrape the sides of the bowl a few times to keep the mixture from climbing up the sides.
D. Repeat with the last two additions.
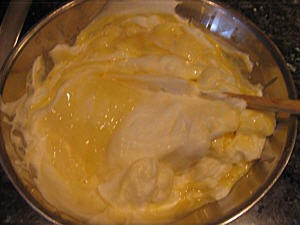
E. Fold the last of the egg whites and the batter mixture until almost completely combined. You'll still see a few streaks of eggs whites. The batter and egg mixture will become smoother.
F. Sprinkle the chopped nuts evenly over the top. Fold until all are combined.
G. Continue the folding movement while slowly rotating the bowl, and cutting down, towards yourself, and out to the left, until the egg whites have been folded into the body of the batter. You shouldn't see any streaks of batter and eggs whites in the mixture and the chocolate should be evenly dispersed. The mixture should be smooth. Sometimes you'll see with a few small lumps visible; it just means that you slightly overwhipped the egg whites. Do not continue to fold the mixture because you'll start to remove the air from the batter.
8. Bake:
When blended, pour the batter into the tube pan and bake for 50 minutes to 1 hour or until the top springs back when lightly touched and is a golden color.
9. Invert cake to cool:
When done baking, remove the cake from the oven and immediately turn the pan over the neck of a neck of a soda or wine bottle, or funnel, which I prefer to use – it is more stable than a bottle. This is just a demo of what it should look like, that's why you can't see any cake – there isn't any in the pan at the moment!
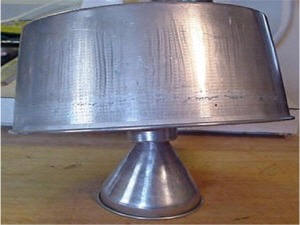
SARAH SAYS: Do not use the little tabs on top of the pan to rest the cake on to cool; it will not raise the cake high enough from the countertop to cool and will cause condensation to form on top of the cake. This will cause a sticky cake top!
Proper cooling is just as important as baking. The cake is inverted in its pan to cool which prevents its structure from shrinking or falling, giving it the open texture that's characteristic of these cakes. If placed to cool on a rack, it would deflate much of that hard-earned volume.
SERVE
Unmold the cake:
(See Grandma's Angel Food Cake for photos showing unmolding a foam cake from a two-part tube-pan.)
When the cake is completely cool, typically taking about two hours, remove it from its pan. Have the plate you will serve the cake off of ready to go.
Loosen the sides with a long metal spatula and remove the center core of the pan. Dislodge the bottom and center core with a thin–bladed, flexible knife. To keep the sides attractive, press the knife against the sides of the pan, moving the knife firmly in one direction; do not use a sawing motion. Invert onto a greased wire rack and reinvert onto a serving plate. Wrap airtight.
Cut the cake into slices with a serrated knife and make small, quick sawing motions. This cake is great with fruit and whipped cream, or with a powdered sugar/milk glaze drizzled over the top.
STORAGE
The cake will keep for about 3 days at room temperature, and 10 days refrigerated. Refrigerate if filled or frosted with perishable items, where it will keep for a few days because the filling and frosting only lasts that long. Chiffon cakes can be frozen for two months or so, but suffer somewhat in texture when thawed. It's best to freeze cake before unmolding from the pan. Wrap pan in foil before doing so.