
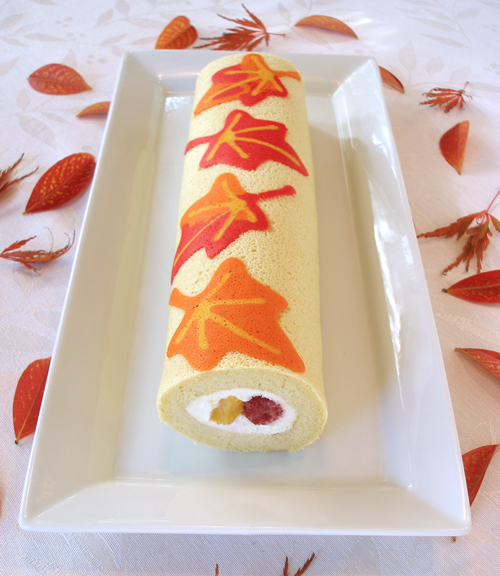
The Crape Myrtle trees in our front yard inspired the vibrant colors in this cake roll. At dusk, the leaves are SO bright, it's as if the trees are on fire. Absolutely breathtaking!
For months, Kelly and I were seeing darling decorated sponge cake rolls all over the internet. Unfortunately, most of the recipes I found were in Japanese or Chinese and I couldn't quite figure out the technique. It took translating a recipe, rewriting it for home bakers, and testing it over and over to make it work. Nine cake rolls and lots of frustration later, I was able to perfect the technique.
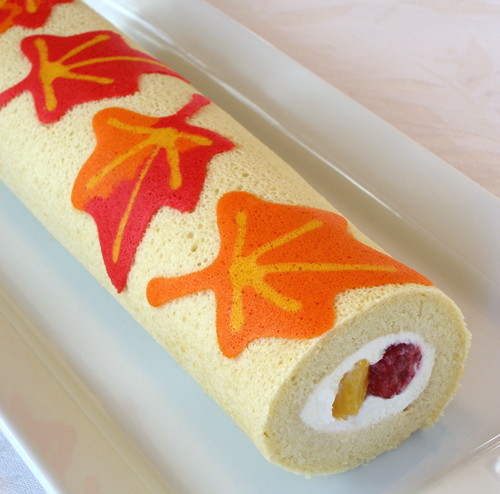
For this stunning cake roll, I started with a light-as-a-feather vanilla sponge cake filled with whipped cream, sweet peaches, and tangy raspberries. I'll show you, step by step, how to fill and roll the cake.
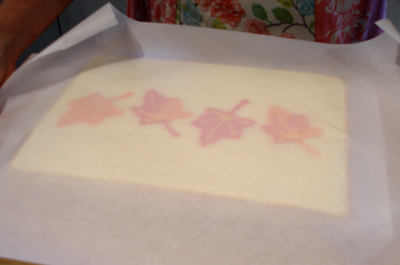
The outside of the roll is decorated with autumn leaf designs, which are created with a special technique using cake batter that I describe below. There is no frosting or fondant involved, which means it's not overly sweet and very refreshing. I've included a design template and a guide to coloring the leaves for this project. The Crape Myrtle trees in my front yard inspired the vibrant colors in this gorgeous rolled cake. (At dusk, the leaves are so bright it's as if the trees are on fire; absolutely breathtaking!)
Make sure you have all your ingredients measured out and grouped together according to the mixing instructions in the recipe before you get started. While the recipe isn't difficult, there are a lot of steps and it is easy to get confused the first time around. After you have made it several times, it will be much easier!
Check out the other recipe tutorials with design templates similar to this, such as the Decorated Sponge Cake Roll, the Cherry Blossom Cake Roll, and the Arabesque Patterned Sponge Cake, each with different patterns and templates.
CAKE RECIPE HELP
INGREDIENTS
For the cake:
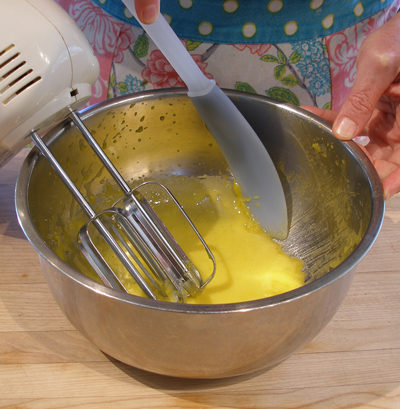
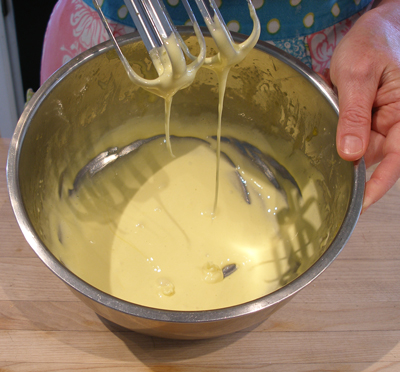
3 large eggs, separated – 3 large egg yolks, Step II, and 3 large egg whites for Step IV
1/3 cup sugar, separated – 3 Tablespoons for Step II; 2 Tablespoons and 1 teaspoon for Step IV
1/4 cup water
3 tablespoons vegetable oil
1/2 teaspoon vanilla
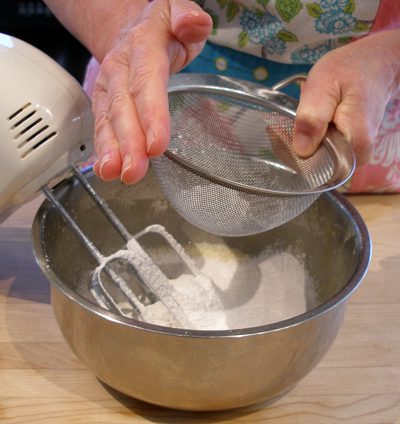
2.8 ounces/80 grams cake flour
For the decorations, Step II:
1 large egg white
pinch of cornstarch
yellow, super red, orange gel paste food coloring; Americolor
1 1/2 teaspoons cake flour, divided; 1/2 teaspoon for each color
For the filling:
3/4 cup heavy whipping cream, well chilled
1 1/2 tablespoons sugar or powdered sugar
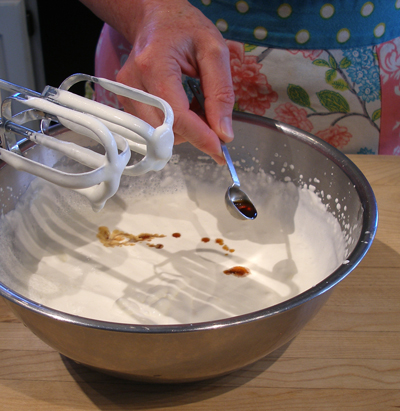
1/2 teaspoon vanilla
raspberries and sliced peaches, placed on paper towels to drain
Equipment:
Silicone Baking Mat, translucent to fit a 9 x 13-inch baking sheet: Must make sure it is 100% silicone if you have to cut to fit pan size and use for baking.
Sources: NordicWare.com and World Cuisine Non-Stick Silicone Baking Mat
Prepare the pan:
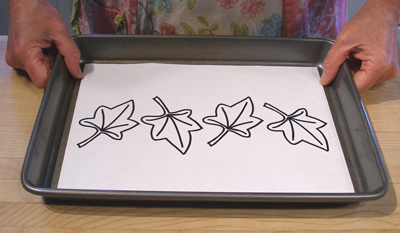
1. Place the White Piping Template in the bottom of a shallow 9- x 13-inch baking sheet(this is also known as a 1/4 sheet pan, or a brownie pan).
Trim the template to fit your pan, if you have to so it lies flat.
NOTE: You will remove this template after you bake the cake.
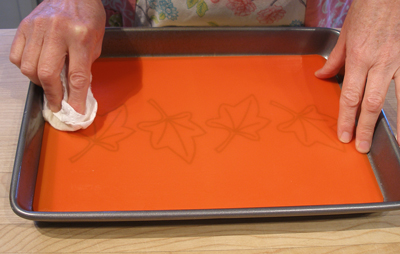
2. Place the silicone liner in the pan and rub the liner and the sides of the pan with a little vegetable oil.
NOTE: You will need to use a translucent liner, such as the one being used here, so you can see the Piping Template, below.
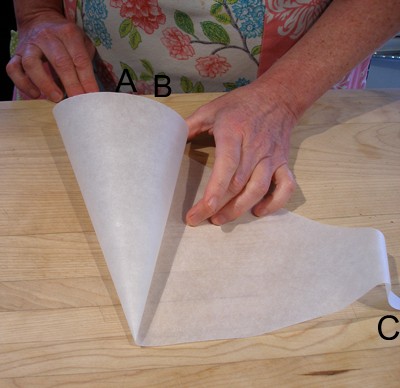
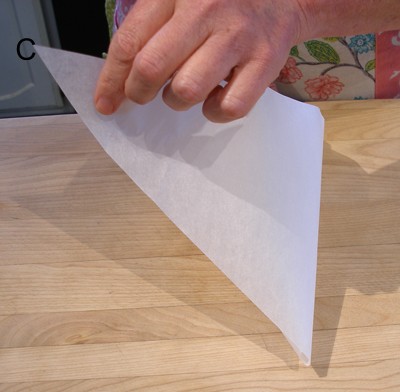
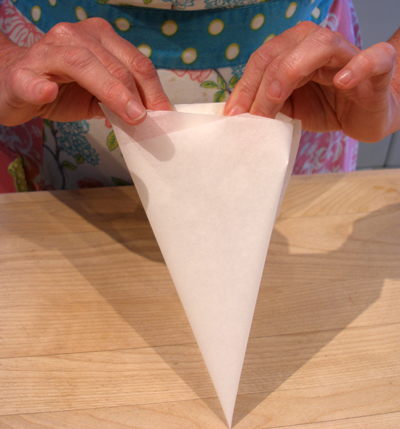
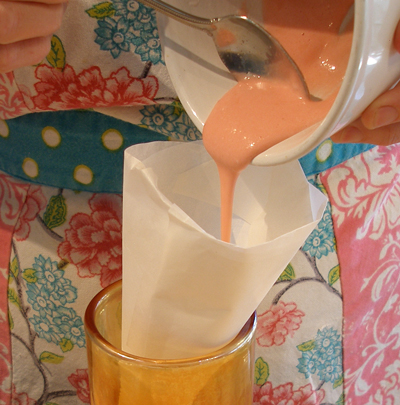
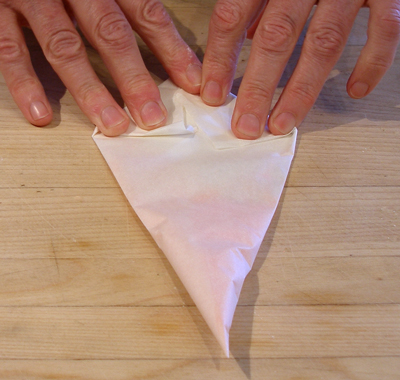
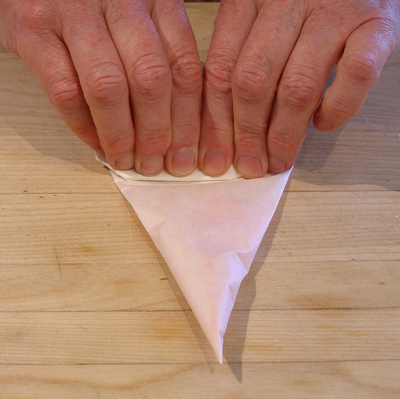
Make four parchment paper cone piping bags: (more)
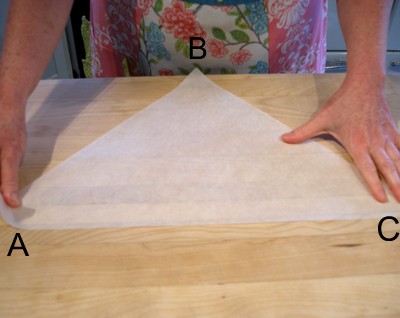
1. Place a parchment triangle(I used Wilton 15-inch parchment triangles) in front of you, with point B facing you.


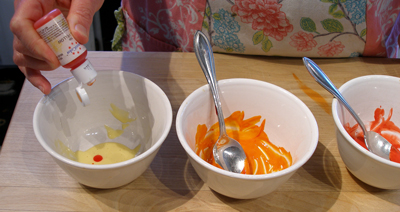
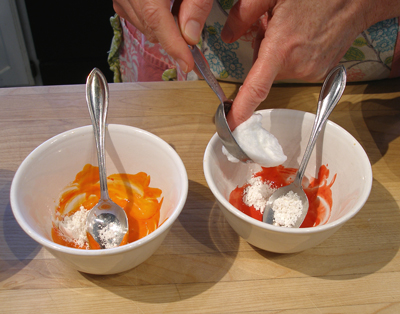
NOTE: This recipe calls for 3 colors – yellow, red, and orange – so you need 3 small bowls.

2. Add one drop of gel paste food color to each bowl and stir to combine.
– Red – in the bowl with 1 teaspoon egg yolk batter, use a drop of super red gel paste color.
– Orange – in the bowl with the 1 teaspoon egg yolk batter, use one drop of orange gel paste color
– Yellow – in the bowl with 1 teaspoon egg yolk batter, use a drop of yellow gel paste color.
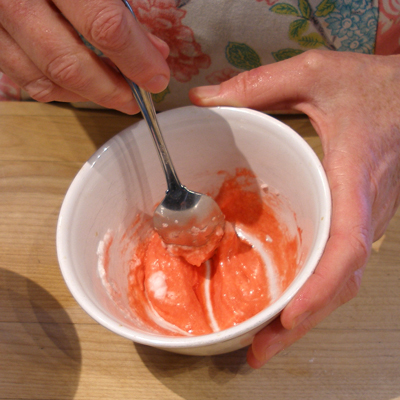
Complete the tinted batter for decorating the cake roll:
1. To each of the colors, add 1/2 teaspoon cake flour.
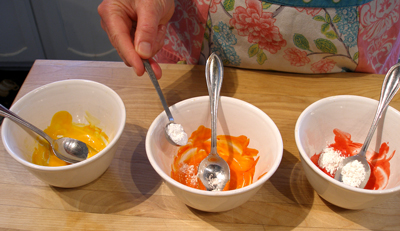
2. Then add 2 tablespoons reserved beaten egg whites, then stir to combine.
3. Stir until the mixture is uniform. Then put the colored batters into separate parchment bags and fold down the tops.
Preheat the oven:
1. Position an oven shelf in the middle of the oven and preheat oven to 325 degrees F for 20 minutes.
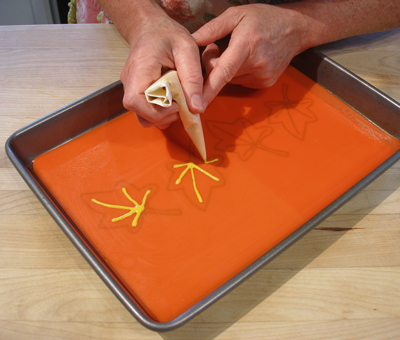
Pipe the decorative pattern on the prepared cake pan and bake:
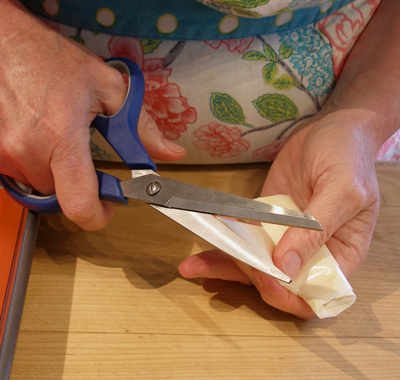
1. If necessary, cut a tiny hole in the end of the parchment cone piping bag; you want to make sure the batter does not come out too quickly while piping!
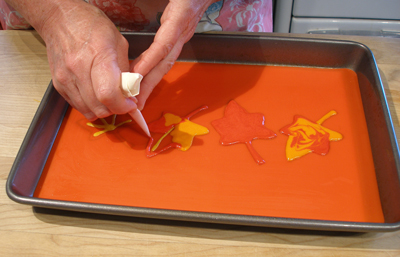
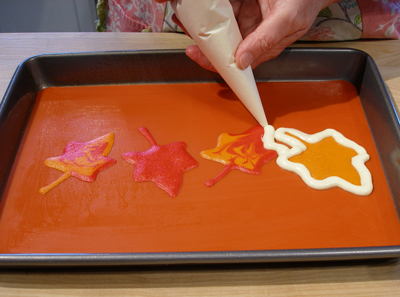
2. Pipe the veins of the leaves with the yellow batter, according to the Template, on the prepared silicone liner, from STEP I.
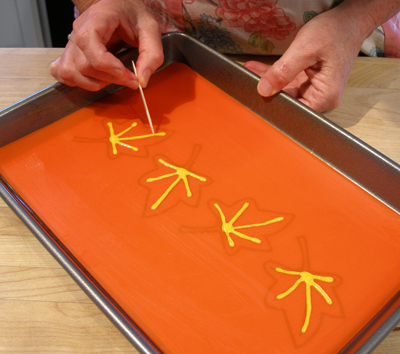
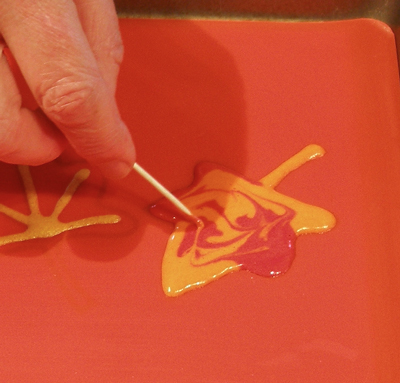
If the line is not completely uniform, you may use a toothpick to gently adjust the lines.
3. BAKE: Bake for exactly for 1 minute and 30 seconds, then remove the pan from the oven.
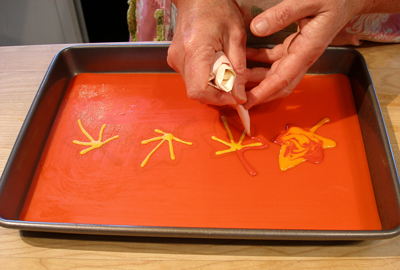
4. I decided to alternate variegated and solid leaves on the cake roll. The first and third leaves are variegated and the second and 4th are solid.
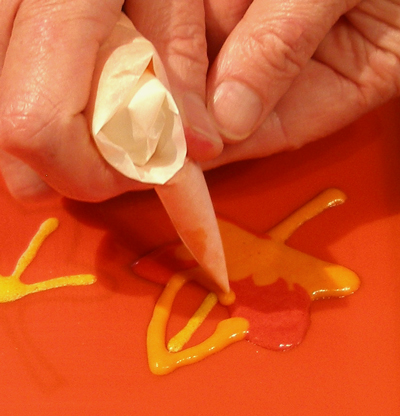
To make the variegated leaves, pipe the stem and an irregular shaped section of the bottom of the leaf with the orange. Then pipe some of the red batter and finish up with more orange…just try to make them look as realistic as possible.
Using the end of a toothpick, gently swirl the batter colors together, being careful to not disturb the veins of the leaves which are sitting just under the leaf batter.
The swirling will not be as pronounced on the cake as they appear here, because we are looking at the BACK of the leaves.
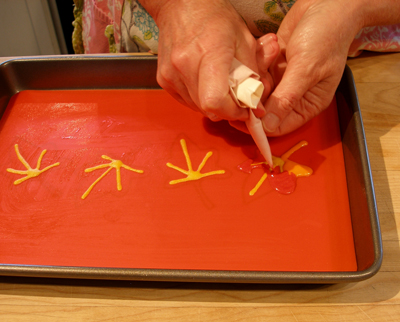
For the solid leaves, just pipe them using red or orange.
When you get to the third leaf, pipe the stem with the red batter, and then pipe the two colors together, as you did on the first leaf.
Use the orange batter to pipe the final leaf.
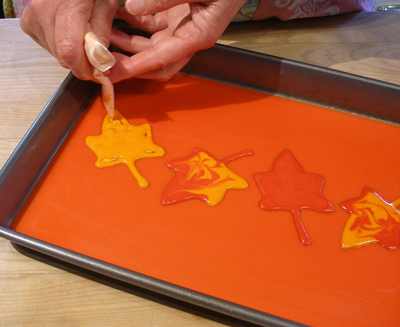
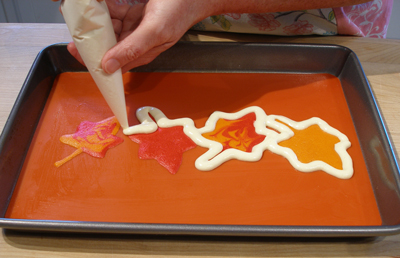
5. BAKE: When complete, bake the leaves for 1 minute and 30 seconds, then remove the pan from the oven.
Gently lift up the corner of the silicone liner and remove the template.
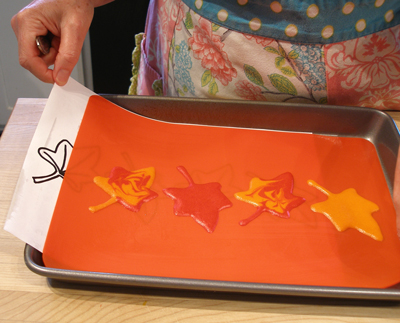
Do not turn off the oven.
STEP IV: FINISH THE SPONGE CAKE ROLL AND BAKE
Complete the remaining plain cake batter:
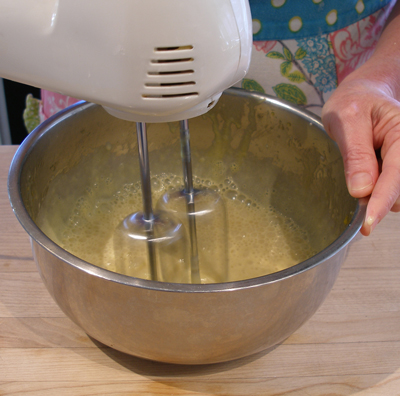
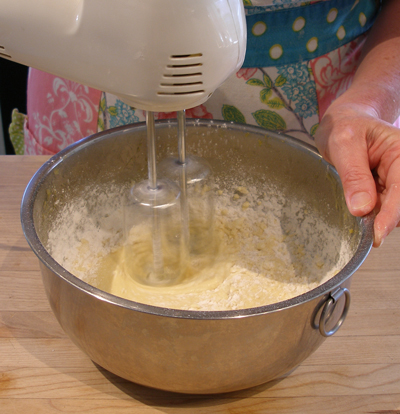
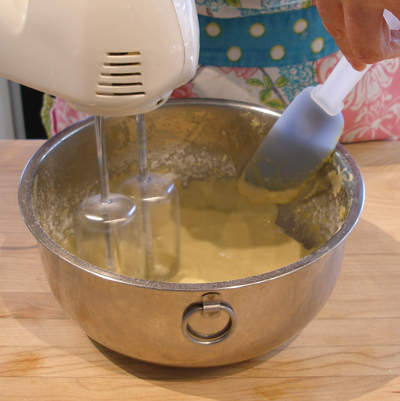
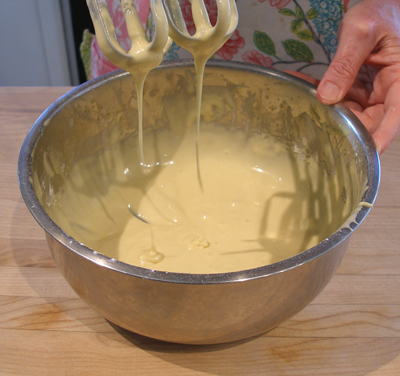
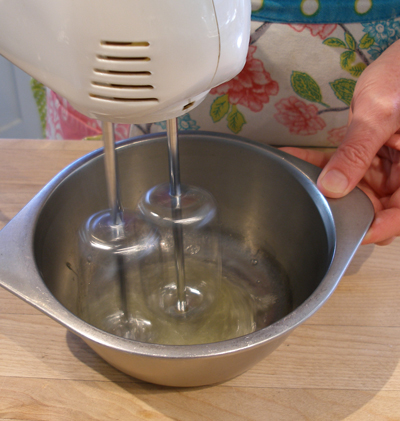
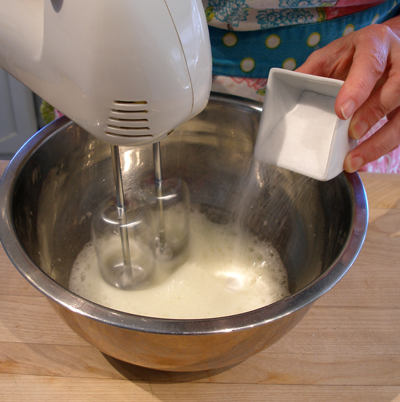
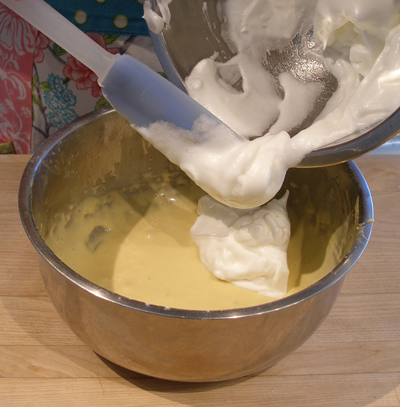
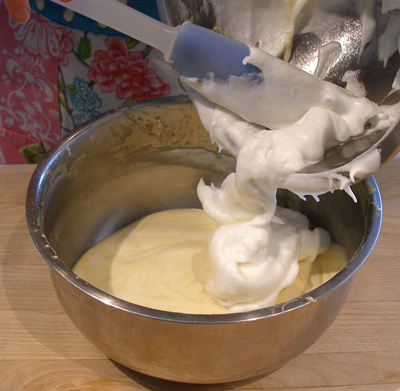
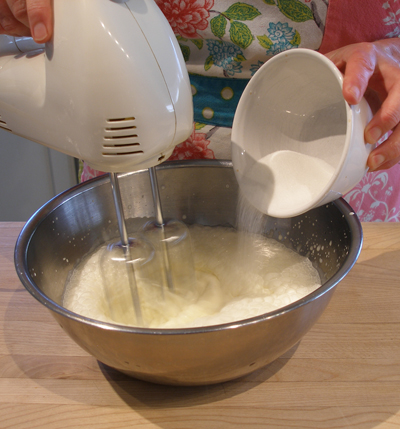
1. With the mixer on medium-low, beat the remaining 3 egg whites until they are foamy, then slowly add the 2 Tablespoons and 1 teaspoon(remaining sugar from the original 1/3 cup). Increase the mixer speed to high and beat until firm peaks form.


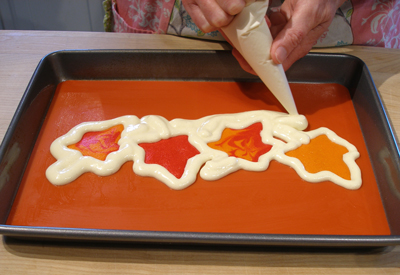
1. Cut a small hole in the tip of the piping bag. Pipe the plain cake batter around the partially baked decoration in the pan.
NOTE: This helps make sure that no air-bubbles form around the design in the finished cake.
2. Squeeze the rest of the plain cake batter in the piping bag out in an empty areas of the pan.
3. Pour the rest of the batter into the pan, and gently smooth the top with a rubber spatula, taking care you do not press down.

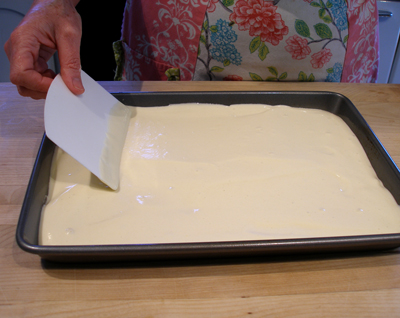
4. Gently drop the pan on the counter a couple of times to release any extra air bubbles.
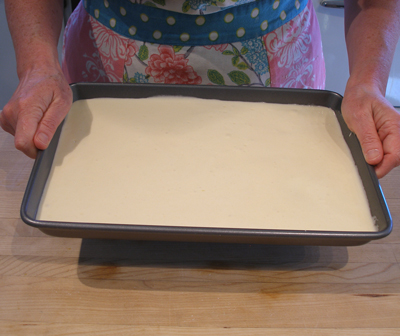
Bake the cake:
1. Bake the cake for about 10 to 11 minutes.
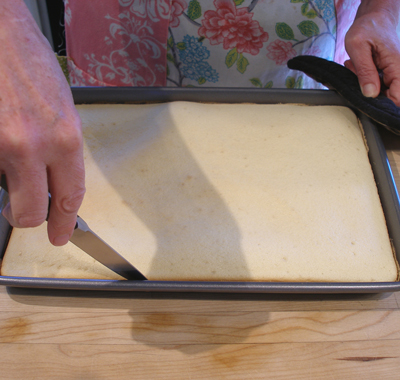
To test for doneness, the cake should be slightly brown on the edges and still fairly pale on top. Test it with a toothpick. It should come out dry.
DO NOT over-bake the cake or it may crack when rolling.
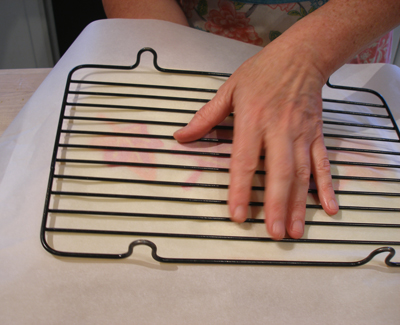
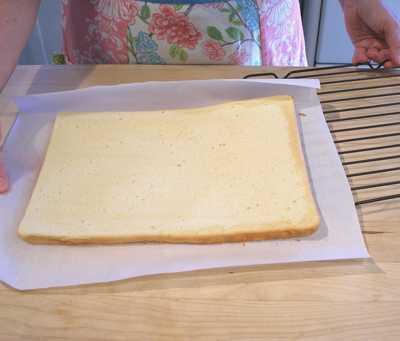
2. Place cake , while still in the pan, on a wire rack. Do not let it cool.

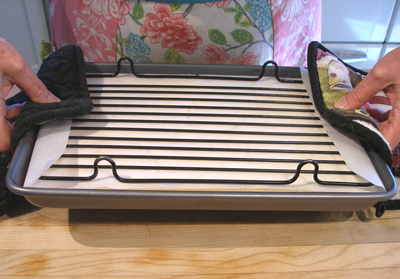
Then place a large piece of parchment on top of it. This will help you roll up the cake, so it should be longer than the cake.

d. Let the cake cool for 15 minutes with the parchment on top of it, to keep it from drying out.
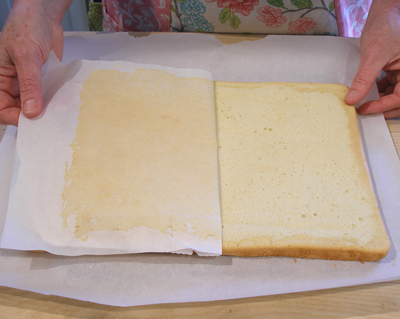
e. When cake is cool, flip the cake over so the decorated side is on the bottom
STEP V: MAKE THE WHIPPED CREAM FILLING AND ROLL THE CAKE. SERVE.
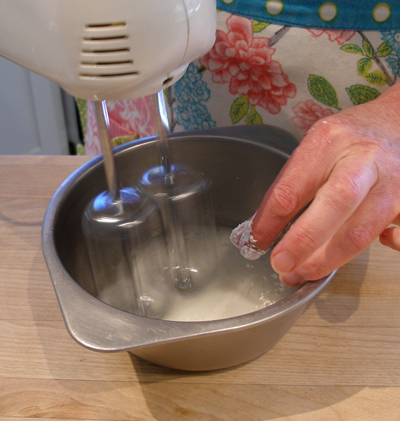
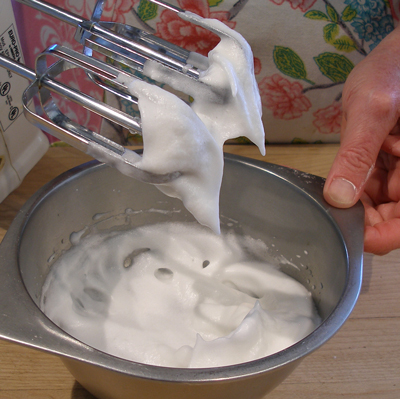
Make the whipped cream:
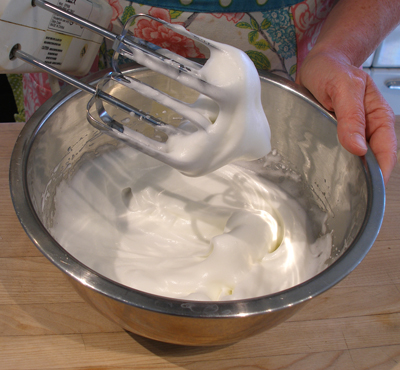
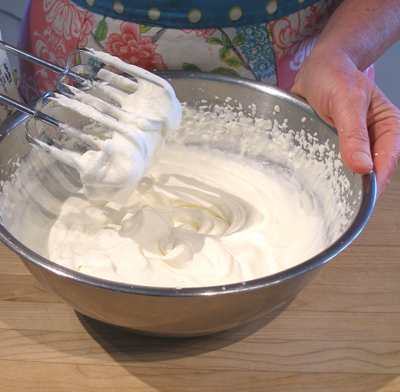
1. Place heavy whipping cream in a bowl and whip on high until it just starts to thicken.
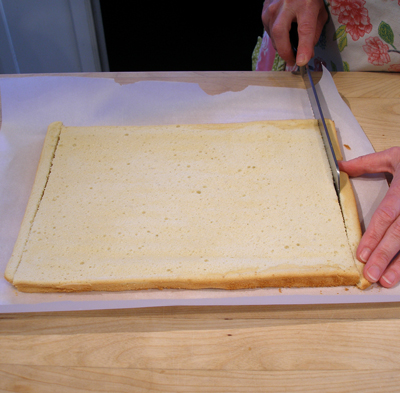
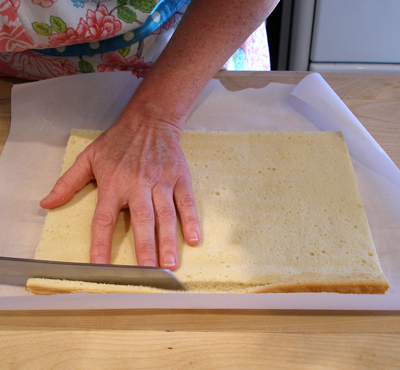
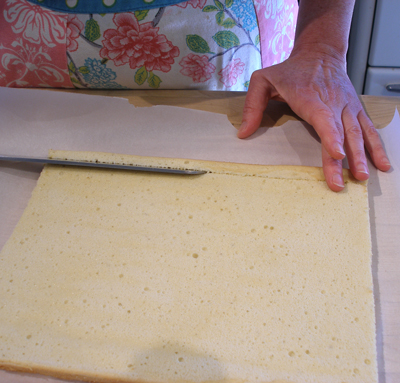
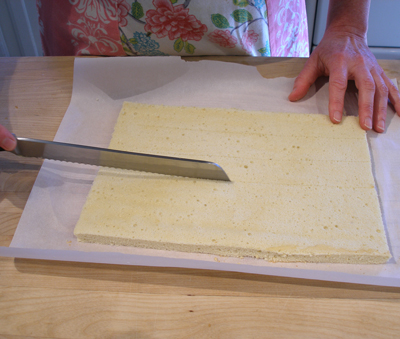
Trim the cake in a certain way:
Fill the cake and roll:

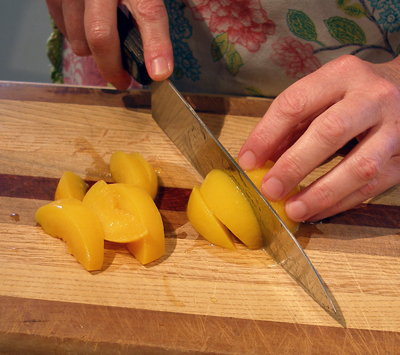
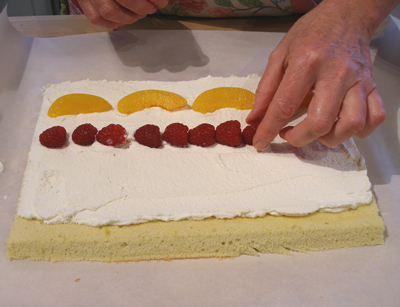
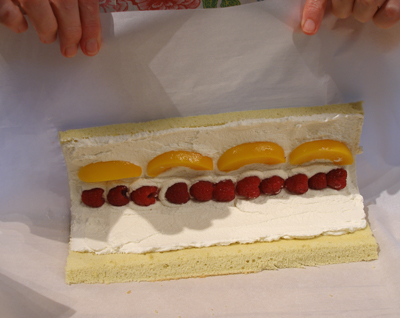
2. I chose to fill this cake with peach slices and raspberries because the colors go well with the decoration on the cake, and the flavors work well together.
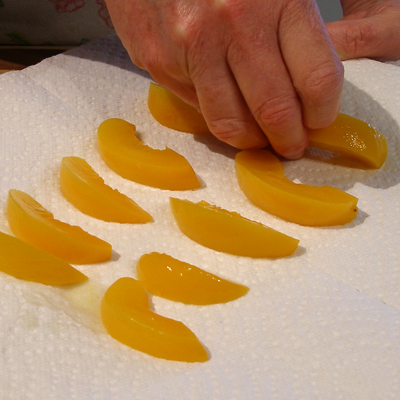
You may use peeled fresh peaches, if you can find them, but I simply used canned peach halves and sliced them, because they are not in season right now. Make sure to put the sliced peaches on a paper towel, to absorb excess moisture
Place 1 row of peaches and one row of raspberries across the length of the cake as shown in the photo below.
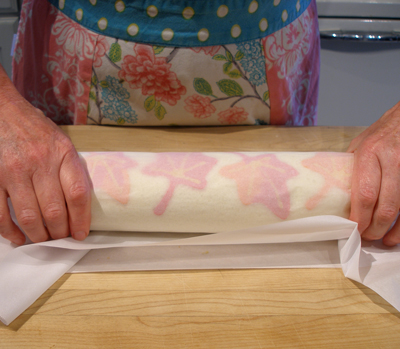
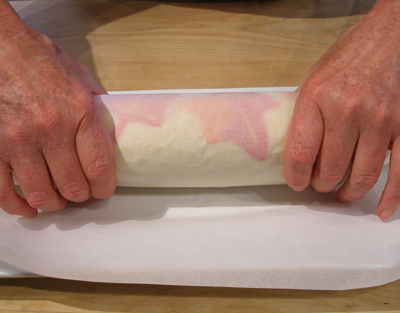
3. Roll the cake up, using the parchment to help you. Start from the edge facing you, and roll away from you.
4. Place the rolled cake in the refrigerator to chill for at least two hours.
Serve:
1. Unwrap the cake. Then trim the cake ends, if necessary, with a sharp serrated knife, to neaten.
2. Place on a pretty platter, seam side down so the pretty pattern shows. Cut into slices and serve.
STORAGE
The cake's whipped cream and fruit filling is perishable, and the cake must remain refrigerated. Keep out of refrigeration at the cool side of room temperature for no more than two hours. The unfilled cake can remain at room temperature for a few days, well covered, or can be frozen for a month or more.