

Crisp and chewy and covered with your favorite toppings, there's nothing like making and eating your own homemade pizza, especially if you have a great dough recipe. We love this one! It's easy to make but has lots of flavor without using sourdough starter. To find out how I coax all that flavor out of our dough, see below! This recipe is ideal for a pizza party because it makes six pizzas, all customizable with your favorite toppings.
BREAD RECIPE HELP
This is used with the:
 Skillet Pizzas
 Stromboli
INGREDIENTS
2 3/4 cups warm tap water, divided; about 100 to 110 degrees F, measured with an instant read thermometer
1 teaspoon active dry yeast
6 1/2 cups unbleached all-purpose or bread flour, divided, plus more as needed; spoon into the measuring cup and level to rim
2 teaspoons mild-flavored honey, such as clover or wildflower
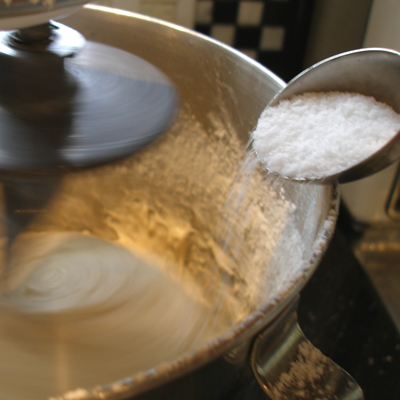
1 tablespoon kosher salt, plus more as needed
INSTRUCTIONS
STEP I: MAKE THE SPONGE STARTER
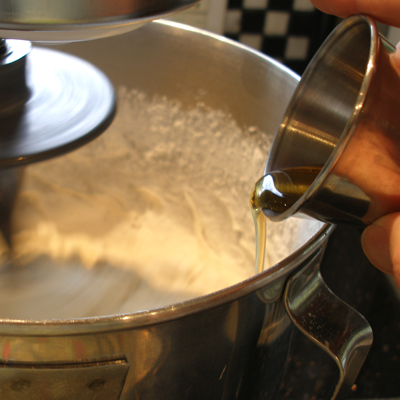
1. Rinse the bowl of a standing mixer with hot water to warm it. Put 2 cups water in the bowl and then sprinkle the yeast over its surface and let it sit for a few minutes to dissolve the yeast. Stir until dissolved.
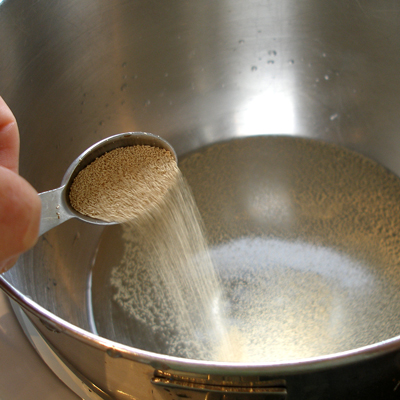
2. Sprinkle the 3 cups flour over the surface of the dissolved yeast.
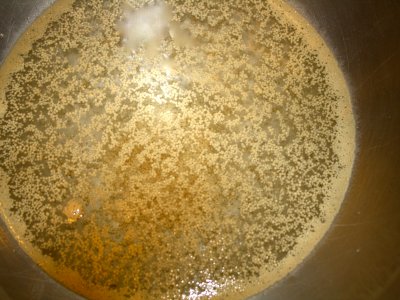
3. Stir with a spoon to quickly combine the ingredients. The resulting sponge will be lumpy and look like oatmeal; it's ok
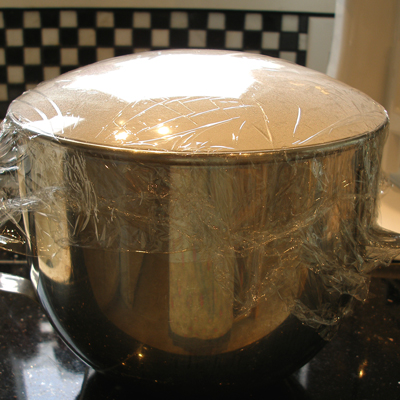
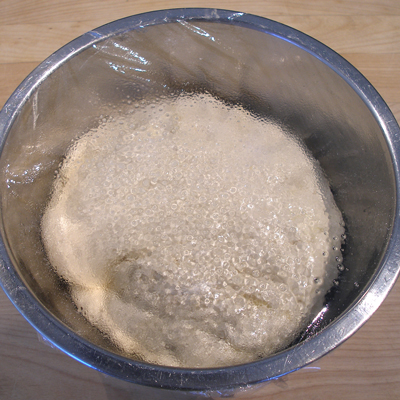
4. Make sure you scrap the sides of the bowl. Wrap the bowl tightly in two layers of plastic wrap. Set the dough aside at room temperature (ideally 68 to 70 degrees F) for 1 hour to ferment.
SARAH SAYS: As the sponge ferments, the CO2 gasses that are released will press firmly against the plastic wrap, so you want to make sure the bowl is well sealed.

5. After 1 hour, the plastic wrap will be puffed up like this just from the CO2 gasses. Isn't that something?!!
The sponge starter will have slightly risen.
STEP II: MAKE THE PIZZA DOUGH
1. Lightly grease with olive oil a bowl large enough to hold the dough when it doubles in size. Set aside.
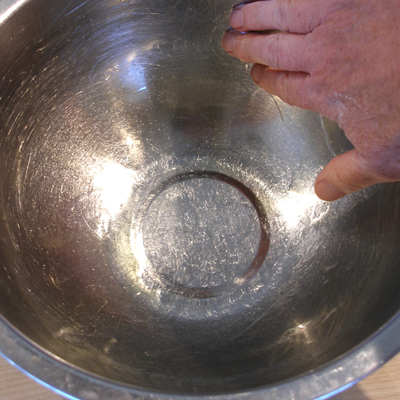
2. Uncover the bowl containing the fermented sponge and it should have slightly risen, be smooth and filled with air bubbles. Do not stir it.
SARAH SAYS: If it doesn't look as described, place the sponge in a warmer place this time, for about 1/2 to an hour, or until it looks right. If that doesn't help, discard and make another sponge.

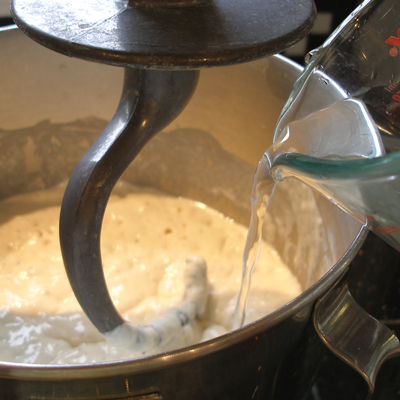
3. Clamp the mixer bowl onto the stand mixer and attach the dough hook taking care not to deflate the sponge.
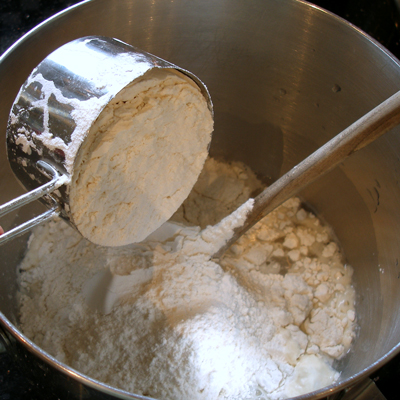
Add the remaining 3/4 cup warm water and the remaining 3 cups flour, slowly at one side of the sponge, while mixing on low to combine.
4. Stop and scrape the mixer bowl.
With the mixer on low, add the honey, and mix the dough for 2 minutes.
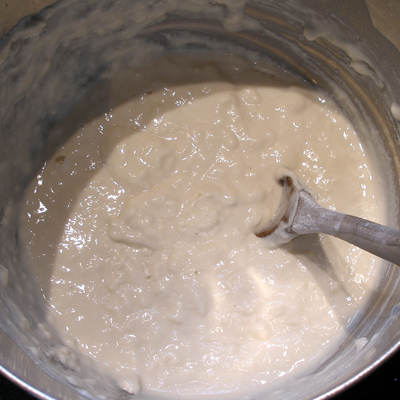
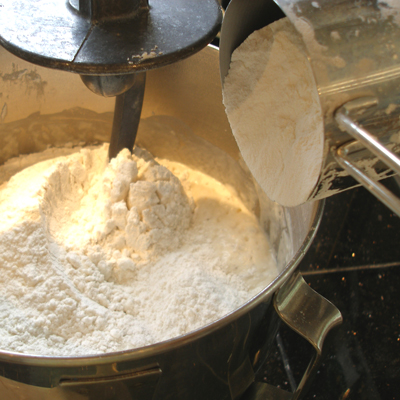
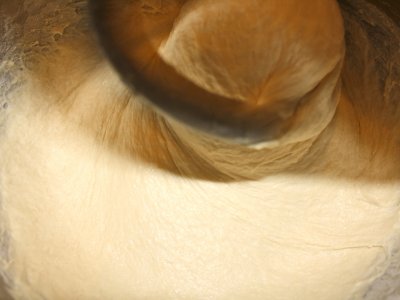
5. Add the salt and mix on medium speed for 6 to 8 minutes, until the dough starts to pull away from the sides of the bowl. Note that the dough will not pull so much that it completely cleans the bowl, but you want the dough to be on the sticky side.
6. After 6 minutes of mixing, the dough is too sticky. Note it does not pull away from the sides of the bowl at all. I needed to add in the rest of the flour – 1/2 cup – into the bowl, a few tablespoons at a time, to make it less sticky.
SARAH SAYS: I continue to mix and add in flour, a few tablespoons at a time.
SARAH SAYS: I continue to add in more flour.
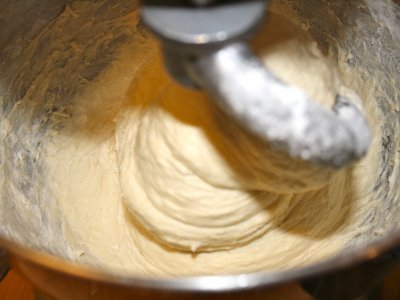
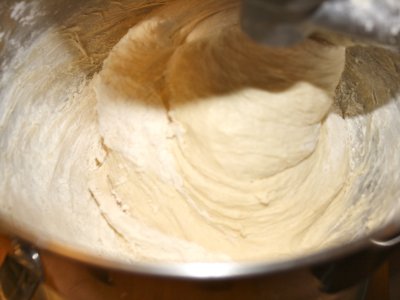
SARAH SAYS: At the end of 8 or so minutes, the dough is perfect – still sticky, but some of it pulled away from the sides of the bowl.
The total amount of flour I needed to make this pizza recipe came to 6 1/2 cups, but the amount will vary depending on the weather; don't be concerned if you need less or more.

7. Scrape the dough out of the mixer into the prepared bowl; the dough will be sticky.
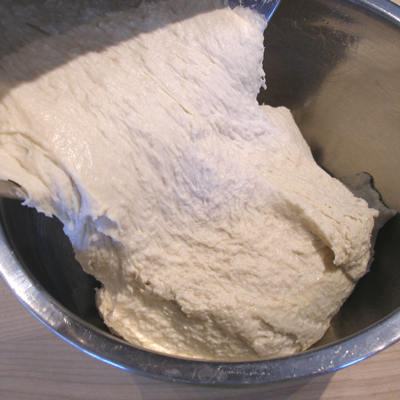
8. Wrap the bowl tightly with a greased-side-down piece of plastic wrap. Set the dough aside at room temperature for 45 minutes to rise.
STEP III: SHAPE THE PIZZA DOUGH
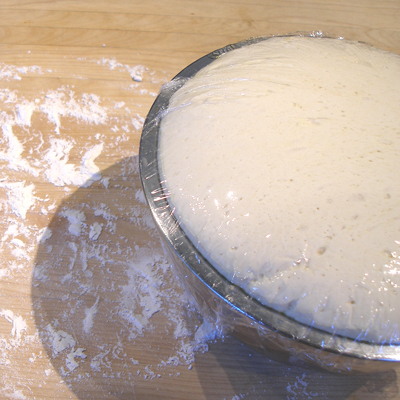
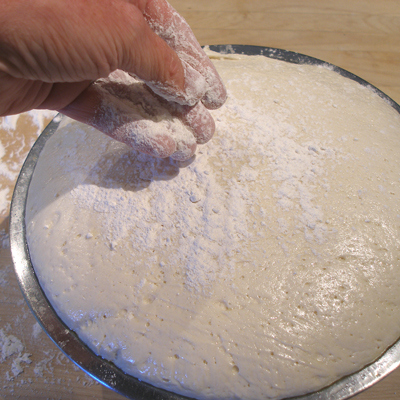
1. Flour your work surface and sprinkle a little flour on the top of your bowl of risen dough.
This is to insure that your hand doesn't stick to the dough, as it is a rather soft dough.
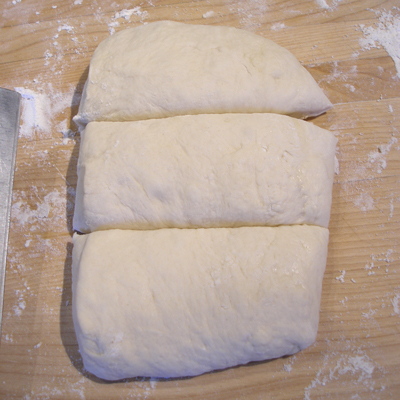
2. Gently deflate the dough and turn it out onto your work surface.
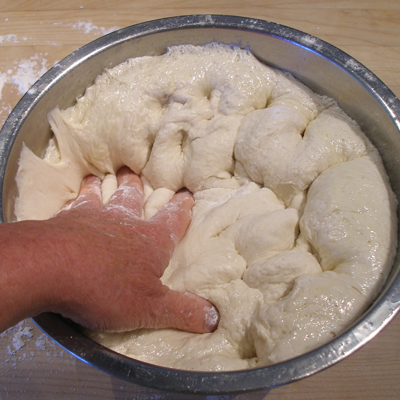
3. Divide the dough into six equal segments using a bench scraper. Make sure you cut straight down as you divide the dough.
SARAH SAYS: I first divide the dough in half, and then divide each half into thirds to get six equally sized pieces.
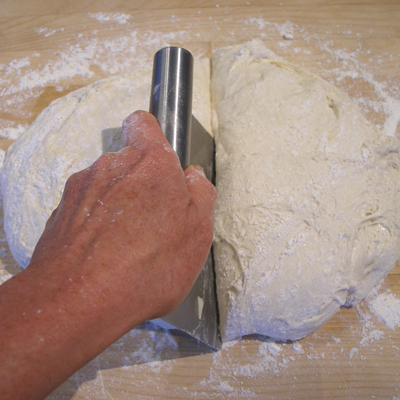
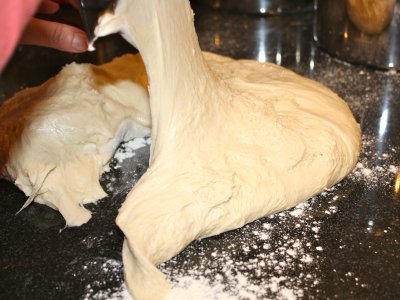
SARAH SAYS: If the dough is sticky and will pull into (gluten) strands as you lift the bench scraper, gently detach them. Place the strands back on the dough.
Sprinkle the top of the dough with more flour if it gets too sticky.
4. Cut each half into three portions, making 6 pieces of dough.
SARAH SAYS: If you are unsure if the pieces are divided evenly, weigh each piece on a kitchen scale to double check. Do not tear off small pieces of dough from the cut pieces to correct the individual weights; use a bench scraper and cut straight down through the dough. Just place the cut piece with the larger piece; they will be shaped into a ball together in the next step.
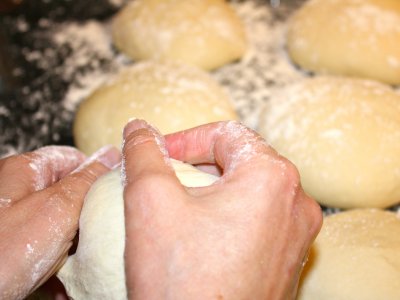
5. After dividing the dough, gently tuck the edges of each round of dough under itself while rotating the dough in your hands.
To form a nice round ball, gently pull the sides of the dough down to the bottom and then pinch them together underneath the ball.
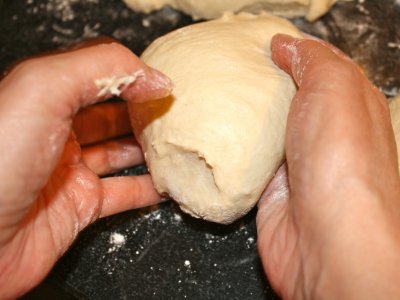
The underside of the dough ball will look like a jellyfish.
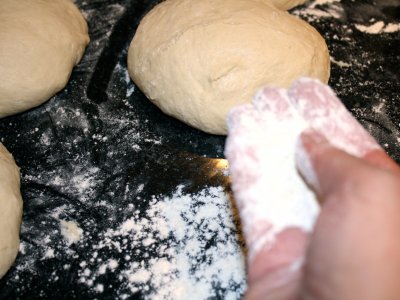
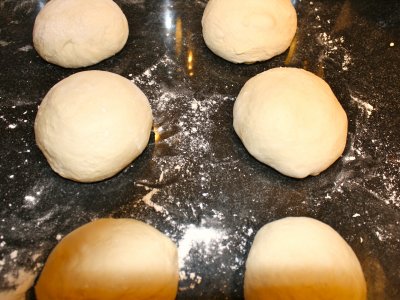
6. Dust the work surface with flour, and place the rounded dough ball on it. Complete rounding the rest of the dough pieces.
Cover the dough rounds with greased side down pieces of plastic wrap and let them rest for 5 minutes.
NOTE: FOR LONG-TERM STORAGE
After rounding, instead of placing on a floured work surface to rest, grease each rounded ball with olive oil and wrap separately in a resealable plastic bag and refrigerate for 2 to 3 days, or freeze for a month or more. To defrost, place in the refrigerator until thawed, the day before you plan to use them.
After removing from the refrigerator, let warm to room temperature in its plastic bag for 10 to 20 minutes. Then start with Step 5, above.
SARAH SAYS: I used one dough round to bake this recipe and froze the other 5 dough balls for later use. But, the photos below show all six dough balls in use.
_
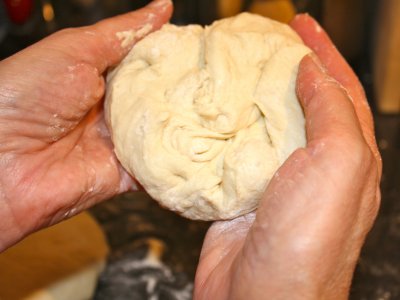
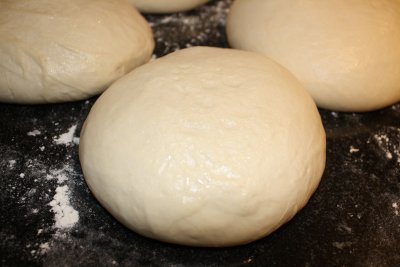
7. After resting, lightly flour your hands and use both hands to gather each round of dough into a taut ball. The underside should look like a jellyfish.
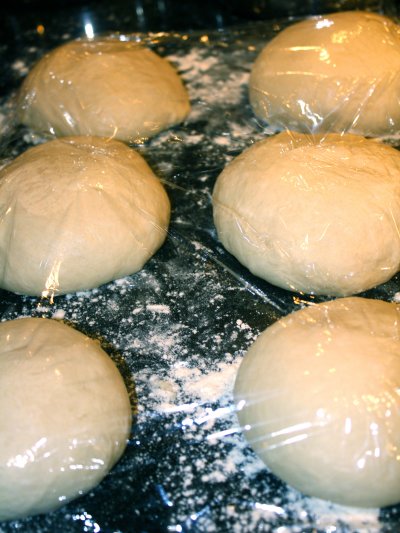
8. Dust a baking sheet generously with flour and place the dough rounds on it.
9. Cover the dough with greased side down plastic wrap and set them again at room temperature for 1 hour to proof or rise.
Meanwhile, while the rounded dough balls rise, prepare your topping recipe.
STEP IV: HEAT THE OVEN. PERFORM THE FINAL SHAPING OF THE PIZZA DOUGH. TOP THE PIZZAS. BAKE AND SERVE.
Heat the oven. Shape the pizza dough:
1. Position the oven shelf to the lower third of the oven.
SARAH SAYS: You can place a pizza stone on the shelf before preheating. Or, use an old baking sheet to bake your pizzas on.
2. Heat the oven to 450 degrees F.
This is one way to shape your dough:
1. Pick up one risen dough ball without deflating it, while keeping the others covered.
SARAH SAYS: Move the five remaining dough balls, on the baking sheet, to the refrigerator for later baking after this first one.
This is not intended for long term storage; this will help retard their rise for baking after this first pizza is complete.
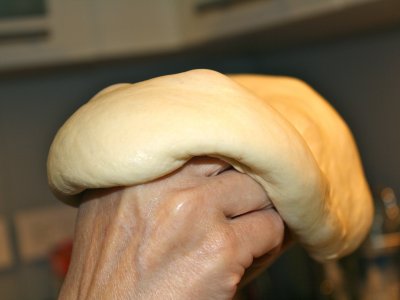
2. Holding the ball underneath with both of your fists, pull your fists apart about 4-inches very slowly so the round stretches apart against the backs of them. The dough should stretch easily. If it doesn't, let it rest for 5 minutes, and try again. Be gentle or the dough will tear. If the dough tears, shape the dough back into a ball, shaped like a jellyfish underneath, and let rest, covered, for 5 minutes. Then try, again.
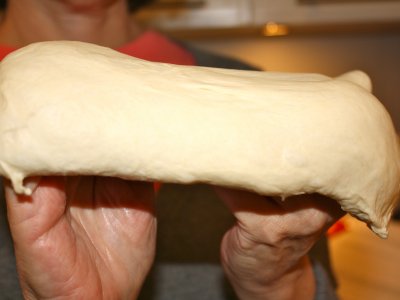
3. Gently move the dough a quarter turn, around your fists like the hands of a clock so the dough continues to stretch outward into a circle.
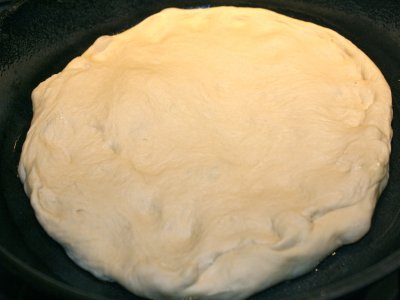
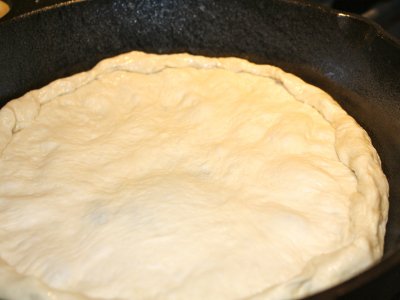
4. When the dough has stretched into a rough circle, about 5- to 7-inches in diameter, place it in the center of your baking sheet.
Then use your fingertips to stretch the dough evenly to fit into the bottom of your pan. Try to evenly distribute the dough; if it isn't, don't worry.
The dough should stretch easily. If the dough is hard to stretch or has some resistance, wait a few minutes to allow it to rest before resuming again.
5. Continue to stretch the dough to about 10-inches. Fold the dough over itself, forming a small crust rim.
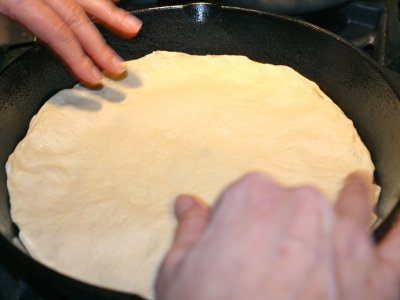
6. Brush the rim of the dough with olive oil and sprinkle with a light coating (1/4 teaspoon) of kosher salt over the surface of the dough.
7. Then, top with your toppings, and bake.