A woven lattice is one the prettiest looking ways to top a pie or tart. It is especially good for juicy fruit and berry or savory pies or tarts to allow for the steam to easily escape from any filling during baking, where you still want to have a crust on top. Though it may look fancy, you can quickly make a lattice top when you follow our simple, step-by-step weaving technique. This technique is used with the Cherry Pie. I have another tutorial showing how to weave a lattice top for tarts.
HOW TO TIPS:
1. Roll the dough and cut the lattice strips.
A. Remove second disk of dough from refrigerator and roll until the pie dough is 3-4-inches larger than the pan you will be using for your pie (at least 12″ wide, for a 9″ pie). Your dough should be about 1/8″ thick.
B. Decide how wide you want your lattice strips to be, and mark your dough for cutting.
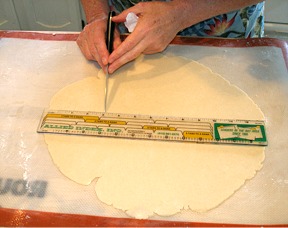
KELLY SAYS: I marked 10 strips, each an inch wide – or I marked the dough at every inch. I used a ruler. :^) Make sure the strips are not too thin in width because they are harder to work with.
C. Cut marked dough with a pastry cutter or a pizza wheel.
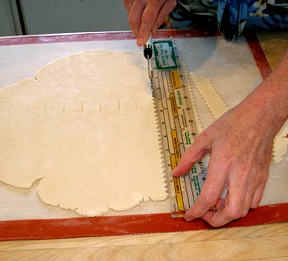
KELLY SAYS: I use a fluted pastry cutter because I think it looks pretty.
2. Weave the lattice strips:
A. When your strips are all cut, remove pan from refrigerator and pour the pie filling into pie dough lined pan. Place the longest strip in the center of your pie pan.
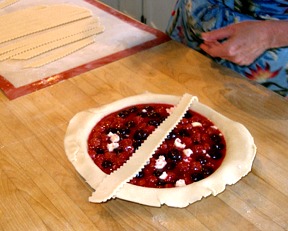
B. Take another long strip and place it over the first strip, making a cross.

KELLY SAYS: From this point on, you will be weaving, you know, under over, under over.
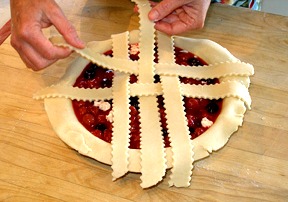
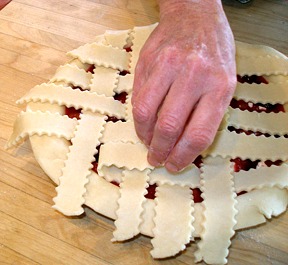
C. Take two more strips and place them, one to the left of the first strip, and one to the right of the first strip, and OVER the second strip.
Then, lift up the first strip and place another strip over the third and fourth strip and under the first strip.
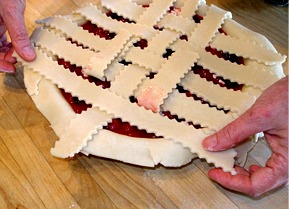
D. Repeat on the other side.

E. Continue weaving your strips, until you reach the edge of the pie pan.
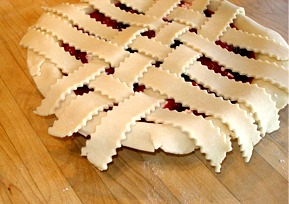
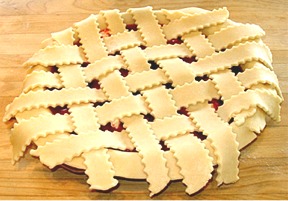
When you are done weaving, your lattice should look like this:
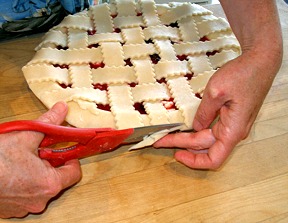
3. Complete the pie crust edge.
A. Trim the lattice so it is the same length as the bottom crust overhang.
B. When your weaving is complete, brush water under all the strips, where it meets the bottom crust. Gently press the lattice to the bottom crust. This will help the lattice top adhere to the bottom crust.
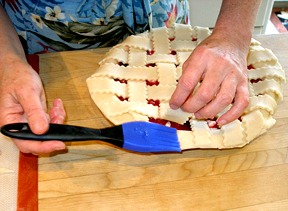
C. Fold the bottom crust OVER the lattice and give it all a traditional crimped edge. This creates a streamlined, tailored look.
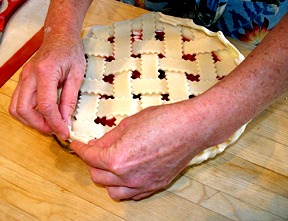
KELLY SAYS: There are many ways to finish the edge of a lattice crust.
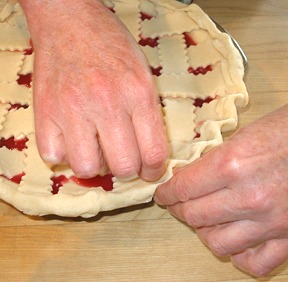
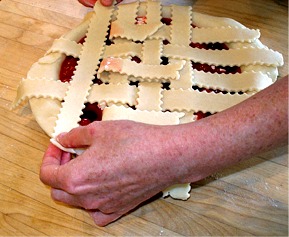
D. Crimp the pie crust edge:
I use the knuckle of one hand and press it between the thumb and index finger of the other hand, to create a scalloped edge.