A coating, as of syrup, applied to food is called a glaze. Glaze can be poured, drizzled or brushed on with a pastry brush on the outside of cakes or cookies or in between cake layers for different looks, called glazing. Once applied, the glaze sets up very quickly, so you only have a small window of time in which to use it.
If you are going to add chopped nuts or chocolate sprinkles on top of the glaze, do so before it sets so that they will adhere. Once it does, you mustn't touch the glaze any more or you will mar its surface.
Before serving, a glazed-topped recipe must be allowed to set uncovered in a cool place or a refrigerator. If you need to touch it up, slip narrow pieces of waxed paper under the cake's edges to keep platter clean. Drizzle glaze and remove waxed paper after it has set.
POUR GLAZE ON A CAKE
This technique is used with the:
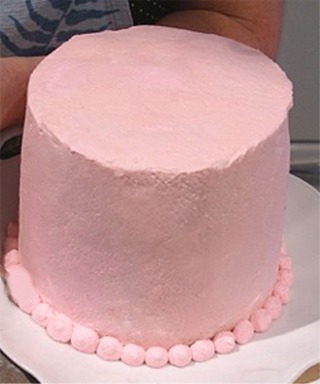
 Cherry Pink Tuxedo Mini-Cake and Cupcakes Recipe
HOW TO TIPS:
When the Chocolate Glaze has cooled to a perfect flowing consistency, remove the chilled frosted cake from the refrigerator.
NOTE: To pour the glaze on the cake, the secret to success is to the cake should actually be cooler than the chocolate because it helps keep the
chocolate from running down the sides too quickly.
4. Start in the center of the cake and pour the glaze SLOWLY.
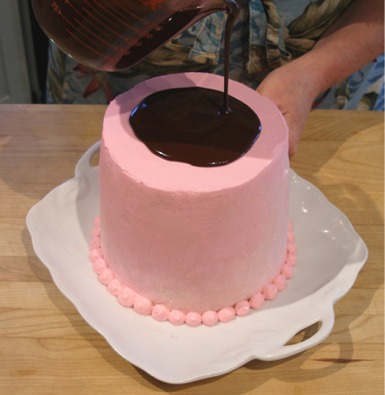
The glaze will move towards the edges of the cake and start to drip over and down the sides.
Stop pouring when it does.
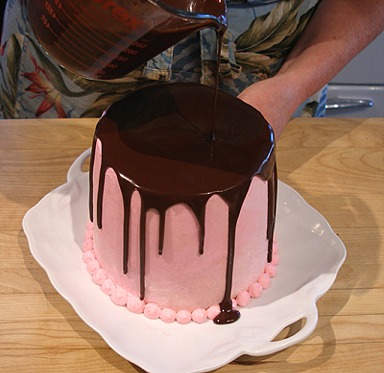
If you see an area of the cake with no drizzle, pour a little more on the top of the cake near that side.
Do not pour too much, or you will have a mess on your hands.
5. Place the uncovered cake back into the refrigerator to allow the chocolate glaze to set. It takes about 10 – 30 minutes or so, depending how thick the glaze has been poured.
ENROBE CAKE IN A GLAZE
If you're going to glaze an iced layer cake with a ganache glaze or a Poured Fondant, first refrigerate the cake for at least 1 hour so that the glaze will not melt the frosting underneath. Before using a Poured Fondant glaze, make sure the cake's covered in marzipan, a hardened Apricot Glaze or a thin layer of icing first so it will provide a smooth surface.
This technique is used with the:
 Spring Blossom Petits Fours or Petit Four Squares Recipe
HOW TO TIPS:
1. Place a wire cake rack over a clean baking sheet. Set aside.
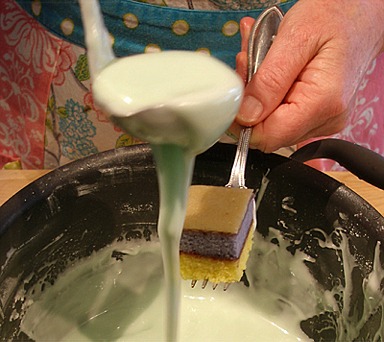
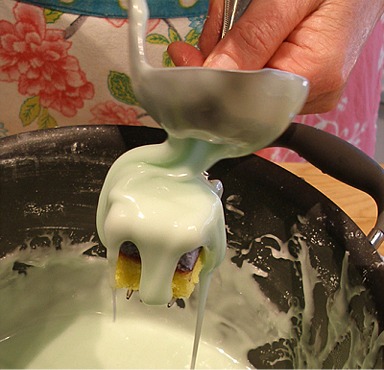
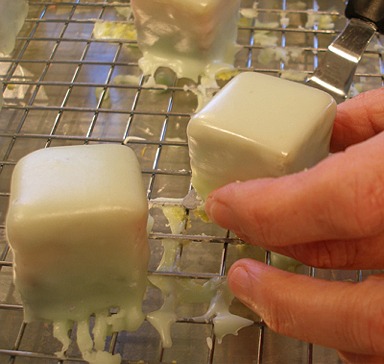
2. Put one PETITS FOURS SQUARE on a fork at a time. Hold it over the pot holding the warm POURED FONDANT GLAZE.
Using a small ladle, pour a generous amount of glaze over the square, making sure to cover all the corners.
NOTE: POURED FONDANT GLAZE will start to thicken as you work. In that event, just place it back on the stove under low heat for a couple seconds or less, stirring constantly. If it is too thick, add a few drops of water at a time and stir while heating. Then, remove it immediately. Place the pot back into the bowl of warm water. If it thins, let cool a bit, while stirring until it thickens.
If you see thin crystals forming on top of the POURED FONDANT GLAZE as you work just stir them back in and you should be fine.
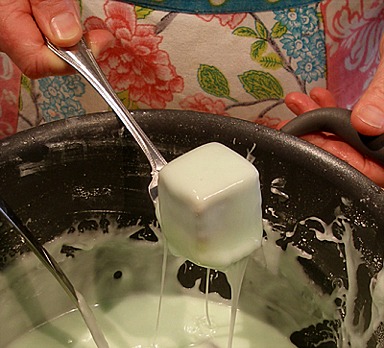
2. Gently tap the fork handle on the edge of the pan to remove most of the excess POURED FONDANT GLAZE, then scrape the bottom of the fork against the side of the pan to remove any dripping glaze.
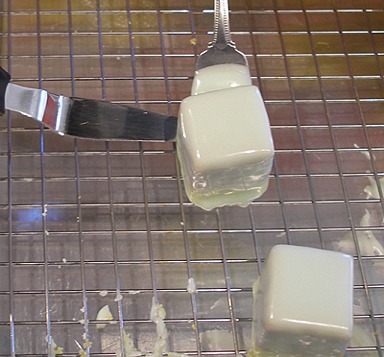
3. Use a small offset spatula to help you place the petit four on the wire cake rack to dry. Dry the petit fours for at least an hour, until the fondant is dry to the touch.
4. Continue with the remaining PETITS FOURS SQUARES, making sure to stir the POURED FONDANT GLAZE if any crystals form on the top. Every once in a while, use a rubber spatula to scrape down the sides of the pan and stir any hardened glaze back into the pan. If the glaze begins to get thick, and it will, you may reheat the pan over LOW heat, stirring constantly, to thin it down again. Make sure the temperature does not exceed 100 degrees F, measured with an Instant Read Thermometer, or you will lose the sheen.
5. After an hour or so, when the PETITS FOURS SQUARES begin to dry, use a small off-set spatula to help remove them from the rack. Then, trim the excess glaze off the bottom edge of each with a sharp paring knife.
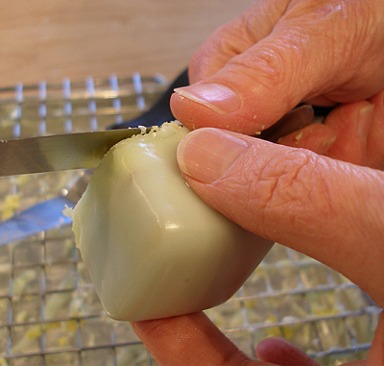
6. Place each PETITS FOURS SQUARE into a mini cupcake paper.
This technique is used with the:
 Valentine's Day Love Stacks Recipe
Glaze the Cake Heart Shapes with Chocolate Ganache
HOW TO TIPS:
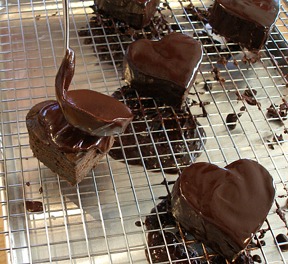
1. Set the cake hearts on a rack, that has been placed over a rimmed baking sheet. The baking sheet will contain the ganache that flows off the cakes.
Later, you can scrape the excess ganache off the baking sheet, so you can reheat it and use it again.
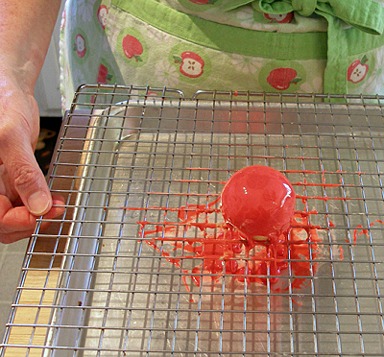
2. Stir the ganache glaze. Using a small ladle, pour a generous quantity of the ganache, over one of the hearts.
SARAH SAYS: Make sure glaze or ganache is of pouring consistency but not hot. It should pour like corn syrup does. If you lift it and pour it back into the bowl it should hold a slight trail. If using a warm glaze, use an Instant Thermometer to make sure it has cooled to 86 to 91 degrees F! If the ganache glaze is too cold for pouring, place it on top of just boiled water, and stir in one direction until warmed.
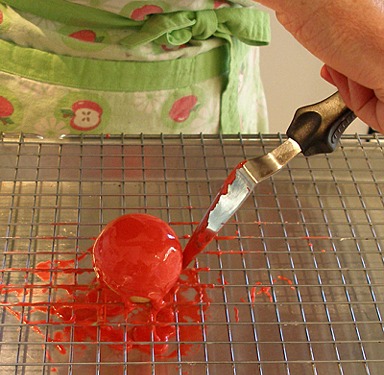
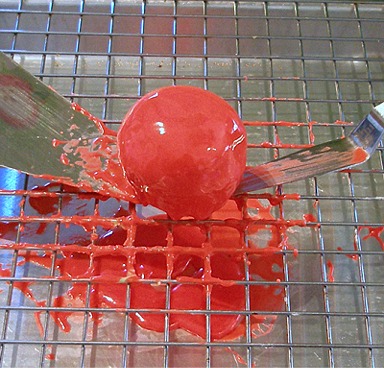
3. Then, gently “bounce” the rack to make the ganache flow evenly over the top and down the sides of the cakes.
If you see any “bald spots” simply pour a little more ganache over the area and bounce the rack again.
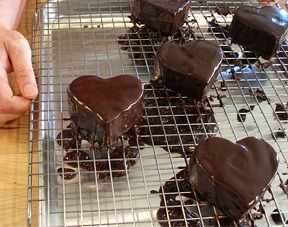
4. Set the cakes aside, until the ganache firms up, or place cakes in the refrigerator, if you're in a hurry. Do not leave the cakes there because the ganache glaze will become dull.
Glaze an entire cake
1. Prepare a pan to catch the excess glaze drips: using a jelly roll pan, place a piece of parchment or waxed paper in the bottom. Place a cake cooling rack in or on top of the pan.
2. When ready to glaze the cake, place the assembled cake on a cardboard round the same size as the cake. (Or, you can cut the cake into slices, and pour glaze or ganache over each one !) Brush all the crumbs from the surface of the cake. Place cake on prepared wire cake rack set in pan to catch any drips. The key is to have two sets. That way, you can move your cake still on the rack, over the next set and pour the excess for your next coating.
3. Make sure glaze or ganache is of pouring consistency but not hot. It should pour like corn syrup does. If you lift it and pour it back into the bowl it should hold a slight trail. If using a warm glaze, use an Instant Thermometer to make sure it has cooled to 86 to 91 degrees F for a glaze or 100 to 105 degrees F for fondant before pouring.
4. The glaze should be poured at once onto the center of the cake, allowing the excess to flow down the sides. The glaze cools quickly and will thicken, so you only have a few minutes to be able to spread it smoothly with a flat and large metal spatula. Do not keep smoothing it, otherwise it will get messed up; at some point you can't fix glaze unless you re-glaze the cake.
5. Carefully tilt the cake and the rack from side to side so that some of the glaze runs down the side. If necessary, smooth quickly and evenly with a metal spatula held about 1/8-inch high, moving it lightly back and forth across the top and to add more to the sides from the excess that has fallen onto the baking sheet.
If you want to cover the cake more thickly and evenly, two coats of glaze can be applied. To do this, after the first coat is applied, refrigerate the cake for 20 minutes or until the glaze is firm. Apply a second coat of tepid glaze. (You will need 1 1/2 times the glaze for a double coat.)
6. Lift cake from rack using a broad spatula and set on a serving plate or on a clean rack if planning to apply a second coat of glaze.
7. Place glazed cake in a cool room so it can harden (unless it has perishable fillings, then the cake must be refrigerated). Allow cake to set for at least 2 hours at room temperature. If in a rush, refrigerate cake for an hour to set. If there are air bubbles use a pin and pop them before the chocolate sets. NOTE: Refrigerating the cake will dull the glaze slightly.
Drizzle on the Glaze
HOW TO TIPS:
1. Place cake or cookie on a wire cake rack set in or over a low-rimmed, parchment lined cookie sheet, to catch any drips.
2. Using a spoon or other implement and drizzle the glaze over the top.
Or, for no muss or fuss, pour glaze into a heavy plastic food-storage bag, snip off a tiny corner and squeeze. Snip off a little more of the corner if you want a thicker drizzle. Glaze can be drizzled in all sorts of directions; it will drip down the sides and go where it wants to.
Brush on Glaze
HOW TO TIPS:
Place cake or cookie on a wire cake rack set in or over a low-rimmed, parchment lined cookie sheet, to catch any drips. Make a simple glaze: Combine 1/2 cup apricot or any flavored jam and 1 tablespoon water. Heat the apricot jam in a pan with the water, then rub through a sieve to remove any lumps and seeds. Return to the pan and heat until boiling before brushing carefully over the cake. Brush off excess crumbs and start at the top in the center and work outward.
If a fruit-like glaze is brushed in between cake layers or cookie dough, such as Rugelach, it is cooked and not strained. Straining thins the fruit-like glaze too much and it tends to ooze out the sides.
Dip in Glaze:
The easiest is to simply dip the top of the eclair or cookie into the glaze until fully covered.
This technique is used with the:
 Hi-Hat Cupcakes
 Chocolate Eclairs Recipe
HOW TO TIPS:
1. Dip the top side of the filled éclairs into the chocolate glaze.
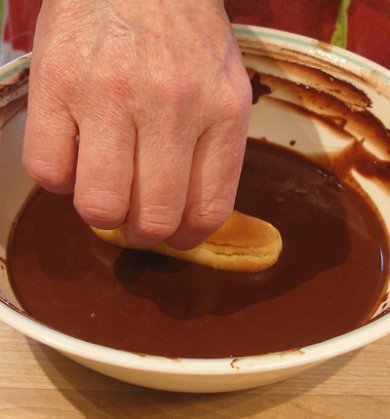
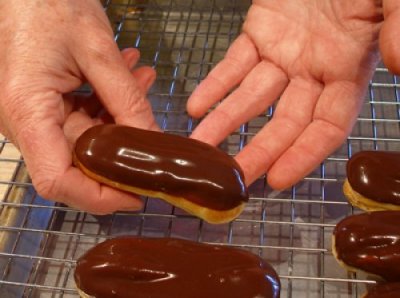
2. Pull the éclair up and let the excess glaze drip off.

3. Place the topped éclair onto a rack, placed over a baking sheet. Let the glaze set up for about 30 minutes before serving.
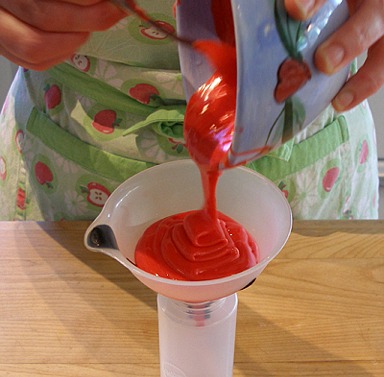
Use a Squeeze Bottle to Apply Glaze:
This technique is used with the:
 Fruit Pie Minis Recipe – Apple, Blueberry and Pear
HOW TO TIPS:
1. Place a cake rack over a baking sheet. Spread waxed paper on your work surface and place a large wire cake rack over it.
2. Stir and optionally pour the glaze into a squeeze bottle. If you do not have one, you can spoon the glaze over the pies with a ladle.
3. Place one pie on the wire cake rack at a time.
Squeeze or spoon a generous amount of glaze over the pie, making sure to cover the whole pie.
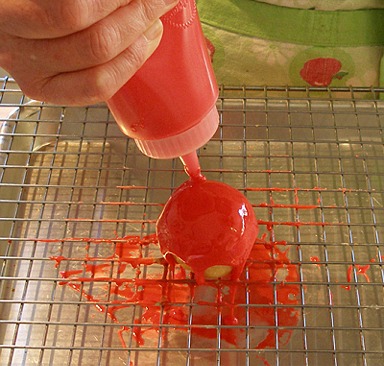
4. Gently tap the rack so the excess glaze falls into the pan below it.
Quickly, before the glaze sets, touch up any bare spots with a small spatula, and then tap rack again to settle the glaze.
4. Carefully remove the glazed pie to the clean rack, using two small spatulas.
Let pies dry, undisturbed, for 20-30 minutes. They make take longer.
Meanwhile, line your worksurface with waxed paper.
5. When pies are completely dry, pick them up and gently smooth the glaze at the bottom of the pies with your finger.
Place the dry pies on the clean waxed paper.