 Professional bakers use atmosphere-controlled “proof boxes” to keep the bread dough at the right temperature and humidity for the best possible rise or fermentation and a moister bread texture. The more warmth and humidity, the faster the dough will rise. I devised a way to have a proof box in my own home, without the great expense which I call, Sarah's Microwave Bread Proofer.
This how to baking technique is used with the Classic White Whole Wheat Sandwich Bread Recipe and the Whole Grain Wheat Bread From a Starter Recipe.
I invented Sarah's Microwave Bread Proofer and wrote about in my Baking 9-1-1 Book, Simon and Schuster, 2003. It is my rising place of choice because it works well and fast every time, and it includes both warmth AND moisture. Wetter dough is more tolerant (ability to be handled without breaking down) and extensible (stretchable), which drier dough is more elastic (snaps back) and less tolerant. The temperature changes its tolerance and elasticity; the warmer the dough the more extensible, but loses some of its tolerance.
SARAH SAYS: I use it for both the bread's Primary Fermentation and/or the Secondary or Final Fermentation. I have also used it with the Sponge Starter from my Whole Grain Wheat Bread From a Starter Recipe and in numerous other Bread Recipes.
Here's how to create Sarah's Microwave Bread Proofer in your home:
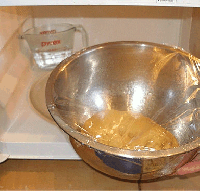
 1. In the microwave, bring 1-inch or a cup of water in a heat-proof glass to a boil on HIGH.
2. Turn off the microwave, place the dough in along with the steaming water, and close the door. The inside of the box will stay warm for 35 to 45 minutes; a portion of the time needed to raise dough for a loaf of bread (provided you don't open the door too often.)
3. Check on the rise and the warmth of the microwave after 35 minutes by opening the  door a crack. If the atmosphere isn't noticeably warm, remove the dough and temporarily put it in a warm place while you microwave the water again. Replenish the water before you do, if necessary. Return the dough to the microwave and close the door.
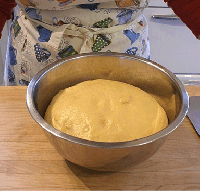
4. When the sponge starter or bread dough has sufficiently risen (primary or secondary or final proofing), remove it from the microwave proofer.


