
 Blanching (scalding vegetables in boiling water or steam for a short time) is a must for almost all vegetables to be frozen and when using certain vegtables in a recipe. It stops enzyme actions which can cause loss of flavor, color and texture.
Blanching cleanses the surface of dirt and organisms, brightens the color and helps retard loss of vitamins. It also wilts or softens vegetables and makes them easier to pack or use in a recipe.
Blanching time is crucial and varies with the vegetable and size. Underblanching stimulates the activity of enzymes and is worse than no blanching. Overblanching causes loss of flavor, color, vitamins and minerals.
As soon as blanching is complete, vegetables should be cooled quickly and thoroughly to stop the cooking process. To cool, plunge the basket of vegetables immediately into a large quantity of cold water, 60 degrees F or below. Change water frequently or use cold running water or ice water. If ice is used, about one pound of ice for each pound of vegetable is needed. Cooling vegetables should take the same amount of time as blanching.
Drain vegetables thoroughly after cooling.
BLANCHING TIMES
This how to baking technique is used with the: Fresh Homemade Pasta and Ravioli Tutorial and the Savory Quiche Tart with a Whole Wheat and Cheese Crust Recipe Tutorial.
HOW TO TIPS:
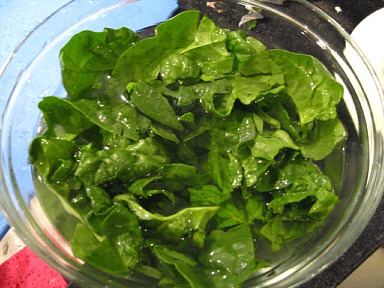
1. Soak the spinach leaves in cold water to get rid of any dirt or sand.
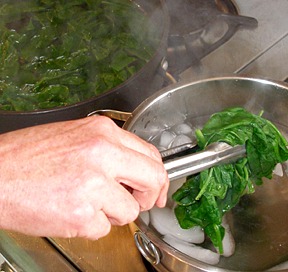
2. Blanch spinach by adding fresh spinach to boiling water in a large shallow pan.

3. Push spinach down into water with tongs, so it is submerged.

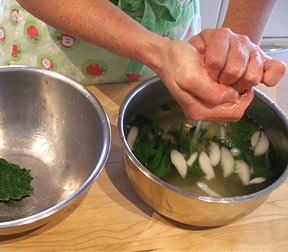
4. After 30 seconds, remove spinach from boiling water and place it in a bowl of ice water.
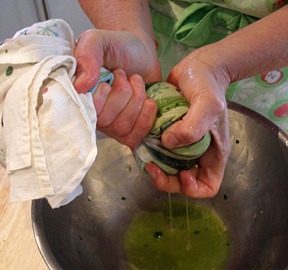
5. Remove spinach from ice water and squeeze to remove as much water as possible.
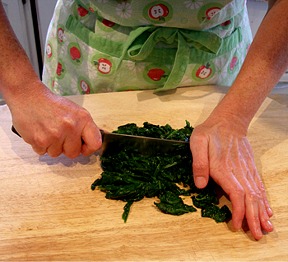
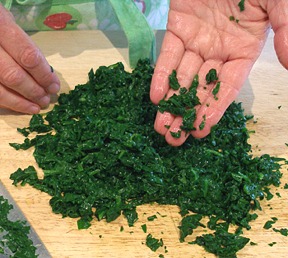
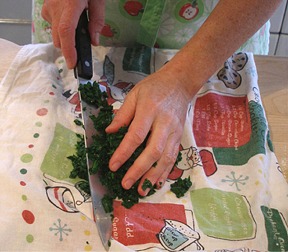
6. Chop spinach very finely with a sharp chef's knife.
7. Place chopped spinach in a clean kitchen towel (I find that flour sack cloths work the best) and squeeze hard, to remove excess moisture.

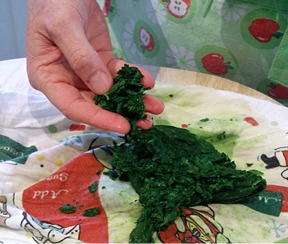
8. When you unwrap the spinach, it should be very dry, as pictured below.
9. Measure the amount needed for your recipe.