
 A chocolate leaf is made by painting a “safe” leaf with melted chocolate or chocolate chips and letting it harden. When you strip off the real leaf, you end up with a delicate chocolate one imprinted with the real leaf's pattern. Chocolate leaves make a great decoration and are delicious to nibble on. For example, before serving, put a chocolate leaf on the top a dollop of whipped cream that sits on a Fudge Sundae. Serve chocolate leaves with homemade cookies for dessert or place in the frosting on a cake as a decoration. The possibilities are endless. We als have a tutorial on how to make chocolate leaves by hand. Go to: Marbled Leaf Decorations
Technique used with the Shabby Chic Rose Cake Recipe, Triple Chocolate Raspberry Cake Roulade or Roll Recipe, and the Sachertorte.
Food styling and photo by Kelly CA © Sarah Phillips CraftyBaking.com
INGREDIENTS
Leaves
6-ounce package (for 50 leaves) of semi-sweet chocolate chips, dark or white chocolate (evenly chopped) or candy melts
LEAVES
Gather leaves from non-poisonous plants with stems, free of pesticides, clean and dry. Round and heart shaped leaves are the easiest to work with. Choose leaves that are flat not curled and not too large or complicated in shape. Young leaves are easiest to peel from the chocolate. Leaves about 1 to 1 and 1/2 inches across are best. If they have a small stem leave it on.
Good Choices: Leaves from fruit trees such as orange, lemon, apple and plum make a nice design. Leaves of cottonwoods, birch, beech, elm, sweet gum, and some oaks have interesting veins. Mint leaves have lacy patterns
Bad Choices: Be sure to avoid poison oak, ivy, oleander and sumac. If in doubt make sure you identify the leaves you've chosen or don't use them.
INSTRUCTIONS
1. Wipe the under-side of the leaves with a soft slightly damp cloth, then dry them with a soft DRY cloth. If water clings to the leaves, the chocolate will not stick.
Set on
2. Assemble a large plate. Line a cookie sheet with parchment or waxed paper. Set both aside.
3. Place the chocolate in a micrwave-proof bowl. Melt it in the microwave, on half power for 30 seconds, then stir. Repeat the heating and stirring until the chocolate is melted. Be careful you do not over-heat the chocolate.
STOVETOP MELTING: Partly fill the bottom of the double boiler with water and heat it to steaming hot- but do not let it boil. Turn off the heat. Put chocolate in the top pan and set it over the water. Stir the chocolate with a spoon until it melts and has no lumps. Remove chocolate from the top of the double boiler. Dry the bottom of the pan holding the melted chocolate.
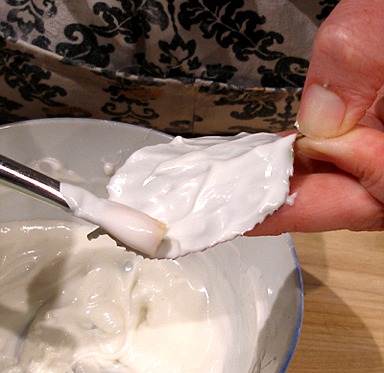
3. Hold the leaf by its stem or place it in the palm of one hand. With a clean and DRY brush, coat the BACK of the leaf (with the veins) with the melted chocolate. Coat it almost to the edges.
Try not to let any chocolate get on the other side of the leaf as it will be harder to peel off later.
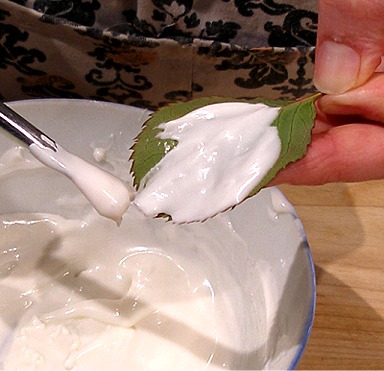
Make sure that the chocolate is thick enough near the rib of the leaf (where the stem is), so it does not crack when you peel the leaf away. If it is too thin it will break apart.
4. After you coat each leaf set it on a large plate chocolate side up. Continue with the rest of the leaves.
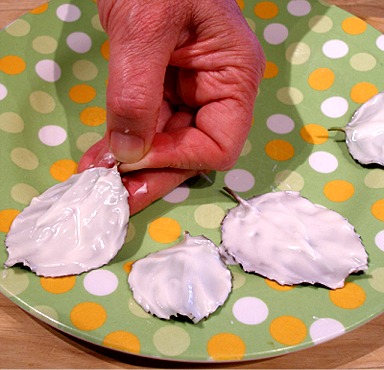
NOTE: After coating a few leaves, stir the melted chocolate each time, right before coating the next few ones. If the chocolate starts to cool and thicken, reheat and stir under gentle heat.
5. When the plate or sheet is full, place in freezer, for a few minutes to let the chocolate harden. (Or, place it in the refrigerator for 10 – 15 minutes.)
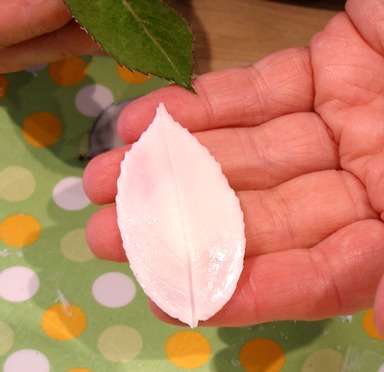
6. When chocolate is set, unmold the leaves by gently peeling away the leaf.
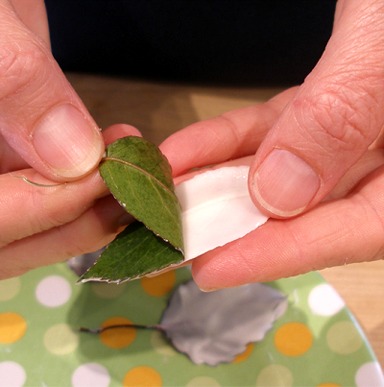
Immediately set the chocolate leaf in a single layer on the prepared cookie sheet.
NOTE: You may need a little practice to be able to do unmold the chocolate leaf without breaking the chocolate. But you will get the hang of it quickly. Carefully hold the chocolate leaf around its edges and strip off the real one by bending its stem in an opposite and downward direction and peeling it off. Work as quickly as possible and touch the chocolate as little as possible. The heat of your hand will melt it quickly.
7. Repeat with the rest of the leaves. Put the chocolate leaves in a cool place until you need them.
STORAGE
Store in a cool, dry place or freeze in a covered container in a single layer until ready to use.