
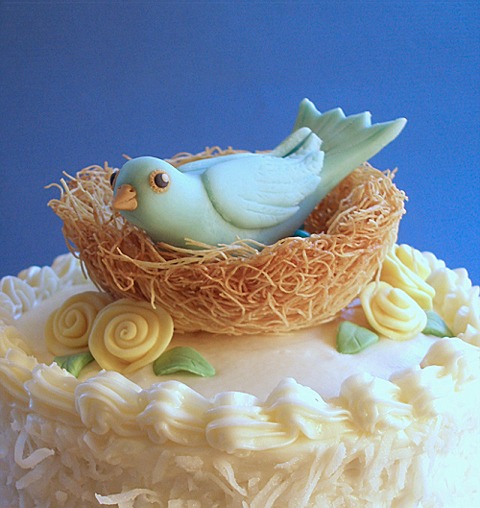
Make the bird at least two days in advance before you need it. The bird will be fairly hard in about two days. I like to let them air-dry for a couple of days, to make sure all the moisture is out, then I store them in an airtight container to use for any project. We use this adorable Fondant Bluebird in the Mother's Day Coconut Cake Tutorial.
FROSTING ICING ETC. RECIPE HELP
INGREDIENTS:
1 1/4 cups Marshmallow Fondant or MMF, more if needed; 3/4 cups tinted light blue (bird), 1 teaspoon each: black (eyes), light brown (beak, eyes) and white (eyes); remainder leave white for extra
SUPPLIES:
Silpat mat, to work on
Cornstarch, to prevent sticking
Small fondant rolling pin
Toothpick-for texturing
Large sewing needle-for texturing
Clean Exacto-type knife
Small paring knife
Small bowl, with tissues, for supporting bird while it dries
INSTRUCTIONS
Use 3/4 cups MMF tinted light blue (bird)
1. Dust your work surface with a little cornstarch, to prevent sticking.
If the fondant begins to stick to your hands, at any time, just rub a little cornstarch between your fingers.
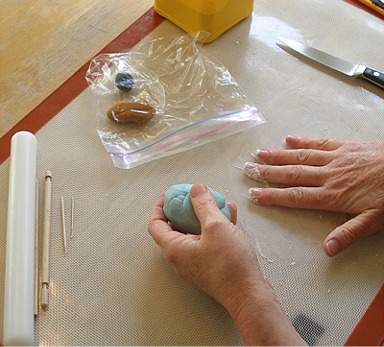
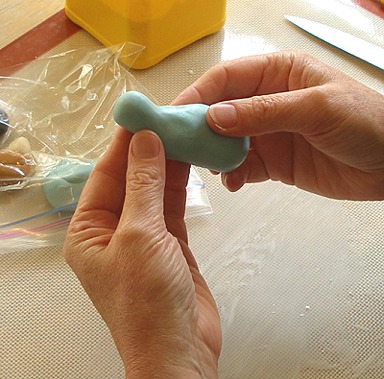
2. Take about 1/4 cup of the blue fondant, and then, elongate it into a thick sausage shape, by rolling it in your hands.
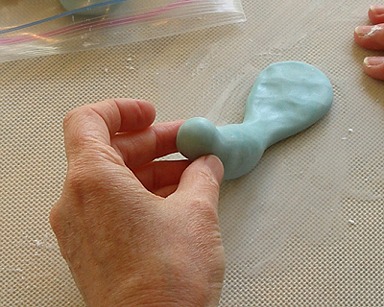
3. With the blue shape, begin to form the bird's head, by gently pinching, around one end of the sausage shape.
Pinch all the way around, until you have created the “neck” of the bird.
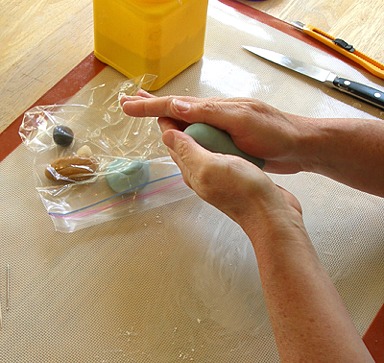
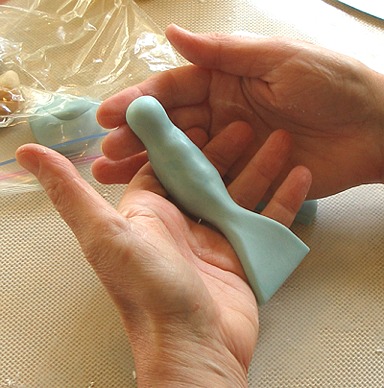
4. Support the head with one hand, and begin to gently pinch about 2/3 of the way down the sausage shape and begin to form the tail of the bird.
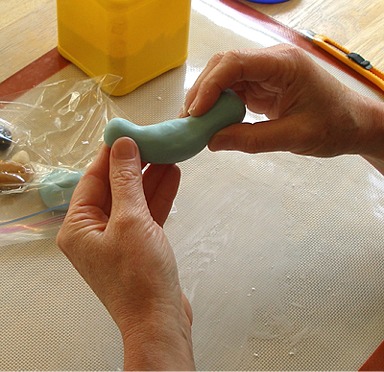
KELLY SAYS: Do not worry if there is a large ball of fondant at the end of the tail, we will cut it away later.
Begin to flatten the tail of the bird by flattening the end of the sausage with your fingers.

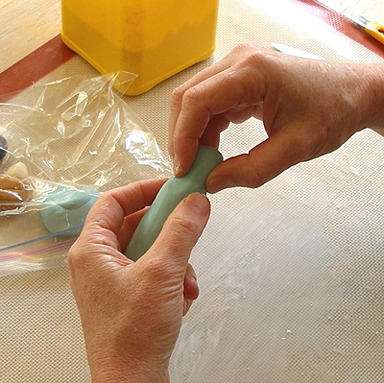
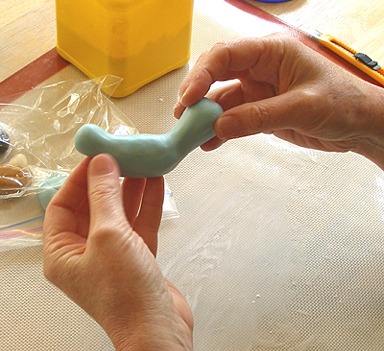
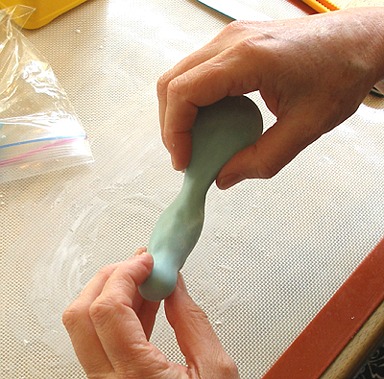
5. Place the tail on the cornstarch dusted silpat mat and continue to flatten, while supporting the head with your other hand.
Pick up the bird and gently pinch the area between the body and the tail of the bird to create a more elegant and narrowed line, supporting head with the other hand.
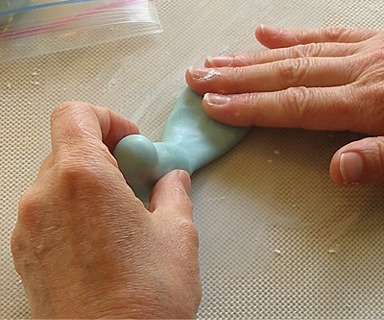
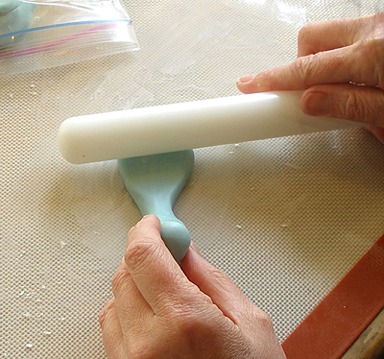
6. Roll the tail with the fondant roller, to remove finger marks and even up the shape. Do not forget to continue to support the head.
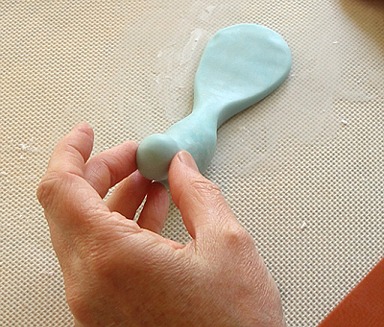
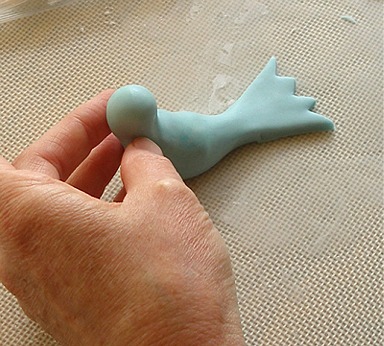
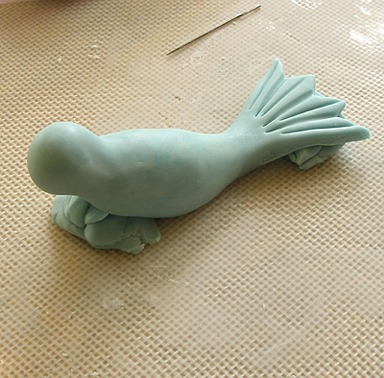
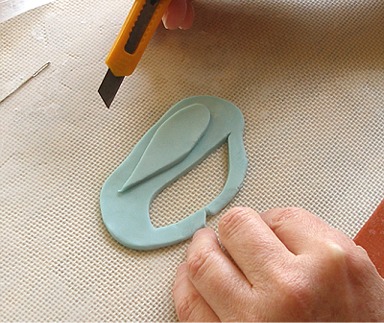
7. Cut off the excess fondant, at the back of the tail, with a sharp paring knife.
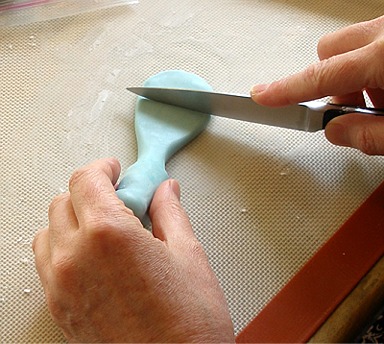
Cut both sides of the tail to refine the shape.
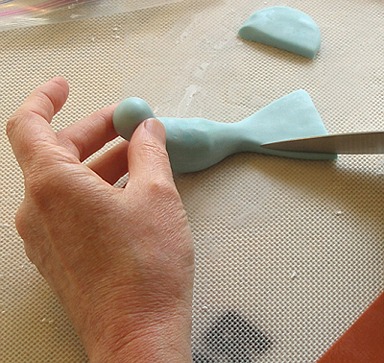
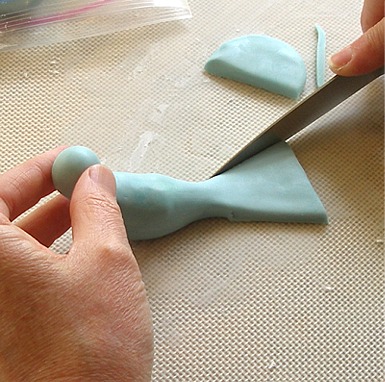
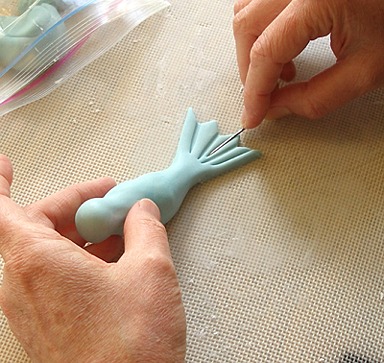
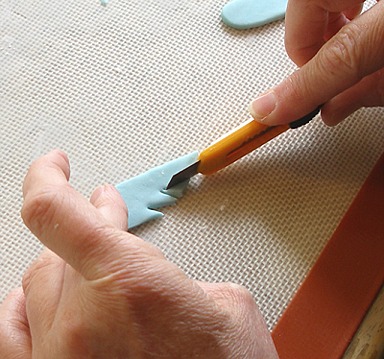
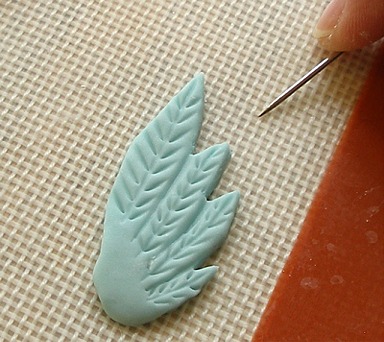
8. Using an exacto knife, cut the tail feathers into the end of the tail.
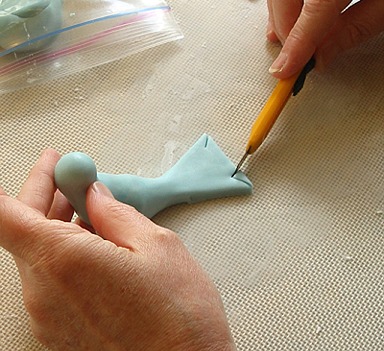
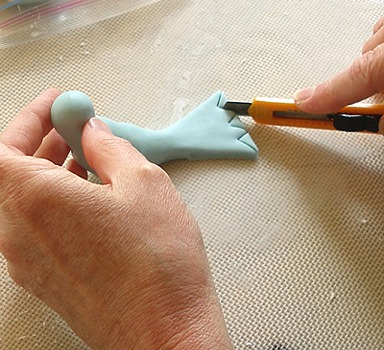
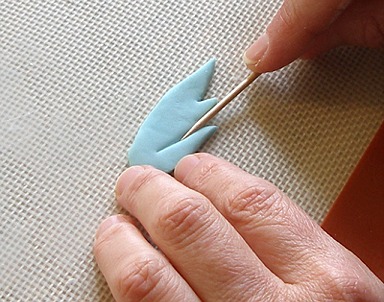
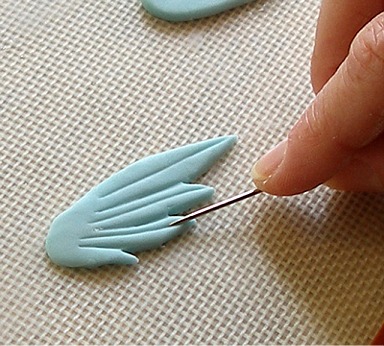
9. Use a toothpick to delineate the feather shapes.
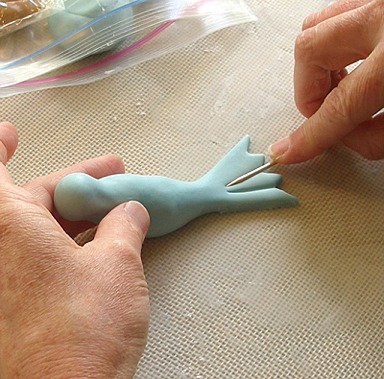

10. Use a large sewing needle to delineate the center rib of each feather.

11. Support the front and tail of the bird with wads of fondant, while you make the wings.
KELLY SAYS: It is much easier to attach the wings to the body after it has set up a little bit.
I let the body dry for two hours, before attempting to attach the wings.
Make the bird's wings:
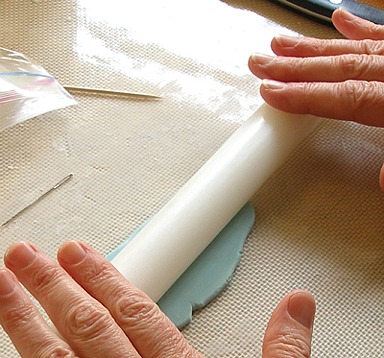
1. Roll out a small portion of remaining blue fondant to about 1/8th inch thick on a cornstarch dusted silpat mat.
2. Cut out an elongated tear-drop shape of the wing, using the exacto knife.
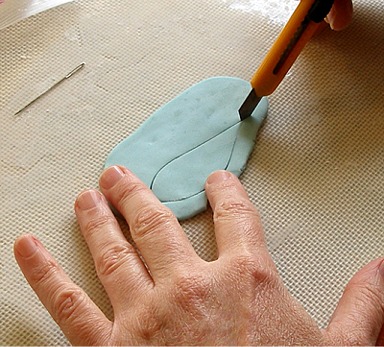
3. Cut out the other wing, by cutting around the first wing. Remember to flip the first wing, so the second wing is its mirror image.
4. Cut several feather tips with the exacto knife.
5. Use the side of the toothpick to delineate the feathers.
6. Use the needle to delineate the center ribs of the wings.
7. Press the needle into the fondant, to create a feather texture on each feather.

KELLY SAYS: It is much easier to attach the wings to the body after they have set up a little bit. I let them dry for two hours, before attempting to attach the wings.
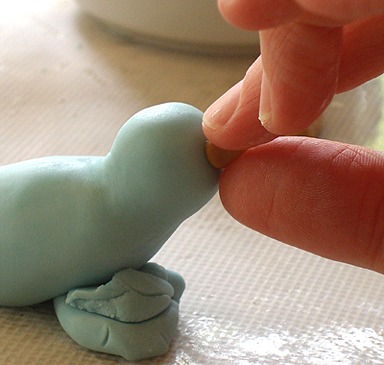
Make the bird's beak:
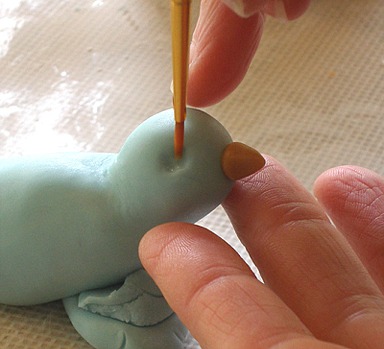
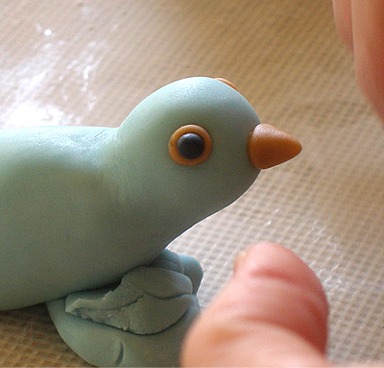
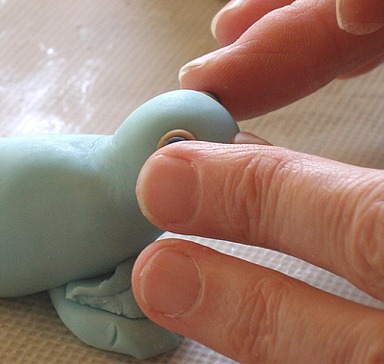
1. Take a very small portion of the light brown fondant and form it into a triangular beak shape. Flatten the end opposite the point of the triangle. This is where we will attach the beak to the head.
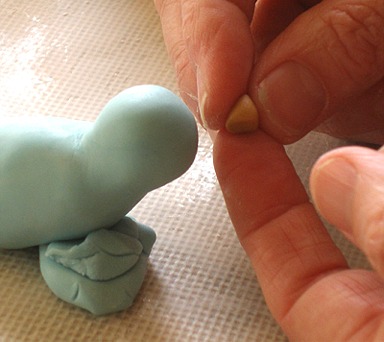
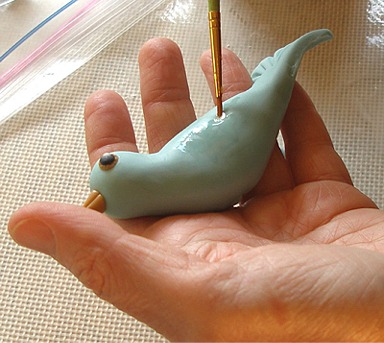
2. Using a very small paint brush, apply a little water to the flat end of the beak and press it onto the head.
Make the bird's eyes:
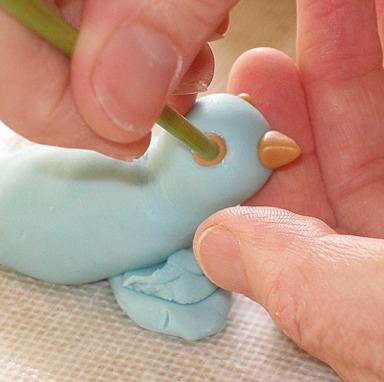
1. Use the rounded end of the paintbrush to create a small impression on each side of the head, where the eyes will be placed.
2. Apply a small amount of water to each of the impressions.
3. Make two VERY SMALL balls of light brown fondant. Try to make them the same size.
Place the one of the balls in each of the hollows you created on the sides of the head.
4. Using the end of the paint brush, gently push the center of each ball, creating a hollow.
Paint the center of each hollow with a small amount of water.
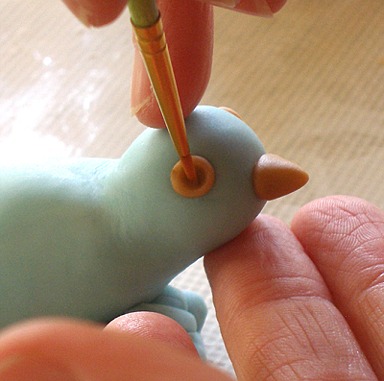
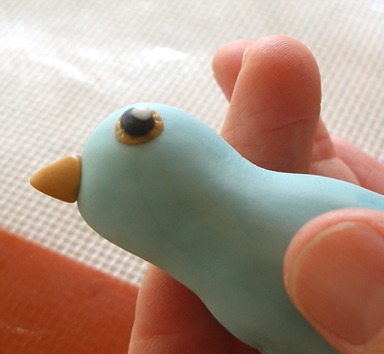
5. Make two equal sized VERY SMALL balls of black fondant and place them in the hollows you created.
Gently press the balls, to flatten.
6. Roll two MINISCULE balls of white fondant. These will create a glint in the bird's eyes and add to its expression.
Paint a small dot of water on the upper and outer part of the eye, and place the white balls in place.
Gently press, to flatten.

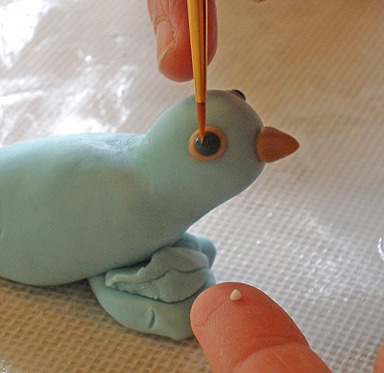
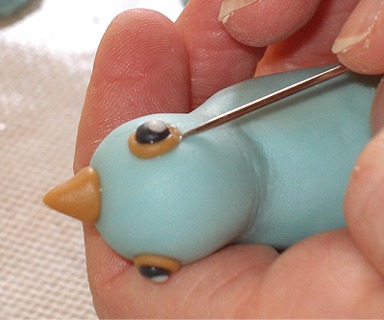
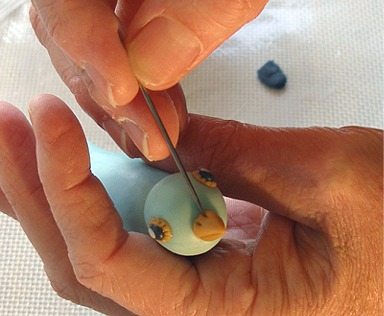
7. Use the tip of the needle to make radiating impressions, all the way around the light brown area of fondant.
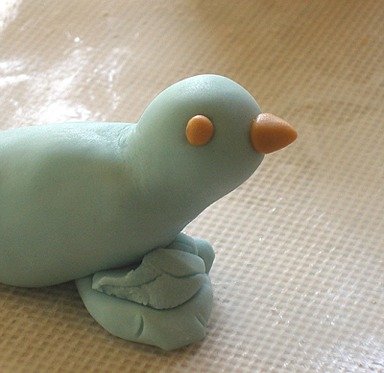
Finishing touches:
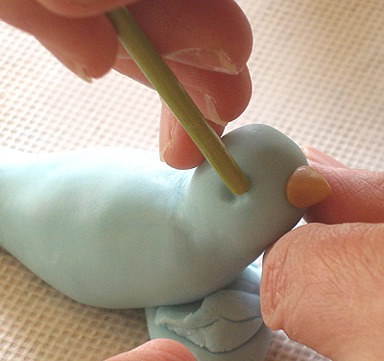
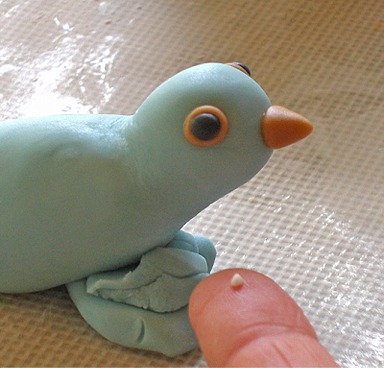
1. Use the needle to delineate the top and bottom portions of the beak.
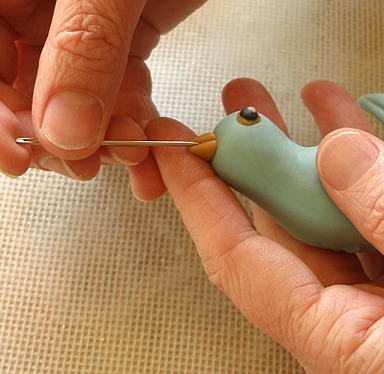
2. Use the tip of the needle to delineate the nostrils.
3. Paint the side of the bird with water and attach the wing.

Repeat with the other wing.
4. Let the bird dry in a bowl lined with tissue. Position the tissue to support the head and tail of the bird, so they won't sag.
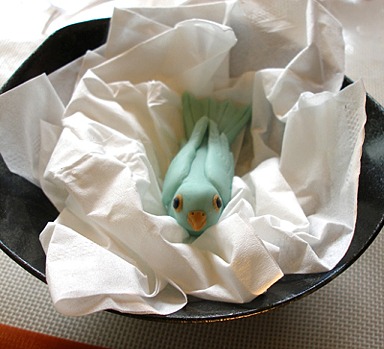
KELLY SAYS: The bird will be fairly hard in about two days. At that point, you will be able to place her in the nest without fear of sagging.
STORAGE
If you need to refrigerate your cake, take the bird out of the nest, before you do so. Place her back in, when you are ready to serve the cake.