
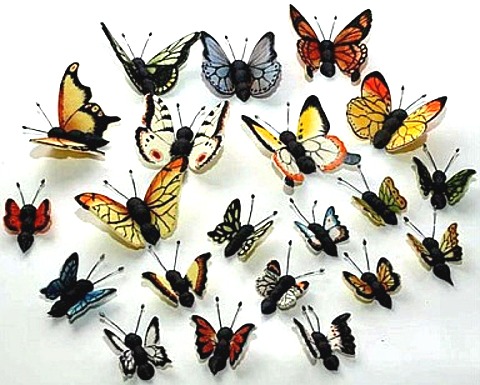
I fell in love with Ann's Gum paste Butterflies. I asked her to put together a tutorial for all of us to learn how to make them! You can see them used in Ann's Sweet 16 Cake photo on Sarah's Scratch Cake from a Mix Tutorial.
FROSTING, ICING, ETC RECIPE HELP

Another cake by Ann using Sarah's Scratch Cake from a Mix covered with MMF and decorated with Ann's Butterflies
INGREDIENTS
1 recipe Gum paste or Tylose Gumpaste – can be purchased ready-made
1 batch Royal Icing, tinted black; make sure it's fairly stiff – do not thin with water
Gel or paste color for tinting gum paste. ANN SAYS: I like to tint mine yellow and white and off-white but you certainly aren't limited to those colors.
Black food coloring for detail work on the gum paste if you want to use a brush
Cornstarch for drying the wings and rolling out the gum paste; sift it a few times before using
EQUIPMENT
Soft paintbrush (I use a size 6) for brushing the powdered color
Liner brush (I use a 10/0) for details if you want to use a brush
Non-toxic pens if you don't want to use a brush, as fine as possible or food color pens, as fine as possible
Butterfly cookie cutters
Parchment paper or waxed paper
Flower formers for finishing the butterflies or cotton balls if you don't use the flower formers
Flower stamens for the antennae
Knife for cutting the wings apart
Pictures of butterflies for ideas or your imagination or both
INSTRUCTIONS
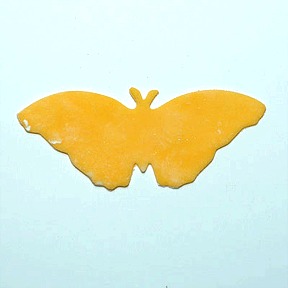
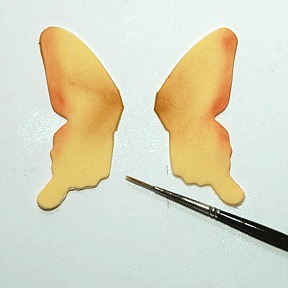
1. Roll out your gum paste very thin – – about 1/8-inch to 1/16-inch thick – on a cornstarch dusted work surface. Cut out the butterfly with a butterfly cookie cutter.
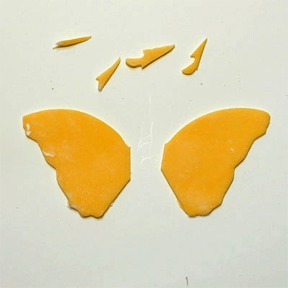
2. Cut the butterfly in half while it is still soft and remove the head and tail, cutting to a slight point which makes it easier to stick into the royal icing body later.
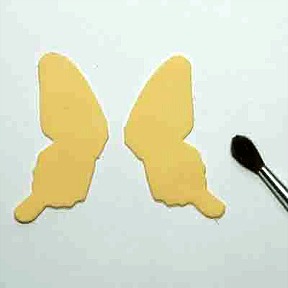
3. After the wings have dried, at least overnight or sometimes longer if it is humid, brush them with powdered color, if desired. I didn't always brush powder on the butterflies. If I do, this is the size brush I use. Use the powder sparingly, adding a little at a time. I'd rather make 10 passes than have color blotches. I brush from the outside in. It seems to work best.
ANN SAYS: I cut this butterfly body differently than the example shown above, Step #2.
Here's what the wings look like after the powder is brushed on based on the design I chose. Also shown is the brush I use for detailing.
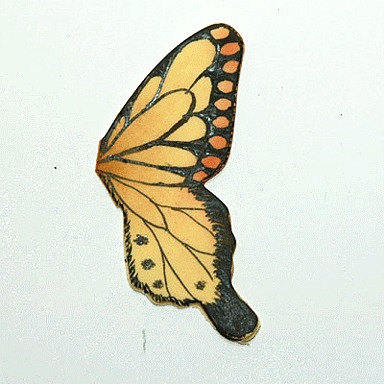
4. Paint on the black wing design with the brush I use for detailing, shown above, pictured in Step #3.
I use black food coloring which I have found in liquid form in my grocery store in the baking section. Before that, I used watered-down Wilton's black color but found it to be a little sticky, even when dry. I haven't tried other brands or the gels. I'm comfortable with a brush but you can also use any non-toxic pen or the food color pens which are available now.
ANN SAYS: There are tons of other designs and other powder placements. I have a couple of butterfly books which I just pick out ideas from. Relax and have fun with this.
Repeat the design with the other wing, making sure you paint the design in the mirror image.
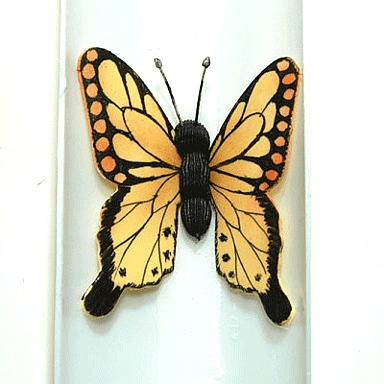
5. Once both wings are done, mix up some stiff royal icing to be able attach the two wings together. Tint it in black, but you are not limited to that color.
Then, I lay a strip of parchment paper or waxed paper in the bottom of my flower former, pipe the body on that (I use a 364 because of the slight ribbing it has), insert the wings letting them rest on the sides and stick in the antennae (flower stamens). If you don't have flower formers you can pipe the bodies on parchment or waxed paper and prop the wings up with cotton balls.
Don't hurry picking up the completed butterfly. The Royal Icing sometimes takes a while to dry, depending on how thick you make it and the weather – sometimes a day or two (if it's humid, a bit longer) – and it's no fun pulling a wing off to fix it.
HAPPY BUTTERFLY MAKING!