

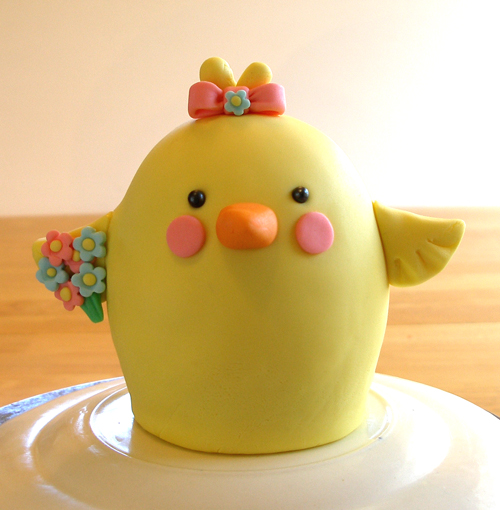
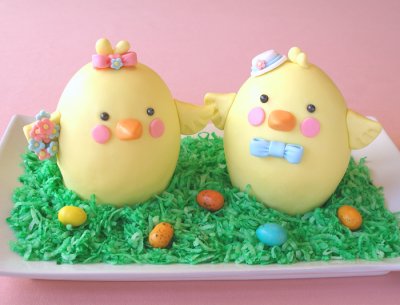
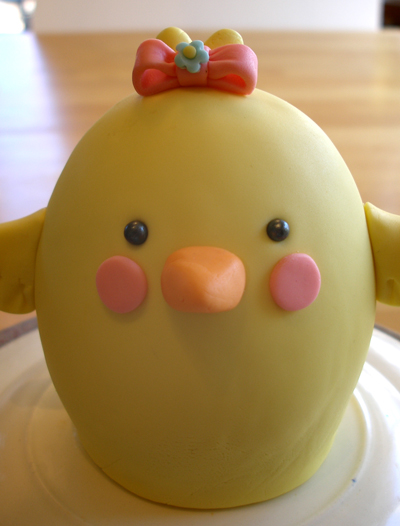
Girl Easter Chick Filled Mini Cake
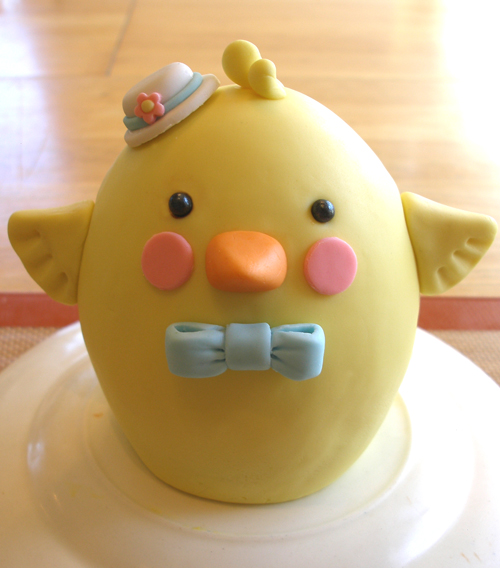
Boy Easter Chick Filled Mini Cake
If you love the combination of chocolate and peanut butter then you will love these adorable and crafty little Easter Chicks cakes! They are so fun to make and taste great too. Egg-shaped peanut butter cakes are filled with a Chocolate Peanut Butter Ganache and decorated with buttercream and fanciful fondant decorations. We'll show you how to make them in our step-by-step tutorial below. Plus, we'll give you the recipe for the best cake to use to make them so they stay sturdy and cute! The cakes can be stored at room temperature for a few days, so you can make them in advance. Your family and friends will be so impressed when you serve these on Easter Day!
CAKE RECIPE HELP
INGREDIENTS
For this project you will need:
1 recipe Ultimate Peanut Butter Cake or UPBC
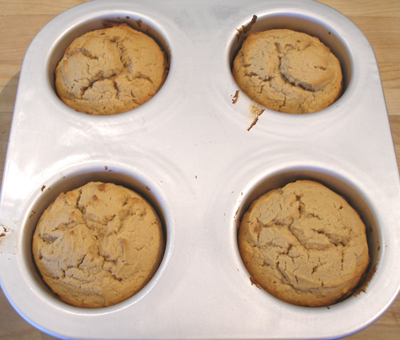
Wilton Mini Wonder Mold Pan; 4 Individual cakes are 3 1/2 x 3 in.
Wilton Mini Ball Pan; Six cavities are 3 1/2 x 3 1/2 x 1 1/2 in. deep.
Yellow, orange, pink, blue, and green gel paste food coloring; preferably AmeriColor
1/2 recipe Chocolate Peanut Butter Ganache, for filling (you will have some left over; refrigerate remainder for a few days or freeze for a month or more)
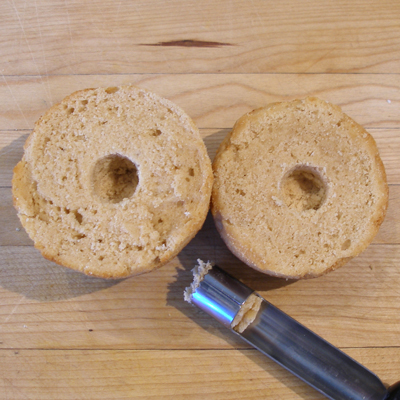
Apple corer
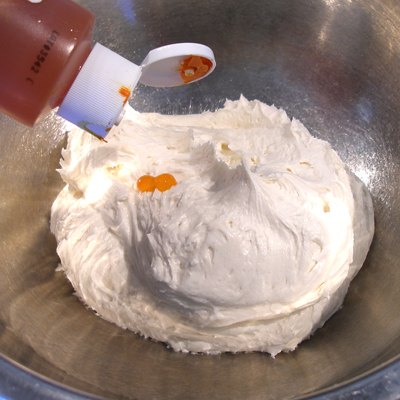
1 recipe Tami’s or Perfect Buttercream; The Two Layer version will give you enough buttercream to ice 4 chick mini cakes. Tint a pale yellow.*
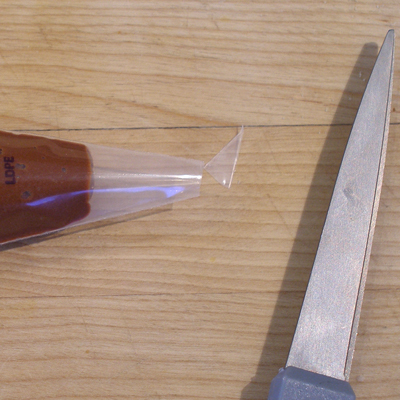
4 1/2- x 3-inch Rectangle of flexible plastic; to smooth the icing. We cut ours from a plastic file folder. You may also use a plastic food container, such as the lid from a large yogurt container.
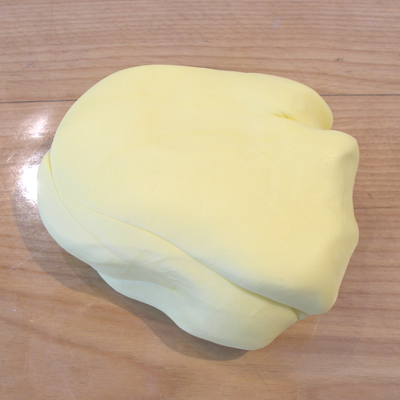
22 ounces white fondant, or Marshmallow Fondant or MMF, tinted**
Silpat nonstick mat
Cornstarch
Smallest flower plunger cutter; we used the smallest one in the set.
Set of fondant tools, plastic or wood
Tiny paint brush
Small fondant roller
Cake turntable
Wilton black pearl sprinkles, for eyes
Ateco 806 piping tip or similar size to use as a cutter
Wilton 4B piping tip. You can also use a 1-inch circle cutter
toothpicks
Green Tinted Coconut, optional
NOTES:
*Tint Tami's or Perfect Buttercream:
1. Tint a pale yellow. Start with 3 drops of yellow gel food coloring, stir it in and then decide if you need more.
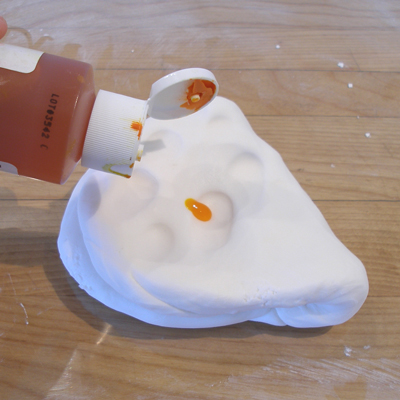
**Tint Fondant:
1. Tint about 16-ounces of fondant a pale yellow color. Start with a few drops of yellow gel food coloring, knead it in and then decide if you need more. Keep covered in plastic wrap so it won't dry out.
NOTE: Try to match the yellow buttercream you tinted (buttercream will darken when stored overnight), in case you develop any small tears in your fondant. The oopsies won’t show up as much that way. ;)
2. You will also need to tint a small quantity of fondant, about 1/4 cup each, pale orange, pale pink, pale blue, and a small amount of green for decorations. Keep each one covered in plastic wrap so as not to dry out.
3. Save and wrap the remainder of the white (untinted) fondant to use in the project.
STEP I: MAKE THE CAKES
1. Position the oven shelf in the middle of the oven. Heat the oven to 350 degrees F.
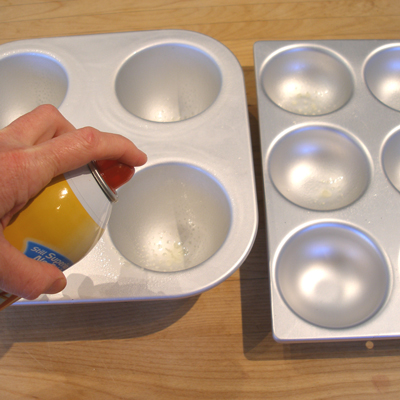
Grease the cavities of the Wilton Mini Wonder Mold Pan and a Wilton Mini Ball Pan with nonstick cooking spray or shortening (not butter). Set aside.
2. Make the Ultimate Peanut Butter Cake or UPBC batter according to the recipe's instructions.
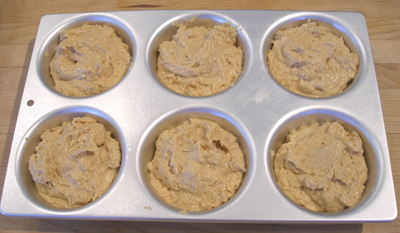
3. Divide the batter in the prepared baking pans, as follows, and lightly smooth the tops:
NOTE: Fill the 4 cavities of the Wilton Mini Wonder Mold Pan until there is about 1/2 inch from the top of the mold.
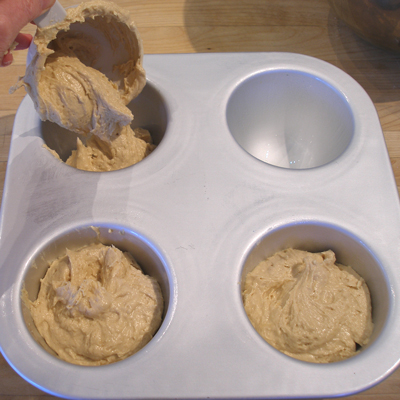
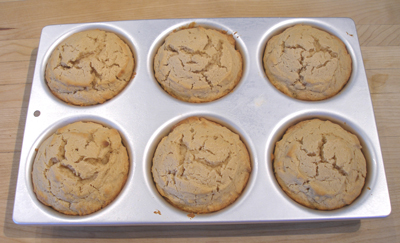
Fill the 6 cavities of the Wilton Mini Ball Pan, leaving about 1/4-inch from the top of the mold.
DO NOT follow the directions on the pan packages because they are directions for using a cake mix.
NOTE: The Mini Ball Pan has 6 cavities.
You will need only 4 cakes from this pan, but I recommend filling all 6 because you may have some loss as you cut the baked cakes to level.
If your leveling goes off without a hitch, you have two little half domes that would be delish spread with a little Nutella, peanut butter or left-over ganache! If you fill only four out of six with batter, fill the remaining two empty ones half full with water before baking.
NOTE: There will be batter left over. Enough to make about 8 – 10 standard-size cupcakes
If you want to make more mini cakes with the leftover batter, cover the bowl, and place the batter in the refrigerator.
After you bake the first batch, let the cakes cool, remove them from the molds, then wash the molds, spray and refill.
Or, to bake the cupcakes, line a cupcake pan with liners. Fill and refrigerate. Bake when the mini cakes have come from the oven.
4. Bake:
The Wilton Mini Ball Pan (6 cavities) cakes will take about 22 minutes.
The Wilton Mini Wonder Mold Pan (4 cavities) cakes will take about 25 minutes.
SARAH SAYS: The tops should feel firm and give slightly when touched. The cakes will shrink slightly from the side of the pans and be slightly browned.
If you insert a toothpick in the middle and remove, there should be a few moist crumbs attached, but not batter.
The cakes will have a slight dome and cracks on top when it comes from the oven, but as the cakes cool, they may flatten on top and some cracks may disappear.
5. Remove cakes to cool on wire racks for 10 to 15 minutes and then unmold on their flat side onto wire cake racks to cool thoroughly. Be careful, the cakes are delicate when warm.
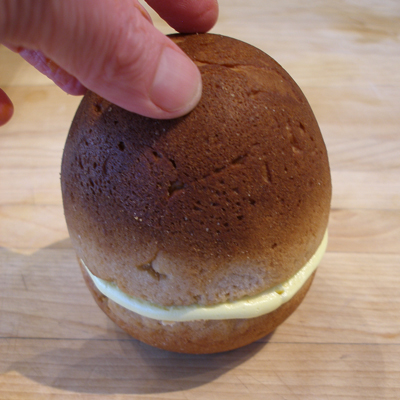
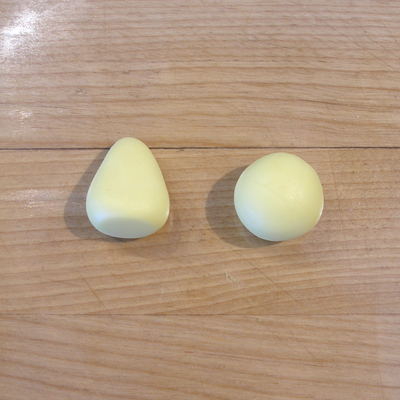
STEP II: TRIM AND CORE THE CAKES
You will match up the cakes in 3 pairs (the larger Wilton Mini Wonder Mold Pan cakes on top with the smaller Wilton Mini Ball Pan cake dome on the bottom) to make 3 egg shaped cakes. But before you match them up, you need to trim the cakes:
1. Trim the all 4 of the Wilton Mini Wonder Mold Pan cakes and 4 out of 6 of the Wilton Mini Ball Pan cakes to remove the uneven tops.
NOTE: Do not cut too much off the Wilton Mini Wonder Mold Pan cakes because you want the diameter to be the same as the Wilton Mini Ball Pan cakes, and the more you cut, the greater the discrepancy will be.
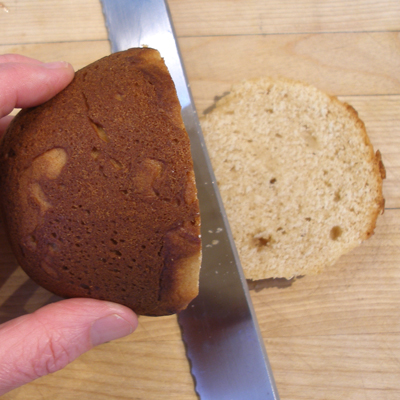

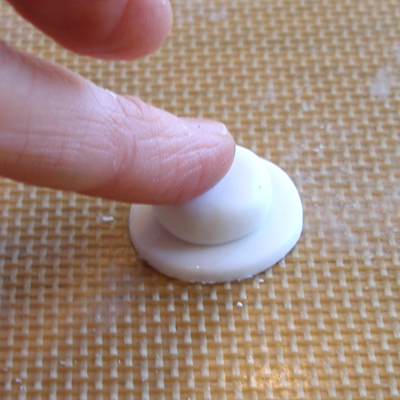
2. Match up the cakes in 3 pairs (the larger Wilton Mini Wonder Mold Pan cakes on top with the smaller Wilton Mini Ball Pan cake dome on the bottom) to make 3 egg shaped cakes. Gently remove and unevenness around the edges with a fine Microplane file.
SARAH SAYS: After trimming, to mark where the cakes fit together, place a toothpick at the 12 o'clock position in the bottom cake half in a horizontal position a little above its edge. Insert one in the same place on the top half. You will do this to mark the position that the layers will need to go back together by aligning the two toothpicks together.
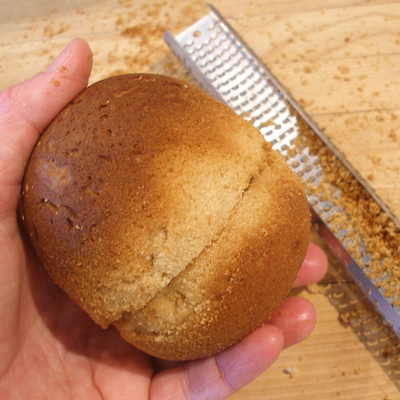
3. “Core” each cake half with the apple corer, being careful to not go completely through each.
STEP III: FILL THE CAKE CORES. JOIN AND ICE THE EGG-SHAPED MINI CAKES. APPLY FONDANT.
Fill and core the cakes. Join and ice the egg-shaped mini-cakes:
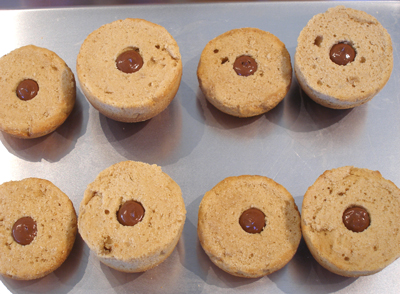
1. Put about 1 cup of Chocolate Peanut Butter Ganache in a disposable piping bag. Cut off the tip to make a small opening for piping.
2. Fill each cake half right up to the top.
Place them on a baking sheet and pop them into the refrigerator until the ganache is set, about 20 minutes.

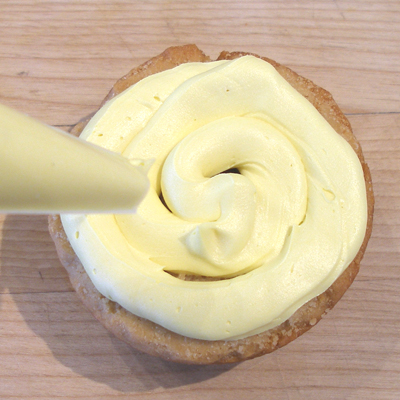
3. Fill a disposable piping bag with Tami's Buttercream. Cut off the tip to make an opening for piping.
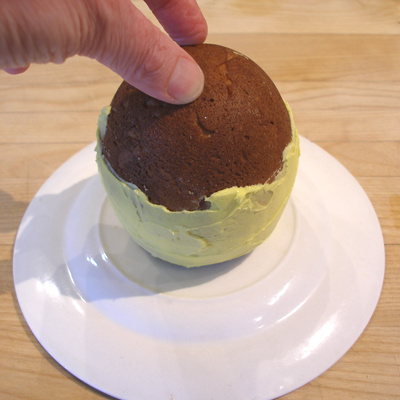
4. Working with one pair of filled cake halves at a time, pipe a generous amount of buttercream onto smaller Wilton Mini Ball Pan cake dome on the bottom.
5. Then align the larger Wilton Mini Wonder Mold Pan filled cake dome half on top of it and gently press to adhere.
SARAH SAYS: Mark the position that the layers will need to go back together by aligning the two toothpicks together you placed earlier in each cake dome.
6. Use a small offset spatula to smooth any of the icing that has oozed out the side.
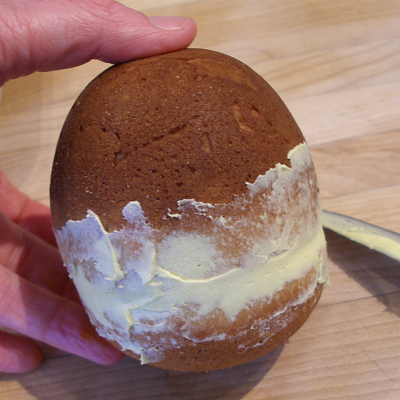
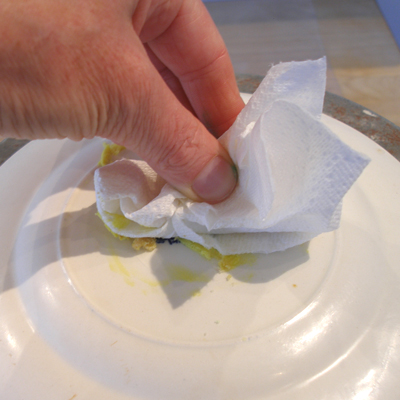
7. Crumb coat THE BOTTOM HALF of the cake, and smooth it with the rectangle of flexible plastic.
Finish icing the egg-shaped mini cakes. Apply the rolled fondant:
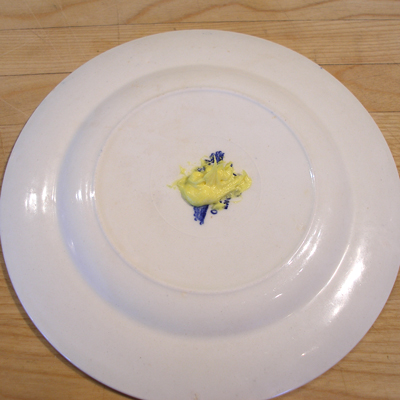
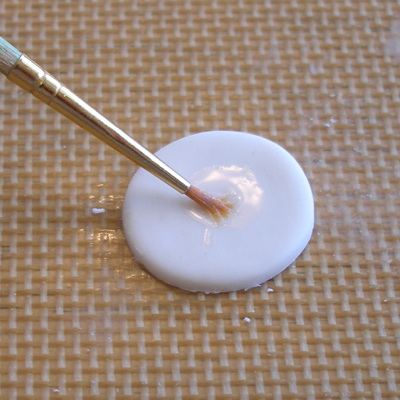
1. Next put a small dollop of icing in the center of an upside down saucer. This is a great tool to use when putting fondant on such a small cake.
Put your cake on the dollop and press down to adhere.
Place the cake, on its saucer, in the refrigerator for about ten minutes, so the icing can firm up and firmly anchor the cake to the saucer.
Repeat this process with the rest of the cakes.
2. Center the saucer on your decorating turntable.
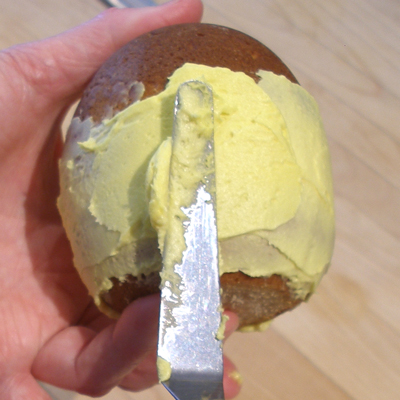
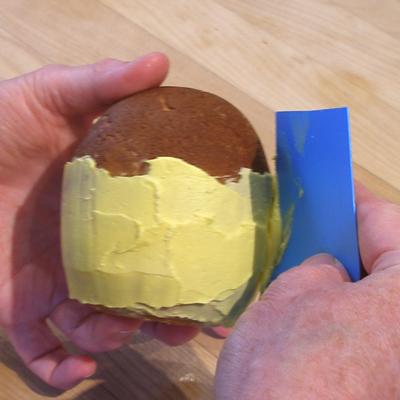
3. Add more frosting to the entire cake, smooth it, as best you can, with the metal spatula, then pop it back in the fridge for about ten minutes, then finish smoothing with the plastic rectangle.
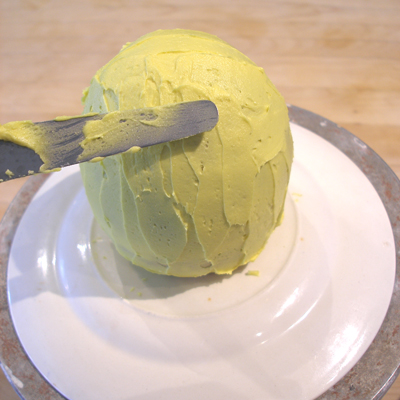
4.
Curve the plastic rectangle to duplicate the curve of the cake as you slowly turn the cake on the turntable. Wipe off the excess frosting as you go along.
Repeat this process with the other cakes, then put them back in the fridge while you prepare your fondant.

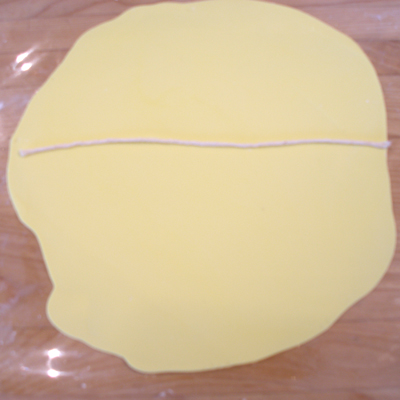
5. Remove one iced cake from the refrigerator at a time. Use a piece of string to measure the diameter of fondant you will need to roll out; without denting the buttercream, carefully take a measurement by wrapping the string around over the top of the buttercream covered egg-shaped mini cake to the bottom edges where it touches the plate. Add one inch to your measurement.
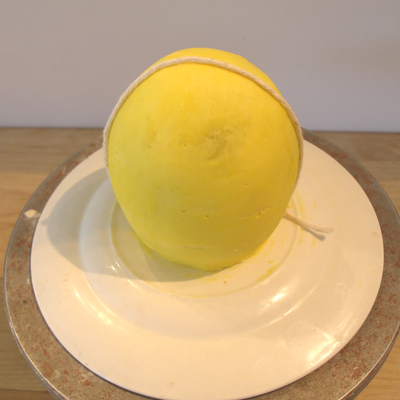
6. The resulting fondant piece should be rolled out into a circle with its diameter equal to the measured piece of string.
Roll out the fondant on a surface that is lightly dusted with cornstarch to be about 1/8-inch thick.
7. Place one cake, still attached to its upside-down saucer, on your turntable.
Center the fondant over the top of the cake and drape it, making sure that it is long enough to cover the cake on all sides.
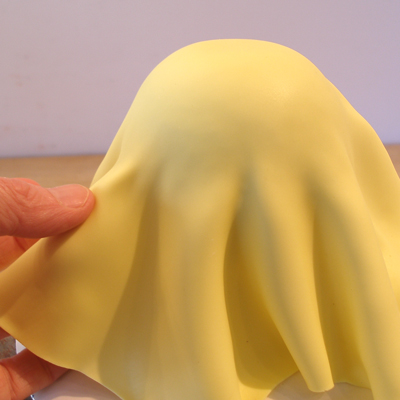
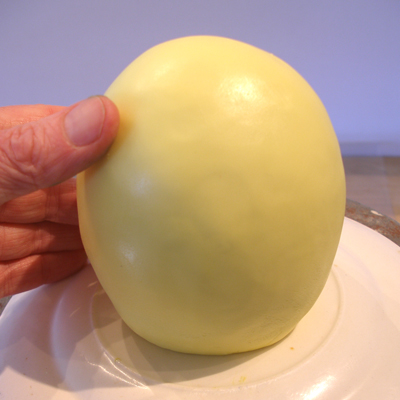
8. Start smoothing the fondant onto the cake by gently lifting the fondant folds up, and then gently rubbing it so the fondant adheres to the cake as you go around.
The fondant stretches as you work with it.
Keep turning the turntable and smooth a little bit at a time, going all the way around the cake.
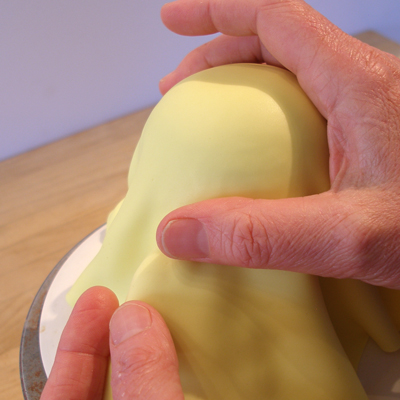
Continue in this manner until you reach the bottom of the cake, then trim off some of the excess fondant with a knife, so you can better smooth the bottom of the cake.

9. Knead some of the excess fondant into a ball, then flatten it to make smoother.
Just gently rub the fondant on the cake and it miraculously smooths out any little bumps that might be there.
NOTE: You cannot use a traditional fondant smoother on this type of shape, but this fondant on fondant technique worked like a charm!
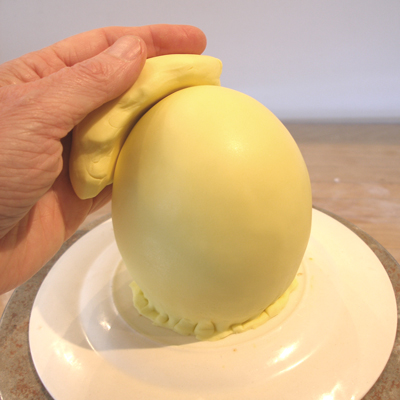
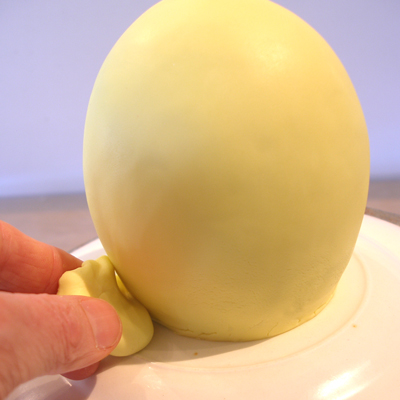
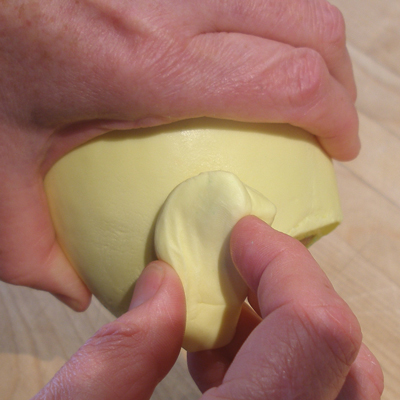
10. When the fondant is smooth, remove any excess fondant at the bottom of the cake with a sharp knife.
11. Use a small wad of fondant to smooth out the bottom of the cake.
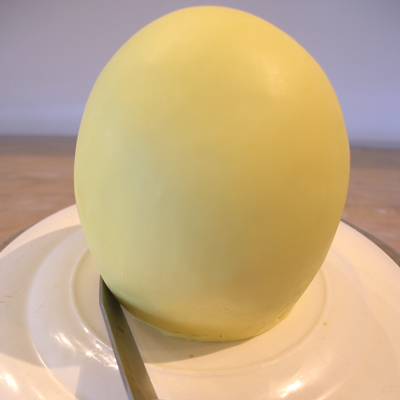
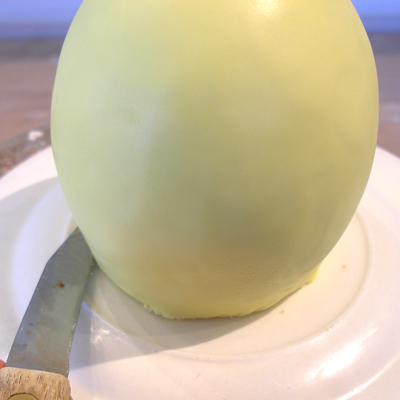
12. Release the cake from the saucer by cutting it off with a sharp knife.
13. Gently pick up the cake and rub around the bottom of the cake with a wad of fondant, to remove and imperfections.
14. Wipe the blob of frosting off the plate, then set the cake back on the plate.
15. Repeat all the above steps with the other three cakes.
STORAGE
Cover the fondant covered egg-shaped mini cakes with plastic wrap and place in an airtight container. Store in a cool, dark place until ready to apply the finishing features and design touches, in the next steps.
The cakes can be stored for a few days; there is no need to refrigerate, and we advise against it because of possible problems encountered with the fondant. The Chocolate Peanut Butter Ganache filling can remain at room temperature for a few days.
STEP IV: APPLY THE FINISHING FEATURES AND DESIGN TOUCHES FOR THE EASTER CHICKS FILLED MINI CAKES
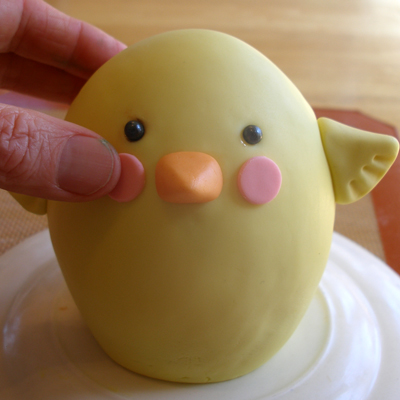
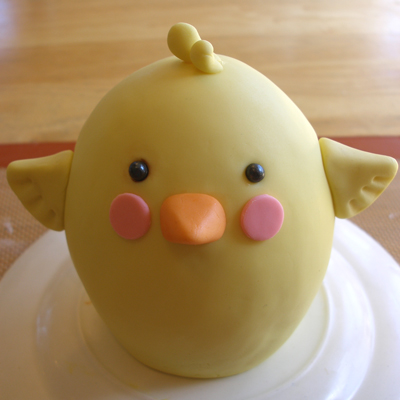
Finished photo: You will need to refer to the finished photo to see where the features and design touches should be placed.
DECORATING TIPS:
Always keep any unused pieces of fondant well covered with plastic wrap so they won't dry out.
Keep the fondant covered egg-shaped mini cakes you are not working on, covered at all times with plastic wrap. Once you place the finishing features and design touches on, loosely cover with plastic wrap. Do not refrigerate.
When rolling out fondant, we like to do so on a nonstick Silpat mat lightly sprinkled with cornstarch. Roll out to about 1/8-inch.
Use only a small amount of water as the “glue” when sticking two pieces of fondant together. After applying water, gently place the fondant piece in place.
You can make any of the finishing features and design touches ahead of time, and not adhere them to the Easter Chicks. Keep them stored in an airtight container, stored in a cool dark place, until needed.
APPLY THE FINISHING FEATURES: For all fondant covered egg-shaped mini-cakes
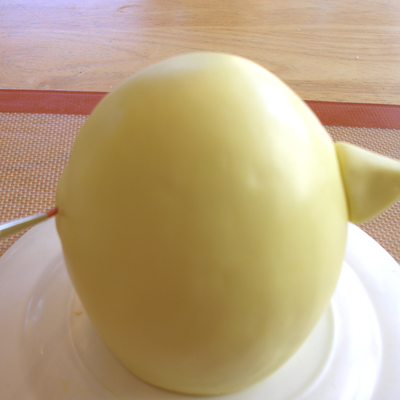
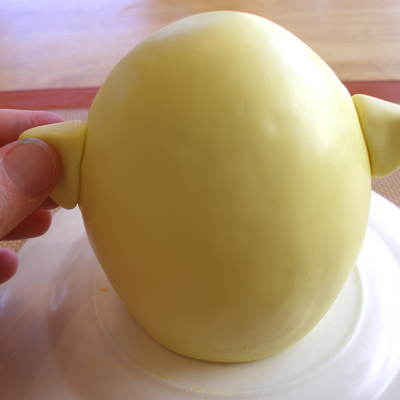
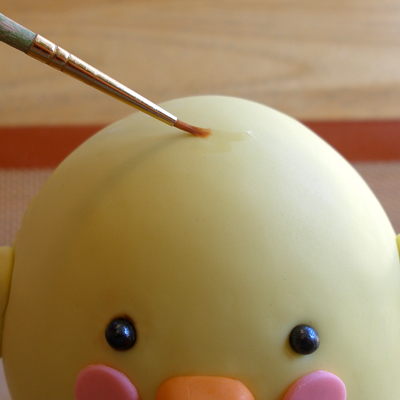
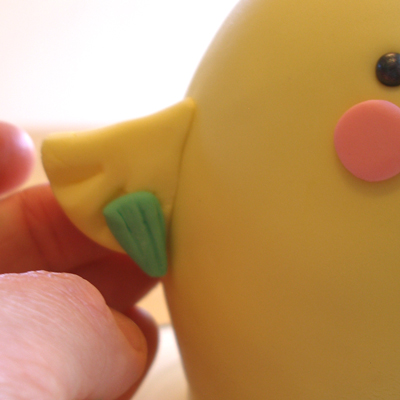
1. Roll out two balls of yellow fondant of equal size, then shape them into a flattened cone shape. These will be the wings.
2. Paint a SMALL AMOUNT of water on each side and press the wings into place.
Using a pointed fondant tool, impress three ridges into the fondant to give the appearance of feathers.
When you do this, support the back of the wing with your other hand. I was taking the picture, so I only had one hand to work with.

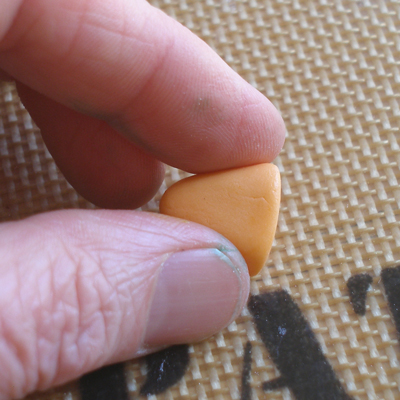
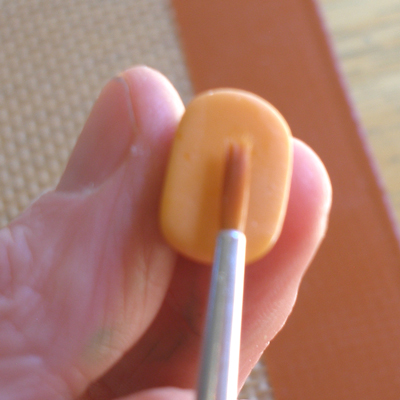
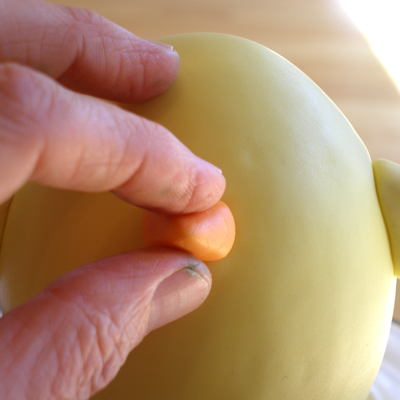
3. Make a small triangle of orange fondant in a shape reminiscent of a piece of candy corn. This will be the beak.
Paint a small amount of water on the bottom and gently press it into place.
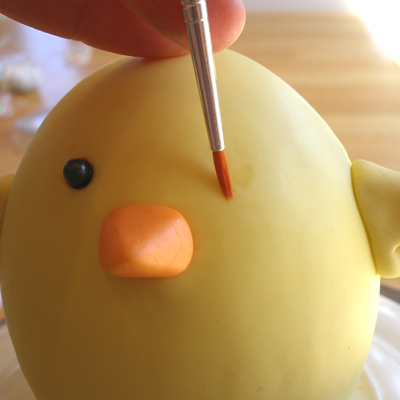
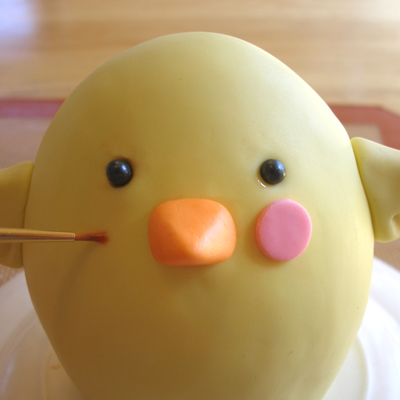
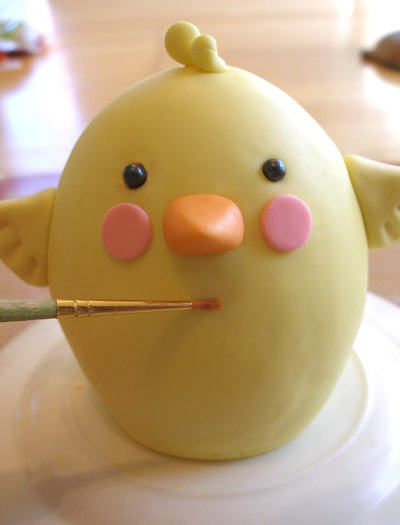
4. Paint a VERY small dot of water on the yellow fondant where the Wilton black pearl sprinkle should be placed for the eye. The water will help the pearls stick.
NOTE: The black pearls have a high concentration of colorant, so if you use too much water, you risk having color bleed on your cute little chick, and that would be tragic.
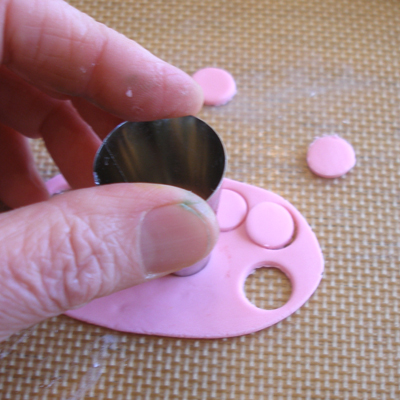
5. Use the tip of a large piping tip to cut out some thinly rolled pink fondant. These will be the rosy cheeks.
NOTES: We used an Ateco 806 piping tip, which is about 1/2-inch in diameter.
Yes, we know that real chicks don’t have rosy cheeks, but it just makes them more kawaii, so just go with it.
6. Paint the yellow chick with a small amount of water where you want the cheeks to go, then gently press the pink fondant cheek circles into place.
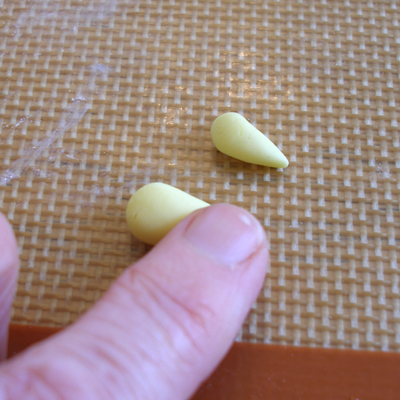
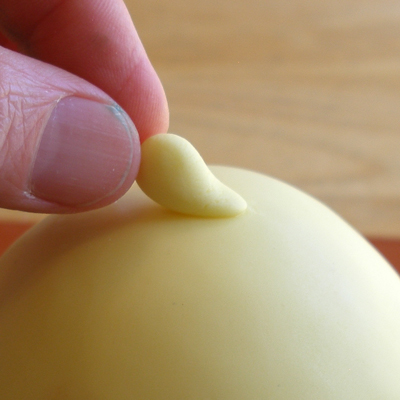
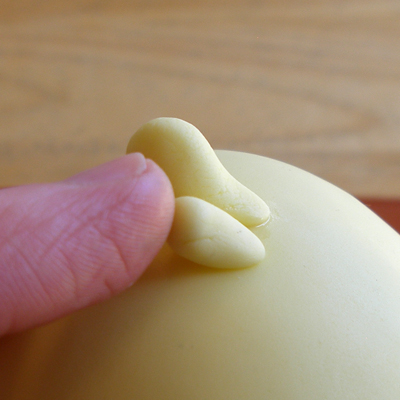
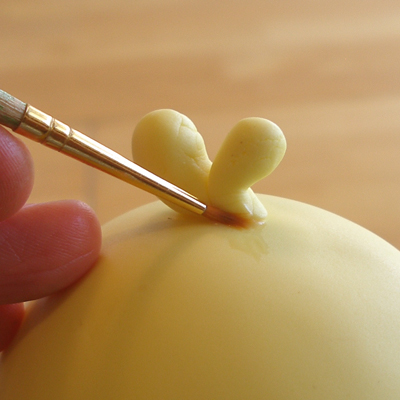
6. Roll out two small tear drop shapes of yellow fondant, one larger than the other.
Place the larger one first, then the smaller one, in front of it.
STORAGE
Once you place the finishing features and design touches on, loosely cover with plastic wrap, and immediately go to the next steps. Do not refrigerate.
APPLY THE DESIGN TOUCHES: Then we made two boy and two girl Easter Chicks Filled Mini Cakes!
Finished photo: You will need to refer to the finished photo to see where the features and design touches should be placed.
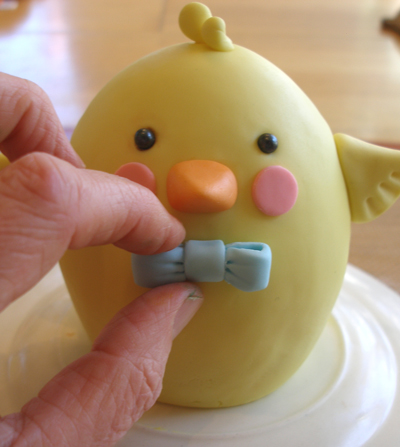
Make four bows out of rolled fondant and attach: Make one blue bow for each one the two boys, and one pink bows for each one the two girls.
For the boy chicks, this will be a bow tie, for the girl chicks, a hair bow. Then attach the appropriate bow to each one.
For each bow:
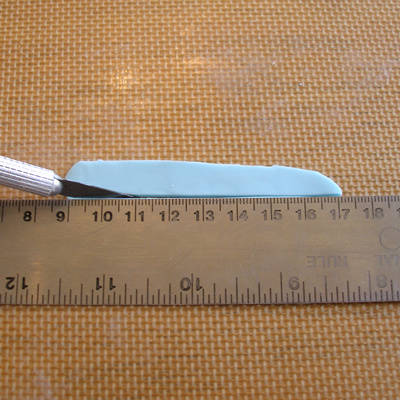
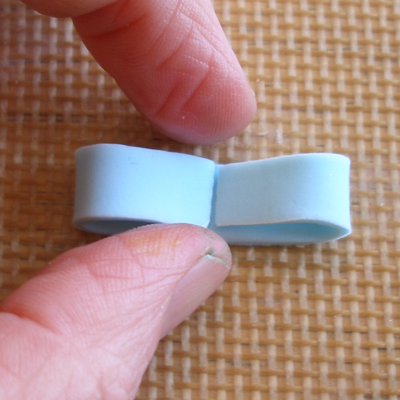
1. Roll out a very thin piece of pale blue fondant and cut out a strip about 2 1/2-inches long and 1/4-inch wide.
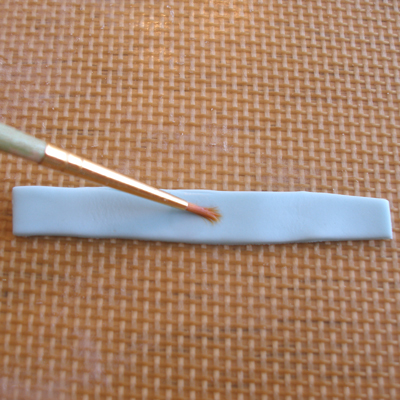
2. Brush on a little water in the center then loop the ends over to the middle.
Pinch the center together to make a gather.
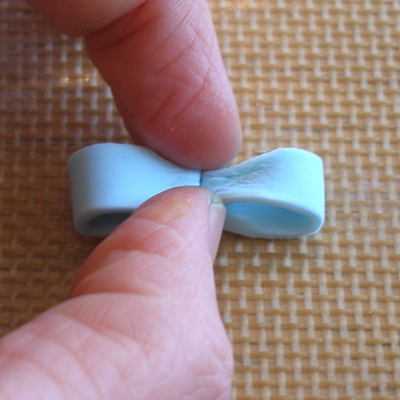
3. Roll out some more blue fondant. Cut out a small band to wrap around the bow.
Attach with a little water, and wrap the ends to the back of the bow.
Use a toothpick to impress a bit of detail to the gathered area.
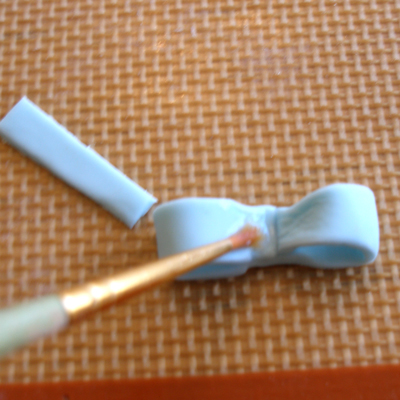

4. Cover the finished bow with plastic wrap.
5. Repeat the bow making steps, making one more blue and two pink bows.
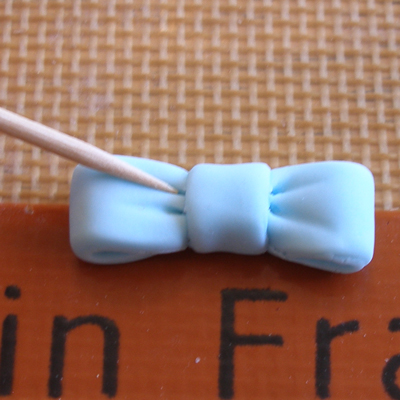
6. For the two boy chicks, attach the blue bowties on each one with a little water.
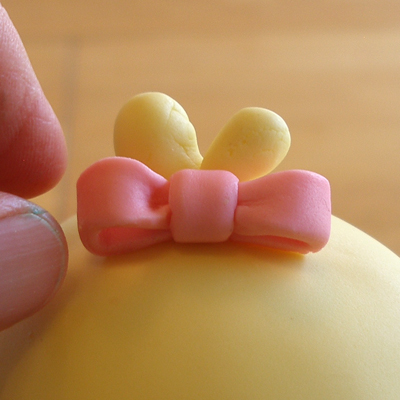
7. For the two girl chicks, add the bow to the bottom of her topknot on each one with a little water.
8. Cover loosely with plastic wrap.
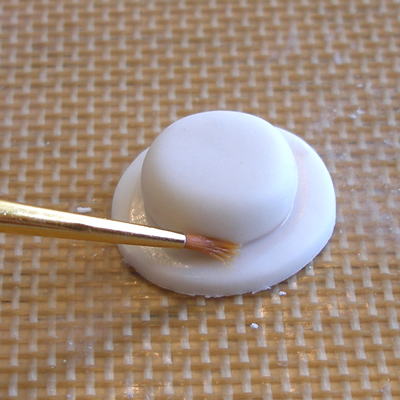
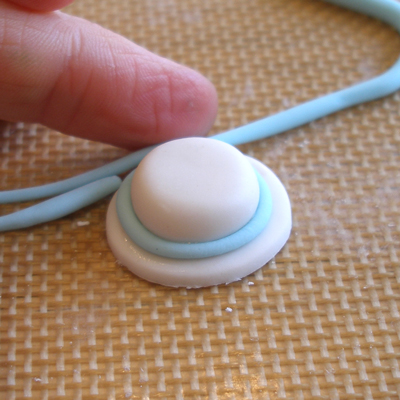
Make two little straw hats out of white (untinted) rolled fondant: Make a straw hat for each one of the two boys, and attach.
To make the little straw hat:
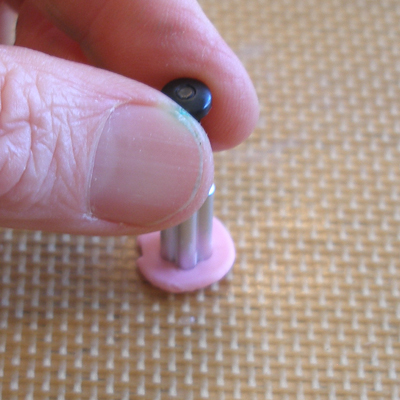
1. Roll out a thin piece of white fondant and cut out a round using the wide side of a large piping tip. This will become the brim of the hat.
NOTE: We used a Wilton 4B piping tip. You can also use a 1-inch circle cutter.


2. Roll a small ball of white fondant and flatten it to form the center of the hat.
Make sure it is a bit smaller than the brim of the hat.
Attach it to the brim with a little water.
3. Roll out a very thin rope of pale blue fondant to make the hat band.
Attach it with a small amount of water, pinching off any excess.
5. Cover the hat loosely with plastic wrap until needed.
6. Repeat the above steps, making one more little straw hat.
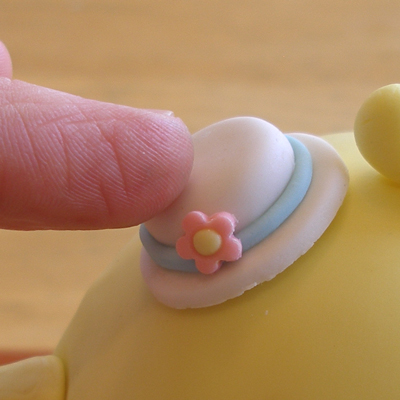
7. Make a pink flower for each little straw hat band:
Roll out a small amount of pink fondant to make flowers with. Then cut-out using the smallest Flower Plunger Cutter.
Roll up a tiny ball of yellow for the center of the flower, paint on a little water and press into place.
Add the flower to the hat band with a tiny amount of water.
8. Paint a little water on one of the boy Easter Chicks Filled Mini Cakes and press a little straw hat into place. Repeat with the second boy chick.
Cover both loosely with plastic wrap.
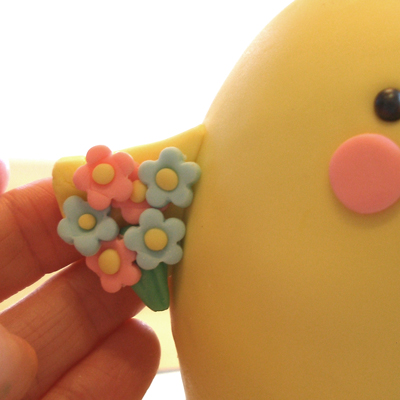
Make more flowers out of rolled fondant for the two girl chicks, and attach: a single one for the center of each pink bow and for bouquets.
To make flowers:
1. Roll out small amounts of pink and blue fondant.
2. Cut out some more flowers using the smallest Flower Plunger Cutter to make a bouquet.
NOTE: We made 14 blue flowers and 12 pink flowers.
3. Make 26 small balls out of yellow fondant. Add a yellow flower center to center of each flower by painting on a little water and pressing into place.
4. Press a blue flower on the pink bow on each one of the girl chicks using a small amount of water.
5. Make two bundle of stems by cutting out a triangle shape with rolled green fondant, with the bottom point removed.
Use a toothpick, large needle, or a cake tester to impress a linear texture so it looks like flower stems.

6. Press the green fondant triangle into place on one of the girl chick's wing with a small amount of water used as “glue”.
7. Add the flowers, using small dots of water to adhere, making a pink and blue bouquet.
Repeat with the second girl chick.
NOTE: We used 3 blue flowers and 3 pink flowers for each bouquet.
SERVE
To serve, tint some coconut green, to look like grass, then set the cakes on a serving plate and scatter small egg-shaped candies on the “grass”.
STORAGE
Store the finished Easter Chicks Filled Mini Cakes, uncovered at room temperature, for two days; do not refrigerate. The fondant covered chicks do not freeze well.
Girl Easter Chick Filled Mini Cake
Boy Easter Chick Filled Mini Cake