
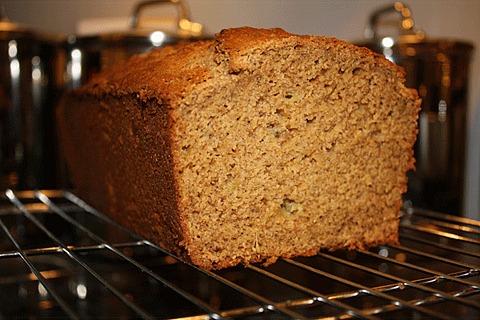
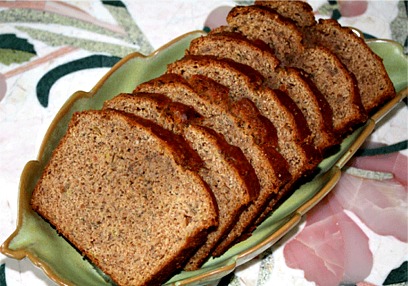
Banana Bread and photo by Sarah Phillips © Sarah Phillips
Banana Bread and photo by Sarah Phillips © Sarah Phillips
My husband, Reed, loves banana bread, and always asks me to bake him some. He does not like the typical recipes that result in heavy, oily and gummy banana bread loaves. So, I jumped at the chance to bake his favorite recipe, which I adapted from a recipe given to me from Tami Smith, who contributed during the early years at CraftyBaking.com. This bread turns out with a wonderful lemon, cinnamon and vanilla fragrance to it which simply adds to the heavenly banana flavor. The bread is also quite moist and tender and can be served for breakfast or makes a wonderful dessert; I have served this plain or with whipped cream and raspberry compote. It is also delicious toasted and served with raspberry jam or when blueberries or raspberries are in season, I have folded in 1 heaping cup of either into the mixed batter at the end. The recipe makes about 18 delicious muffins, taking about 20 to 30 minutes to bake. (Make sure you fill the empty muffin tins half-full with water so they won't smoke!)
Some of the biggest issues I have found that bakers have with quick-breads are that they tend to overmix them, leading to dry and and tough loaves, and overbake them, also contributing to their dryness and unappealing flavor. Many also have trouble with recipes that include mashed bananas, because we tend to overmash them until their pulps are almost liquidy, leading to bouncy loaves or ones that do not bake fully, which mushy bottoms. It's as though we almost ruin their pulp's cellular structures so the recipes cannot bake properly. I have taken special care with this recipe to alleviate this biggest problem.
Banana bread is also not limited to the 9-inch by 5-inch loaf pan; I sometimes bake mine in two 4- x 7-inch loaf pans, instead. I find that the loaves bake higher and you don't seem to run into the “gooey-middle” and over-browned exterior.
QUICK BREAD RECIPE HELP
INGREDIENTS
1 1/2 cups (about 3 large) LIGHTLY mashed ripe bananas; I like to use ones that start to get covered with brown flecks. Do not puree; rather have large pieces showing.
2 cups unbleached all-purpose flour; spoon into measuring cup and level to rim
2 teaspoons ground cinnamon
3/4 teaspoon baking powder
3/4 teaspoons baking soda
1/2 teaspoon salt
3/4 cup sugar
1/4 cup plain yogurt or buttermilk
2 large eggs, beaten lightly
4 tablespoons unsalted butter, melted and cooled
2 tablespoons canola or vegetable oil
2 teaspoons vanilla
2 teaspoons lemon peel
1 cup lightly toasted, roughly chopped walnuts
LEMON PEEL TIPS:
When you zest a lemon to get its peel for a recipe, make sure you only get the colored part of the peel, not the underlying white part. The white part is bitter. I used a microplane or a fine citrus grater, but you can use a grater, instead. Just make sure it leaves fine pieces of lemon peel.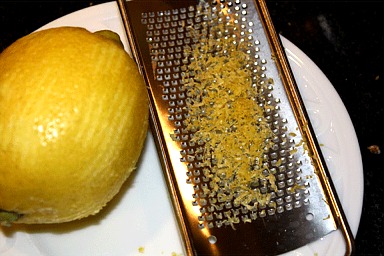
INSTRUCTIONS
1. Position the oven shelf to the middle and preheat the oven to 400 degrees F. Generously grease a 9 x 5 x 3-inch loaf pan and set aside.

SARAH SAYS: This is a light-colored heavy bread pan. If using a dark and nonstick pan, reduce the oven heat by 25 degrees F.
2. In a large bowl, combine the flour, ground cinnamon, baking soda, powder and salt. Make a well in the center and set aside.
3. Place the sugar, yogurt, beaten eggs, melted butter, oil, vanilla and lemon peel in a medium size bowl. Whisk together until well-combined and frothy. Add in the mashed bananas and stir in until combined; take care not to mash the bananas while doing so.
4. Add the banana mixture to the flour mixture. With a large rubber spatula, fold together with large gentle strokes until ALMOST combined.
Add in the walnuts and FOLD until JUST combined. Then, STOP!
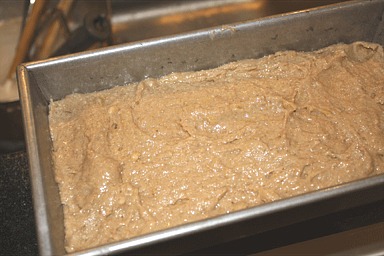
5. Fill the prepared loaf pan with batter and gently smooth its surface.
6. Immediately place the pan in the middle of the middle shelf in a hot, preheated oven.
Lower the oven temperature to 350 degrees F.
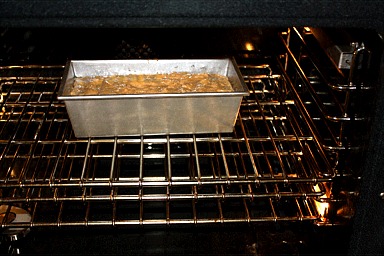
SARAH SAYS: Note the position of the oven shelf. My oven has six rack positions; the middle is considered to be the third rung up from the bottom.
Do not open the door to peek for at least 15 minutes.
NOTE: If you are using two 4- x 7-inch loaf pans, you will need to check them after about 15 to 20 minutes; do so quickly so you do not want to keep the oven door open too long and lower the oven's temperature.
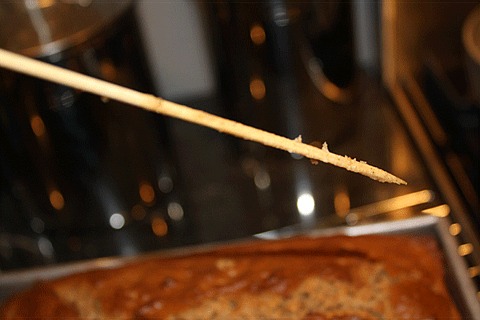
7. Bake for 40 to 60 minutes or until a wooden skewer inserted in the center comes with a few moist crumbs but not batter.
SARAH SAYS: A double recipe takes about the same amount of time to bake.
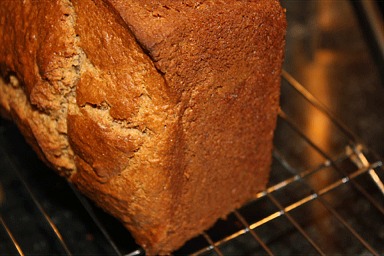
If the bread seems to be over browning during baking, but the cracks are still quite moist, tent them with a piece of foil and lower the oven to 325 degrees F for the final baking time.
8. Let the baked bread sit on a wire cake rack for 10 minutes before unmolding. Place the bread on its side, to cool completely before slicing.
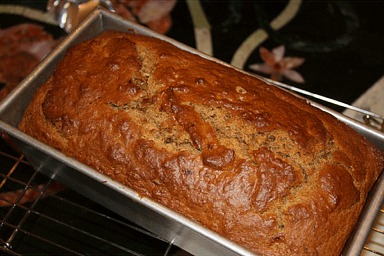
SARAH SAYS: I like to cool both quick-breads and yeast breads on their side. That's so the bread can cool better without running the risk of causing condensation to form on its bottom because of its close proximity to the countertop.
SARAH SAYS: I like to use a large serrated bread knife for slicing.
HELP!: My bread turned out dry even though I followed your instructions to the letter!
SARAH SAYS: Do NOT throw it out! Simply wrap it in foil and place it on the countertop for a day or two. Banana and sugar are humectants and will attract moisture from the air; your bread will be as good as new!
STORAGE
Wrap cooled Banana Bread with plastic wrap and store at room temperature for a day or two; refrigerate after that so it won't mold. If it is humid, refrigerate the bread, so it won't mold.
SARAH SAYS: I personally think the flavor of the bread is better the next day!
The bread freezes nicely, wrapped in plastic wrap and then sealed in an airtight container, for a month or more.