
I first tasted this pie from the Little Pie Company in New York City, and have served it at my Thanksgiving table for years, even though I am a baker – just because the pie is incredible! I have always wanted to replicate it because it is so expensive – It costs $65.00 (plus, shipping) when ordered from them, but I finally figured out how to create the same recipe, at a much lower cost, which I now share it with you! This pie is the greatest and has been brought to life with Kelly's careful hands and wonderful photos! This recipe rendition will be served at my Holiday table from now on! It's butter-y, it's cinnamon-y, it's cream-y and crunch-y, and of course, filled with fresh apples – plus, it is so close to the original. It smells amazing as it bakes!
PIE RECIPE HELP
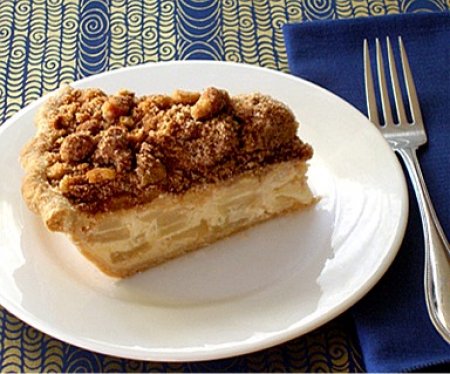
Kelly Says: “The taste of this pie is very sophisticated. I LOVE the combination of the tart apples, sour cream custard and the rich, crunchy cinnamon streusel topping. This makes the PERFECT Thanksgiving pie!
Not to sound braggy, BUT, this sour cream apple pie was the best tasting pie on that table. I am so glad that Sarah was able to deconstruct the original recipe so we can make it at home.”
INGREDIENTS
KELLY'S PERFECT FOOD PROCESSOR PIE DOUGH – SINGLE CRUST / Recipe alone
Makes a single crust for a 9-inch standard or 9 1/2-inch deep-dish pie
INGREDIENTS
1/2 cup (1 stick) unsalted butter, cold
1 1/4 cups unbleached all-purpose flour; spoon into measuring cup and level to rim
1/2 teaspoon sugar
1/2 teaspoon salt
1/8- 1/4 cup ice water; make with water and ice cubes
SOUR CREAM APPLE WALNUT PIE FILLING
INGREDIENTS
1 1/4 cups sour cream
2 large eggs
3/4 cup sugar
1/4 cup flour
1/2 teaspoon salt
2 teaspoons pure vanilla extract
6-7 Granny Smith (very tart), Honeycrisp (less tart) or Golden Delicious (not tart) or other crisp apples; peeled, cored, and sliced thin
2 teaspoons lemon peel (zest)
STREUSEL TOPPING
INGREDIENTS
1 cup unbleached all-purpose flour; spoon into measuring cup and level to rim
1/2 cup sugar
1/2 cup dark brown sugar, packed
2 teaspoons ground cinnamon
1/4 teaspoon nutmeg
a dash of salt
1 cup toasted walnut pieces; chopped, toasted, and then, measured
8 tablespoons melted butter
3. Set walnuts aside to cool completely before using and/or storing.
STEP 1: MAKE THE PIE CRUST
1. Cut butter into cubes and place in a bowl and place in the refrigerator to chill.
2. A. Place dry ingredients into the bowl of your food processor, fitted with the metal blade. Process for a few seconds to mix.
B. Add the well-chilled butter cubes on top of the dry ingredients, in the food processor.
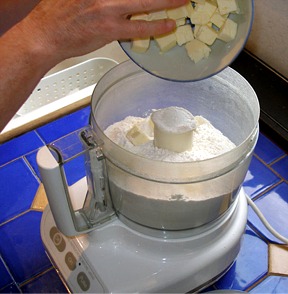
C. PULSE the butter and flour mixture together a FEW TIMES until the butter is no longer in large chunks. You should be able to still see small chunks of butter in the mixture. This helps form the flaky texture you are looking for in your pie crust.
3. Add the water to the dry ingredients.
KELLY SAYS: This is where you must proceed with caution. Too little water and your dough will be crumbly and impossible to roll out. Too much water and your crust will be sticky to roll and tough, when baked. You must use a gentle hand with pie dough and proceed slowly!
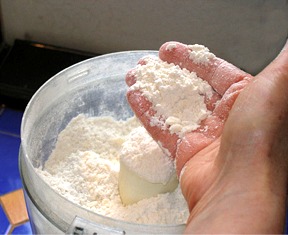
A. START with 1/8 cup of water, adding it to the flour mixture, through the feed tube in the food processor, while pulsing the machine until the dough starts clumping together. DO NOT just turn the processor on – use the PULSE button.
B. Open the processor to check the condition of the dough. It should still be a bit crumbly, but it should start to clump together. To test the dough, squeeze it between your fingertips and it should just stick together. If it does, the dough is done – do NOT add any more water.

KELLY SAYS: If the dough is too dry, add more water, a few drops at a time, up to a teaspoon, and hit the pulse button for a second. Open the food processor and check the dough after each addition. Most of the time, I find that 1/8 cup water total is plenty. Of course, the moisture content of flour can vary, and you MAY have to add more than 1/8 cup, but do so, about 1 teaspoon at a time.
If the dough is too wet, add a teaspoon of flour at a time, and pulse the food processor to combine.
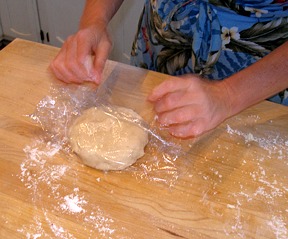
4. A. Empty the food processor contents out onto your work surface and gather the dough into one mound. Flatten the disk, and make it as round as possible, so it is easier to roll out, when the time comes. Wrap the disk in plastic wrap and place them in the refrigerator, to chill.
STEP II: ROLL THE PIE CRUST AND FLUTE THE EDGES
It is important that your pie dough is well chilled before you go to roll it out.
Roll until the pie dough is 3-4-inches larger than the pan you will be using for your pie (at least 12″ wide, for a 9″ pie). Your dough should be about 1/8-inch thick.
SARAH SAYS: I like to use a Pyrex ovenproof glass pie pan for baking my pie in. I can easily see if the pie crust is done baking on the bottom so I do not take it from the oven too soon.
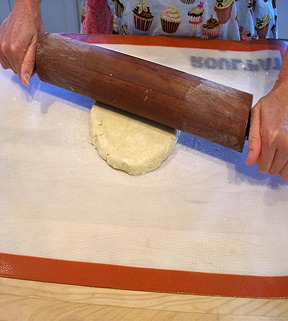
1. Place dough on lightly floured work surface or silpat rolling mat. Flatten dough slightly by hitting it a few times in different spots, with the side of your rolling pin. Otherwise, pat it down with your fingertips.This helps to get you started with your rolling.
SARAH SAYS: It is important to add as little flour to the work surface during the rolling process because it toughens the pie crust dough. LIGHTLY flour your rolling pin and work surface or only enough to keep the dough from sticking.
2. A. To start, begin in the center of the dough and roll outward. Stop the rolling pin as it nears 1/4 inch from the edge of the dough; don't roll over the edges as they crack or become too thin. Do not roll backwards; simply lift the rolling pin when done.
B. Lift and rotate the dough by a quarter before resuming again, tossing a light dusting of flour beneath, only if necessary. This is to ensure that it is not sticking to your rolling surface and that is is being evenly rolled. If your dough is cold enough, it should not stick. If your dough sticks, loosen it with a long offset icing spatula, dusting underneath with a small amount of flour.
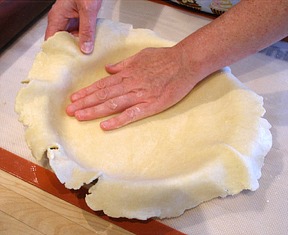
3. Fit the rolled out pie dough into the bottom of the pie pan.
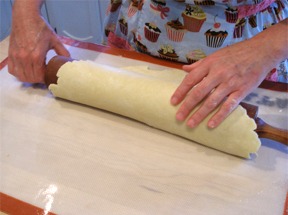
A. To transfer the dough to the pie pan, roll the dough onto the rolling pin. First place a floured rolling pin, centered on the edge away you. Roll towards you and, at the same time, pick up the edge (use a bench scraper or spatula if dough sticks to the countertop) and support the dough as you wrap it around the pin. Be careful not to press it. Keep rolling until all of the dough is rolled onto the pin.
B. Position dough over the pie pan and begin unrolling the dough, starting from one edge, leaving a 2-inch overhang on all sides
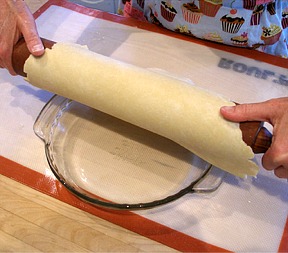
C. When the dough is unrolled, GENTLY easy the dough into place. Lift up the dough edge and ease the dough down into the pan with your other hand. DO NOT stretch the dough because this will make it shrink while baking.
D. Trim the excess dough around the edge of the pie with a sharp knife or with kitchen shears, which I find the easiest to use. Leave about an inch overhang for fluting purposes.
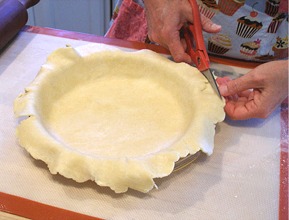
KELLY SAYS: I like to use kitchen scissors for this task.
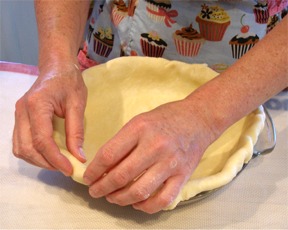
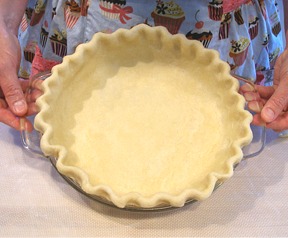
2. Flute the pie crust edges. Cover and place it in the refrigerator.
A, Fold the excess dough underneath itself at the pie pan rim and even with the lip making a double layered edge.
B. To flute, pinch the dough by pressing my index finger in between the thumb and index finger of the other hand.
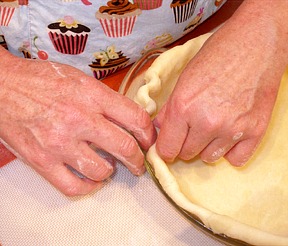
C. The fluting is complete…Pop the crust back into the fridge to chill, for at least an hour, while while you prepare your apples and filling.
STORAGE
The unrolled pie dough can be made 2 to 3 days in advance and refrigerated or frozen for up to a month. Thaw in refrigerator before use. The finished pie crust can be frozen for a month or more. There's no need to thaw before use.
STEP III: MAKE THE FILLING AND BAKE THE PIE
1. Position the oven shelf to the middle of the oven and preheat the oven to 400 degrees F. Line a baking sheet with a silpat nonstick mat, parchment paper or foil. Set aside.
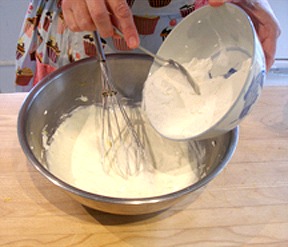
2. In a mixing bowl, whisk together the sour cream and the eggs.
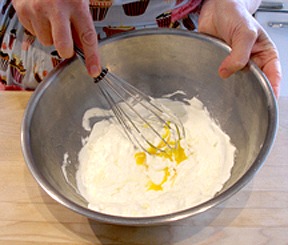
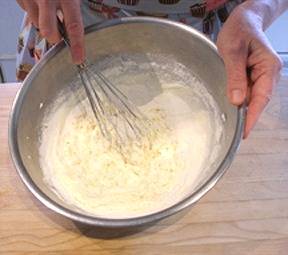
3. Combine the sugar and flour and whisk into the sour cream mixture.
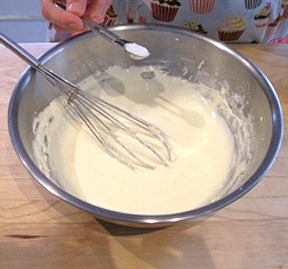
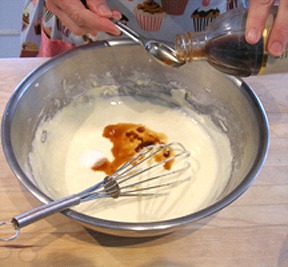
4. Add the salt and vanilla and lemon peel to the sour cream mixture, as well. Whisk to combine and set aside while you slice your apples and arrange them in the pie crust.
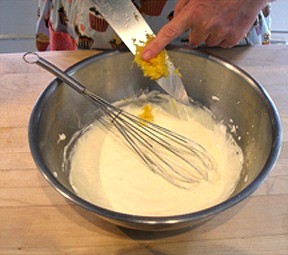
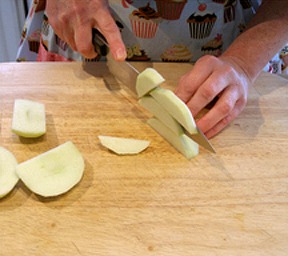
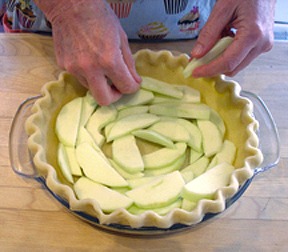
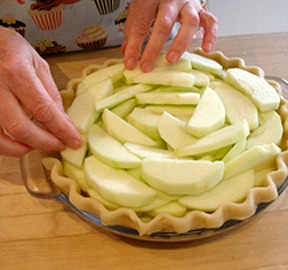
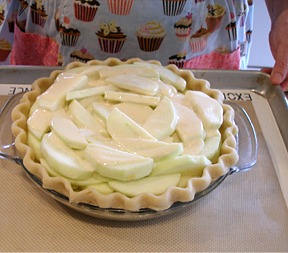
5. Thinly slice the apples and arrange them, neatly, in the unbaked pie shell. There is no need to core them in advance.
SARAH SAYS: The key to success with this pie is to make sure you THINLY AND EVENLY slice the apples, otherwise they won't bake properly.
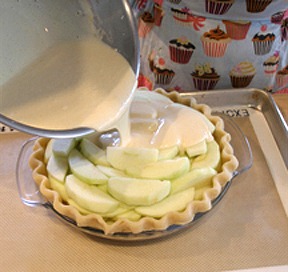
6. Place apple-filled pie pan on the prepared baking sheet and then pour the sour cream mixture over the apples, into the pie shell.
7. Bake the pie for 10 minutes at 400 degrees F to set the crust. After 10 minutes, LOWER THE HEAT to 350 degrees F and bake for 45 minutes more or until the top apples are starting to brown on the edges. You won't notice any bubbling juices, yet! The apples will not have softened much in texture yet, either.
NOTE: If apples on top begin to brown too deeply, cover them, loosely, with a piece of foil.
STEP IV: MAKE THE TOPPING AND BAKE THE PIE, AGAIN
While pie is baking, prepare the topping.
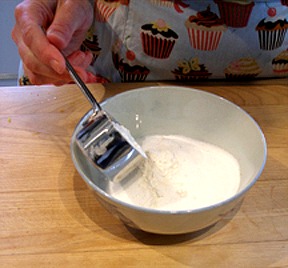
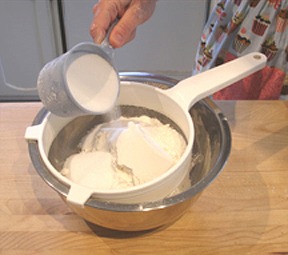
1. Combine flour and white sugar in a mixing bowl.
KELLY SAYS: I like to sift the flour after measuring, just to make sure there are no lumps.
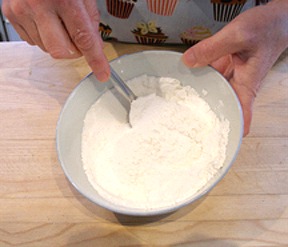
2. Add the brown sugar, cinnamon, nutmeg and salt.
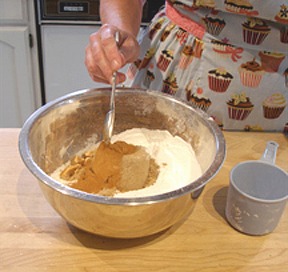
Using freshly ground nutmeg makes all the difference in the world!
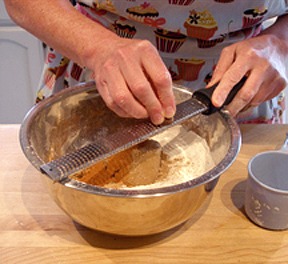
3. Mix the ingredients together with a spoon, or your clean hands.
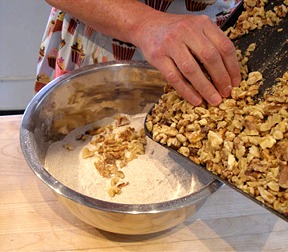
4. Add the toasted and cooled walnuts to the dry ingredients and toss, to combine.
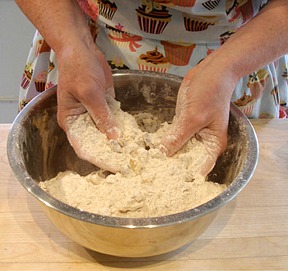
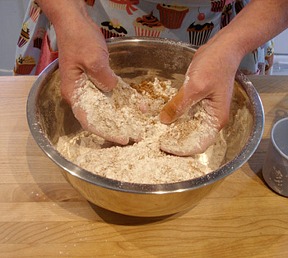
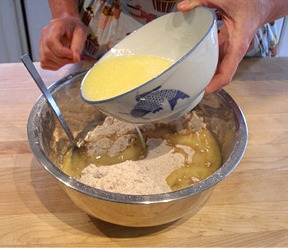
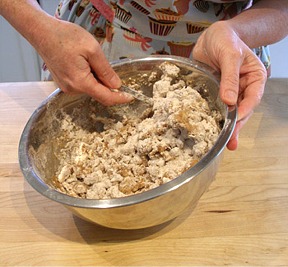
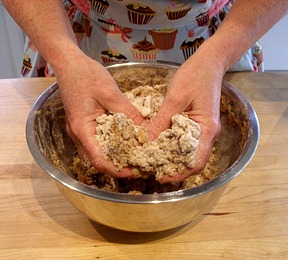
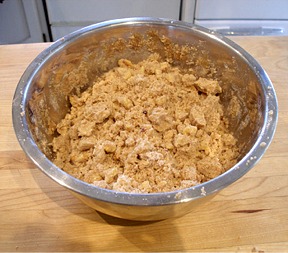
5. Carefully drizzle the melted butter over the top of the ingredients, stir to combine, and then work with hands to form a crumbly topping.
6. When the pie has baked 45 minutes from STEP III, #7, above, remove from oven and completely cover the apples with topping. Do NOT turn off the oven.
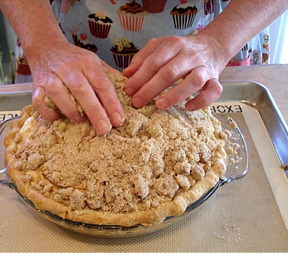
Brush away stray crumbs, to keep your pie pan and baking sheet clean. Burnt-on streusel makes a real mess and is hard to get off!
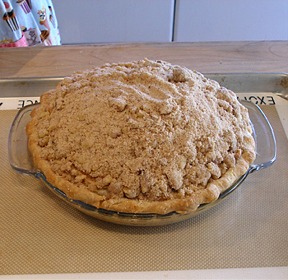
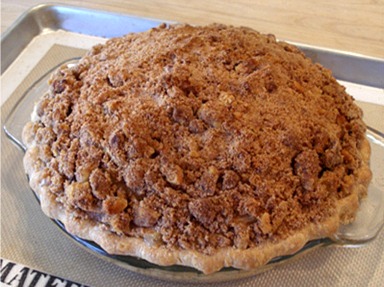
7. Return the pie to the oven and bake for an additional 25 minutes at 350 degrees F or until the topping is browned and you can see the apple juices bubbling on the edges of the pie.
NOTE: If the topping and/or crust beings to brown to much, cover loosely with a piece of foil.
When done, remove pie from oven and cool on a wire cake rack. It will take about 1 to 2 hours.
SERVE
The pie tastes best served at room temperature or warmed just a bit.

STORAGE
This pie must be stored in the refrigerator, because of the sour cream custard filling. It will keep for about 3 to 5 days.