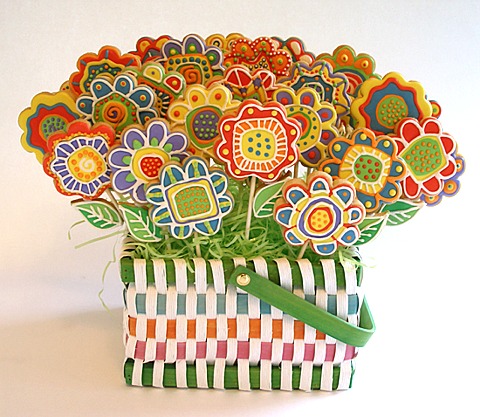
Cookies and photo by Kelly Hong © Sarah Phillips
Royal Icing is one of the most versatile icings to use in decorating – it is easy to make and dries hard, can be flavored and tinted in any color. If you are going to eat the icing on a cookie, my recipe doesn’t use raw egg whites, rather I use safe-to-eat dried pasteurized egg whites, found in the grocery store, or meringue powder, more commonly found in cookware stores. Royal Icing turns soft when it comes into contact with any type of grease or oil, or high humidity. Be sure that all of your tools are free of grease before using to mix or decorate with.
FROSTING, ICING, ETC RECIPE HELP
INGREDIENTS
1/3 cup egg white powder or meringue powder, more if needed
1/2 cup warm water, more if needed
1 pound (about 4 cups) powdered sugar, more if needed
1/2 teaspoon lemon juice or water
1/2 teaspoon vanilla extract
food coloring
INSTRUCTIONS
1. Place cookies to be glazed, 2-inches apart on a wire cake rack set over a pan lined with wax paper to catch any glaze drips. Set aside.
2. Prepare the glaze: In a medium mixing bowl, dissolve the egg white powder in water. With a hand held mixer on medium to medium-high, beat until soft peaks form. With the mixer on low, add the powdered sugar, ½ cup at a time. Beat after each addition until well combined. Add the lemon juice and extract. Beat for an additional 3 minutes with the mixer on medium-high speed or until the mixture forms medium to stiff peaks.
Adjust icing so it flows like corn syrup. To test, draw a knife through the icing. Count to 10 seconds. If the mark disappears, the icing is perfect. Adjust with 1 teaspoon egg white powder or water to thicken or thin. Beat after each addition.
3. When the desired flow consistency is achieved, add food color in small amounts, one drop at a time, until desired shade is reached.
4. Cover glaze with a damp kitchen towel until ready to use.
HOW TO GLAZE
With a spoon, pour about a tablespoon of icing in the middle of the cookie. Quickly, with a small offset metal spatula or a table knife, spread the glaze to the edges and let drip over the sides. Return to the wire cake rack to set. Repeat with remaining cookies.
Let glaze set for about 6 to 8 hours, preferably overnight, until hard. (Do not cover the cookies while doing so). Afterwards, the cookies can be stacked, packaged or stored without marring their finish.
STORAGE
Icing does not need refrigeration; store in an airtight container in a cool, dry place where it keeps for about a week. Cover icing with a damp kitchen towel (not a paper towel because it dries too quickly) and then with plastic wrap. Stir before using.
If any of the Royal Icing has crusted (gets a thin crust of hardened sugar) during storage, it cannot be used.
If too stiff after storing, rebeat with an electric mixer at low speed first. I've noticed that mixing thin icing for several minutes after storing tends to thicken it up, so add more water, if necessary, a drop at a time, to thin it.
STORE GLAZED COOKIES
Store glazed cookies in between layers of waxed paper in an airtight container where they will keep for about four days. Keep away from humidity otherwise the glaze will become sticky. They can be frozen, wrapped the same, for about a month.
When you are ready to use them, take them out of the freezer, unwrap them and lay them out, in a single layer on a rack and let them come to room temperature, and air dry for a couple of hours before packing them in the cellophane bags.


