
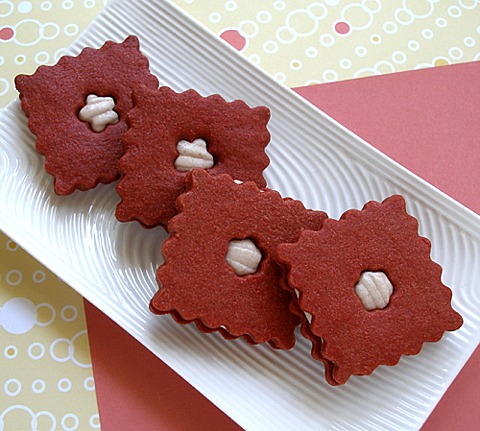
emmabellas, one of our Premium Members, asked me for a Red Velvet sugar cookie recipe. Since that time, I came up with a luscious Red Velvet Sandwich Cookie recipe, filled with the White Chocolate Raspberry Ganache Filling and Frosting. I specially created this recipe just so the cookies would tint in vivid red hues and still bake without losing their shapes. The recipe has become so popular and reliable that I also use it with the Red Velvet Checkerboard Cookies Recipe.
COOKIE RECIPE HELP
Kelly Says: “Majorly DELISH!!”
STEP I: MAKE THE RED VELVET SHORTBREAD COOKIES
RED VELVET SHORTBREAD COOKIES
INGREDIENTS
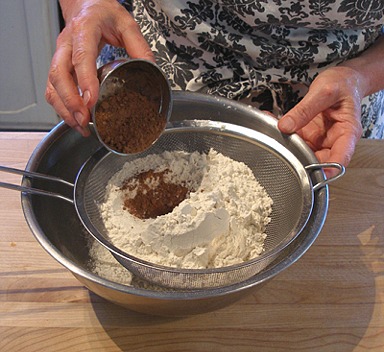
2 cups unbleached all-purpose flour, MINUS 2 tablespoons; spoon into measuring cup and level to rim
2 tablespoons cocoa powder; natural or Dutch-process
2/3 cup sugar
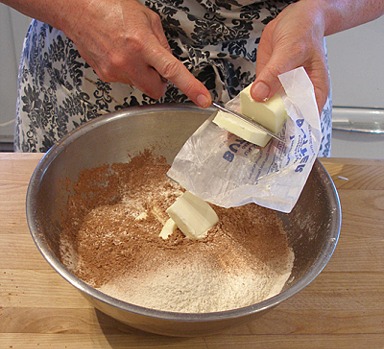
3/4 cup plus 2 tablespoons (14 tablespoons) cold unsalted butter, cut into tablespoon size pieces – rechill if necessary
1 large egg yolk, cold
1 1/2 tablespoons light cream, cold; can use whole or 2% milk
1/4 teaspoon red gel food color; we prfer AmeriColor
2 teaspoons vanilla extract
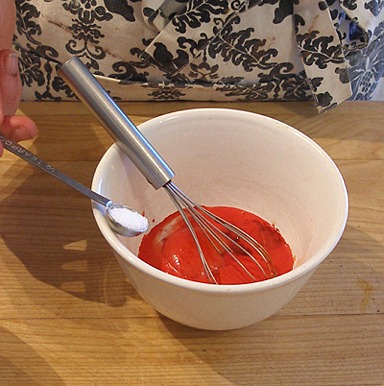
1/4 teaspoon salt
NOTES:
I measured out two cups flour, and then removed the two tablespoons.

INSTRUCTIONS
Mix the dough:
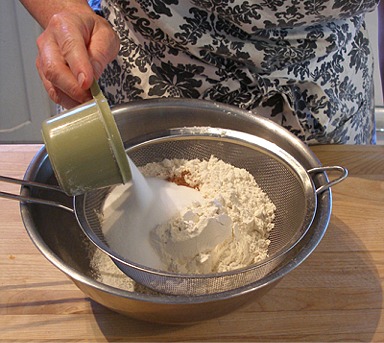
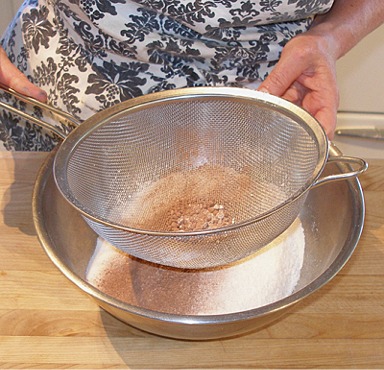
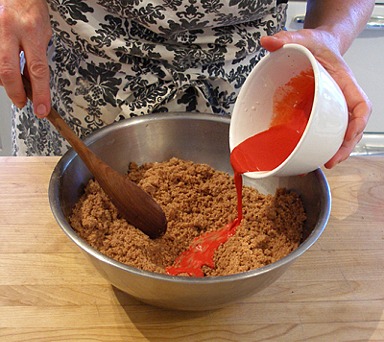
1. In a large bowl, thoroughly mix together the flour, cocoa and sugar. Sift the ingredients together.
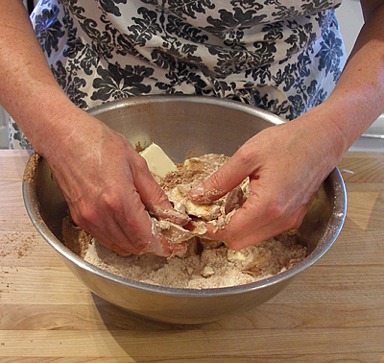
2. Toss the cold butter into the flour mixture.
Using forks, a pastry blender or your fingertips, cut the butter into the flour until the mixture is the consistency of coarse meal.
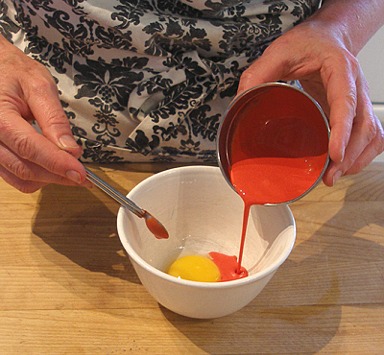
3. In a small bowl, mix the food color in with the cream. Stir until combined.
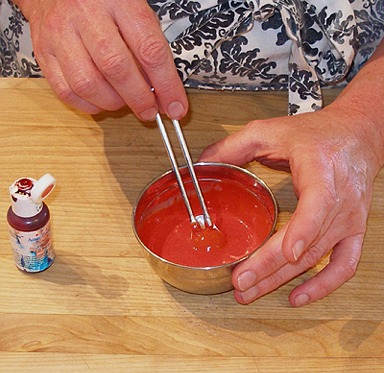
4. In another small bowl, beat together the egg yolk, cream / red food coloring mixture, vanilla and salt with a fork until well blended and smooth.

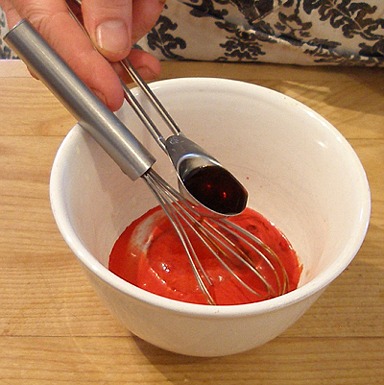
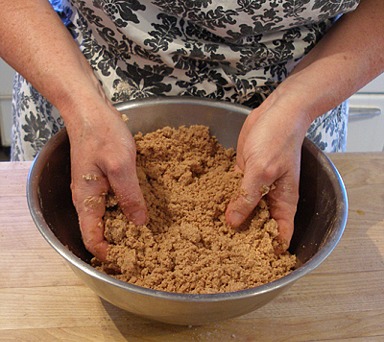
5. Add the egg yolk mixture to the flour / butter mixture, and lightly stir the two together with a large spoon.

6. Then, knead the two together until the dough is evenly incorporated.
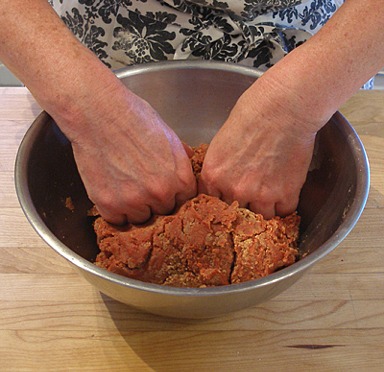
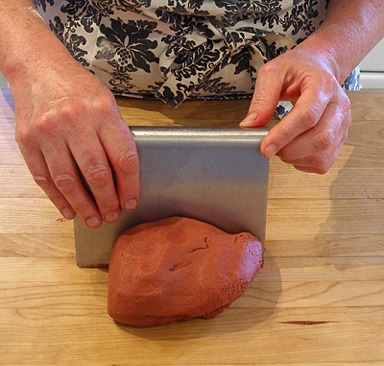
7. Divide the dough in half. Press each half into a disk and wrap in plastic wrap and refrigerate for at least two hours.
NOTE: The red color of the dough will intensify as it chills.
Roll the cookie dough:
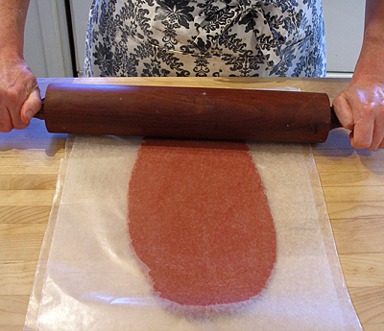
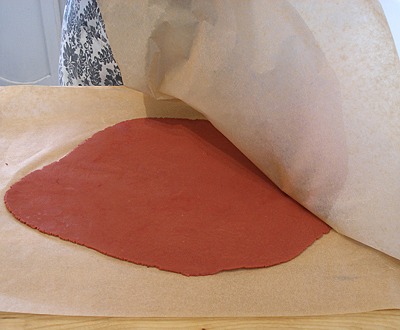
1. When dough is thoroughly chilled, remove one disk from the refrigerator. Divide it in half.
Place one half on a silpat or nonstick mat or on a lightly floured surface. Rewrap and return the other half to the refrigerator.
2. Roll out each portion 3/16 inch thick; check the underside of the dough and smooth out any wrinkles that form.
3. Roll out the second half of the first dough disk.
4. Repeat steps 1 – 3 with the second dough disk in the refrigerator.
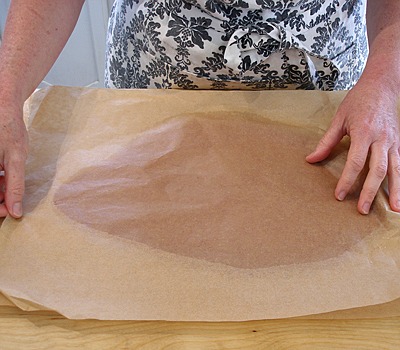
5. Stack the rolled portions (paper still attached), one on top of the other, on a baking sheet.
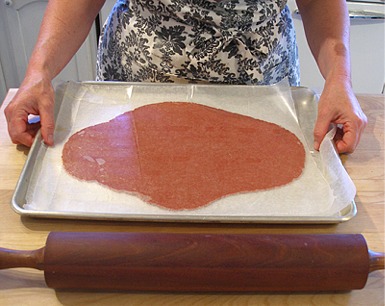
6. Refrigerate for 30 minutes, or until chilled and firm, or freeze for about 15 minutes to speed chilling.
Preheat the oven, Cut-out the cookie dough, Bake and Cool:
1. Position and oven shelf to the middle of the oven and preheat the oven to 325 degrees F.
2. Line baking sheets with ungreased parchment paper.
KELLY SAYS: I like to line mine with Silpat, nonstick baking mats.
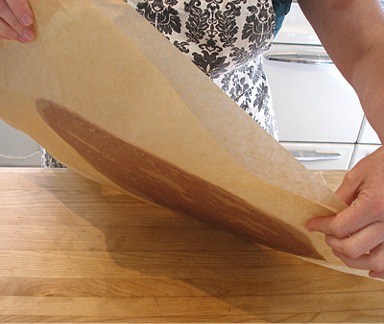
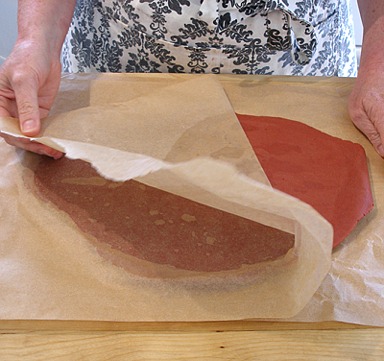
3. Working with one rolled out dough portion at a time and leaving the remaining chilled, gently peel away, then pat one sheet of wax paper back into place.
4. Flip the dough over, then peel off and discard the second sheet.
5. Using a 2-INCH fluted square cutter or other desired shape, cut out the cookies. (If at any point the dough softens too much to handle easily, transfer the paper and cookies to a baking sheet and refrigerate or freeze until firm again.)
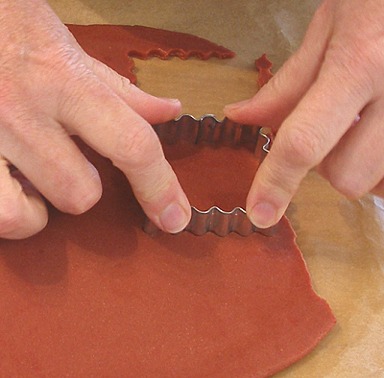
6. Using a spatula, carefully transfer the cookies to the baking sheet, spacing about 1 1/4 inches apart. Reroll any dough scraps. Continue cutting until all the dough is used.
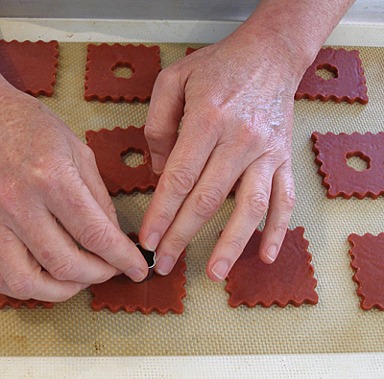
KELLY SAYS: Since we are making sandwich cookies, cut a little window out of the center of half the cookies. I chose to use a small flower cutter for the window.
Bake:
1. Bake the cookies, one sheet at a time, in the middle third of the oven for 9 to 13 minutes, or until just lightly browned on the edges.
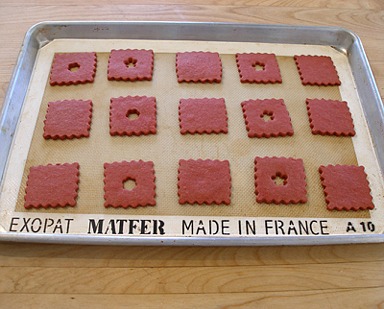
2. Using a metal spatula, immediately transfer the cookies to wire racks. Let stand until completely cooled.
STORAGE
Store unfilled cookies in an airtight container for up to 2 weeks or freeze for up to 2 months.
COLOR VARIATIONS
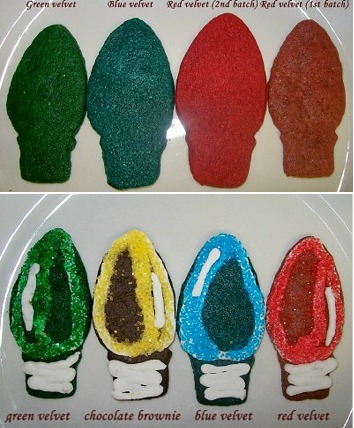
kareninflorida: So here are my Christmas versions of the red velvet cookie (sans sandwich.) I made a couple of variations to the recipe…
STEP II: MAKE THE WHITE CHOCOLATE RASPBERRY GANACHE FILLING
WHITE CHOCOLATE RASPBERRY GANACHE FILLING

Ganache is a simple mixture of melted chocolate and cream to which it has several uses depending on the ratio of the two ingredients to one another. It can be used as a glaze or whipped and put on a cake as a frosting. To it other ingredients are often added for flavor, richness and a smooth texture.
This recipe calls for cooling the ganache and then whipping it to use as a creamy frosting and filling on a cake.
INGREDIENTS
10 ounces white chocolate chips or chopped white chocolate; good quality
1/2 cup heavy whipping cream (do not use light cream or milk)
1/8 cup seedless raspberry, or any flavor jam if you don't have seedless, heat jam until warm, strain and remove seeds. Then measure amount needed.
2 teaspoons light corn syrup, measure in measuring spoons
pinch (1/8 teaspoon) salt
1/2 stick (1/4 cup) unsalted stick butter, softened
NOTES: I use a hand held mixer fitted with beaters to make this recipe, but a stand mixer is perfectly fine, too. Just make sure you do not overmix the recipe. Use the paddle attachment if you use your stand mixer.
INSTRUCTIONS
1. Chop the chocolate into 1/4- to 1/2-inch pieces and place in a stand mixer bowl. (NOTE: If using chocolate chips, there is not need to chop them; simply use as is.)
Scrape the chocolate into a mixing bowl; do not handle it as it will melt or soften. I am using a bench scraper to move the chopped chocolate into a large mixing bowl. Set aside.
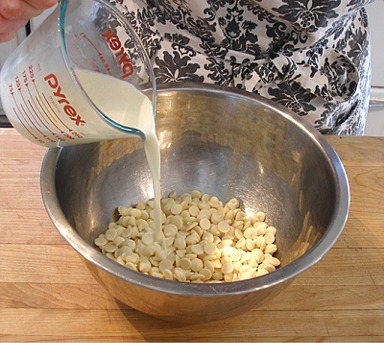
2. Pour the cream into a heavy bottomed saucepan. Slowly bring to a boil under low heat while stirring to prevent burning. When you see tiny bubbles forming around the side of the pan and steam rising from the middle, remove the cream immediately from the heat.
3. Pour the hot cream over the chocolate in a large mixing bowl. Swirl the bowl a couple of times so the chocolate is covered. Push downed any uncovered pieces with a whisk or a heatproof rubber spatula so the chocolate is completely submerged. Let stand for 2 to 3 minutes; whisk or mix with a hand-held mixer on low speed until smooth.
SARAH SAYS: If you are using a stand mixer to eventually beat your ganache, place the chocolate in its mixing bowl. When you have to whip the mixture, you don't have to transfer it into the bowl.
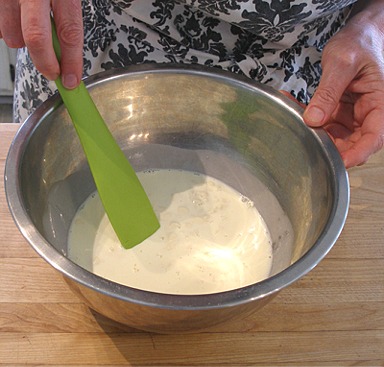
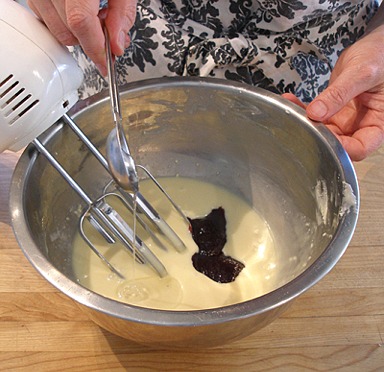
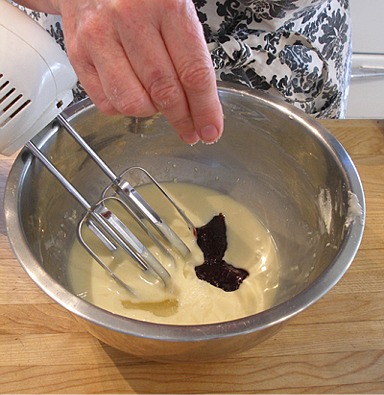
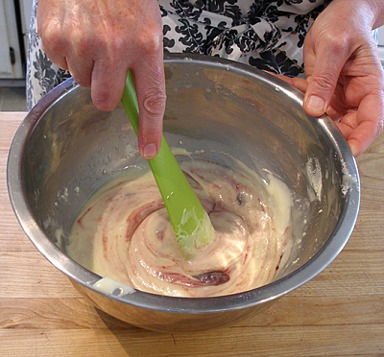
4. When the chocolate is melted and the mixture is still warm, add the seedless raspberry jam, corn syrup and salt. Stir the chocolate mixture with a spoon until all of the ingredients are incorporated.
SARAH SAYS: If the mixture has cooled, it's ok — DON'T reheat it because you'll cause the chocolate to separate from the cream. Simply stir in the raspberry jam and corn syrup to incorporate!
5. Chill the chocolate ganache until stiff, but not hard: You need the chocolate mixture to be chilled so when you whip it, it becomes fluffy and stays that way. Place a piece of plastic wrap on the surface of the chocolate mixture and refrigerate until stiff but not hard. This takes about an hour.
NOTE: You can leave the chocolate mixture in the refrigerator for a day or two. The mixture will become stiff. Let it warm at room temperature for about 1/2 hour to an hour or until it softens slightly so you can whip it.
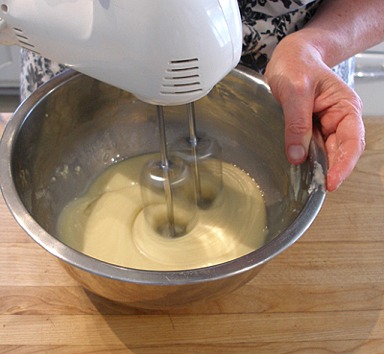
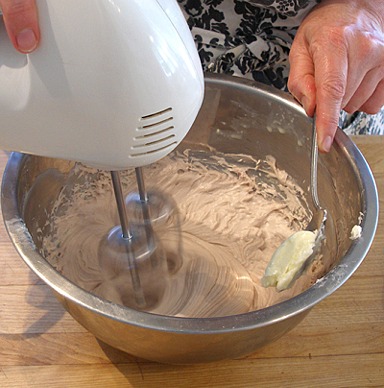
6. Whip the chocolate ganache while adding the butter, and beat until fluffy and creamy:
SARAH SAYS: For quick cooling, I place the mixture in the freezer for about 20 minutes until it stiffens. The chocolate is mixed with cream, so it won't seize!
If you don't have time to chill the mixture, place bowl in a larger bowl of ice and water and whip. The cold water below will quickly cool the chocolate mixture. Make sure no water leaks into the ganache mixture; it won't seize, but it will ruin its consistency.
A. Fit your hand-held mixer with beater attachments or clip the mixer bowl onto the stand mixer. Start beating the chilled chocolate mixture on low and gradually increase the speed to high. (If using a stand mixer, increase the speed to medium-high.)
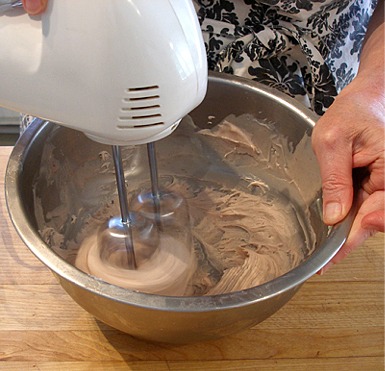
Quickly add the butter in tablespoon-size chunks as you beat. Increase the mixer speed to high. (If using a stand mixer, use the medium speed).
As you whip air into the mixture, it becomes lighter in color and increases in volume. Move the beaters around the mixture, making sure you reach all parts of the bowl.
B. Whip just until the mixture becomes fluffy and light in color taking about 2 minutes. It should be spreadable. Don't overwhip or the mixture will become grainy. If it does, reheat in a double boiler and strain.
SARAH SAYS: If you need to correct the consistency of your ganache, add a tablespoon of warmed cream or 1/2-ounce melted chocolate at a time and mix before deciding to add more. Remember ganache becomes stiffer when refrigerated and softer as it warms to room temperature.
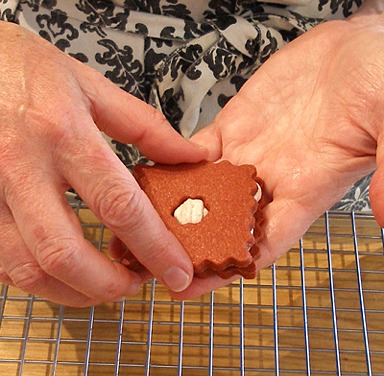
STEP III: FILL THE COOKIES
1. Make pairs of cookies of similar size.
2. Fill piping bag, fitted with a medium round tip, and pipe filling on the bottom half of each cookie.
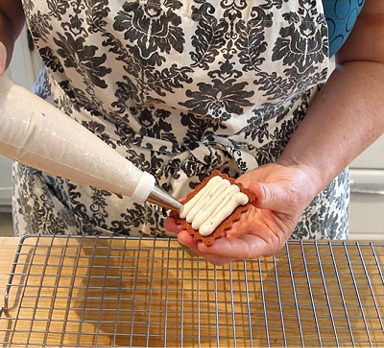
3. Place the top cookie over the filling and press gently.
STORAGE
Store cookies, well wrapped, at room temperature for a day or two, and then, refrigerate for a couple of days because of the ganache filling.
The cookies can be frozen, well wrapped for a month or more.