
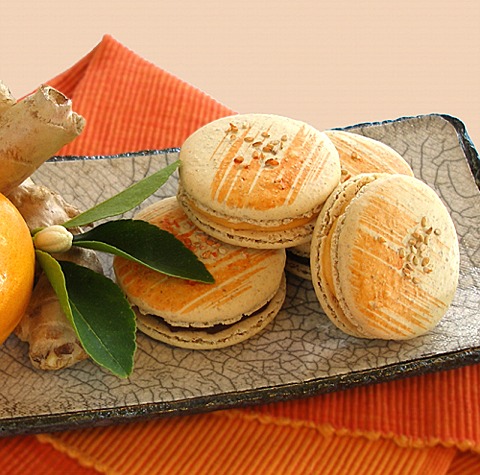
SARAH SAYS: French macaroons, known as macrarons, have enjoyed a surge in popularity thanks to French pâtissier Pierre Hermé. He has elevated them from being served as petits fours in smart restaurants for the last 30 years to a fashionable statement, with his flavors changing with every season.
Still made with ground almonds or almond flour, egg whites and sugar, but now with added coloring to make green, ivory, chocolate, yellow, flecked or marbled, macarons are little fragile and crispy light cookies that sandwich a creamy filling. They used to be made in just a few flavors, such as vanilla, chocolate, coffee and raspberry, filled with either with ganache or a butter cream. But, today you can find them in Hermé's shop in every flavor choice possible. He has also substituted the ganache or a butter cream fillings with lighter, flavour packed ones flavored with fruit. They have even been made into a Croquembouche. They are actually gluten-free.
However, a member asked me on the forum how they could achieve a Nut-free version of this famous macaron cookie. I responded:
QUOTE(lochan2410 @ Aug 25 2009, 08:06 AM)
Was in Paris recently and just couldn't get enough of macarons. Tried both Laduree's and Pierre Hermes' and they were soooo good. Anyway, I'm in a little bit of a dilemma when it comes to making macarons. My son is allergic to nuts so I have to find an alternative to the ground almonds. Someone suggested semolina and I have tried it in Sarah's recipe but the batter was too stiff. Should I reduce the amount of semolina? Or maybe I should substitute the ground almonds with something else?
SARAH PHILLIPS' RESPONSE:
I am sorry to hear about your son's allergy! Find out the solution in the recipe below!
COOKIE RECIPE HELP
KELLY SAYS: Creating a nut-free macaroon is exciting, because it allows people with nut allergies to enjoy these tasty little gems without worry.
Sarah was on the right track when she suggested using seeds, instead of almonds, in the recipe.
For this version, I used raw sunflower seeds, and toasted sesame seeds, in place of the almonds.
I chose sunflower seeds because the raw seeds have a pretty neutral flavor, and I toasted the sesame seeds, because I really wanted that flavor to shine.
You can use any filling you like, but I was inspired by the combination of sesame, ginger and orange, that you often find in Asian food, to create the ganache filling.
If you do not like ginger, you can omit it from the recipe.
I also filled the center of the macarons with a bit of salted caramel, just to gild the lily. It is a delicious combination.
They are also fabulous with the salted caramel alone.
INGREDIENTS
1 1/4 cups powdered sugar; makes the surface of the cookies shinier
2 ounces raw hulled sunflower seeds
2 ounces toasted sesame seeds
3 large egg whites; see instructions for handling, under INSTRUCTIONS – STEP I: PREPARE THE EGG WHITES
1/8 teaspoon salt
1/4 cup granulated sugar
1/4 teaspoon pure vanilla extract or any extract; do not use an oil based flavoring as it will deflate the egg whites
KELLY CA SAYS:
Process the seeds into flour:
1. Place the seeds in the bowl of a food processor, and pulse them until they are finely ground. Be careful that you don't take them too far, or you will start to make seed butter.
2. Sift the ground seeds through a seive, to remove the larger bits. The seeds must be finely ground, to make proper macarons.
KELLY CA SAYS: The larger seed pieces that are left in the sieve can be toasted in a dry pan and used as toppings for ice cream, or in a streusel, or even sprinkled on a salad, to add a little crunch. Just set them aside, for later use.
INSTRUCTIONS
STEP I: PREPARE THE EGG WHITES
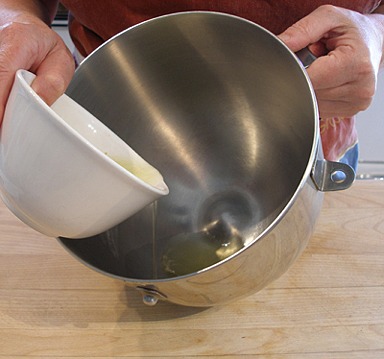
1. Allow the cracked egg whites to thicken by leaving them uncovered at room temperature for two hours. This is very important.
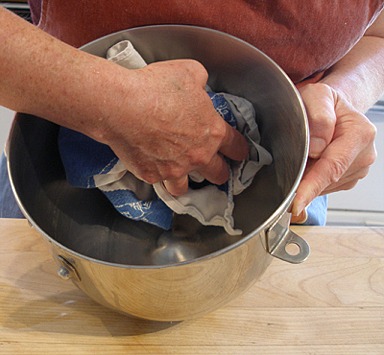
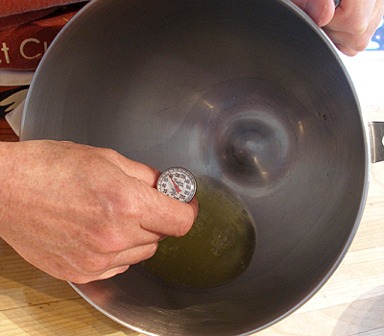
2. Then, warm the egg whites to around 75 – 76 degrees F . This is very important.
To warm them, run the mixer bowl under hot water and then dry. Use an Instant Read Thermometer to measure.
SARAH SAYS: Do not skip this step; I have found you will get better results.
STEP II: PREPARE THE BAKING PAN
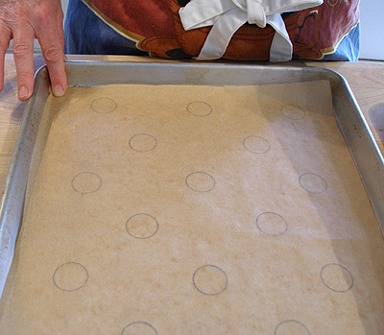
1. Draw a template of circles to pipe the macaron batter on. There are two ways, A or B:
A. On three pieces of parchment, use a pencil to draw 1 1/2-inch circles about 2 inches apart.
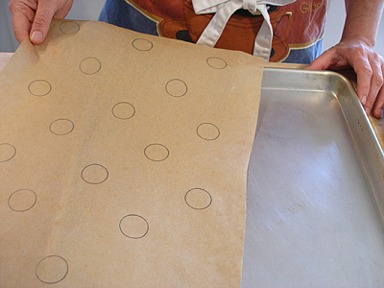
Flip each sheet over and place each sheet on a baking sheet. Or, Line 2 baking sheets with parchment paper or nonstick baking mats (Silpats), and mark circles using a 1 1/2-inch cutter dipped in flour.
Or,
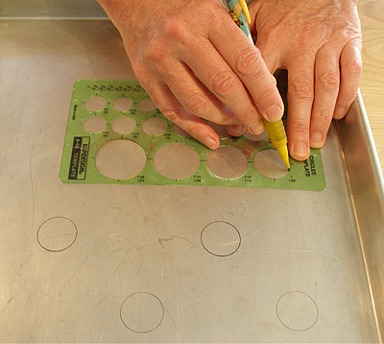
B. If you are using silpat mats, you can draw the circles right on the baking sheet. You will be able to see them through the mat. The pencilled circles wash off when you are done.
STEP III: COMBINE THE POWDERED SUGAR AND THE GROUND SEEDS
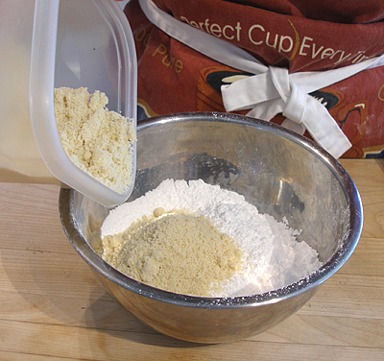
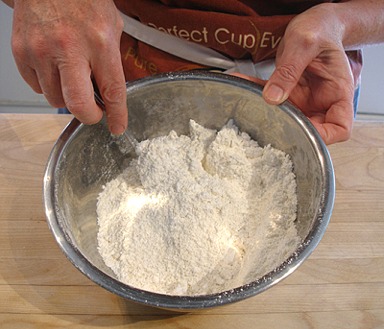
1. Sift powdered sugar into a medium-size bowl.
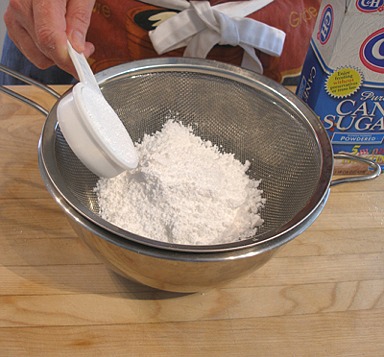
2. Mix in the grund sunflower and sesame seeds and set aside. If the mixture is not dry because of the ground seeds, spread on a baking sheet, and heat in oven at the lowest setting until it is.
STEP IV: BEAT THE EGG WHITES AND FOLD IN THE SEED FLOUR MIXTURE. ADD THE VANILLA EXTRACT AND OPTIONALLY TINT THE MACARON BATTER
SARAH SAYS: It is important to follow the steps carefully; mixer speed is important and one of the most overlooked steps.
1. Fit an electric stand mixer with a whisk attachment. Whip the egg whites on low speed until it starts to froth, and then add salt.

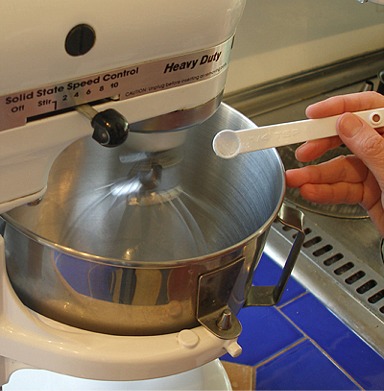
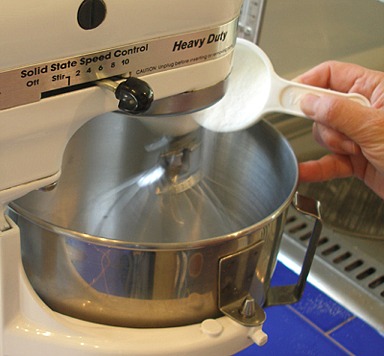
2. Gradually increase the mixing speed to medium-high and slowly add granulated sugar, a few teaspoons at a time.
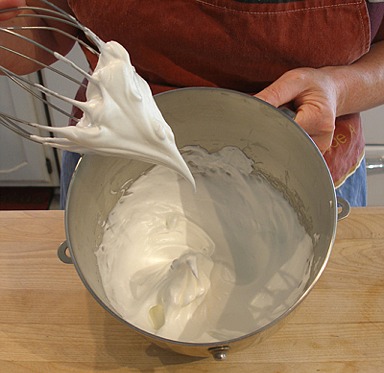
Continue to beat the whites untill the “firm peak stage”, which means at the end of the range of “soft peaks”.
The egg white foam will start to become smooth, moist and shiny.
SARAH SAYS: Stop the beaters and then lift them — straight peaks should almost form. Do not beat them to the Stiff Peak Stage. This is very important.
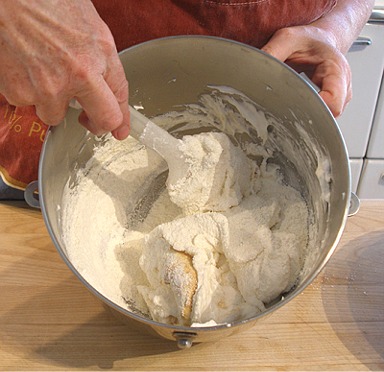
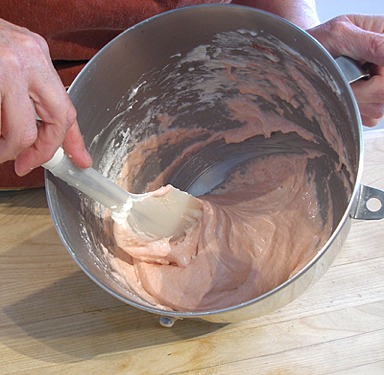
3. With a large rubber spatula, gently fold in 1/3 of the powdered sugar/almond flour mixture into egg whites until just incorporated.

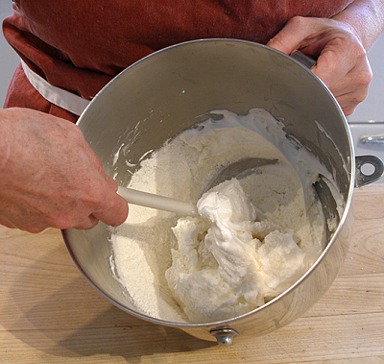
4. Fold in vanilla and the next 1/3 of powdered sugar/almond flour mixture until just incorporated.
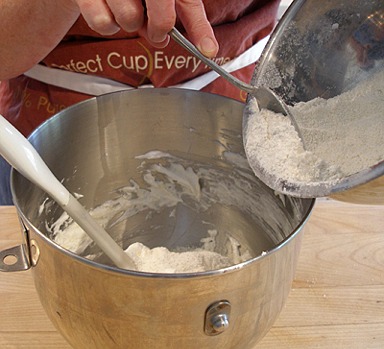
5. Fold in vanilla the remaining 1/3 of powdered sugar/almond flour mixture until just incorporated. The mixture should be shiny, just like a runny cake batter.
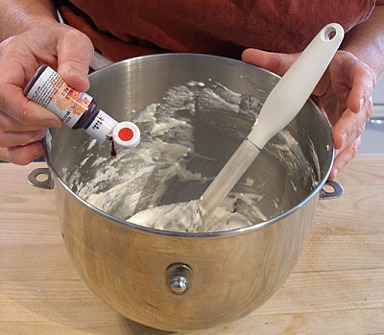
6. KELLY CA SAYS: If you want to color your macarons, this is the time to add the color and fold it into the beaten egg whites.
I used a couple of drops of red gel food color for the pink macarons. Be careful not to add too much. You want a nice pastel color.
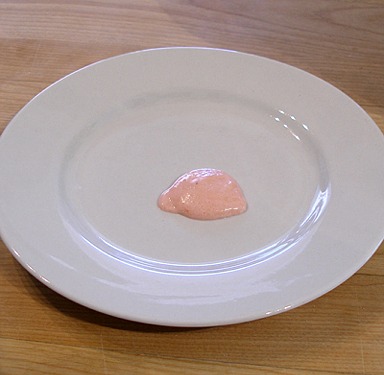
7. Test your batter to make sure it is the proper texture. Not too liquidy, nor too stiff. Lift the batter with your fingertip, any peak formed should fall into the batter and quickly dissolve. Firmly tap bottom of bowl on the counter to eliminate air pockets.
KELLY CA SAYS: You may also take a small spoonful and place it on a plate. If the peak dissolves, the batter is ready to be baked.
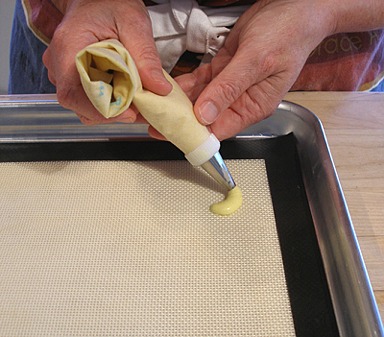
STEP V: PIPE THE MACARON BATTER AND LET DRY FOR ONE TO TWO HOURS
1. Fit a pastry bag with a 1/2-inch plain, round tip (such as Ateco #806). And, fill the pastry bag no more than half full with the macaron batter.
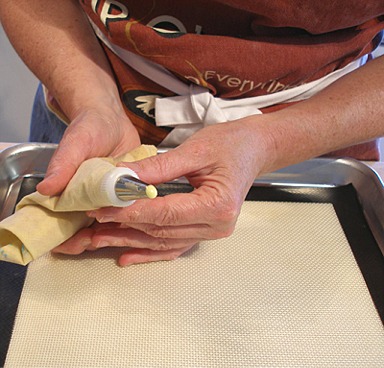
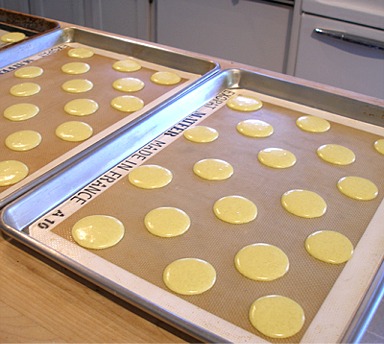
2. Pipe the batter into the marked circles onto the prepared baking sheets, starting next to the edge of the cricle and spirilng into the center.
Repeat until all of the batter has been piped. Tap the underside of the baking sheet to remove air bubbles.
SARAH SAYS: If the cookies form peaks on their tops after piping, flatten them with a wet fingertip.
KELLY CA SAYS: If you want to add toppings to your macarons, do so while the batter is still wet. You can add finely chopped nuts, if you like.
Do not add too much, you do not want to weigh the cookies down with toppings. I added some finely chopped pistachios to some of the cookies.
3. SARAH SAYS: Let the piped macaron batter dry at room temperature for 1 to 2 hours, to allow skins to form on top and so the feet can form on the bottom of the cookie when baked. This is very important. KELLY CA: I let my piped macarons sit for one hour.
SARAH SAYS: Letting the batter rest before baking and leaving the oven door slightly ajar during baking helps prevent the tops of the macarons from being too soft or fragile. I believe the feet are formed because, as you let the batter sit, the edges of the piped cookie batter circle dry out. So, when you bake the cookie, the dried edges form the pretty feet and the more liquidy part of the inner batter puffs up to form the cookie part. A thin sugar shell dries on top of the batter, allowing a thin sugar skin to form on top, stretching and helping keep the macaron flat and shiny on top as it bakes. So, resting the batter is essential. I think the whole making of a macaron is an exercise in food architecture and engineering!
STEP VI: BAKE THE MACARONS
1. Meanwhile, position an oven shelf in the middle of the oven. Preheat the oven to 325 degrees F (160C) for 30 minutes.
2. Bake one sheet at a time, for 10 to 11 minutes. Use a wooden spoon to keep the oven door slightly ajar.
Check at 30 second intervals because these cookies overbake very quickly; do not open the oven door to check, but rather peak through the opening in the oven door.
Bake until macaroons are slightly firm and can be gently lifted off parchment (bottoms will be dry).
SARAH SAYS: Letting the batter rest before baking and leaving the oven door slightly ajar during baking helps prevent the tops of the macarons from being too soft or fragile.
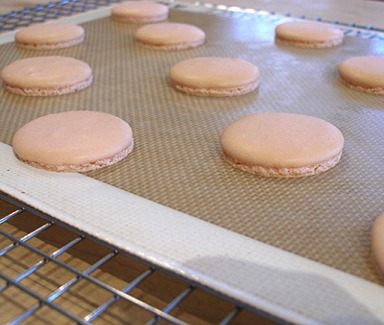
3. Let cool on sheets 5 minutes. Remove macarons from oven and transfer parchment to a cooling rack. When cool, slide a metal offset spatula underneath the macaron to remove from parchment.
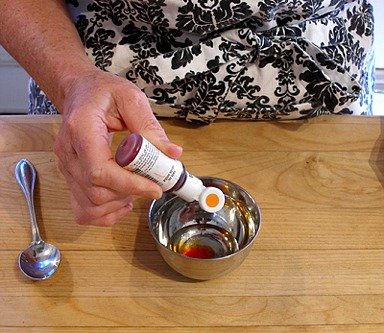
STEP VII: PAINT THE MACARON TOPS
Painting the tops of macarons with a mixture of food color and water adds a little flair to your cookies, and is surprisingly easy to do.
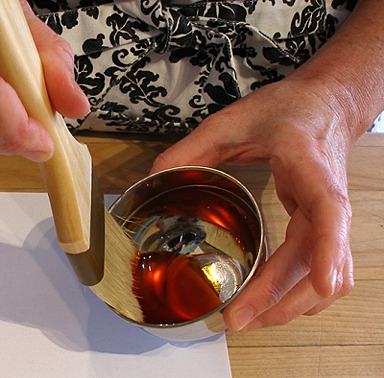
1. Put 1 tablespoon of tap water in a small bowl and add 4-5 drops of gel food coloring.
Stir to combine.
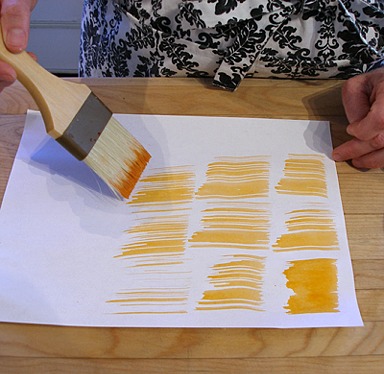
2. Before you start painting your macarons, it is best to practice your brushstrokes on a piece of paper, so you know what you are doing.
Dip just the very tip of a pastry brush into the color, and pull it from left to right.
You can see that I used way too much pressure on the brush in the first stroke that I put on the paper.
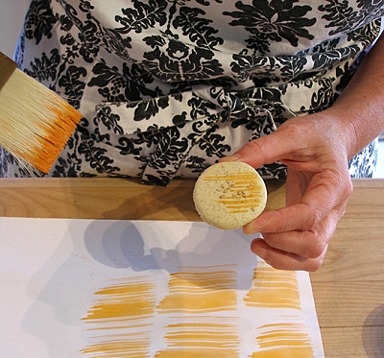
3. When you are feeling confident with your brushstrokes, paint the top of your macaron shells by starting on the left hand side of the cookie, and pulling to the right.
You need only paint the top of your macarons, the bottom can remain unpainted.
4. After all of the tops of your shells are painted, set them aside to dry completely.
STEP VIII: FILL THE MACARONS
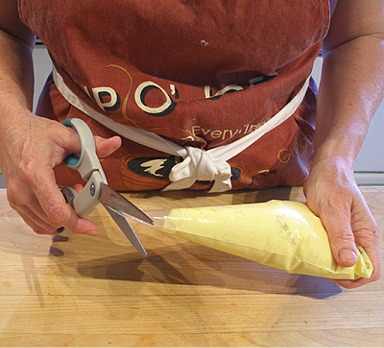
1. Fill a disposable pastry bag with ganache or buttercream.
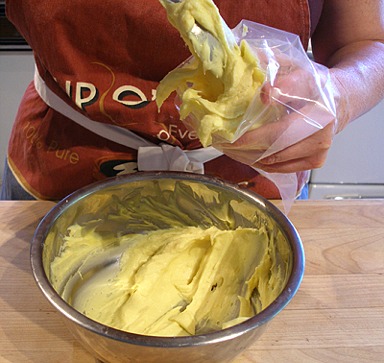
With scissors, cut a small hole in the tip side of the pastry bag.
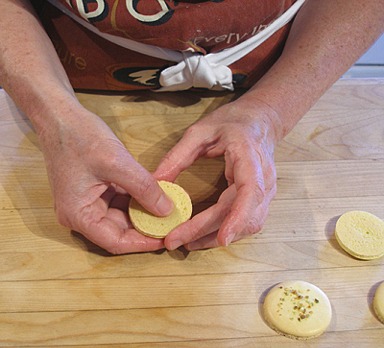
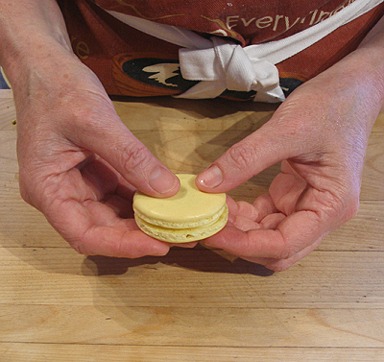
2. Pair macarons of similar size.
You may gently press the flat side of the macaroon with your thumb to make a small indentation, to make room for more filling.
Take care so the macaroon does not crack.
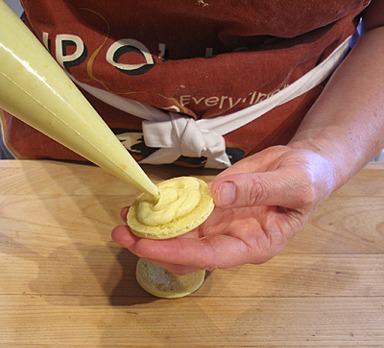
3. Pipe about 1 teaspoon of the Italian Buttercream, or ganache filling onto flat sides of half the macaroons.
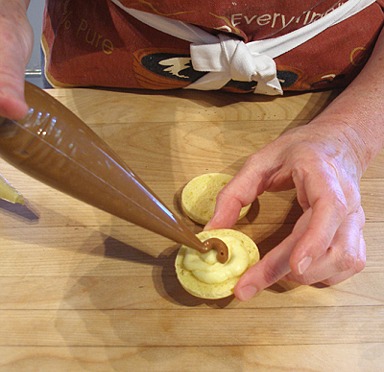
KELLY CA SAYS: I also added a little dollop of dulce de leche to the center some of my macarons, just for a little flavor excitement.
4. Sandwich with remaining halves, keeping flat sides together.
NOTE: Press the cookie together gently. You do not want your filling to ooze out the sides of the cookie.
5. Refrigerate for 20 minutes, to allow flavors to blend together, but do not store there. They also turn shiny on top after being in the fridge for awhile. Bring back to room temperature before serving.
STORAGE
Let the cookies stand at least one day before serving, so the flavors can meld.
Store alone in an airtight container for up to 3 to 5 days, or freeze. If you freeze them, defrost them in the unopened container, to avoid condensation which will make the macarons soggy.
Macarons and photos by Kelly CA © Sarah PhillipsCraftyBaking.com
VARIATIONS
Nut-Free Coconut French Macarons by Orange Piggy
I substituted almond meal(seeds) with finely ground dried coconut flakes. They came out yummy with lots of coconut fragrance. I filled them with chocolate! buttercream.
Macarons and photos by Orange Piggy © Sarah PhillipsCraftyBaking.com {C}
FILLING OPTIONS FOR FRENCH MACARONS
CHOCOLATE ORANGE GINGER GANACHE by Kelly CA
INGREDIENTS
10 ounces white chocolate OR dark chocolate, chopped; NOT candy melts. Use an excellent quality chocolate
1/2 cup heavy cream
3 tablespoons orange juice concentrate
2 teaspoons finely grated orange zest
1/2 teaspoon orange extract
1 teaspoon crystallized ginger, minced very finely
2-3 drops orange gel food coloring, optional
INSTRUCTIONS
1. Heat the cream in the microwave, or in a pot, till it reaches a gentle boil.
2. Add the orange juice concentrate to the cream and stir, over heat, till it combines with the cream.
3. Pour hot cream over chocolate, and gently shake bowl to cover the chocolate with the cream.
4. Add the orange zest and let the mixture sit for about one minute, to soften.
5. Stir the mixture, in one direction, and then gently whisk to combine.
6. Add orange extract, the ginger, and gel food coloring, if desired.
7. Set aside to cool, stirring occasionally, until ganache is firm enough to pipe.
SALTED CARAMEL MACARON FILLING by Kelly CA
I made a new filling and it is so good, I could eat the whole bowl!
It is GREAT in macarons, but can be used for other desserts as well. I think it would make a stellar cake filling
I wanted to share the recipe with you:
INGREDIENTS
1 cup granulated sugar
1/4 cup water
2 tablespoons corn syrup
1 cup heavy cream, warmed
2 teaspoons vanilla extract
3/4 to 1 teaspoon fleur de sel, or sea salt
1 stick(1/4 pound) unsalted butter, cold, and cut in cubes
INSTRUCTIONS
1. In a heavy saucepan, combine the sugar, water and corn syrup. Stir till sugar dissolves and then STOP stirring.
2. Bring mixture to a boil, over medium-high heat. Cook mixture till it is a medium amber color. Watch mixture carefully…it can burn if you are not careful.
3. Heat cream in microwave, till it is hot. Pour hot cream into the caramelized sugar mixture, a little at a time. Be careful, because it will bubble up, and it is very hot!
4. Stir mixture till it is smooth, and then add the vanilla extract, and the salt.
5. Cool mixture, stirring occasionally, till it is about 110 degrees.
6. When the mixture has cooled to 110 degrees, add the cubes of butter, a few at a time, mixing them into the caramel with an immersion blender, to create an emulsion.
7. When butter is incorporated, pour caramel into a bowl, and cover with plastic wrap, placed directly on the surface, so a skin doesn't form on top.
8. Place caramel in the refrigerator, to firm up, till you are ready to fill your macarons.