
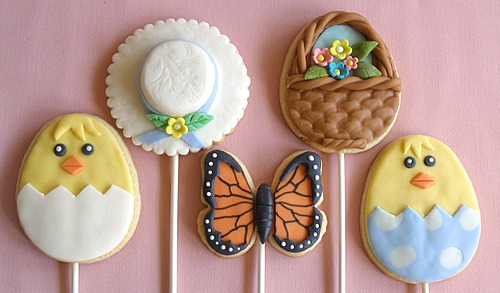
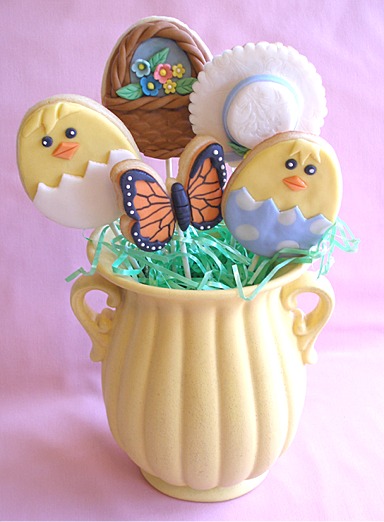
Make Sarah's Creative Cut-Out Sugar Cookie recipe into Pops for Easter, beautifully decorated with Marshmallow Fondant or MMF and some Simple Safe Royal Icing Glaze! Put together all sorts of styles and shapes, guided by over 100 color photos and detailed, step-by-step instructions! Recipes included!
COOKIE RECIPE HELP
INGREDIENTS
Two batches of Sarah's Creative Cut-out Sugar Cookie Dough, well-chilled for 4 hours; form each batch into a dough round and separately in plastic wrap.
SARAH SAYS: Make each batch separately to avoid overcreaming the butter and sugar and overmixing the batter, otherwise the cookies will puff and spread in the oven, even if chilled sufficiently.
1/2 batch of Simple Safe Royal Icing Glaze
One batch Marshmallow Fondant or MMF, colors of your choice and white
1/2 cup light corn syrup, for “gluing” fondant to cookies
EQUIPMENT
Choose which cookie cutters you would like to use to make your lollies. For this tutorial, I chose and egg shape, a butterfly and a fluted round cutter, and a smaller plain round cutter, to make Easter bonnet cookies.
15-20 paper lollipop sticks(these can be found at most craft stores, in the baking section)
Various items to texture fondant, such as embossing mats, CLEAN rubber stamps, lace, etc.
Small fondant rolling pin
Flower plunger tool, to make flowers, or small cutters
Silpat mat to work on
CLEAN Exacto knife
Cornstarch for dusting work surface and fondant pin
Black food color marker
KELLY SAYS: I got the blossom cutters at a local cake decorating store.
STEP I: MAKE THE COOKIE LOLLIES – EXAMPLE USING THE EGG SHAPE
KELLY CA SAYS: In order to make the cookie lollies, your Sarah's Creative Cut-out Sugar Cookie Dough must be very cold. After making your dough, chill it for at least 4 hours, before you start.
Again, you CANNOT make these if your dough isn't really cold!
1. Position the oven shelf to the middle and preheat the oven to 350 degrees F. Line several baking sheets with parchment paper or a Silpat, nonstick baking mat and set aside.
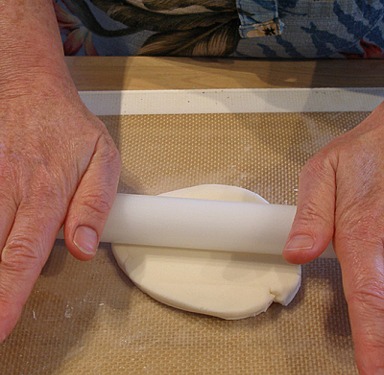
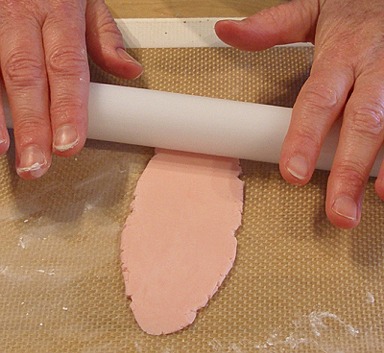
2. Use half a dough round (from one batch) at a time, leaving the rest in the refrigerator. Place it on a lightly floured surface, or a silpat mat.
Lightly flour your rolling pin, too.
KELLY SAYS: You will use half a dough round (from one batch) for each of the four cookie cutter shapes in this tutorial.

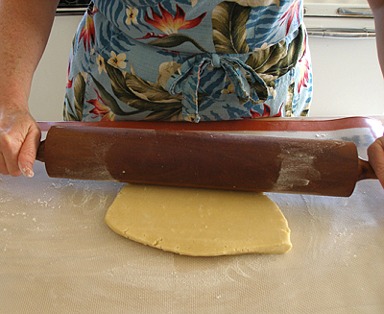
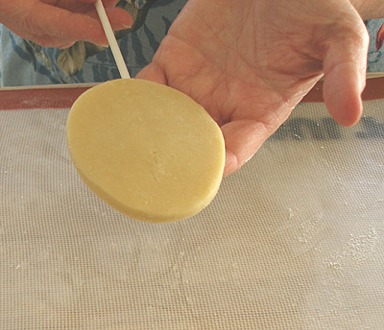
3. Roll dough to about 1/4-inch thick.
KELLY SAYS: The dough must be thicker than normal, when you make cookie lollies, so it has enough strength to be supported on the stick.
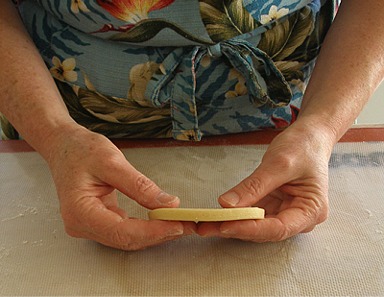
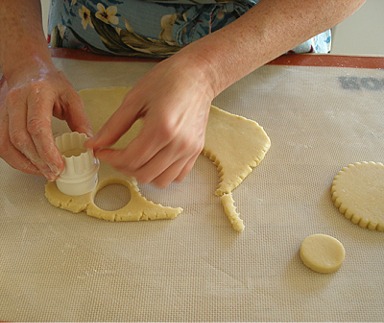
4. Cut cookies out of rolled out dough using one cookie cutter shape. Here. I started with the egg shape.
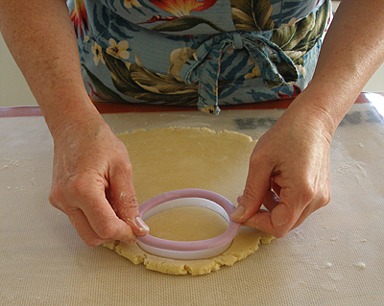
KELLY SAYS: Here you can see the 1/4-inch thickness of the dough.
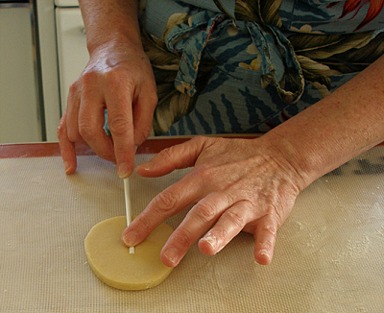
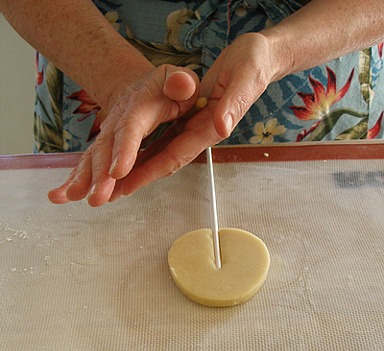
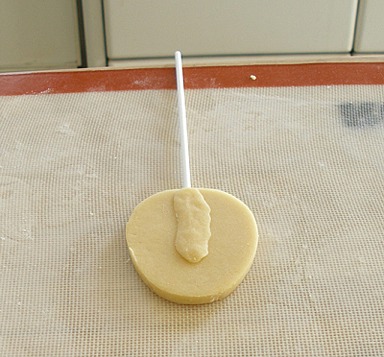
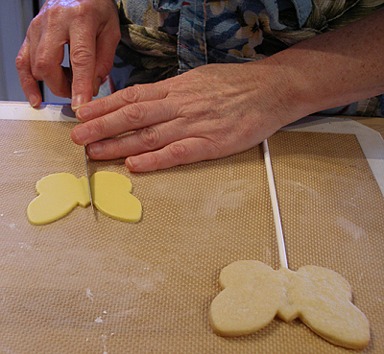
5. Flip cookie over and press the stick gently into the back of the cookie, about 1/2 way up from the bottom. Do not press too hard or the stick will show from the front.
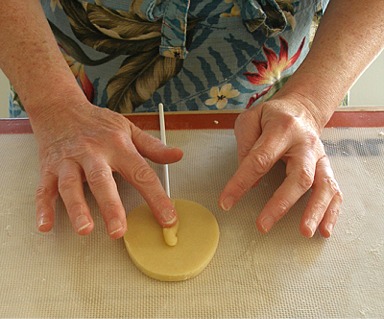
6. Take a small piece of dough and roll it into a sausage shape.
7. Press this “sausage” over the exposed stick, to cover it.
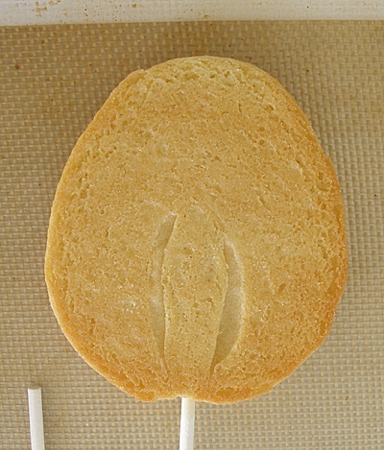
8. Flip cookie over, making sure to support the cookie from behind, and place it on a prepared baking sheet.

9. Bake the cookies until the edges just start to color, about 10-12 minutes, depending on the size of your cookies.
When cookies are done, remove pan from oven but let them cool, on the baking sheet, for a few minutes before you remove them to a wire rack.
KELLY SAYS: After the cookies are baked, you will see that the little “sausage” has formed a little extra support for the stick.
10. Repeat with the remaining cookie dough, using a different cookie cutter for each half a dough round (from one batch) at a time.
STEP II: DECORATE THE HATCHING CHICK COOKIES
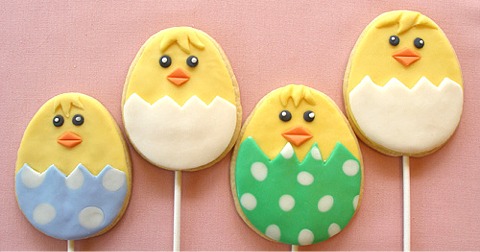
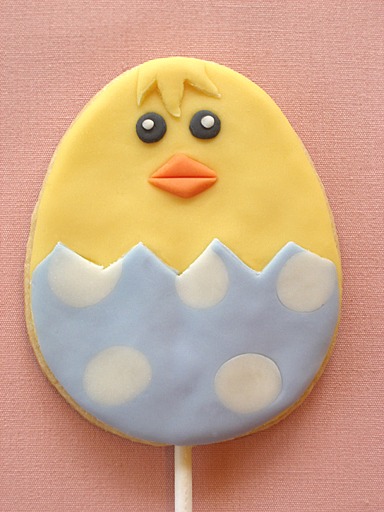

KELLY SAYS: I made the “egg” section white on some of my chicks, and I made some of them look like Easter eggs.
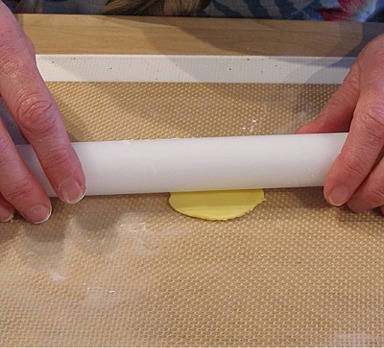
When I work with Marshmallow Fondant or MMF, I like to work on a silpat nonstick mat. Dust a little cornstarch on the mat, if it is sticking. Take a small portion of the MMF and roll it to 1/8-inch thickness.
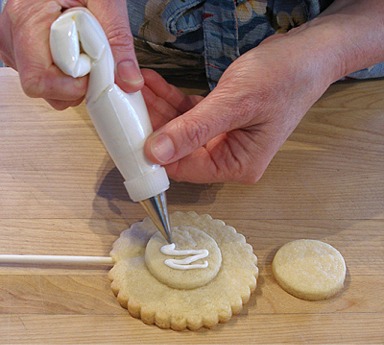
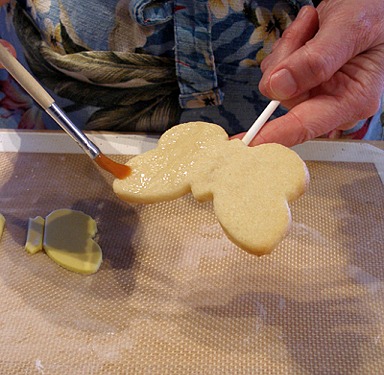
1. Cover a baked and cooled egg shaped cookie on a stick, with yellow tinted MMF:
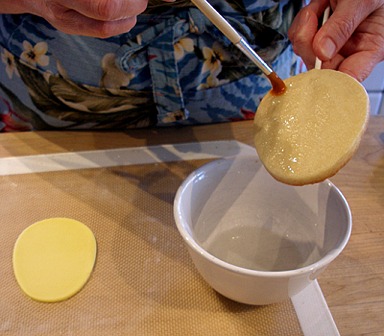
A. To do so, roll out the MMF. Then, cut out the MMF with the same egg-shaped cookie cutter you used to cut the cookie dough out with.

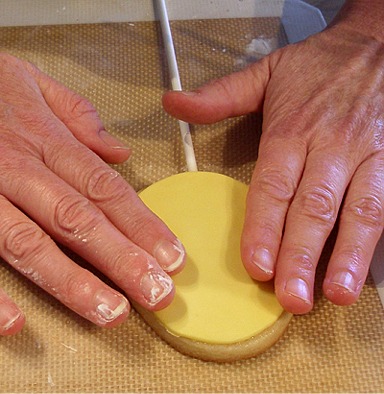
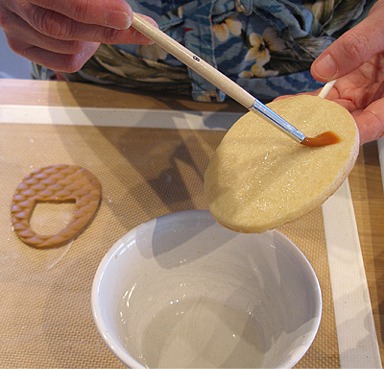
B. Brush the cookie lightly with corn syrup and center the MMF on the cookie.
C. Gently press the MMF to adhere to its surface.
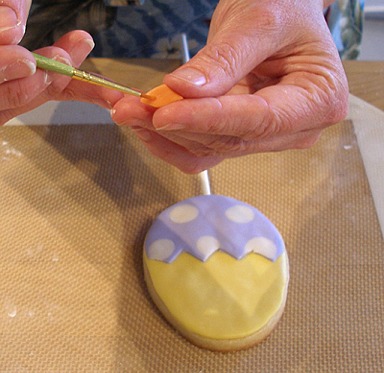
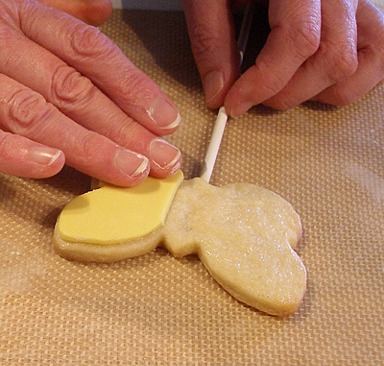
2. This is how you make it look like your chick is emerging from a colored Easter egg:
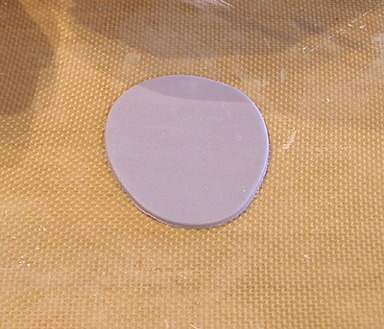
A. Take a small piece of colored MMF and roll it out thin. Then cut it out with the egg shaped cookie cutter.
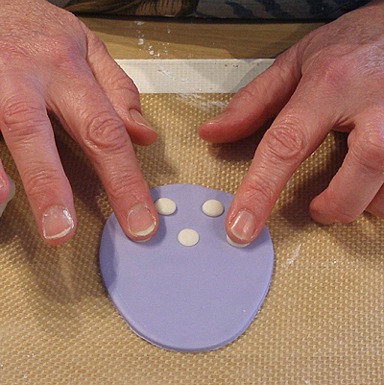
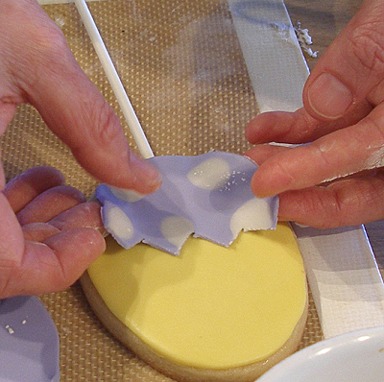
B. Take little balls of white(or any contrasting color) MMF and place them in a pattern on the surface. Press down lightly with your fingers and then roll the balls into the fondant, so they are flush with the surface.
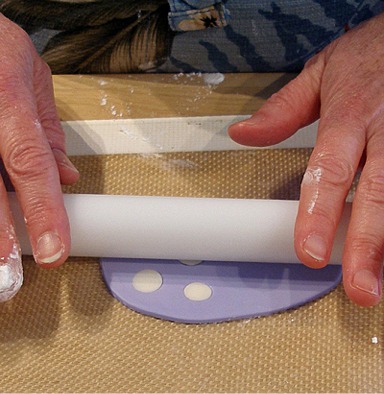
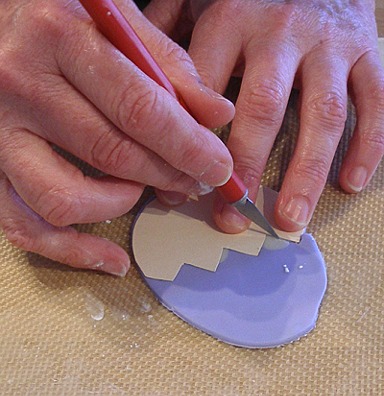
C. Take the egg cutter again, and cut the fondant.
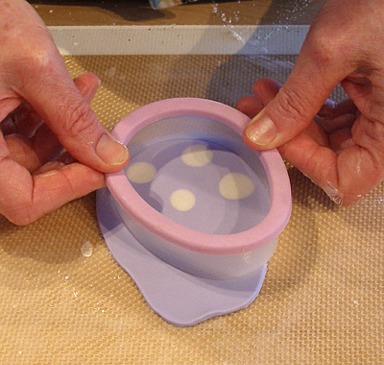
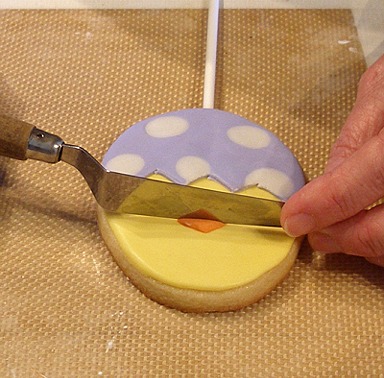
D. I made a little template of a cracked egg shell, out of thin cardboard, to cut around. Cut the shape out with an Exacto knife.
E. Brush the bottom section (yellow part) of the egg with a little water and set the egg shell in place, pressing gently.
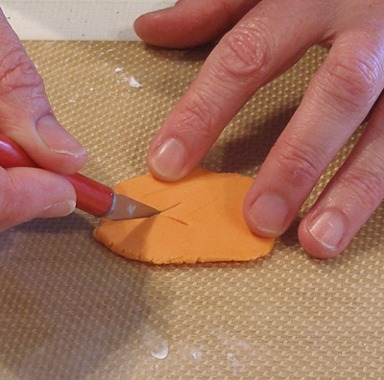
3. Make the chick's “beak”:
A. Cut an elongated diamond shape out of MMF. Brush the back with water and adhere it to the chick's face.

B. Use the dull side of a knife to gently mark across the center of the beak.
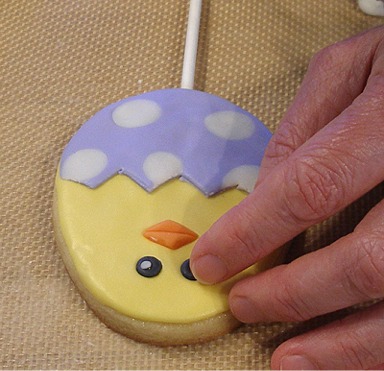
4. Make the eyes:
A. Use the opening of a large plain piping tip to cut the eyes out of black MMF.
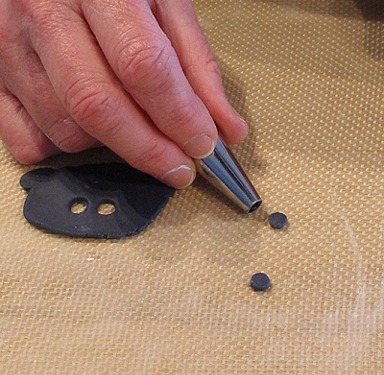
B. Brush back of eyes with a little water and gently press into place.
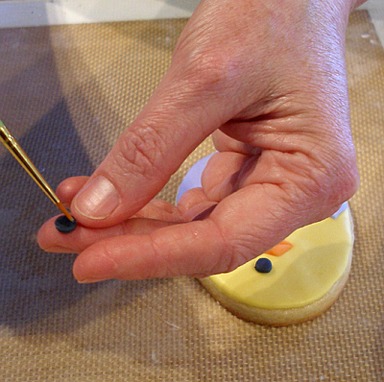
C. Roll up a tiny ball of white MMF and place on eye to form a little highlight. You can also use white royal icing and pipe it on, if you like.
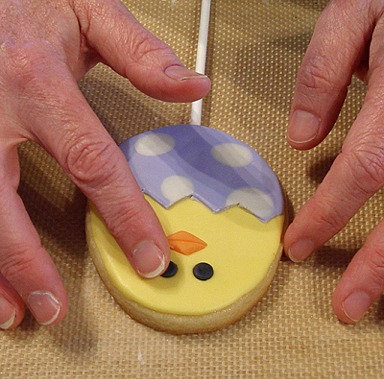
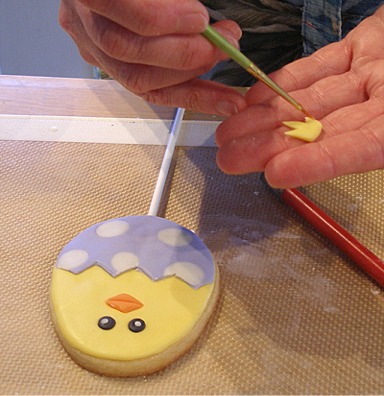
5. Make the chick's crown:
A. Cut out a little upside down crown shape form the little chick's head fluff. This just adds a little dimension and cuteness.
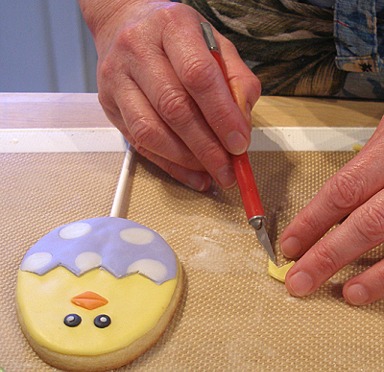
B. Apply a little water and gently press into place.
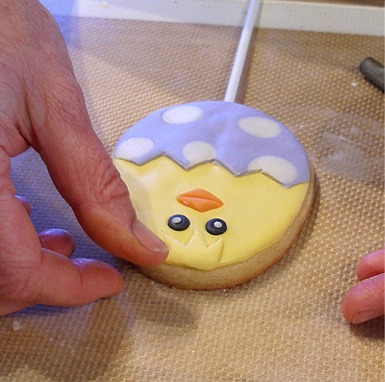
DONE!
STEP III: DECORATE THE FLOWER BASKET COOKIES

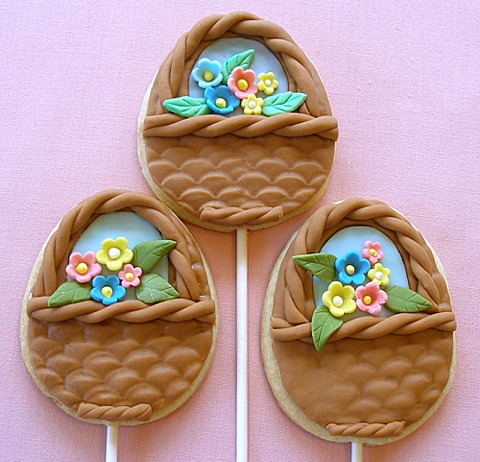
KELLY SAYS: Use the egg-shaped cookie to make the flower basket cookies.
Dust a little cornstarch on the nonstick mat, if it is sticking. Take a small portion of the MMF and roll it to 1/8-inch thickness.
I got the blossom cutters at a local cake decorating store. I got the texture mat that I used on the baskets HERE.
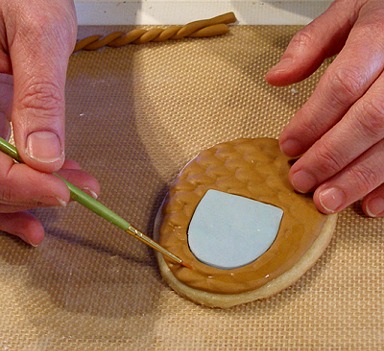
1. Cover a baked and cooled egg shaped cookie on a stick, with brown tinted MMF:
A. Roll out a small piece of MMF and then place in on the embossing mat and roll again.
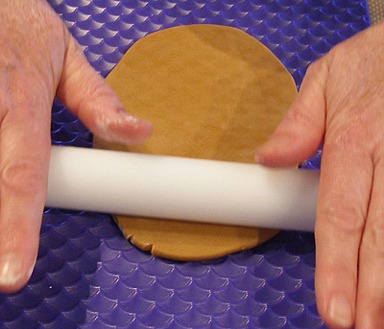
KELLY SAYS: If you have a basket-weave embossing mat, use this to texture the fondant for the basket.
I have a fish scale mat, so that is what I used.
B. Flip textured piece over and place it on your work surface.

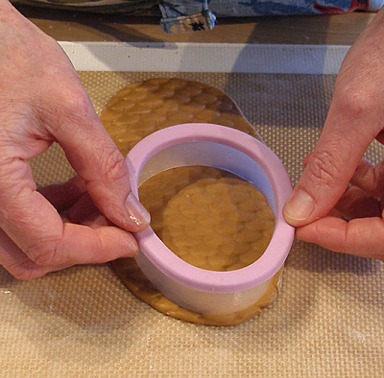
C. Cut it out, using the same egg cookie cutter you used for the cookies.
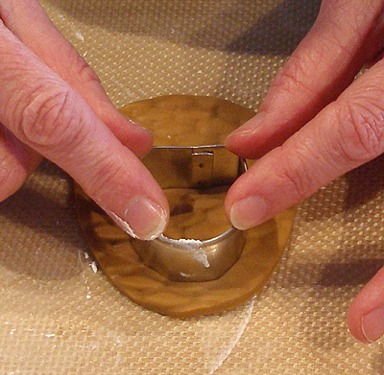
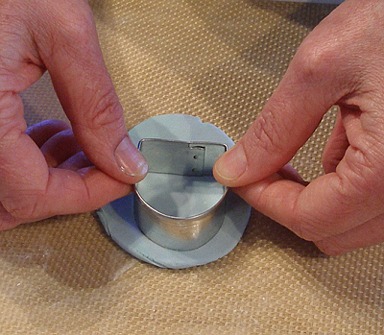
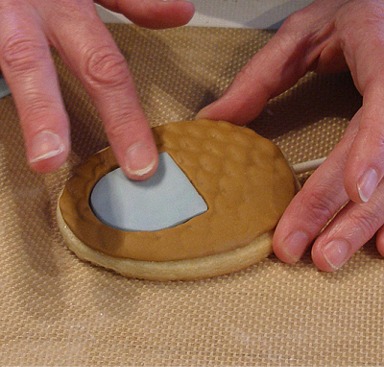
D. Cut out the center of the top half of the cookie using a knife or the center of a purse cookie cutter set, if you have one.
E. Brush cookie with corn syrup and put the MMF on the cookie.
2. Place the blue background to the flower basket on the cookies:
A. Roll out a small portion of blue MMF and cut it out using the same purse cutter, or, if you don't have a purse cookie cutter, do the best you can, with a small knife.
B. Put the blue shape in place, pressing gently until it fills the gaps.
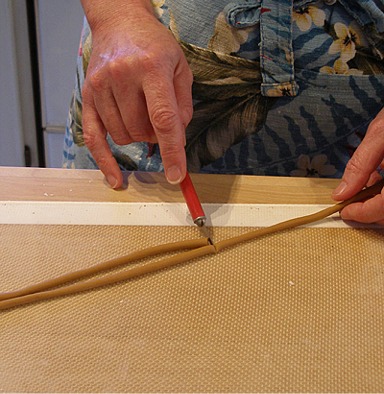
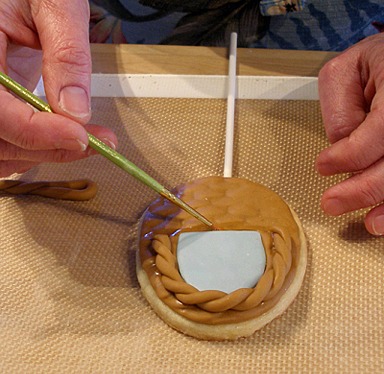
3. Make the decorative ropes. Form the basket handle and decorative elements:
A. Roll the MMF into a thin rope shape, about 14-inches long.
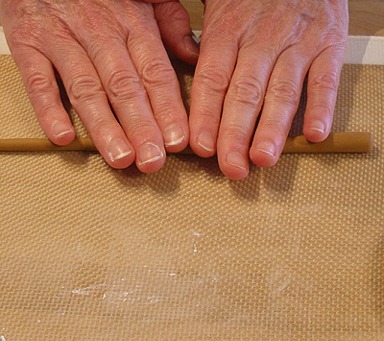
B. Cut two equal 5-inches long lengths, to form the basket handle. Set the remaining 4-inches aside.
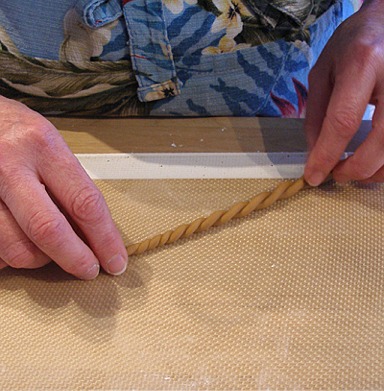
C. Twist the 5-inch lengths together to form the basket handle.
D. Apply water to the brown embossed MMF on the cookie and gently press the handle to adhere to it. Trim ends with the Exacto knife.
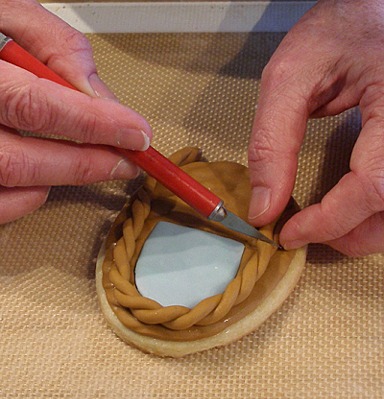
E. Fold the remaining 4-inches of the rope it in half and twist to form the edge of the basket. Paint edge of basket with water and glue it into place. Trim edges with Exacto knife.
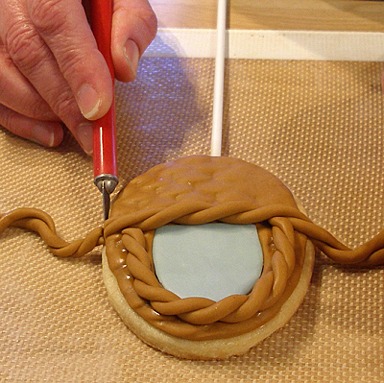
F. Do the same thing, with a thinner rope, to form the foot of the basket.
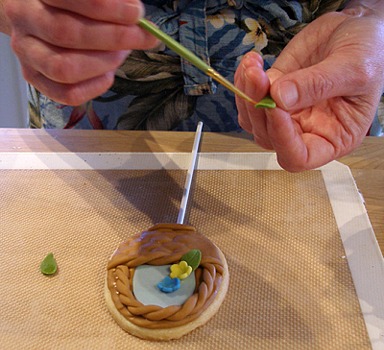
3. Fill the basket with MMF flowers:
A. Make several colors of flowers, using the plunger cutter. You may want to make a couple of different sizes, for variety. Pinch out some small leaf shapes, and mark the veins with the dull side of a knife. Set them aside to dry a bit.
KELLY SAYS: Create a little bouquet, adhering the leaves and flowers with a little water.
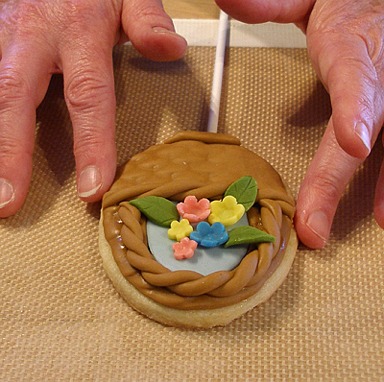
B. Add little royal icing centers to your flowers.
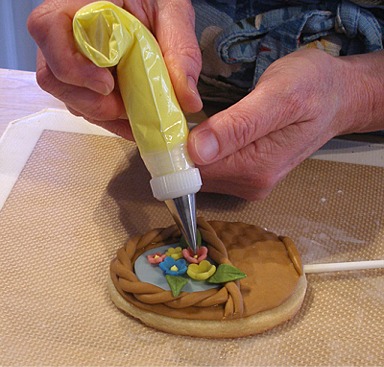
DONE! Aren't they cute!?
STEP IV. CUT-OUT, BAKE AND DECORATE THE EASTER BONNET COOKIES
Kelly SAYS: The Easter Bonnet cookies require a little trick when you make them.
1. Cut out and bake the Easter Bonnet cookie dough:
KELLY SAYS: In order to make the cookie lollies, your Sarah's Creative Cut-out Sugar Cookie Dough must be very cold. After making your dough, chill it for at least 4 hours, before you start.
Again, you CANNOT make these if your dough isn't really cold!
A. Position the oven shelf to the middle and preheat the oven to 350 degrees F. Line several baking sheets with parchment paper or a Silpat, nonstick baking mat and set aside.
B. Use half a dough round (from one batch) at a time, leaving the rest in the refrigerator. Place it on a lightly floured surface, or a silpat mat.
Lightly flour your rolling pin, too.
KELLY SAYS: You will use half a dough round (from one batch) for each of the four cookie cutter shapes in this tutorial.
C. Roll dough to about 1/4-inch thick.
KELLY SAYS: The dough must be thicker than normal, when you make cookie lollies, so it has enough strength to be supported on the stick.
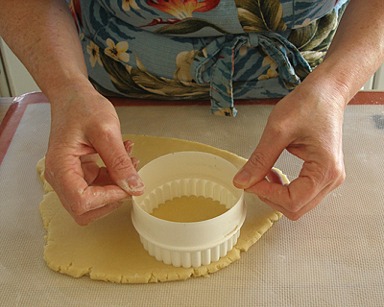
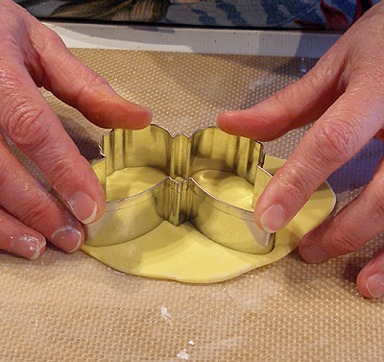
D. Cut-out the cookie shapes:
Use a 3-inch fluted cutter, to cut out what will become the brim of the hat.
Use a 1 1/2-inch round cutter, to cut out what will become the crown of the hat. Plus, cut an extra one for each hat. The extra circle will be used, after the cookie bake, to help make the crown more prominent.
E. Turn the large fluted cut-out circle over and insert the stick, just like we did with the egg cookie, STEP I, #s 5 – 7. Then, carefully flip the cookie over, and place it on the baking sheet.
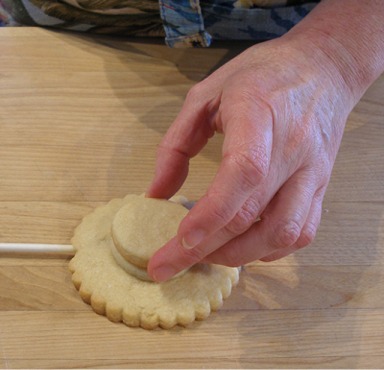
F. Take ONE of the smaller circles and center it on the large circle. You do not need to use anything to stick these together. They will bake together.
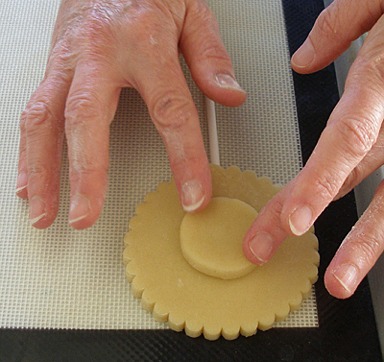
Place the other small circle on the baking sheet.
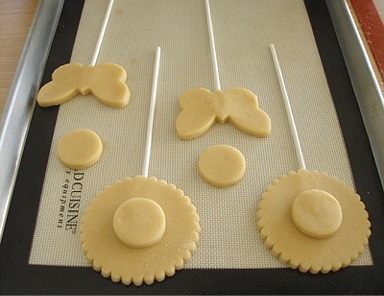
G. When they are baked, the bonnet cookies will look like this:
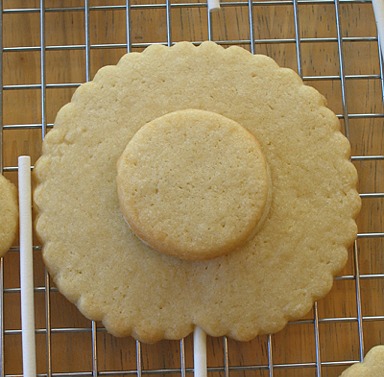
2. After the cookies have baked and cooled:
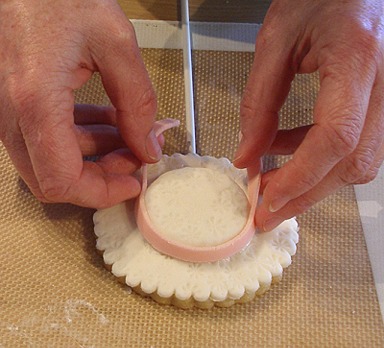
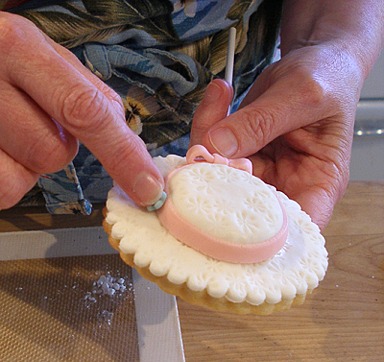
A. In order to make the crown of the hat more prominent, take the other small circle and “glue” it to the cookie with a little royal icing.
KELLY SAYS: Let the royal icing set up for at least 1/2 hour before decorating the cookies with fondant.
3. Decorate the Easter Bonnet Cookies:
KELLY SAYS: Dust a little cornstarch on the nonstick mat, if it is sticking. Take a small portion of the MMF and roll it to 1/8-inch thickness.
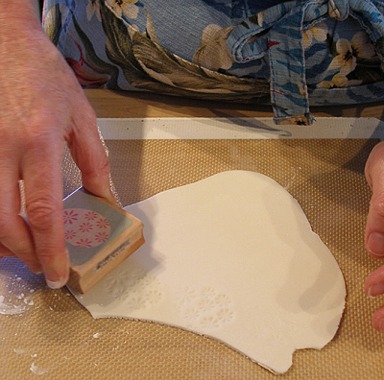
Cover the baked and cooled cookie with textured with white MMF:
A. Texture the fondant by using an embossing mat or even rubber stamps, like I did here. If you are using rubber stamps, they must be used ONLY for baking.
Stamping the MMF will automatically make it thinner.
B. Because the fondant has to go over the crown of the hat, you must cut it out with a cutter that is larger than the one you used for the brim. I have a graduated set of circle cutters and I used a 3 1/2-inch cutter for the fondant.
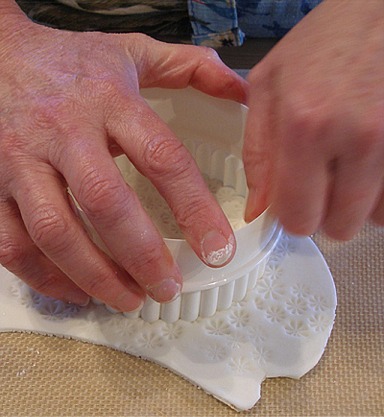
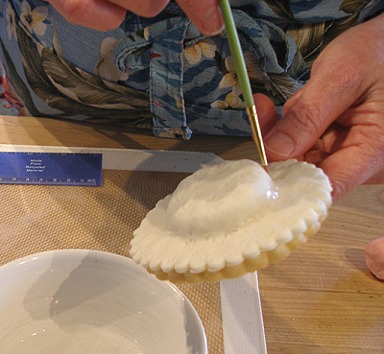
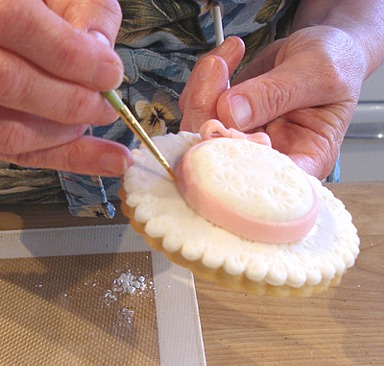
C. Pour some corn syrup in a small bowl and lightly brush the surface of the cookie with the corn syrup. This will adhere the fondant to the cookie.
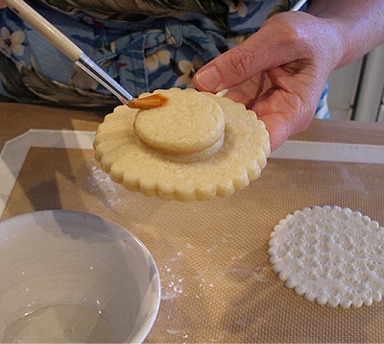
D. Carefully pick the fondant circle up, and center it on the cookie.
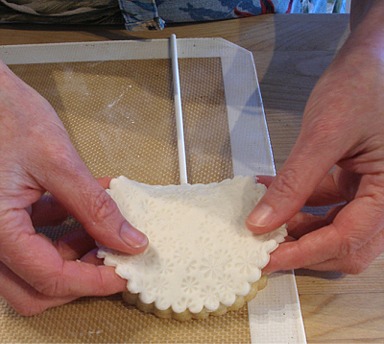
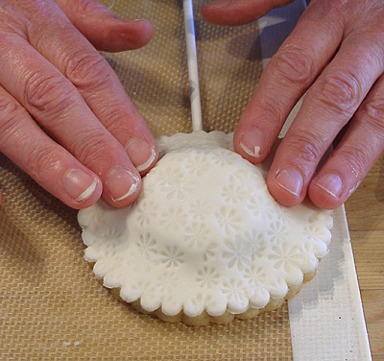
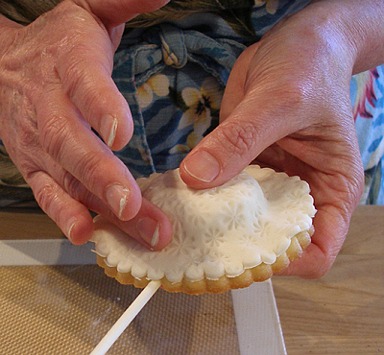
E. Gently work the fondant around the contours of the cookie.
Make and attach the ribbon:
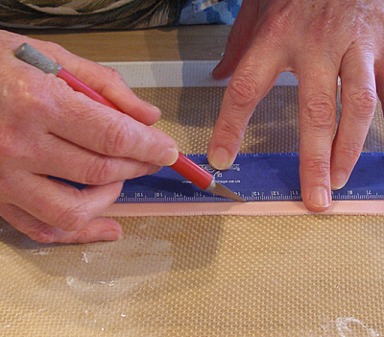
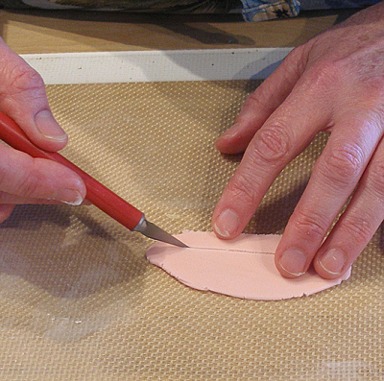
A. Roll out a small portion of fondant, to form the ribbon around the hat. This should be very thin.
B. Using a straight edge and a clean Exacto knife, cut out the ribbon.
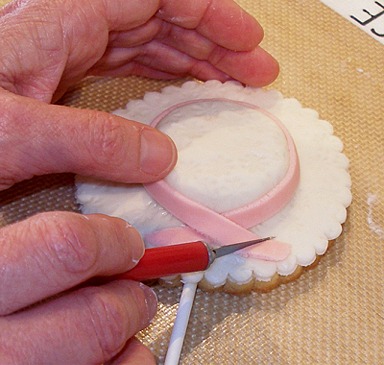
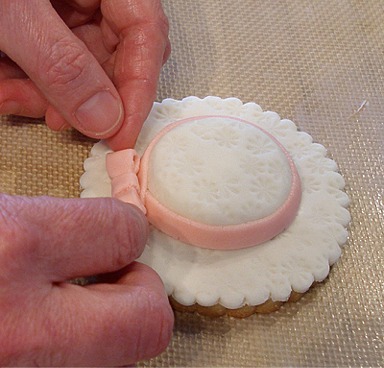
C. Lightly brush the sides of the crown of the hat with water, this will “glue” the ribbon to the hat.
D. Center the ribbon on the front of the hat and wrap it around to the back, pressing gently as you go.
E. When you reach the stick, on the back of the hat, cross the two ends over each other, and put a little dab of water where they overlap, to secure.
Use the Exacto knife to trim the ends of the ribbon.
Attach a bow to the cookie:
A. Make the bow by cutting a long rectangle of fondant, about 2-inches long.
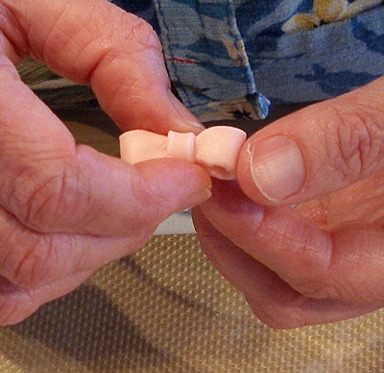
B. Place a dab of water in the center of the rectangle and fold each end toward the center, then pinch the center, to form a bow shape.


C. Cut out a thin strip of fondant, to form the center of the bow. Attach it to the bow with a small dab of water and gently pinch it together in the back.
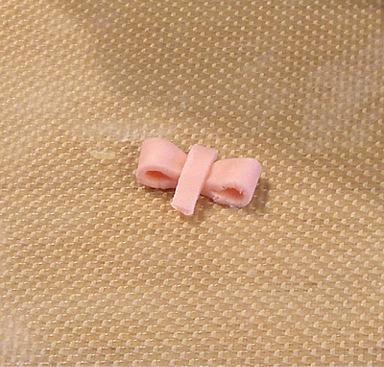
D. Attach the bow to the back of the hat, with a little dab of water.
Attach flowers to the hats:
KELLY SAYS: You can embellish the hat any way you like, but, I made some simple fondant flowers, made with a plunger cutter. It is best if these are partially dry before you attempt to handle them, so they don't lose their shape.
It is best to make a lot of these little flowers at once and let them air-dry. You can then use them whenever you want to pretty-up a cupcake or a cookie.
When they are totally dry, you can store them, in a airtight container, indefinitely.
I always have a supply of them, in my pantry, for when inspiration strikes.
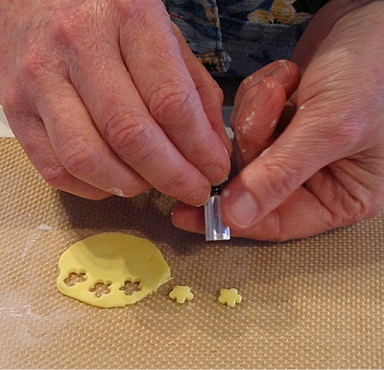
A. Dust a little cornstarch on the mat, if it is sticking. Take a small portion of the MMF and roll it to 1/8-inch thickness.
B. Cut out flowers using lower plunger tool or with small cutters.
C. Attach the flowers to the hat with a small amount of water.
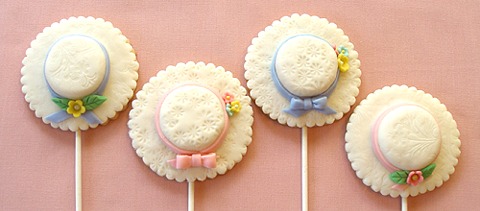
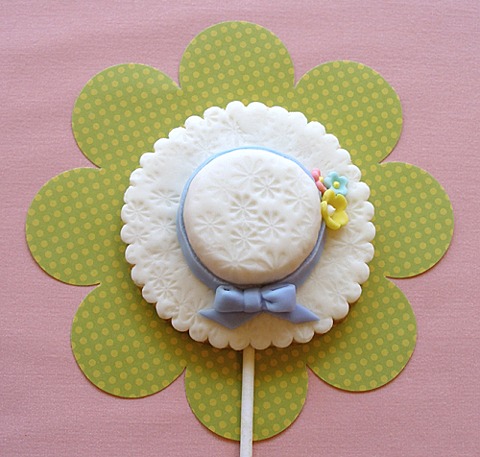
DONE! Aren't the Easter Bonnet Cookies so sweet!?
STEP V: DECORATE THE BUTTERFLY COOKIES
KELLY SAYS: Dust a little cornstarch on the mat, if it is sticking. Take a small portion of the MMF and roll it to 1/8-inch thickness.
1. Cut out and bake the butterfly cookies! Let them cool before decorating.
2. Decorate the Butterfly Cookies:
Cover a baked and cooled butterfly shaped cookie on a stick, with MMF:
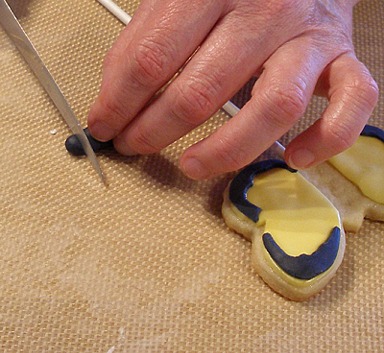
A. To do so, roll out the MMF, using the color of your choice. Then, cut out the MMF with the same butterfly-shaped cookie cutter you used to cut the cookie dough out with.
B. Cut the body off, leaving the wings.
C. Brush cookie lightly with corn syrup and adhere the wings to the butterfly.
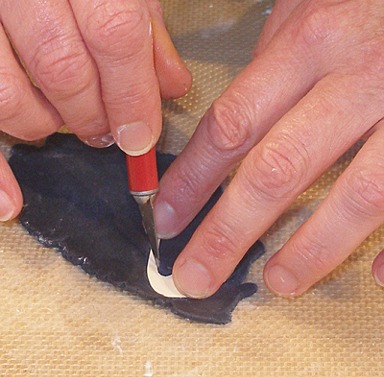
Work on the black outline on the wings:
A. Using the same cookie cutter you used to cut out the butterfly, trace the outline on a piece of very thin card board. I used manila file folders.
Cut the shape out with scissors.
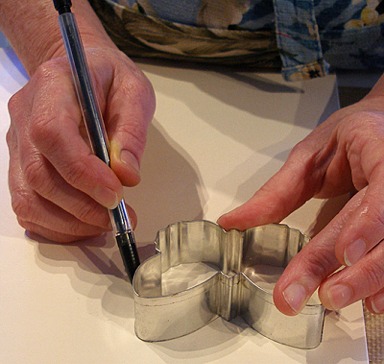
B. Make a border around the wing edges (top and bottom wings), and cut the shapes out. You only need to make two of these because you can flip them over when you make the edges on the other side of the butterfly. These will be used as templates to cut out the black MMF.
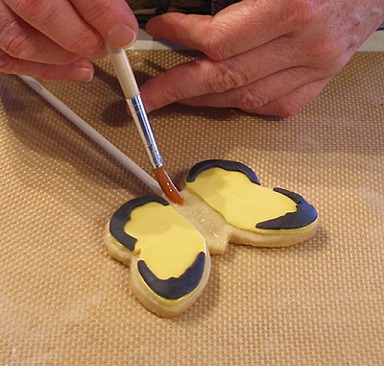
C. Roll out black MMF very thinly, use a little dusting of cornstarch, if needed to keep MMF from sticking to your work surface.
Use your wing templates and cut out two of each shape.

D. Brush the wing edges with a little water and adhere MMF shapes.
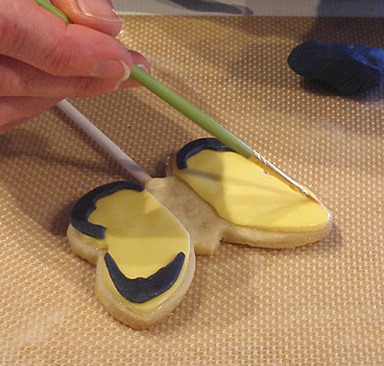
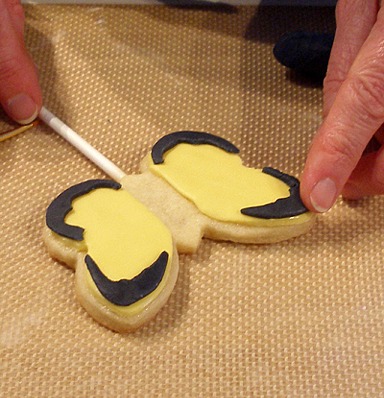
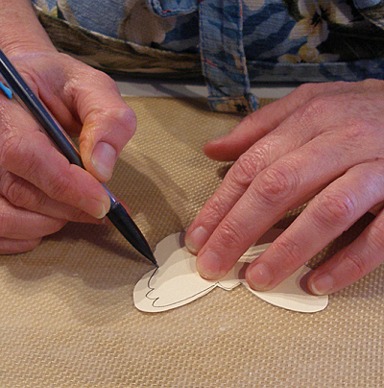
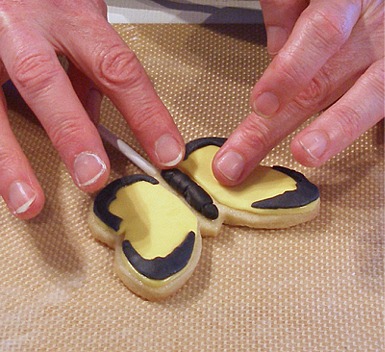
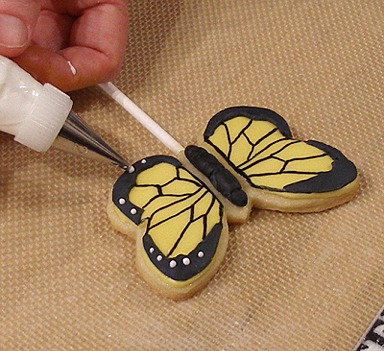
Fill in the body of the butterfly and decorate the wings:
A. Take a small “sausage” shape of black MMF and form the body of the butterfly, pinching to form the head, thorax and abdomen. Use the dull side of the knife to delineate the body parts.
B. Brush the center of the cookie with corn syrup and attach the body, being careful to not get corn syrup on wings.
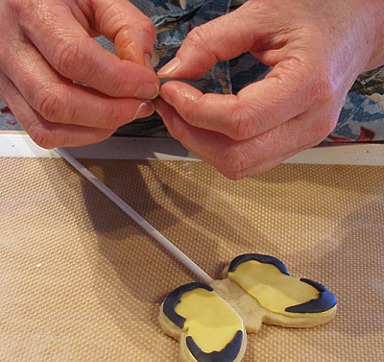
C. Use a black food writer to draw on the veins in the wings.

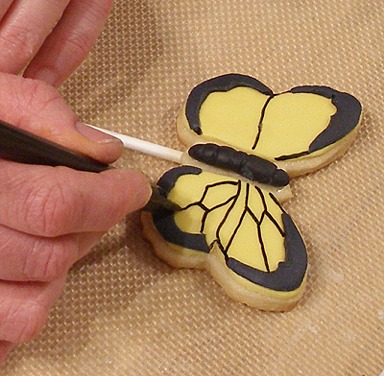
D. Use white royal icing to pipe on the dots on the edges of the wings.
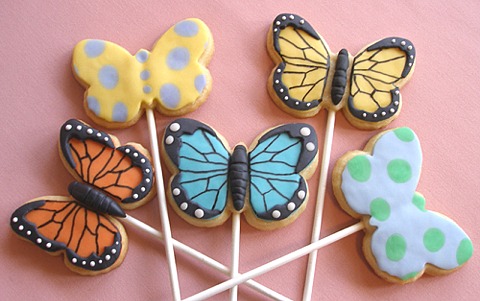
KELLY SAYS: You can also use the same technique that we used on the chick's colored egg to make simpler, polka dot butterflies, if you like.
DONE! The cookies are so delicate! Don't they just take your breath away!?